Navigate with named routes
In the Navigate to a new screen and back recipe, we learned how to Navigate to a new screen by creating a new route and pushing it to the Navigator.
However, if we need to navigate to the same screen in many parts of our apps, this can result in code duplication. In these cases, it can be handy to define a “named route,” and use the named route for Navigation.
To work with named routes, we can use the Navigator.pushNamed function. This example will replicate the functionality from the original recipe, demonstrating how to use named routes instead.
Directions
- Create two screens
- Define the routes
- Navigate to the second screen using
Navigator.pushNamed - Return to the first screen using
Navigator.pop
1. Create two screens
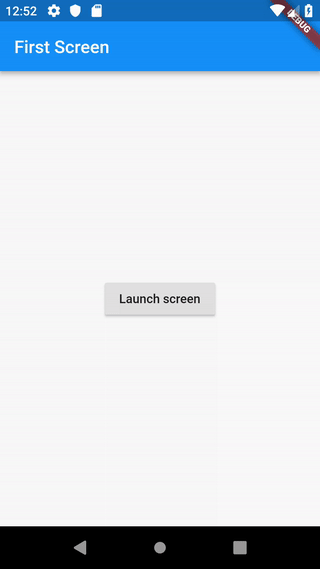
First, we’ll need two screens to work with. The first screen will contain a button that navigates to the second screen. The second screen will contain a button that navigates back to the first.
class FirstScreen extends StatelessWidget {
  @override
  Widget build(BuildContext context) {
    return Scaffold(
      appBar: AppBar(
        title: Text('First Screen'),
      ),
      body: Center(
        child: RaisedButton(
          child: Text('Launch screen'),
          onPressed: () {
            // Navigate to second screen when tapped!
          },
        ),
      ),
    );
  }
}

class SecondScreen extends StatelessWidget {
  @override
  Widget build(BuildContext context) {
    return Scaffold(
      appBar: AppBar(
        title: Text("Second Screen"),
      ),
      body: Center(
        child: RaisedButton(
          onPressed: () {
            // Navigate back to first screen when tapped!
          },
          child: Text('Go back!'),
        ),
      ),
    );
  }
}
2. Define the routes
Next, we’ll need to define our routes by providing additional properties to the MaterialApp constructor: the initialRoute and the routes themselves.
The initialRoute property defines which route our app should start with. The routes property defines the available named routes and the Widgets that should be built when we navigate to those routes.
MaterialApp(
  // Start the app with the "/" named route. In our case, the app will start
  // on the FirstScreen Widget
  initialRoute: '/',
  routes: {
    // When we navigate to the "/" route, build the FirstScreen Widget
    '/': (context) => FirstScreen(),
    // When we navigate to the "/second" route, build the SecondScreen Widget
    '/second': (context) => SecondScreen(),
  },
);
Note: When using initialRoute, be sure you do not define a home property.
3. Navigate to the second screen
With our Widgets and routes in place, we can begin navigating! In this case, we’ll use the Navigator.pushNamed function. This tells Flutter to build the Widget defined in our routes table and launch the screen.
In the build method of our FirstScreen Widget, we’ll update the onPressed callback:
// Within the `FirstScreen` Widget
onPressed: () {
  // Navigate to the second screen using a named route
  Navigator.pushNamed(context, '/second');
}
4. Return to the first screen
In order to navigate back to the first page, we can use the Navigator.pop function.
// Within the SecondScreen Widget
onPressed: () {
  // Navigate back to the first screen by popping the current route
  // off the stack
  Navigator.pop(context);
}
Complete example
import 'package:flutter/material.dart';

void main() {
  runApp(MaterialApp(
    title: 'Named Routes Demo',
    // Start the app with the "/" named route. In our case, the app will start
    // on the FirstScreen Widget
    initialRoute: '/',
    routes: {
      // When we navigate to the "/" route, build the FirstScreen Widget
      '/': (context) => FirstScreen(),
      // When we navigate to the "/second" route, build the SecondScreen Widget
      '/second': (context) => SecondScreen(),
    },
  ));
}

class FirstScreen extends StatelessWidget {
  @override
  Widget build(BuildContext context) {
    return Scaffold(
      appBar: AppBar(
        title: Text('First Screen'),
      ),
      body: Center(
        child: RaisedButton(
          child: Text('Launch screen'),
          onPressed: () {
            // Navigate to the second screen using a named route
            Navigator.pushNamed(context, '/second');
          },
        ),
      ),
    );
  }
}

class SecondScreen extends StatelessWidget {
  @override
  Widget build(BuildContext context) {
    return Scaffold(
      appBar: AppBar(
        title: Text("Second Screen"),
      ),
      body: Center(
        child: RaisedButton(
          onPressed: () {
            // Navigate back to the first screen by popping the current route
            // off the stack
            Navigator.pop(context);
          },
          child: Text('Go back!'),
        ),
      ),
    );
  }
}