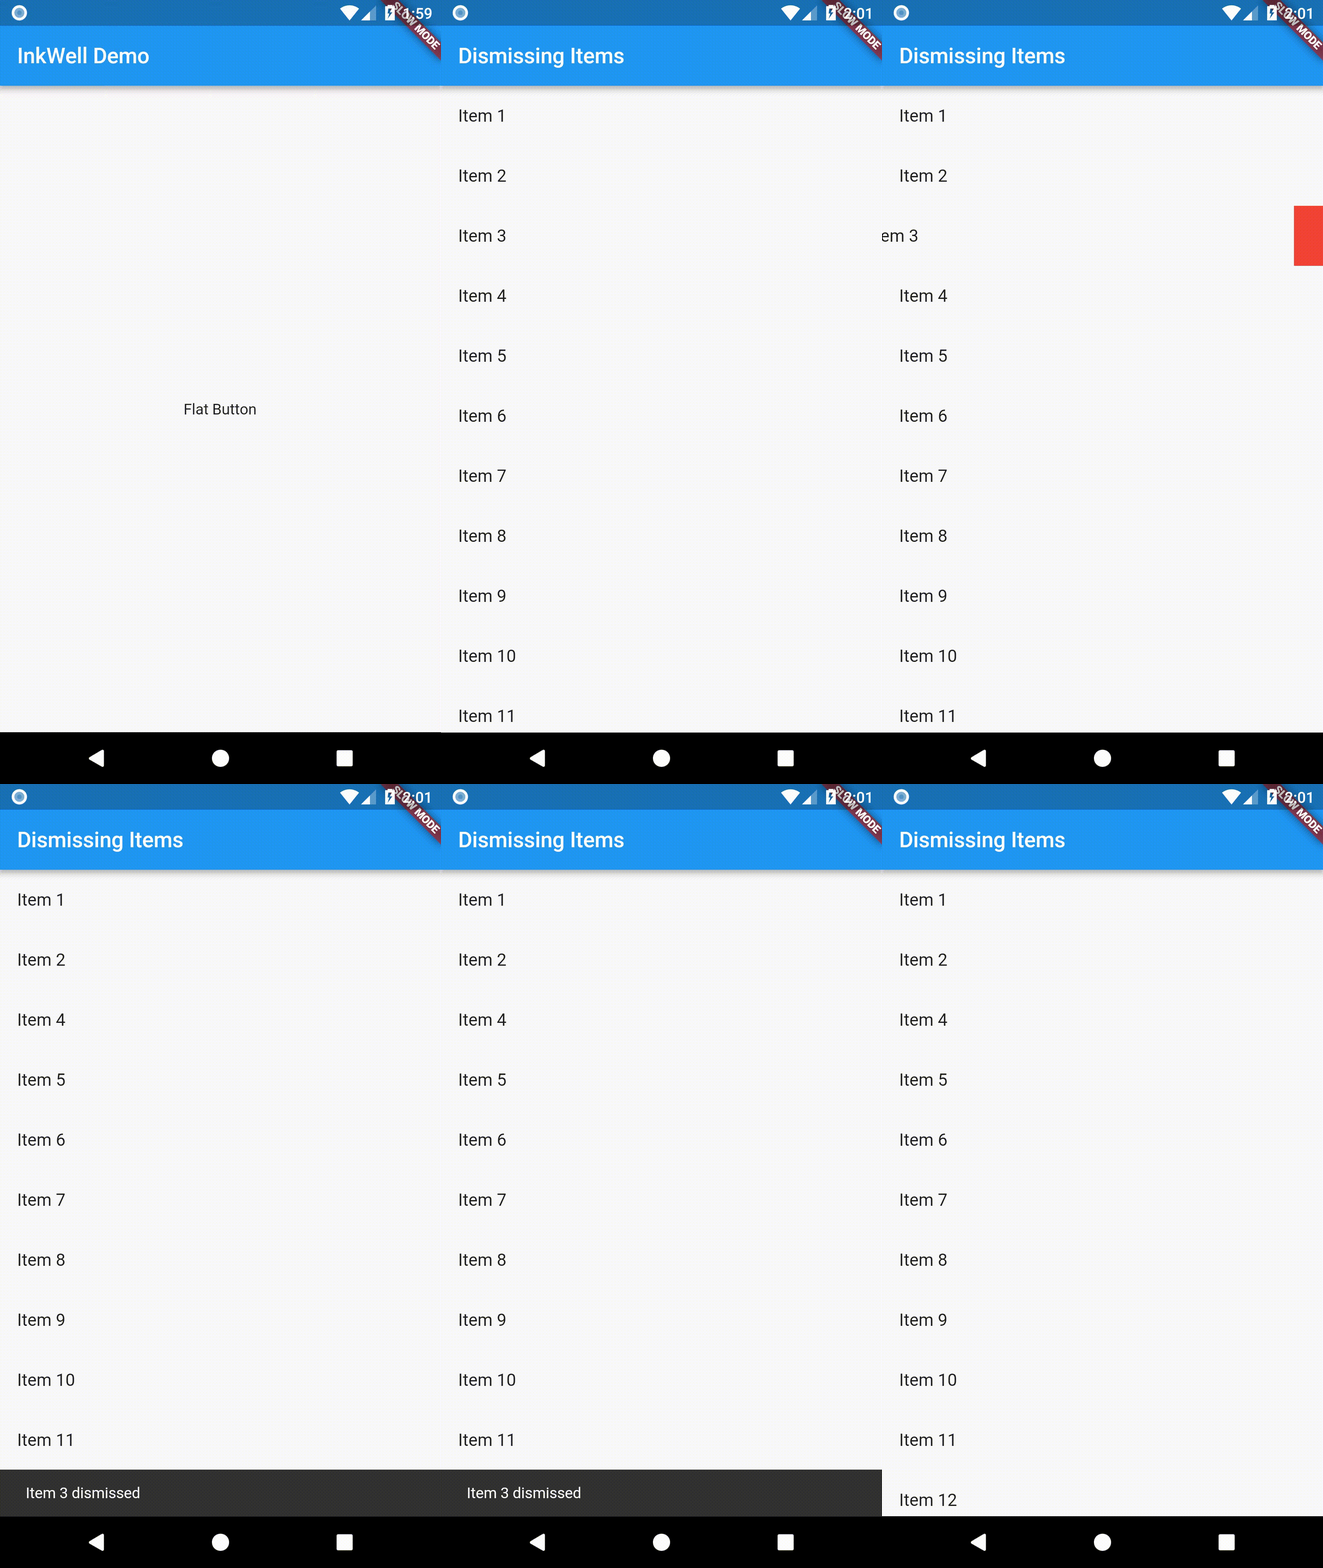
Implement Swipe to Dismiss
The “Swipe to dismiss” pattern is common in many mobile apps. For example, if we’re writing an email app, we might want to allow our users to swipe away email messages in a list. When they do, we’ll want to move the item from the Inbox to the Trash.
Flutter makes this task easy by providing the Dismissible Widget.
Directions
- Create List of Items
- Wrap each item in a
DismissibleWidget - Provide “Leave Behind” indicators
1. Create List of Items
First, we’ll create a list of items we can swipe away. For more detailed instructions on how to create a list, please follow the Working with long lists recipe.
Create a Data Source
In our example, we’ll want 20 sample items to work with. To keep it simple, we’ll generate a List of Strings.
final items = List<String>.generate(20, (i) => "Item ${i + 1}");
Convert the data source into a List
At first, we’ll simply display each item in the List on screen. Users will not be able to swipe away with these items just yet!
ListView.builder(
  itemCount: items.length,
  itemBuilder: (context, index) {
    return ListTile(title: Text('${items[index]}'));
  },
);
2. Wrap each item in a Dismissible Widget
Now that we’re displaying a list of items, we’ll want to give our users the ability to swipe each item off the list!
After the user has swiped away the item, we’ll need to run some code to remove the item from the list and display a Snackbar. In a real app, you might need to perform more complex logic, such as removing the item from a web service or database.
This is where the Dismissible Widget comes into play! In our example, we’ll update our itemBuilder function to return a Dismissible Widget.
Dismissible(
  // Each Dismissible must contain a Key. Keys allow Flutter to
  // uniquely identify Widgets.
  key: Key(item),
  // We also need to provide a function that will tell our app
  // what to do after an item has been swiped away.
  onDismissed: (direction) {
    // Remove the item from our data source.
    setState(() {
      items.removeAt(index);
    });

    // Show a snackbar! This snackbar could also contain "Undo" actions.
    Scaffold
        .of(context)
        .showSnackBar(SnackBar(content: Text("$item dismissed")));
  },
  child: ListTile(title: Text('$item')),
);
3. Provide “Leave Behind” indicators
As it stands, our app allows users to swipe items off the List, but it might not give them a visual indication of what happens when they do. To provide a cue that we’re removing items, we’ll display a “Leave Behind” indicator as they swipe the item off the screen. In this case, a red background!
For this purpose, we’ll provide a background parameter to the Dismissible.
Dismissible(
  // Show a red background as the item is swiped away
  background: Container(color: Colors.red),
  key: Key(item),
  onDismissed: (direction) {
    setState(() {
      items.removeAt(index);
    });

    Scaffold
        .of(context)
        .showSnackBar(SnackBar(content: Text("$item dismissed")));
  },
  child: ListTile(title: Text('$item')),
);
Complete example
import 'package:flutter/foundation.dart';
import 'package:flutter/material.dart';

void main() {
  runApp(MyApp());
}

// MyApp is a StatefulWidget. This allows us to update the state of the
// Widget whenever an item is removed.
class MyApp extends StatefulWidget {
  MyApp({Key key}) : super(key: key);

  @override
  MyAppState createState() {
    return MyAppState();
  }
}

class MyAppState extends State<MyApp> {
  final items = List<String>.generate(3, (i) => "Item ${i + 1}");

  @override
  Widget build(BuildContext context) {
    final title = 'Dismissing Items';

    return MaterialApp(
      title: title,
      theme: ThemeData(
        primarySwatch: Colors.blue,
      ),
      home: Scaffold(
        appBar: AppBar(
          title: Text(title),
        ),
        body: ListView.builder(
          itemCount: items.length,
          itemBuilder: (context, index) {
            final item = items[index];

            return Dismissible(
              // Each Dismissible must contain a Key. Keys allow Flutter to
              // uniquely identify Widgets.
              key: Key(item),
              // We also need to provide a function that tells our app
              // what to do after an item has been swiped away.
              onDismissed: (direction) {
                // Remove the item from our data source.
                setState(() {
                  items.removeAt(index);
                });

                // Then show a snackbar!
                Scaffold.of(context)
                    .showSnackBar(SnackBar(content: Text("$item dismissed")));
              },
              // Show a red background as the item is swiped away
              background: Container(color: Colors.red),
              child: ListTile(title: Text('$item')),
            );
          },
        ),
      ),
    );
  }
}


