Cesium 源码剖析-Post Processing 之物体描边 Silhouette
Cesium在1.46版本中新增了对整个场景的后期处理(Post Processing)功能,包括模型描边、黑白图、明亮度调整、夜视效果、环境光遮蔽等。对于这么炫酷的功能,我们绝不犹豫,先去翻一翻它的源码,掌握它的实现原理。
1 后期处理的原理
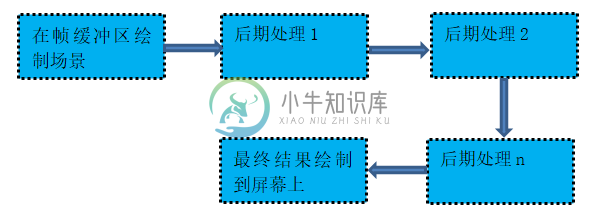
后期处理的过程有点类似于照片的PS。生活中拍摄了一张自拍照,看到照片后发现它太暗了,于是我们增加亮度得到了一张新的照片。在增加亮度后发现脸上的痘痘清晰可见,这可不是我们希望的效果,于是再进行一次美肤效果处理。在这之后可能还会进行n次别的操作,直到满足我们的要求。上述这个过程和三维里面的后期处理流程非常类似:拍的原始照片相当于三维场景中实际渲染得到的效果,在此基础上进行物体描边、夜视效果、环境光遮蔽等后期处理,最后渲染到场景中的图片相当于定版的最终照片。整个过程如下图所示:

2 Cesium添加后期处理的流程
在介绍Cesium添加后期处理流程之前,首先对用到的相关类进行说明:
PostProcessStage:对应于某个具体的后期处理效果,它的输入为场景渲染图或者上一个后期处理的结果图,输出结果是一张处理后的图片。
PostProcessStageComposite:一个集合对象,存储类型为PostProcessStage或者PostProcessStageComposite的元素。
PostProcessStageLibrary:负责创建具体的后期处理效果,包括Silhouette、Bloom、AmbientOcclusion等,创建返回的结果是PostProcessStageComposite或者PostProcessStage类型。
PostProcessStageCollection:是一个集合类型的类,负责管理和维护放到集合中的元素 ,元素的类型是PostProcessStage或者PostProcessStageComposite。
Cesium中添加后期处理的流程是:首先通过PostProcessStageLibrary创建一个或者多个后处理效果对象,得到多个PostProcessStage或者PostProcessStageComposite,然后将他们加入到PostProcessStageCollection对象中。这样PostProcessStageCollection对象就会按照加入的顺序进行屏幕后期处理,在所有的效果都处理完毕后,执行FXAA,最后绘制到屏幕上。下面对Silhouette实现原理进行介绍,Ambient Occlusion实现原理将会在下一篇文章中单独进行说明。
3 Silhouette实现原理
3.1 开启物体描边功能
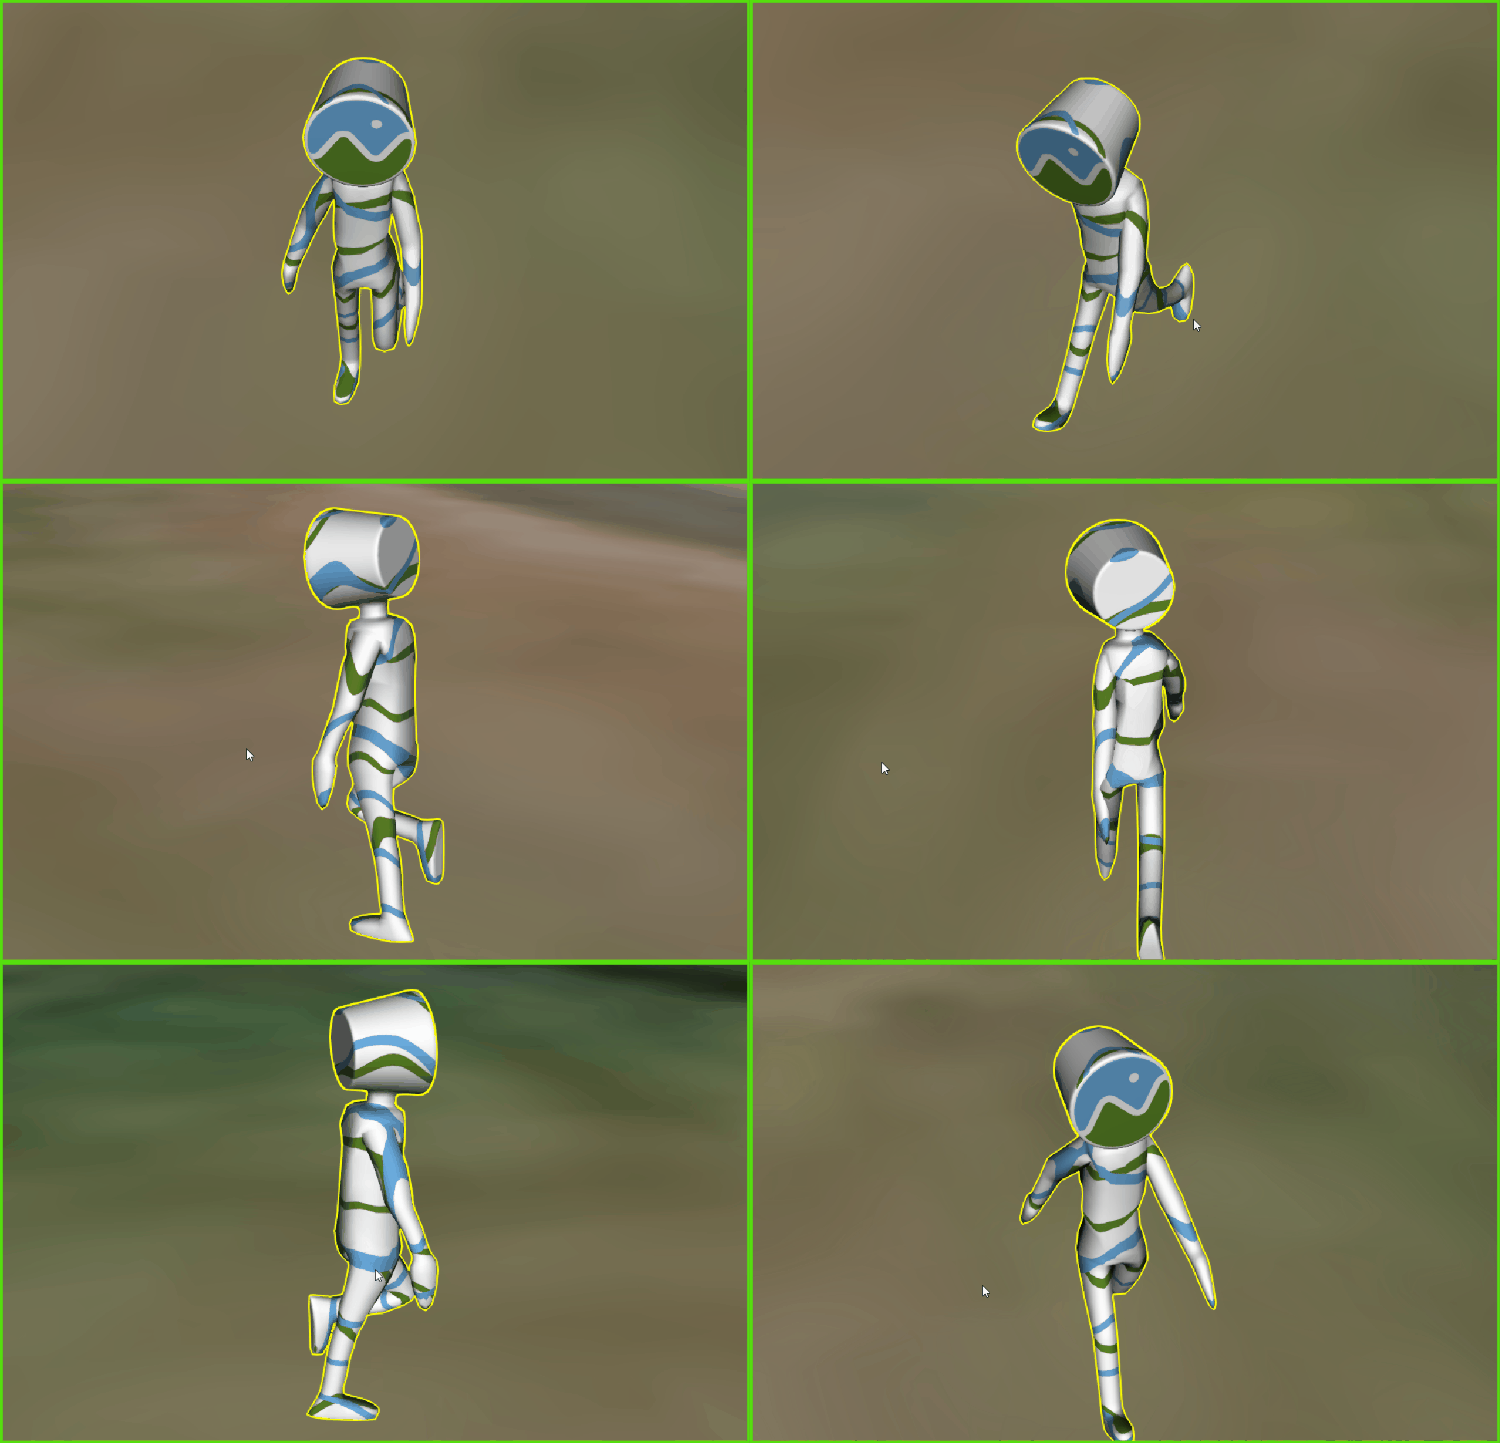
silhouette的效果可以理解为物体轮廓、描边,相当于把物体的外轮廓线勾勒出来。在Cesium中开启silhouette的代码和效果如下:
1 var collection = viewer.scene.postProcessStages;
2 var silhouette = collection.add(Cesium.PostProcessStageLibrary.createSilhouetteStage());
3 silhouette.enabled = true;
4 silhouette.uniforms.color = Cesium.Color.YELLOW;

3.2 js代码内容
创建Stage的函数是实现功能的关键所在,Cesium.PostProcessStageLibrary.createSilhouetteStage()这个函数的具体内容如下:
 1 PostProcessStageLibrary.createSilhouetteStage = function() {
 2         var silhouetteDepth = new PostProcessStage({
 3             name : 'czm_silhouette_depth',
 4             fragmentShader : LinearDepth
 5         });
 6         var edgeDetection = new PostProcessStage({
 7             name : 'czm_silhouette_edge_detection',
 8             fragmentShader : EdgeDetection,
 9             uniforms : {
10                 length : 0.25,
11                 color : Color.clone(Color.BLACK)
12             }
13         });
14         var silhouetteGenerateProcess = new PostProcessStageComposite({
15             name : 'czm_silhouette_generate',
16             stages : [silhouetteDepth, edgeDetection]
17         });
18         var silhouetteProcess = new PostProcessStage({
19             name : 'czm_silhouette_color_edges',
20             fragmentShader : Silhouette,
21             uniforms : {
22                 silhouetteTexture : silhouetteGenerateProcess.name
23             }
24         });
25
26         var uniforms = {};
27         defineProperties(uniforms, {
28             length : {
29                 get : function() {
30                     return edgeDetection.uniforms.length;
31                 },
32                 set : function(value) {
33                     edgeDetection.uniforms.length = value;
34                 }
35             },
36             color : {
37                 get : function() {
38                     return edgeDetection.uniforms.color;
39                 },
40                 set : function(value) {
41                     edgeDetection.uniforms.color = value;
42                 }
43             }
44         });
45         return new PostProcessStageComposite({
46             name : 'czm_silhouette',
47             stages : [silhouetteGenerateProcess, silhouetteProcess],
48             inputPreviousStageTexture : false,
49             uniforms : uniforms
50         });
51     };
通过浏览代码发现,该函数最后的返回结果是PostProcessStageComposite对象,该对象包含了silhouetteGenerateProcess和silhouetteGenerateProcess两个元素,其中silhouetteGenerateProcess又是一个PostProcessStageComposite类型,包括silhouetteDepth和edgeDetection两部分。在后期处理过程中真正起作用的是PostProcessStage类型的对象,此处包括silhouetteDepth、silhouetteDepth、silhouetteProcess三个对象,也就是说这三个对象的顺序执行实现了物体描边效果。对于PostProcessStage这种类型的对象,它的输入值包括一些效果参数和一张输入照片,顶点着色器没有什么特殊内容,就是构建一个贴屏幕的四边形,重点全部在片源着色器中。下面对这三个片源着色器中的代码进行详细分析。
3.3 LinearDepth
LinearDepth的代码如下:
 1 uniform sampler2D depthTexture;
 2
 3 varying vec2 v_textureCoordinates;
 4
 5 float linearDepth(float depth)
 6 {
 7     float far = czm_currentFrustum.y;
 8     float near = czm_currentFrustum.x;
 9     return (2.0 * near) / (far + near - depth * (far - near));
10 }
11
12 void main(void)
13 {
14     float depth = czm_readDepth(depthTexture, v_textureCoordinates);
15     gl_FragColor = vec4(linearDepth(depth));
16 }
代码比较简单,一共才10多行,目的就是将深度图中的深度值进行线性拉伸。depthTexture代表场景中的深度图,v_textureCoordinates代表屏幕采样点坐标。首先通过czm_readDepth读取场景中的深度值,然后利用linearDepth函数(该函数通过远近裁剪面对输入值做了一个线性变换)进行线性拉伸。其实质是把深度值转换成视空间下的z值,然后将这个z值除以far,得到一个0-1的值,该值的大小可以反应屏幕像素点在视空间下的z值大小。最后将得到的深度值赋值给gl_FragColor变量,相当于把深度值隐藏在颜色中。这样就得到了一张经过线性拉伸后的深度图,用于后面的处理。
3.4 EdgeDetection
EdgeDetection的代码如下:
 1 uniform sampler2D depthTexture;
 2 uniform float length;
 3 uniform vec4 color;
 4
 5 varying vec2 v_textureCoordinates;
 6
 7 void main(void)
 8 {
 9     float directions[3];
10     directions[0] = -1.0;
11     directions[1] = 0.0;
12     directions[2] = 1.0;
13
14     float scalars[3];
15     scalars[0] = 3.0;
16     scalars[1] = 10.0;
17     scalars[2] = 3.0;
18
19     float padx = 1.0 / czm_viewport.z;
20     float pady = 1.0 / czm_viewport.w;
21
22     float horizEdge = 0.0;
23     float vertEdge = 0.0;
24
25     for (int i = 0; i < 3; ++i) {
26         float dir = directions[i];
27         float scale = scalars[i];
28
29         horizEdge -= texture2D(depthTexture, v_textureCoordinates + vec2(-padx, dir * pady)).x * scale;
30         horizEdge += texture2D(depthTexture, v_textureCoordinates + vec2(padx, dir * pady)).x * scale;
31
32         vertEdge -= texture2D(depthTexture, v_textureCoordinates + vec2(dir * padx, -pady)).x * scale;
33         vertEdge += texture2D(depthTexture, v_textureCoordinates + vec2(dir * padx, pady)).x * scale;
34     }
35
36     float len = sqrt(horizEdge * horizEdge + vertEdge * vertEdge);
37     float alpha = len > length ? 1.0 : 0.0;
38     gl_FragColor = vec4(color.rgb, alpha);
39 }
通过shader的名字就可以大体猜到这段代码的作用就是对边界进行检测。depthTexture是通过linearDepth拉伸后的深度图,length是设置的物体边界长度判断值,color是设置的边界颜色,v_textureCoordinates是屏幕采样点的坐标。在main函数中首先定义了directions和scalars两个数组。directions代表进行边界检测的方向,scalars表示边界检测的权重值。padx表示每个像素在x方向上的坐标跨度,pady表示每个像素在y方向上的坐标跨度。horizEdge表示水平方向的边界值,vertEdge表示竖直方向边界值。然后就是通过for循环在以该像素为中心的九宫格中计算水平方向的深度差值和垂直方向的深度差值,计算的过程可以用下图表示:

通过上面这张图可以清晰的看出,边界检测的过程其实是对周围八个像素点计算z坐标差值,包括水平坐标差值horizEdge和竖直差值vertEdge。通过这两个值得到总差值len,通过表和len的 大小设置颜色的透明度为1或者0,输出一张图。
3.5 Silhouette
Silhouette的代码如下:
 1 uniform sampler2D colorTexture;
 2 uniform sampler2D silhouetteTexture;
 3
 4 varying vec2 v_textureCoordinates;
 5
 6 void main(void)
 7 {
 8     vec4 silhouetteColor = texture2D(silhouetteTexture, v_textureCoordinates);
 9     gl_FragColor = mix(texture2D(colorTexture, v_textureCoordinates), silhouetteColor, silhouetteColor.a);
10 }
silhouette的代码非常简单,其中colorTexture代表原始场景图,silhouetteTexture是通过EdgeDetection得到的图。通过silhouetteColor.a进行两张图的混合,就可以得到最终的结果。
4 总结
后期处理其实是一个叠加修改的过程,通过不同步骤的加工,最后得到想要的结果。本文所讲的物体描边其实是对整个屏幕中的要素进行边界检测,检测出为边界的地方就将其颜色改为设定的值。花了大半天时间写完了,希望对感兴趣的同学有所帮助。晚上我要出去玩,玩,玩!!!
Cesium 源码剖析系列教程目录
- 视频投影
- Clipping Plane
- Ambient Occlusion(环境光遮蔽)
- Post Processing之物体描边(Silhouette)
- 添加雨雪天气

