
Building with MagicaVoxel
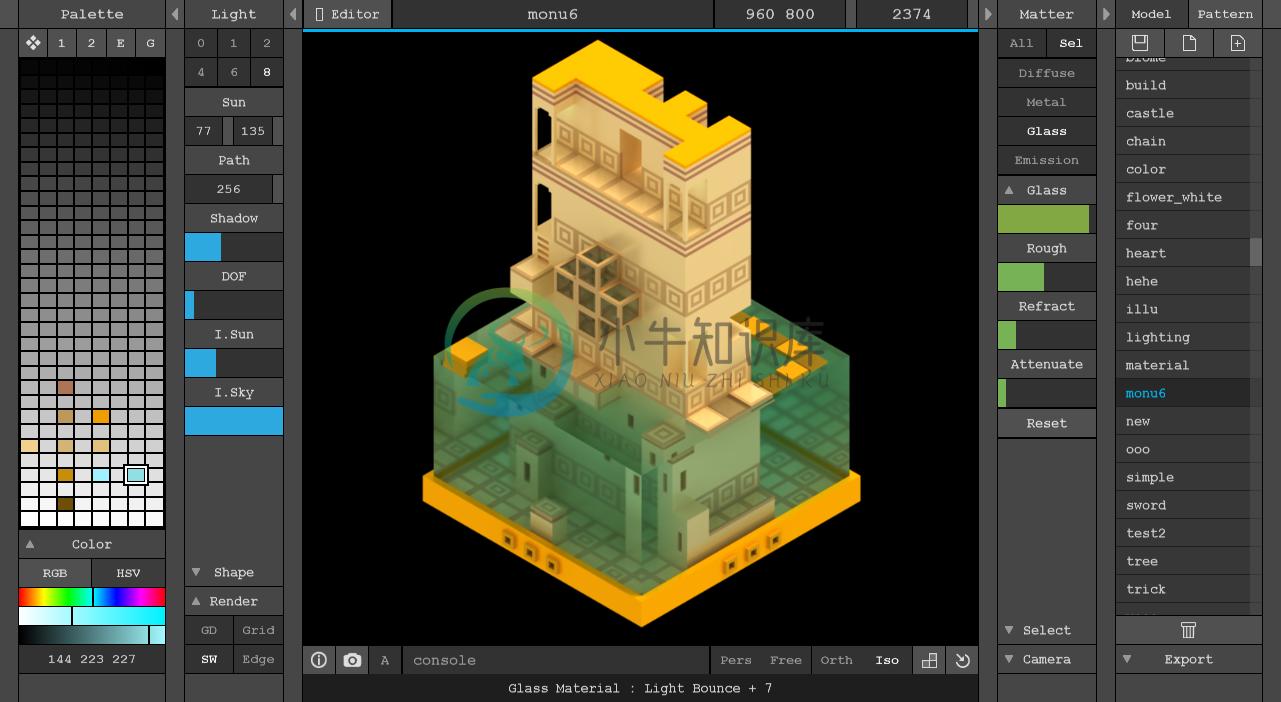
MagicaVoxelis a free and user-friendly tool for building 3D scenes and models using voxels(i.e., blocks). MagicaVoxel makes modeling super easy, similar to building in Minecraft.
Installation
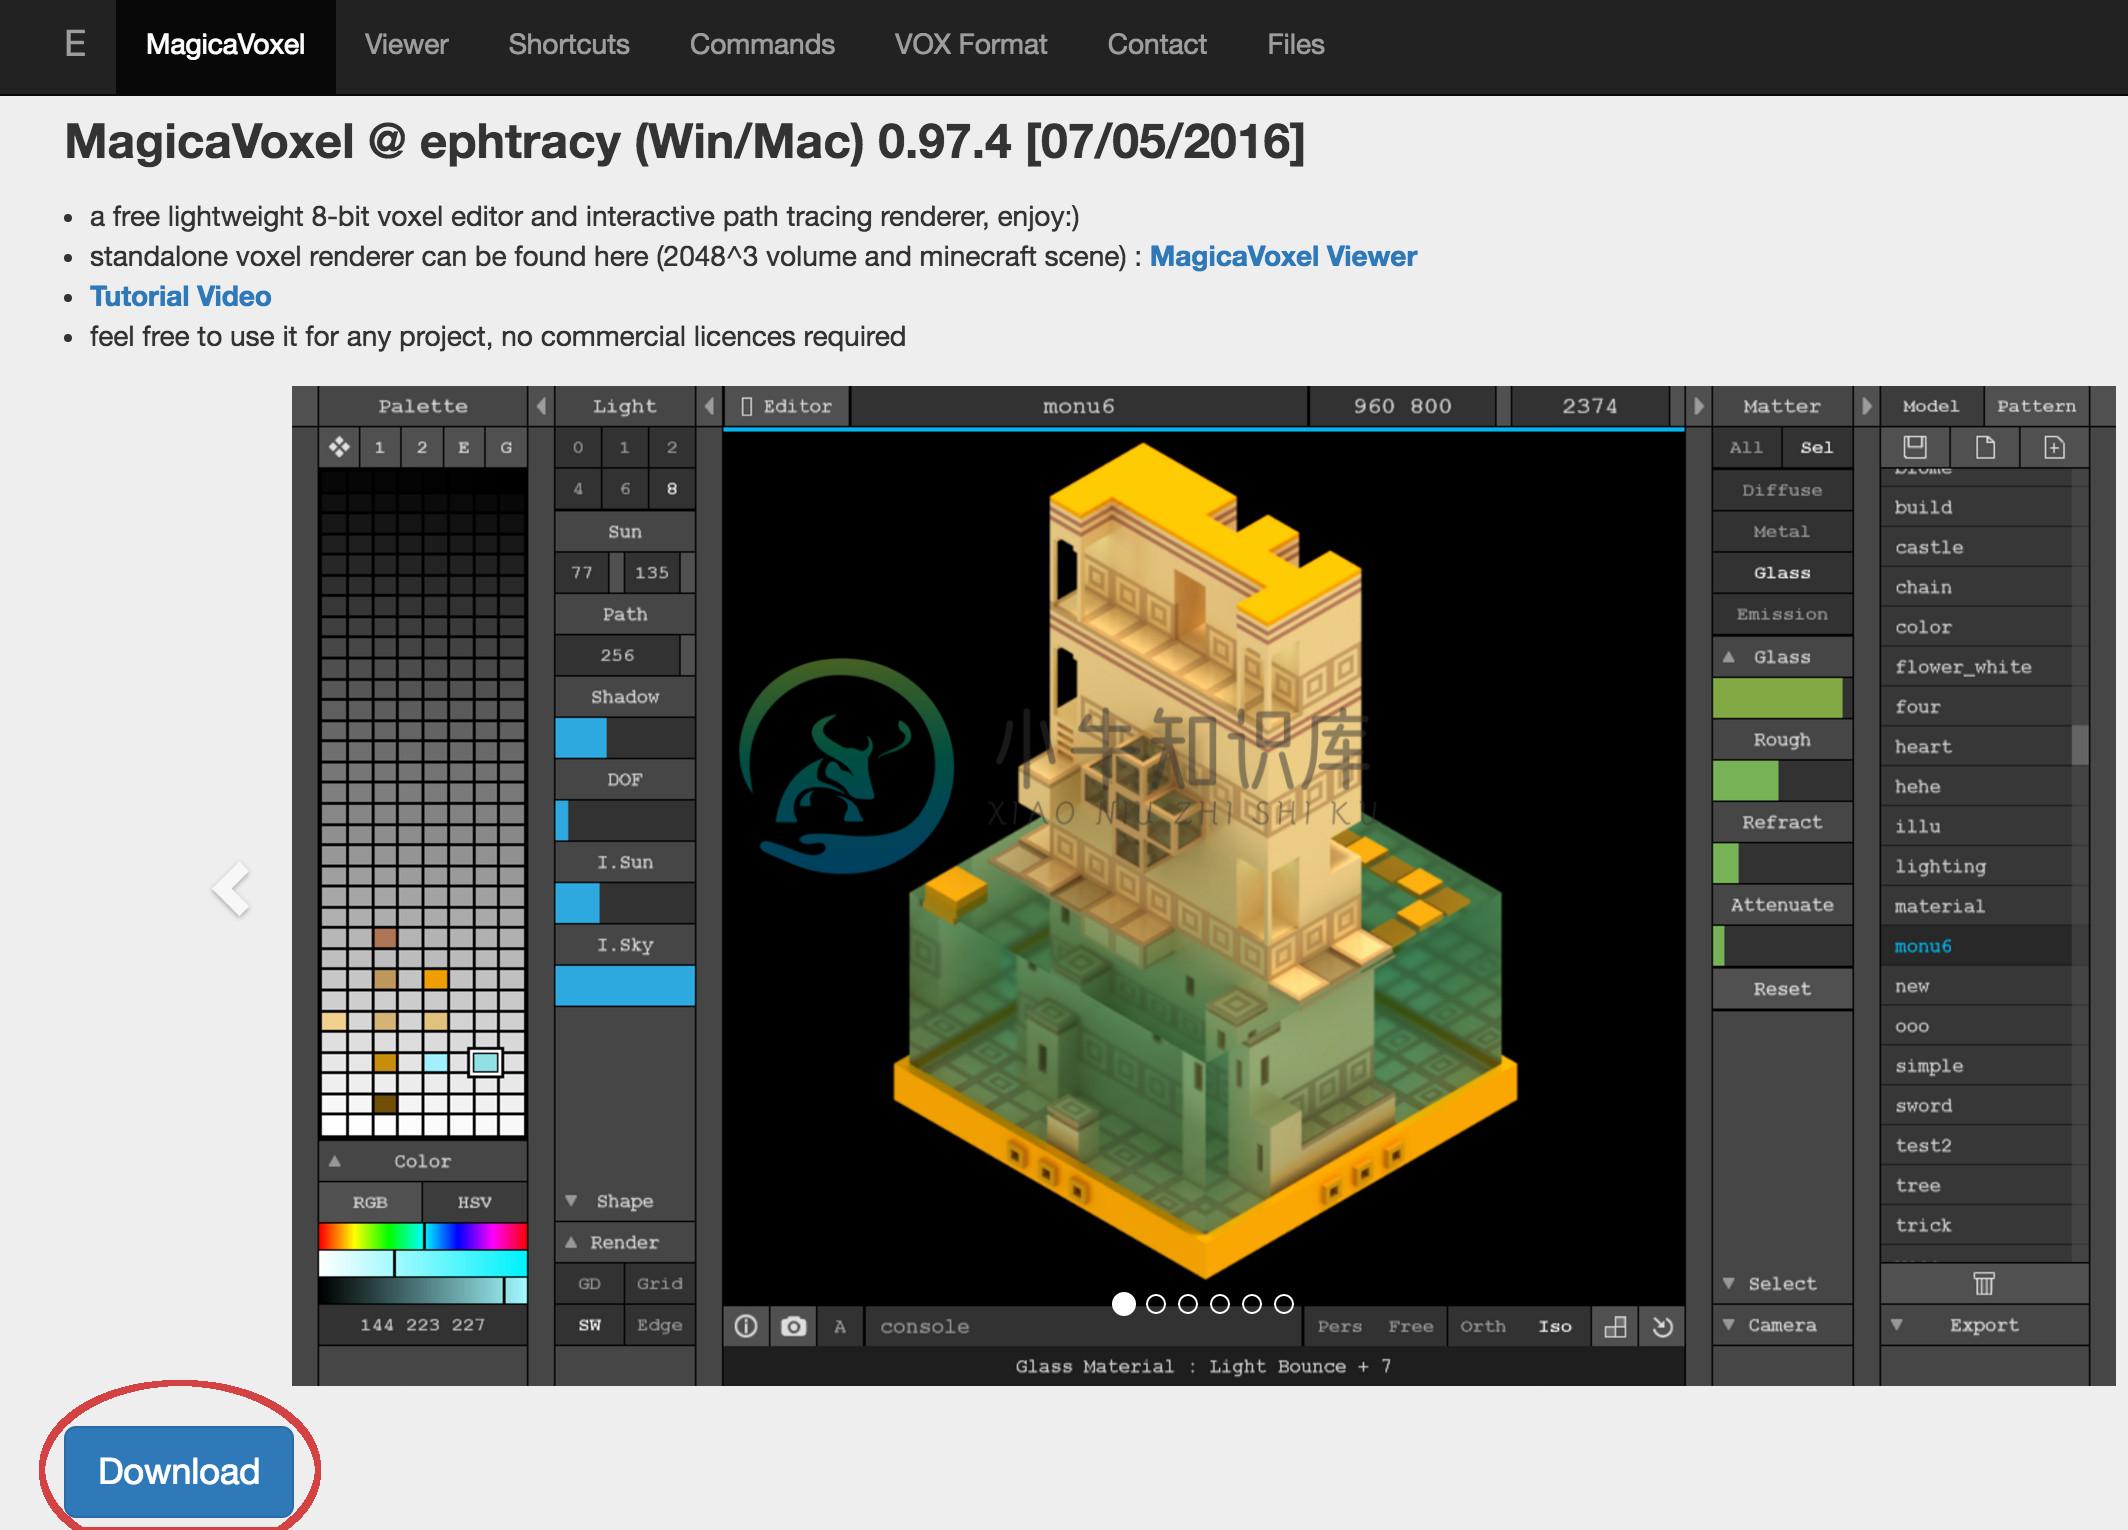
MagicaVoxel works on Windows and OS X. On the MagicaVoxel homepage, click the Downloadbutton and install the application:
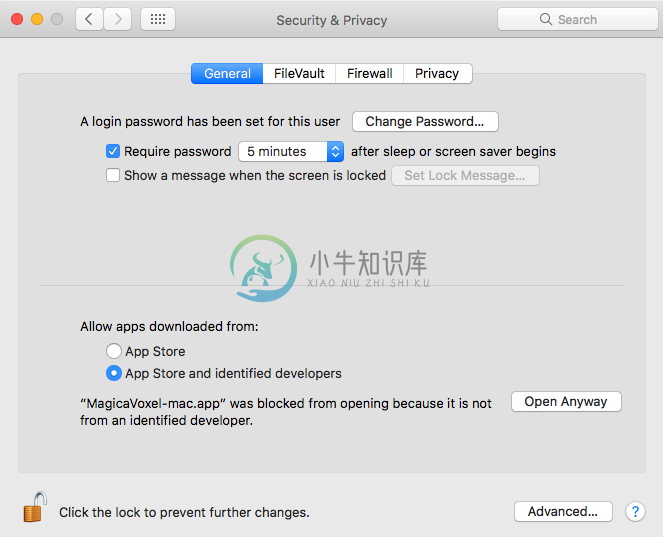
On macOS, open the MagicVoxel app file by clicking on it in Finder. Initially, you will see a message noting that you cannot open applications from unidentified developers. After dismissing that message, open the Security & Privacysettings pane and click “Open Anyway” on the MagicVoxel app:
Alternatively, you can find the MagicVoxel app file in Finder, right click on it, and then choose “Open” from the shortcut menu. In the subsequent dialogue click “Open” again. For more information, visit Apple’s documentationon unidentified developers.
Tutorial
The official tutorial video serves as a good introduction to using MagicaVoxel. The author quickly runs through many basic features in 10 minutes:
The best way to learn the MagicaVoxel UI is to click around, play with application controls, and pay attention to the tooltips on hover. Many developers are able to create their first scene within a half hour! Given the absence of official tutorials, however, the following serves as a quick guide to navigating the UI.
Viewport
The center panel hosts the viewport where we build our model. We can change the viewport our mouse/trackpad or the wasdkeys:
- Pan: Hold
<space> + <right-click>and move the mouse or trackpad, or hold<space>and press one of the<a>or<d>keys. - Rotate: Hold
<right-click>and move the mouse or trackpad, or press one of the<a>or<d>keys. - Zoom: Scroll up and down with the mouse or trackpad, or press one of the
<w>or<s>keys.

The top right corner of the viewport allows you to change the bounding dimensions of the model. Note that in MagicaVoxel, the XY plane is horizontal and the Z axis points up.
Color Palette
The left panel is the color palette. You can use the default palettes, modify them, create your own, and save them. The palette is tied to the scene so if you change from the palette a color that a voxel is using, the voxel will update its color. At the bottom, there are tools to define your own color with sliders or via copying and pasting hex or rgb values:
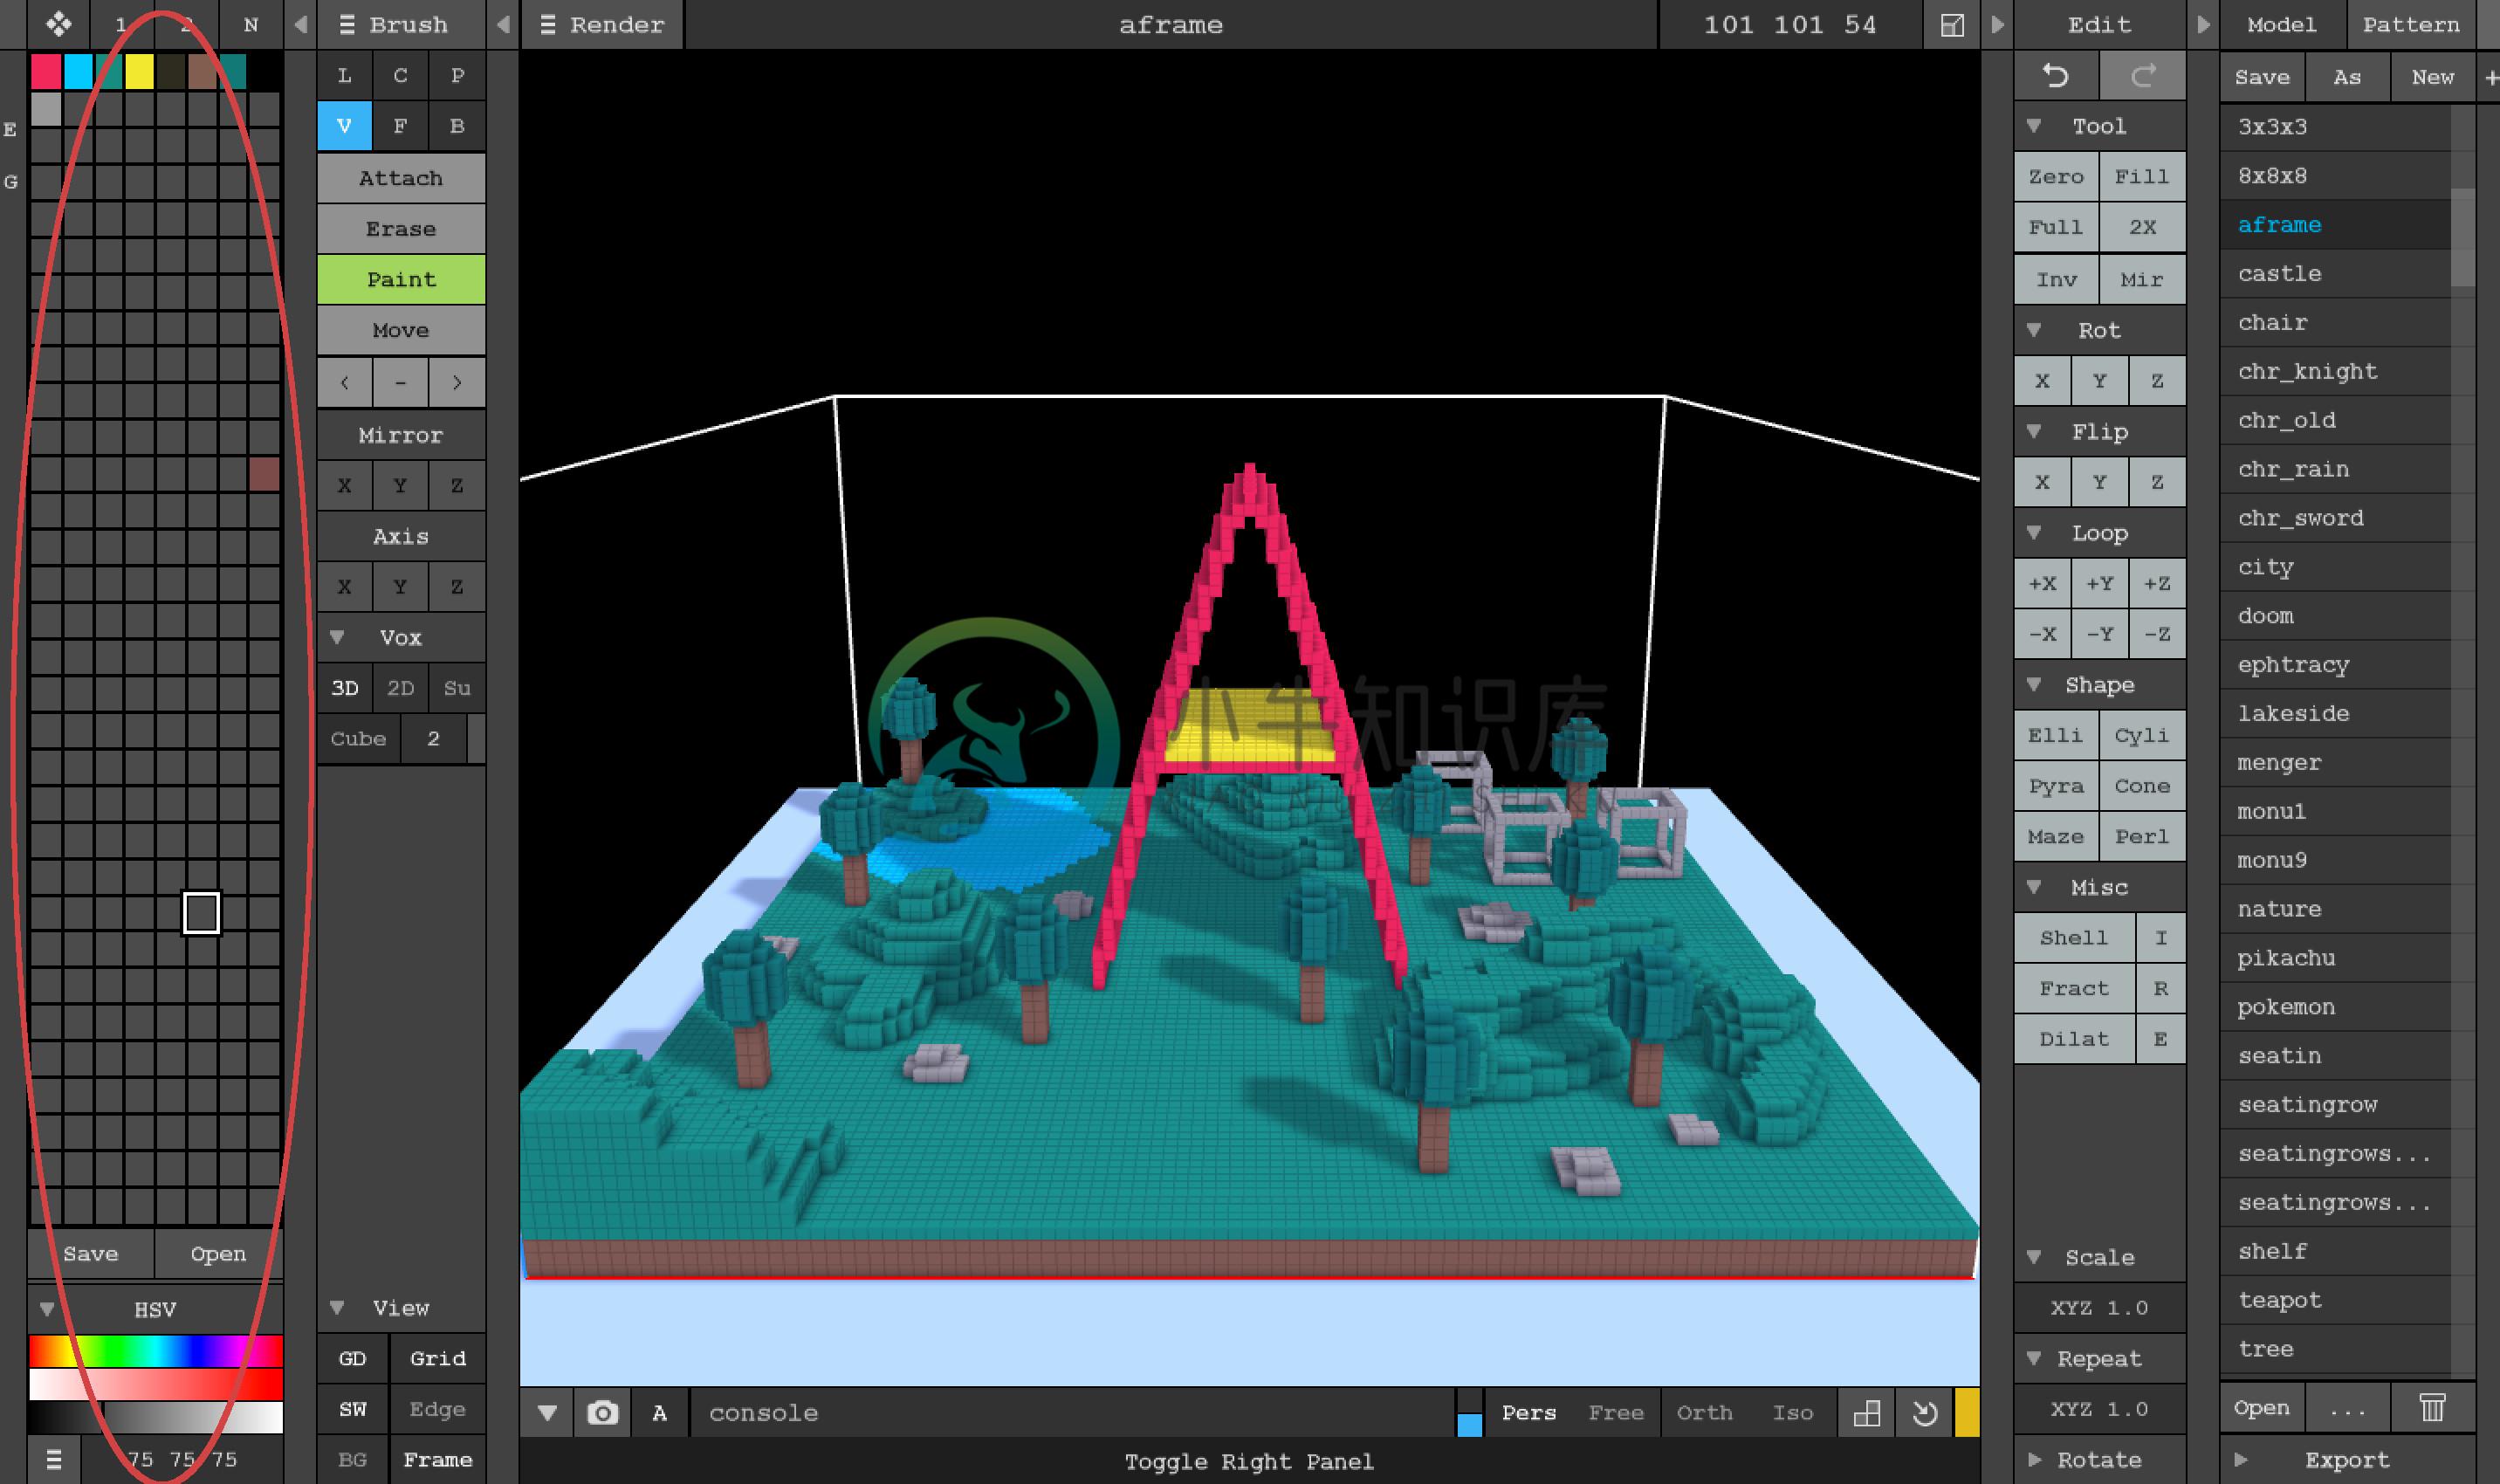
Brushes
The brushes panel is to the right of the color palette. Brushes add, erase, or paint voxels in various shapes, sizes, and patterns. With a brush selected, simply click in the viewport on your model to use it:

There are six brushes:
- V (Voxel): Works on individual or discrete groups of voxels.
- F (Face): Works on groups of adjacent voxels that are the same shape or color.
- B (Box): Works on a 2-dimensional box of voxels where we control the area of the box by dragging.
- L (Line): Works on a 1-dimensional line of voxels where we control the length of the line by dragging.
- C (Center): Works on a circle or square of voxels where we control the radius of the shape by dragging.
- P (Pattern): The pattern brush lets us use other MagicaVoxel models and paste them into the current model. Useful for placing repeated shapes.
Actions
There are four actions that work in conjunction with the brush type:
- Attach (t): Add voxel(s).
- Erase (r): Remove voxel(s).
- Paint (g): Change color of existing voxel(s).
- Move: Moves entire model. Unfortunately, there is no way to select individual voxel(s) to move.

Below the actions are three color picking tools to pick, remove, and place color. It is useful to know the <alt> + <click>shortcut to select a color by clicking on a voxel.
Exporting to A-Frame
After creating your model, you can export it to an A-Frame scene for the world to see! We recommend exporting to either the .PLYor .OBJformats.
.PLY(with Baked Shadows)
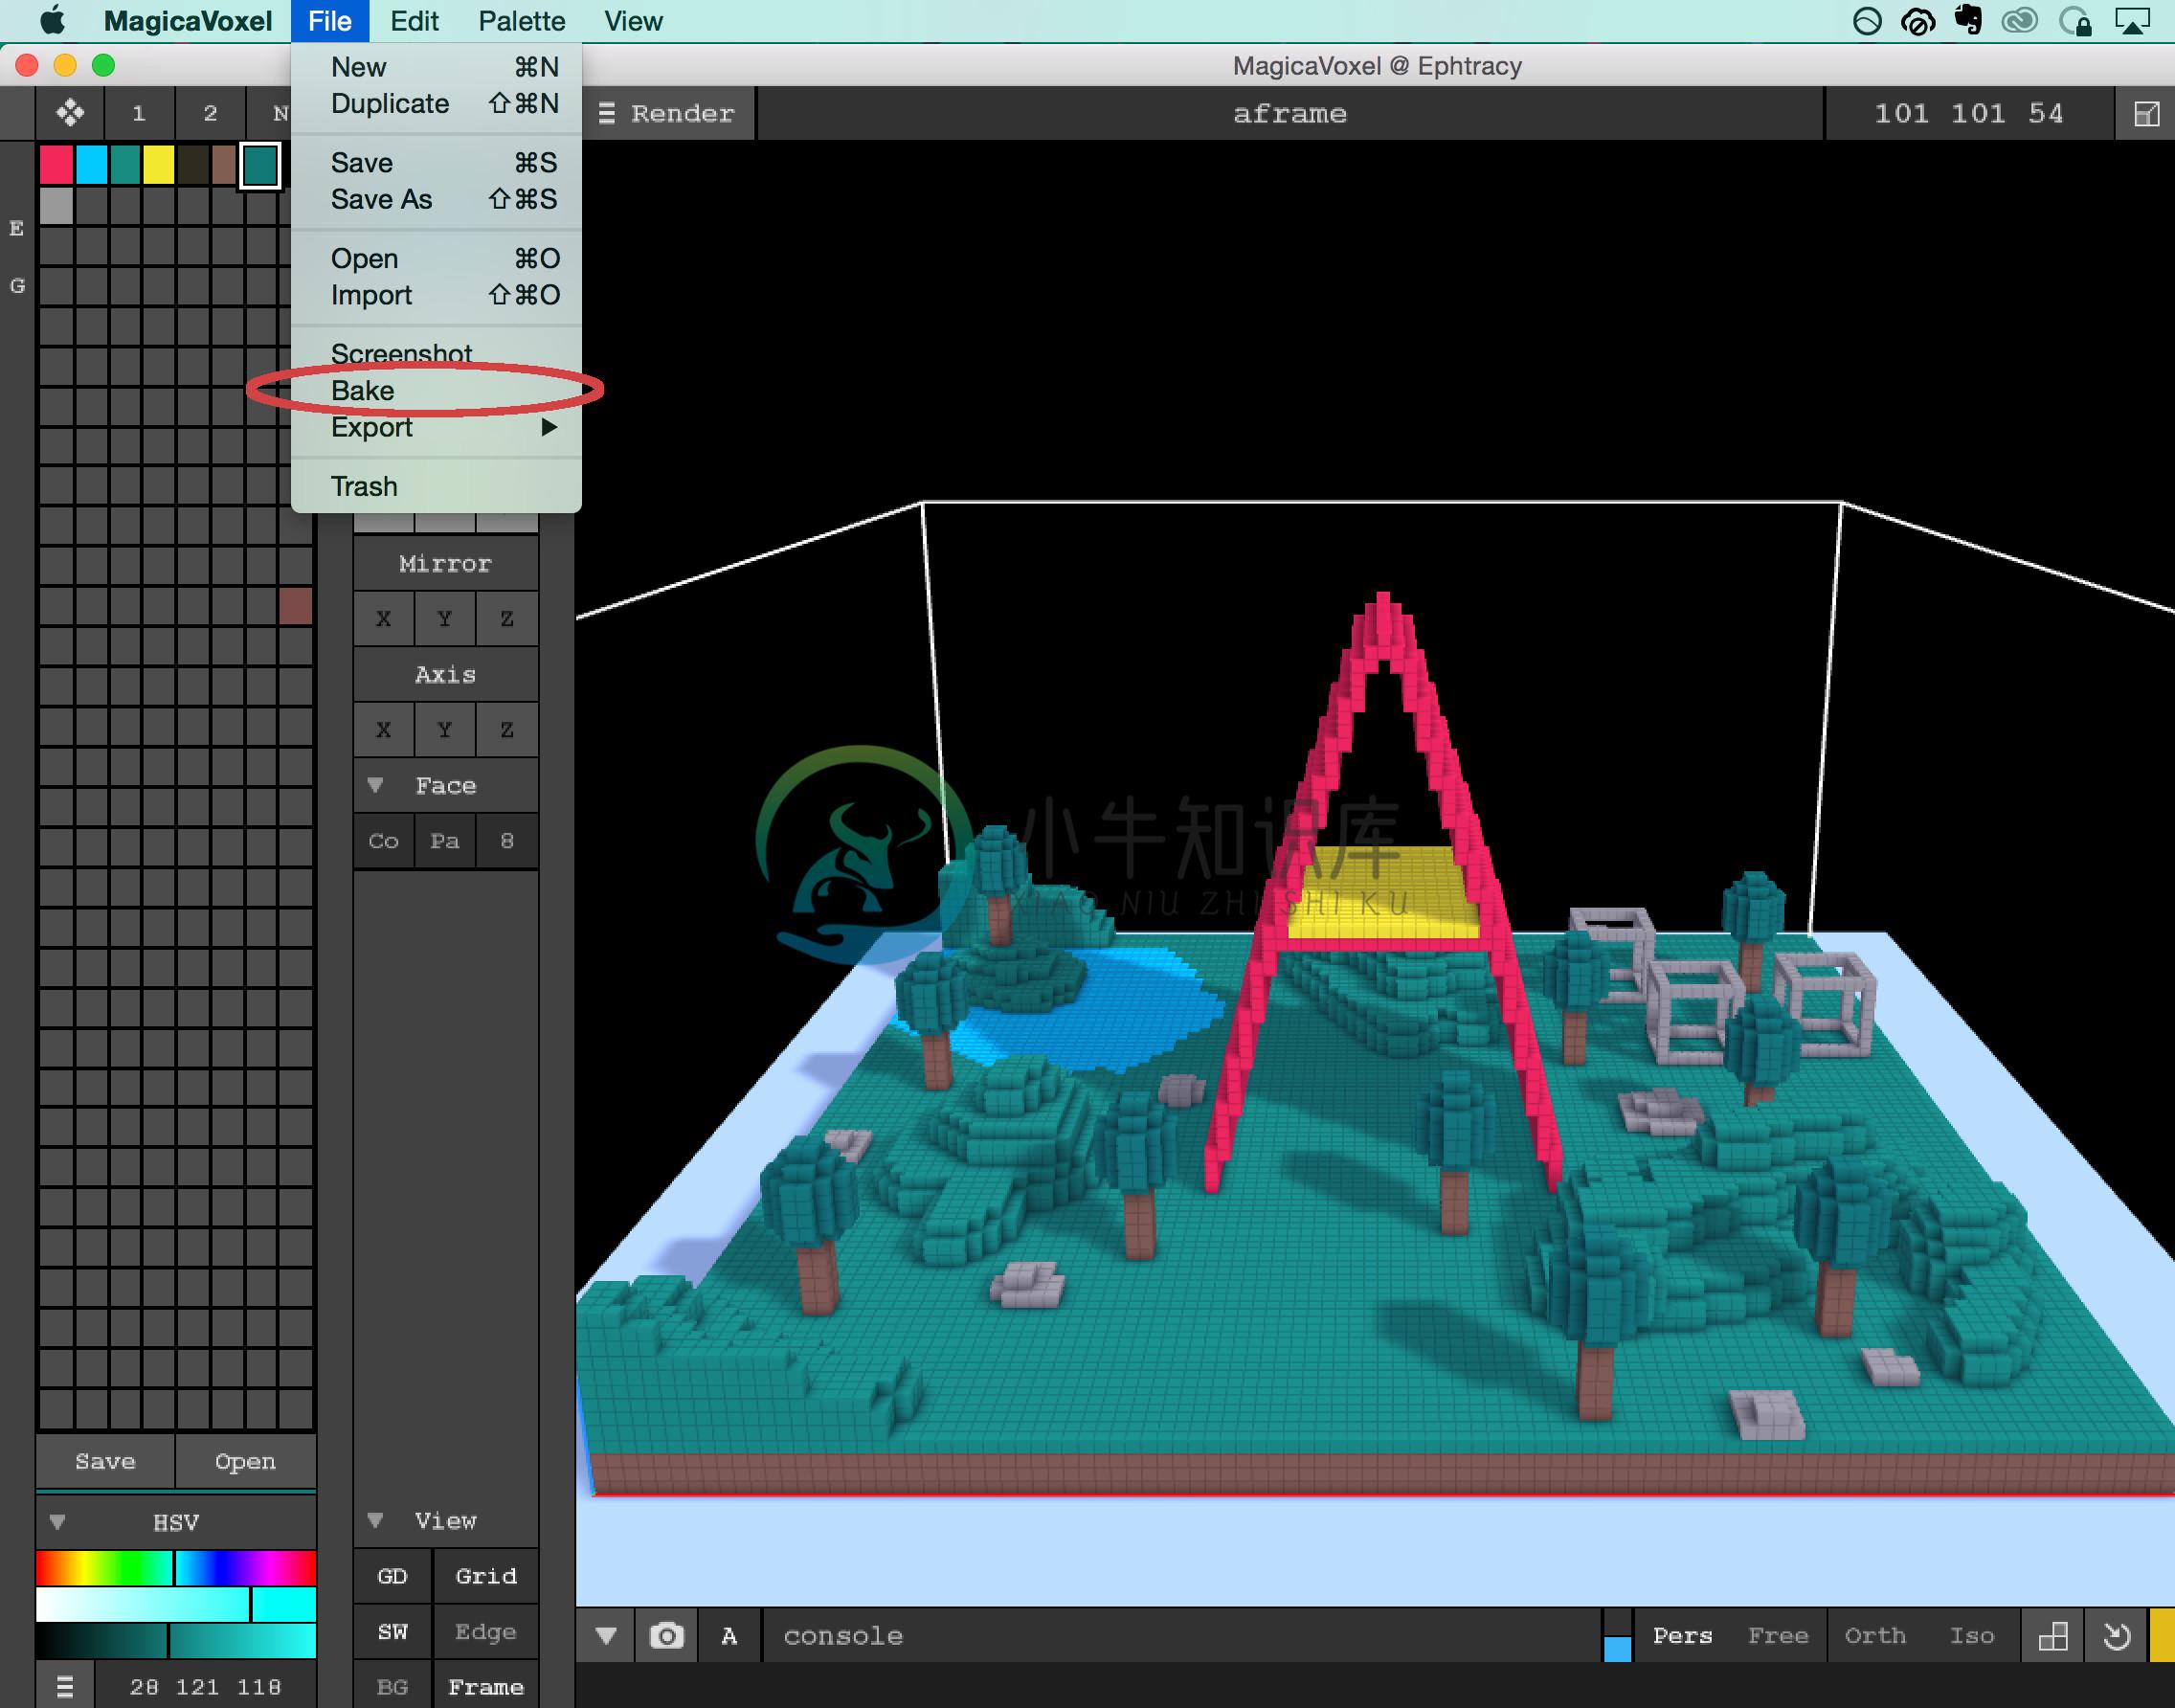
The PLYformat produces a large file size but includes baked shadows, meaning the rendered shadow colors are stored in the file. The A-Frame scenes shown above produce a ~5MB file size with baked shadows. It depends on your desired constraints whether or not file sizes on this order is tolerable, but exporting with baked shadows will look visually great in A-Frame.
To see the .PLYmodel in A-Frame, use the ply-modelcomponent found in Don McCurdy’s aframe-extras. Currently the model must be rotated by -90 0 0to display properly:
              <
                html>

              <
                head>

              <
                script
                src=
                "https://aframe.io/releases/1.1.0/aframe.min.js">

              </
                script>

              <
                script
                src=
                "https://rawgit.com/donmccurdy/aframe-extras/v2.1.1/dist/aframe-extras.loaders.min.js">

              </
                script>

              </
                head>

              <
                body>

              <
                a-scene>

              <
                a-assets>

              <
                a-asset-item
                id=
                "myPlyModel"
                src=
                "myModel.ply">
              </
                a-asset-item>

              </
                a-assets>


              <
                a-entity
                ply-model=
                "src: #myPlyModel"
                rotation=
                "-90 0 0">
              </
                a-entity>

              </
                a-scene>

              </
                body>

              </
                html>
|
.OBJ
The .OBJformat produces a much smaller file size than .PLY, but MagicaVoxel does not support baked exports to .OBJ. Exporting to .OBJwill also produce a .MTLfor the colors and textures. You will need to include both and put them in the same directory as each other.
To render a .OBJin A-Frame with HTML:
              <
                html>

              <
                head>

              <
                script
                src=
                "https://aframe.io/releases/1.1.0/aframe.min.js">

              </
                script>

              <
                script
                src=
                "https://rawgit.com/donmccurdy/aframe-extras/v2.1.1/dist/aframe-extras.loaders.min.js">

              </
                script>

              </
                head>

              <
                body>

              <
                a-scene>

              <
                a-assets>

              <
                a-asset-item
                id=
                "myModelObj"
                src=
                "myModel.obj">
              </
                a-asset-item>

              <
                a-asset-item
                id=
                "myModelMtl"
                src=
                "myModel.mtl">
              </
                a-asset-item>

              </
                a-assets>


              <
                a-entity
                obj-model=
                "obj: #myModelObj; mtl: #myModelMtl">
              </
                a-entity>

              </
                a-scene>

              </
                body>

              </
                html>
|
We will later try to produce guides to baking lightmaps and shadowmaps into the .OBJusing Blender.