flex-direction 排列方向
优质
小牛编辑
143浏览
2023-12-01
flex-direction 排列方向
弹性和模型中内部的子元素的排列方向可以通过这个属性修改,那么我们就一起看下它的使用吧。
1. 官方定义
flex-direction 属性规定项目的排列方向。
2. 慕课解释
flex-direction 用来调整主轴的方向,我们知道主轴默认是水平方向且从左到右,而我们可以通过这个属性设置主轴的方向,即项目是水平方向从左到右还是垂直方向从上到下或者从下到上排列。
3. 语法
div{
    flex-direction: row|row-reverse|column|column-reverse|initial|inherit;
}
<div class="demo">
    <div class="item">1</div>
    <div class="item">2</div>
    <div class="item">3</div>
</div>
.demo{
    display:flex; // 让容器变成弹性盒
    flex-direction:row-reverse; 改变项目的排列方向
}
4. 兼容性
| IE | Edge | Firefox | Chrome | Safari | Opera | ios | android |
|---|---|---|---|---|---|---|---|
| 10+ | 12+ | 28+ | 4+ | 6.1+ | 12.1+ | 7+ | 4.4 |
5. 实例
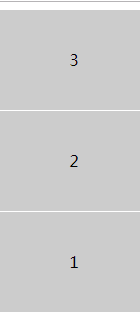
- 让子元素从上到下垂直方向排列
.demo{
    display:flex;
    flex-direction:column;
    text-align: center;
    line-height: 100px;
}
.item{
    background:#ccc;
    height:100px;
    border-bottom:1px solid #fff;
}
效果图
<!DOCTYPE html>
<html lang="en">
<head>
    <meta charset="UTF-8">
    <meta name="viewport" content="width=device-width, initial-scale=1.0">
    <title>Document</title>
    <style>
        .demo{
            display:flex;
            flex-direction:column;
            text-align: center;
            line-height: 100px;
        }
        .item{
            background:#ccc;
            height:100px;
            border-bottom:1px solid #fff;
        }
    </style>
</head>
<body>
    <div class="demo">
        <div class="item">1</div>
        <div class="item">2</div>
        <div class="item">3</div>
    </div>
</body>
</html>
- 让子元素从下到上反向排列
.demo{
    display:flex;
    flex-direction:column-reverse;
    text-align: center;
    line-height: 100px;
}
.item{
    background:#ccc;
    height:100px;
    border-bottom:1px solid #fff;
}
效果图

<!DOCTYPE html>
<html lang="en">
<head>
    <meta charset="UTF-8">
    <meta name="viewport" content="width=device-width, initial-scale=1.0">
    <title>Document</title>
    <style>
        .demo{
            display:flex;
            flex-direction:column-reverse;
            text-align: center;
            line-height: 100px;
        }
        .item{
            background:#ccc;
            height:100px;
            border-bottom:1px solid #fff;
        }
    </style>
</head>
<body>
    <div class="demo">
        <div class="item">1</div>
        <div class="item">2</div>
        <div class="item">3</div>
    </div>
</body>
</html>
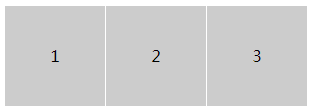
- 让子元素从左到右排列
.demo{
    display:flex;
    flex-direction:row;
}
.item{
    background:#ccc;
    height:100px;
    width: 100px;
    border-right:1px solid #fff;
}
效果图
<!DOCTYPE html>
<html lang="en">
<head>
    <meta charset="UTF-8">
    <meta name="viewport" content="width=device-width, initial-scale=1.0">
    <title>Document</title>
    <style>
        .demo{
            display:flex;
            flex-direction:row;
            text-align: center;
            line-height: 100px;
        }
        .item{
            background:#ccc;
            height:100px;
            width: 100px;
            border-right:1px solid #fff;
        }
    </style>
</head>
<body>
    <div class="demo">
        <div class="item">1</div>
        <div class="item">2</div>
        <div class="item">3</div>
    </div>
</body>
</html>
- 让子元素从左到右反向排列
.demo{
    display:flex;
    flex-direction:row-reverse;
}
.item{
    background:#ccc;
    height:100px;
    width: 100px;
    border-right:1px solid #fff;
}
效果图
<!DOCTYPE html>
<html lang="en">
<head>
    <meta charset="UTF-8">
    <meta name="viewport" content="width=device-width, initial-scale=1.0">
    <title>Document</title>
    <style>
        .demo{
            display:flex;
            flex-direction:row-reverse;
            text-align: center;
            line-height: 100px;
        }
        .item{
            background:#ccc;
            height:100px;
            width: 100px;
            border-right:1px solid #fff;
        }
    </style>
</head>
<body>
    <div class="demo">
        <div class="item">1</div>
        <div class="item">2</div>
        <div class="item">3</div>
    </div>
</body>
</html>
6. 经验分享
通过 flex 可以做一个上下固定,中间自适应的布局,它常常用于登录页那类的布局设置。
<div class="demo">
    <div class="head">头部</div>
    <div class="content">内容</div>
    <div class="foot">尾部</div>
</div>
html,body{
    padding:0;
    margin:0;
    height: 100%;
    color:#fff;
}
.demo{
    height: 100%;
    display: flex;
    flex-direction: column;
}
.head,.foot{

    flex:0 1 100px;
    background: #000;
}
.content{
    flex: 1;
    background: red;
}
案例:
案例演示 预览 复制 复制成功!<!DOCTYPE html>
<html lang="en">
<head>
<meta charset="UTF-8">
<meta name="viewport" content="width=device-width, initial-scale=1.0">
<meta http-equiv="X-UA-Compatible" content="ie=edge">
<title>demo</title>
<style>
html,body{
padding:0;
margin:0;
height: 100%;
color:#fff;
}
.demo{
height: 100%;
display: flex;
flex-direction: column;
}
.head,.foot{
flex:0 1 100px;
background: #000;
}
.content{
flex: 1;
background: red;
}
</style>
</head>
<body>
<div class="demo">
<div class="head">头部</div>
<div class="content">内容</div>
<div class="foot">尾部</div>
</div>
</body>
</html>
说明:这个布局就是两端固定,中间自适应的典型写法,而如果设置 flex-direction:row就变成了左右固定,中间自适应的横向布局。而他们正是组成页面的基础。
7. 小结
- 一定要在弹性盒模型下使用。
- 可以通过样式直接设置排列顺序,节省浏览器性能。

