设置付款(Setup Payments)
在本章中,我们将研究如何在Drupal中设置Payments 。 付款是指向公司或个人交换货物,服务或两者的付款过程。
以下是在Drupal中设置付款的步骤。
Step 1 - 从链接下载Basic Payment模块和PayPal支付模块的最新文件,并安装在您的Drupal站点中。
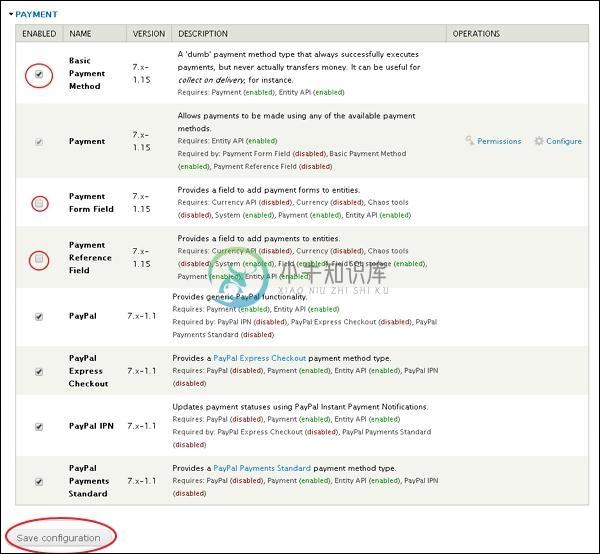
Step 2 - 接下来,在模块中启用Basic Payment and PayPal Payment ,然后单击Save configuration 。
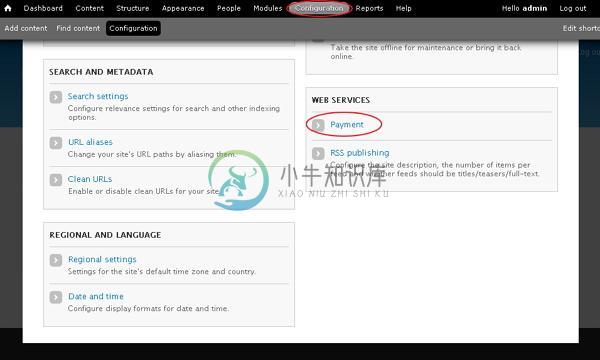
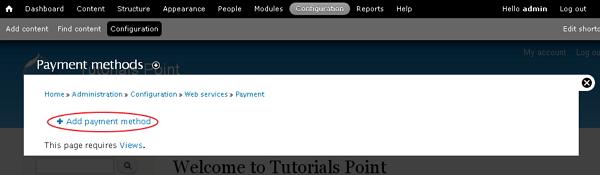
Step 3 - 单击Configuration --》 Payment ,如以下屏幕所示。
Step 4 - 单击Payment methods 。
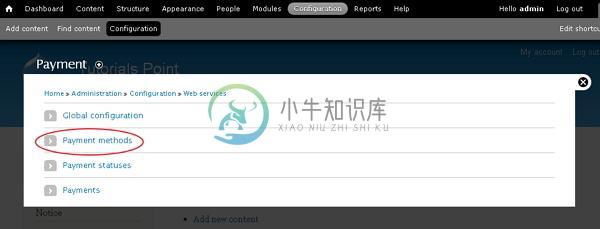
Step 5 - 然后,单击Add payment method 。
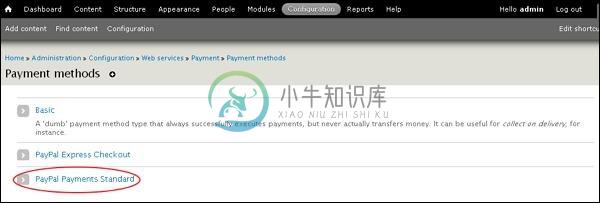
Step 6 - 点击PayPal Payments Standard 。
Step 7 - 您必须填写PayPal付款表单。
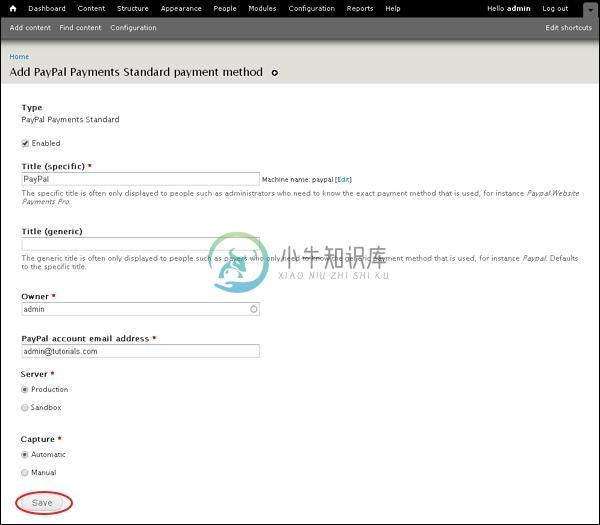
它包含以下字段 -
Title(specific) - 输入特定标题名称。
Title(generic) - 输入通用标题名称。
Owner - 输入Owner的名称。
PayPal account email address - 输入您的电子邮件地址。
Server - 从生产或沙箱中选择一个服务器。
Capture - 选择一种捕获方法,即手动或自动。
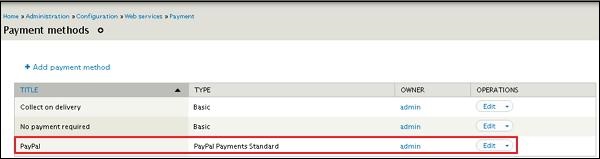
Step 8 - 您可以在以下列表中查看上面创建的PayPal。
Step 9 - 接下来,转到Structure --》 Content Types 。 将显示以下页面,单击Add content type 。
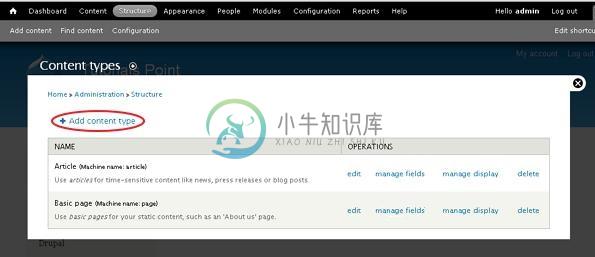
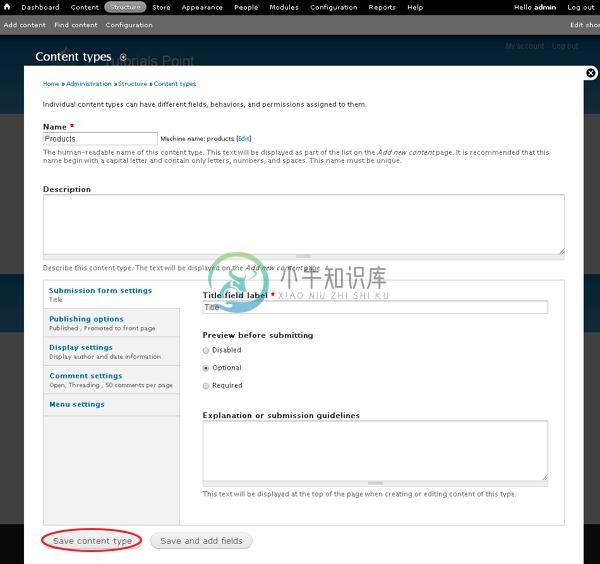
Step 10 - 将内容类型名称创建为Products并保存。
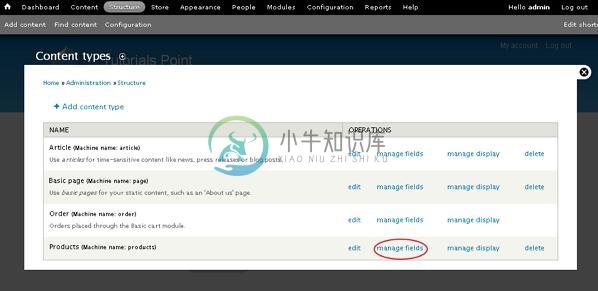
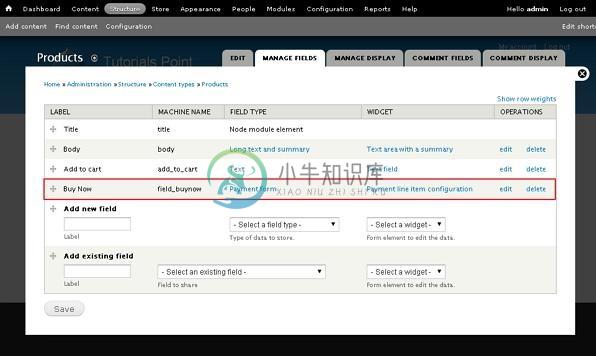
Step 11 - 您可以在列表中查看已创建的Products内容。 单击manage fields 。
Step 12 - 添加新字段作为Buy Now ,从下拉列表中选择Payment form获取数据类型。
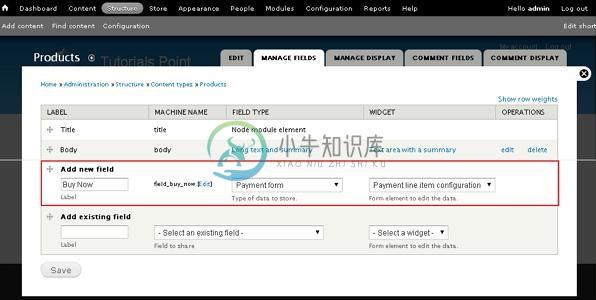
单击“ Save按钮。
Step 13 - 现在,您可以在列表中查看创建的“ Buy Now字段。
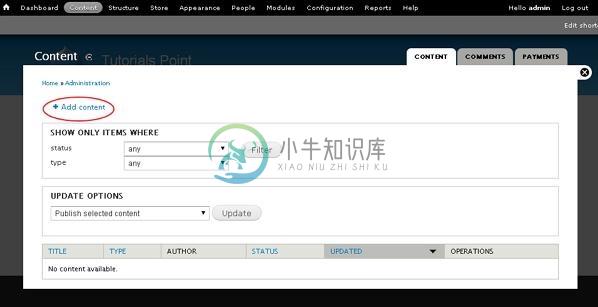
Step 14 - 转到“ Content ,单击“ Add content 。
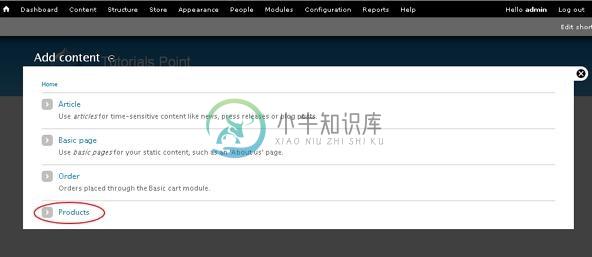
Step 15 - 单击Products 。
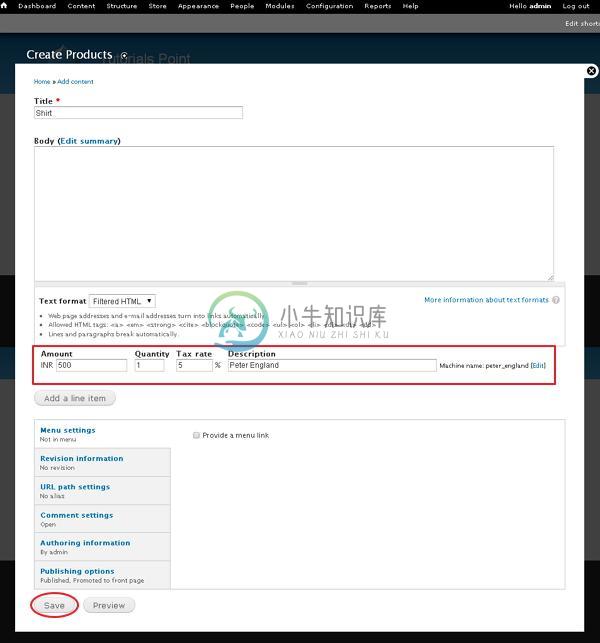
Step 16 - 在字段中输入您的产品信息,如以下屏幕所示,然后单击“ Save按钮。
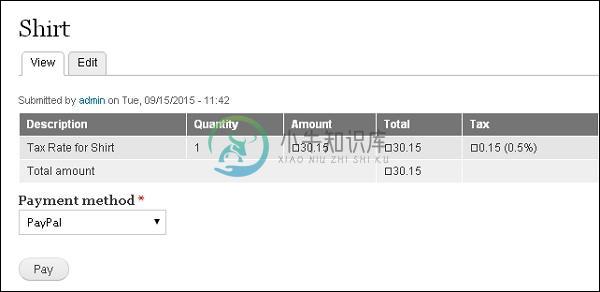
Step 17 - 您现在可以在您的网站上查看您的内容,如以下屏幕所示。 点击Pay按钮。
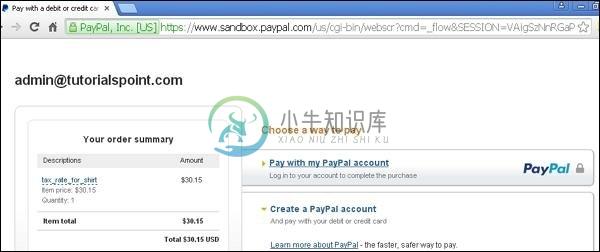
Step 18 - 您将被重定向到场外支付服务器以授权付款。
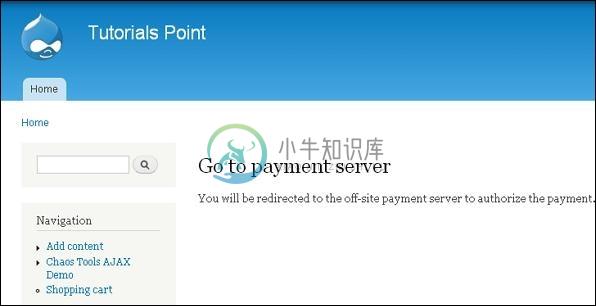
之后,它将引导您进入PayPal网站以进行将来的付款流程。
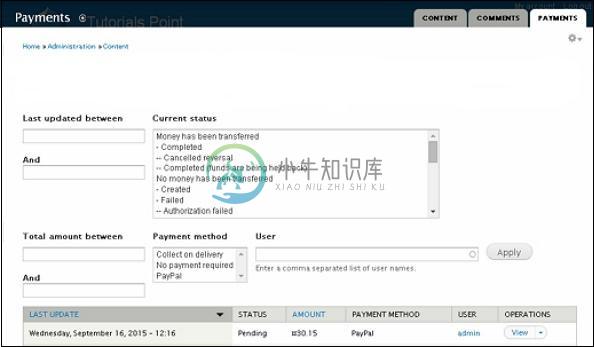
Step 19 - 付款流程完成后,您可以查看付款详情,如以下屏幕所示。
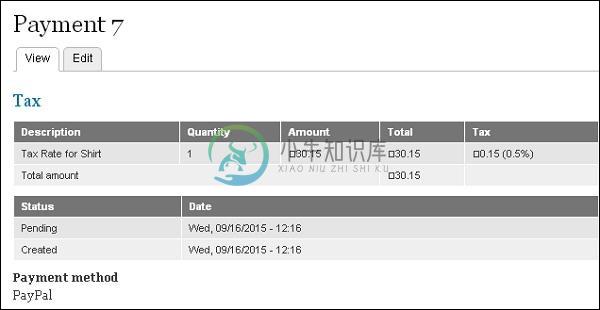
Step 20 - 转到Content --》 Payments标签。 在这里,您可以查看产品的付款状态。