5.4 Android 接入文档英文版
Dev environment
- Android version
- Jice sdk support API 17(Android 4.2) and above minmumly, please set the Android version to 4.2 above when you integrate Jice SDK.
- v4 Compatibility Jar
- We use
PairClass in the SDK, and thePairClass depends onandroid-support-v4.jar. So You need to integrate the latestandroid-support-v4.jar.
- We use
Integration SDK
step 1: Add SDK to your project
ADT
Login https://jice.io/login and go to settings on the bottom. Then download the Andriod SDK. Copy
jicesdk.jarto the libs of your project and re-build.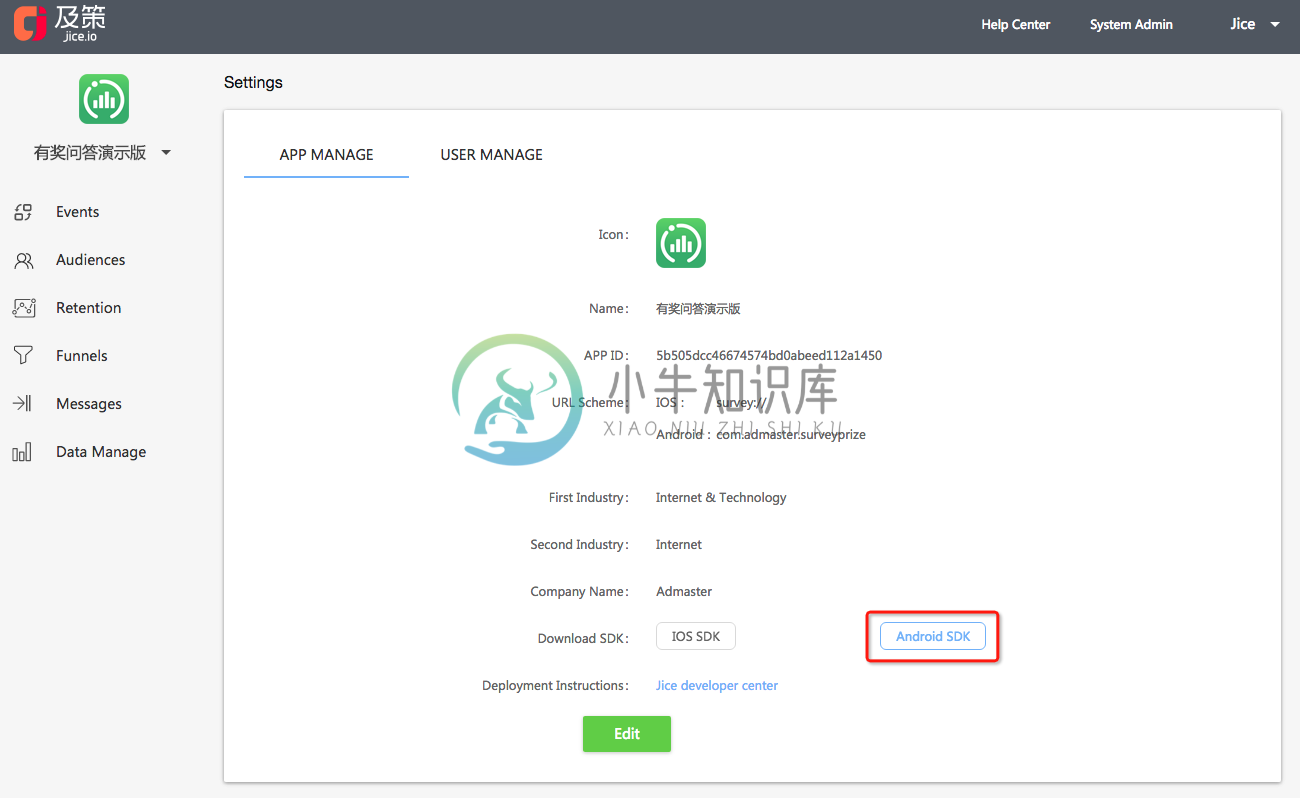
step 2: Add permissions to AndroidManifest.xml
After importing our SDK, we need to configure device information related permissions to AndroidManifest.xml, so that we can obtain user related device information. After the configuration is completed, we will reauthorize us to collect data. At the same time, the site builder should add related privacy when the user activates the APP for the first time The agreement statement obtains user consent.
<!-- Network permission -->
<uses-permission android:name="android.permission.INTERNET" />

<!-- Network status permission -->
<uses-permission android:name="android.permission.ACCESS_NETWORK_STATE" />
<uses-permission android:name="android.permission.ACCESS_WIFI_STATE" />

<!-- Device info permission -->
<uses-permission android:name="android.permission.READ_PHONE_STATE" />

<!-- Cache in-app message permission -->
<uses-permission android:name="android.permission.READ_EXTERNAL_STORAGE" />
<uses-permission android:name="android.permission.WRITE_EXTERNAL_STORAGE" />
Initialize SDK
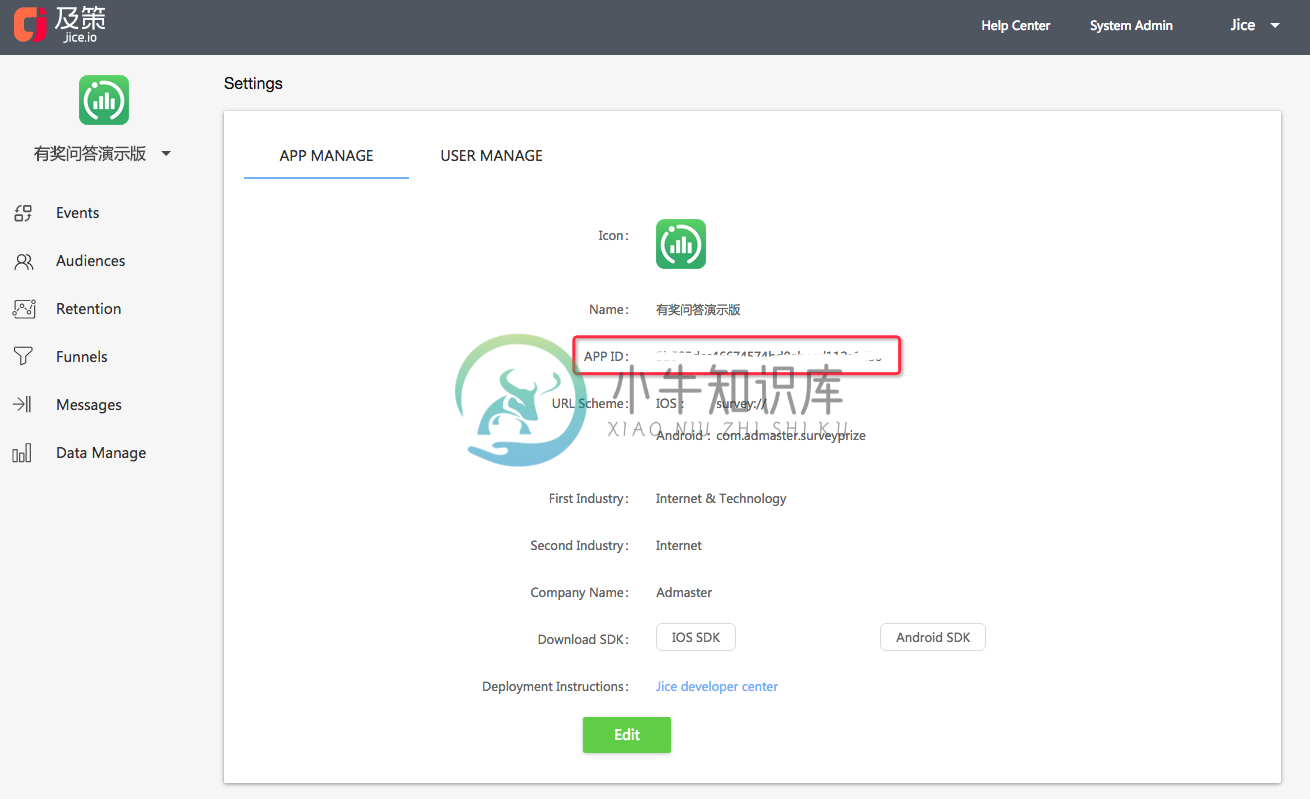
step 1: Get appkey from Jice website
Login https://jice.io/login and go to settings on the bottom to get the app key.
step 2: Configure appkey in main AndroidManifest.xml
Add AppKey under the application node in the AndroidManifest.xml.
<meta-data android:name="com.admaster.jicesdk.appKeymJiceAPI.trackEventName" android:value="Your appkey on Jice website" />
step 3: Add Jice instance to your main activity
Import com.admaster.jice.api.JiceSDK at the entrance(such as custom Application or Activity) to the program, and call JiceSDK.getInstance(Context context, JiceConfig config) to initialize SDK.
Description: it is recommended that developers will initialize interface in android: name = "android. Intent. The category. The LAUNCHER" attributes Activity onCreate () method, ensure every time you start the APP can call.If within a custom Application to initialize the SDK, may by a third party service work in independent processes make custom Application initialization for many times, can cause JiceSDK initialization time statistics abnormal events.
- API Parameters
appKey: Your app identifier generated by Jice.config:SDK config class.if you want to custom it,view Custom SDK config at the end.Or assign it to null.
JiceSDK mJiceAPI = JiceSDK.getInstance(getApplicationContext(), new JiceConfig());
Congratulations! You have performed the basic SDK integration.If integrate successfully, Jice will receive basic event data, for example,start and active, after restarting app. Note that it may take a few minutes for your first datapoints to show up within the Jice. 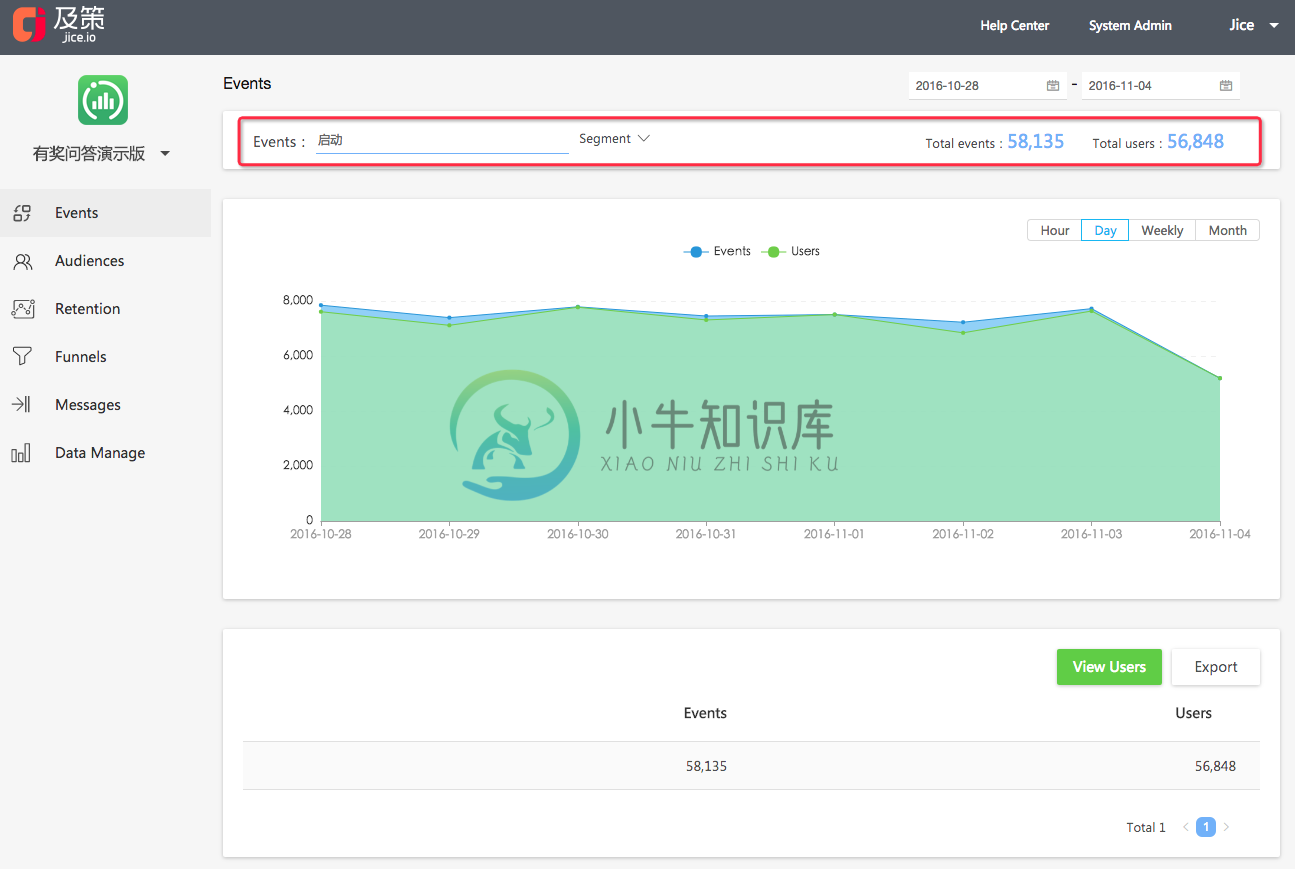
Sending Event
Once you've initialized SDK successfully, you can track an event by calling mJiceAPI.trackEventName. Before add the event tracking code, your operation colleague need to add the tracking event on Jice website and then download the tracking codes for you . You can add the event tracking code with the code file. 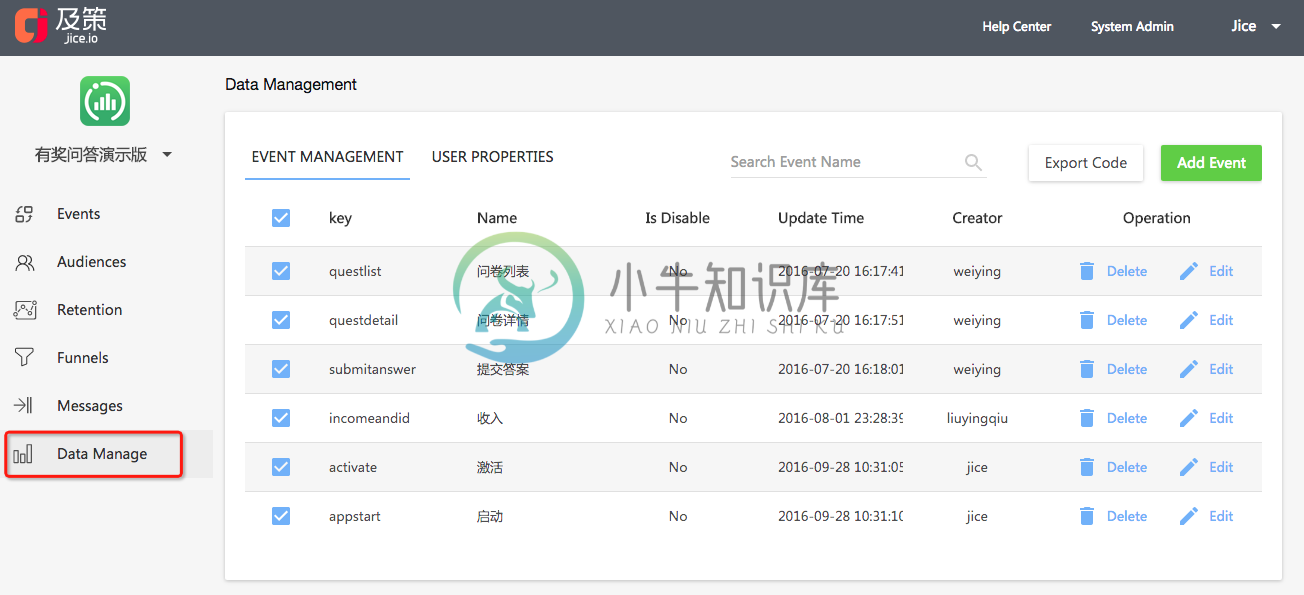
- API Parameters
eventname:The event name you define on Jice website.eventlabels: The properties of the event you define on Jice website.
void trackEventName(String eventName,HashMap<String, ?> eventlabels)
- Demo
//When a user add an item to shopping cart
HashMap<String, Object> eventlabel = new HashMap<String, Object>();
eventlabel.put("pid", 22473); // item id
eventlabel.put("itemname", "tshirt"); // item name
eventlabel.put("itemprice", 800); // item price
mJiceAPI.trackEventName("productview", eventlabel);
You can also use the fllowing two methods track events.
void trackEventName(String eventname)
void trackEventName(String eventname, JSONObject eventlabels)
Notice:
- The event is required and the event properties are optional.
- The event key and the property key should be same with the event settings on Jice website. Or you cannot see data on Jice.
- You can add as much as 50 events and 20 event properties per event.
Congratulations! You have performed the event track SDK integration. If integrate successfully, Jice will receive event data after triggering an event. Note that it may take a few minutes for your first datapoints to show up within the Jice.
Storing user profiles
If you want to know who trigger the tracking event further more. You can call mJiceAPI.addUserIdentifier to track the user. Before add the profile tracking code, your operation colleague need to add the tracking profiles on Jice website and then download the tracking codes. You can add the profile tracking code with the code file. 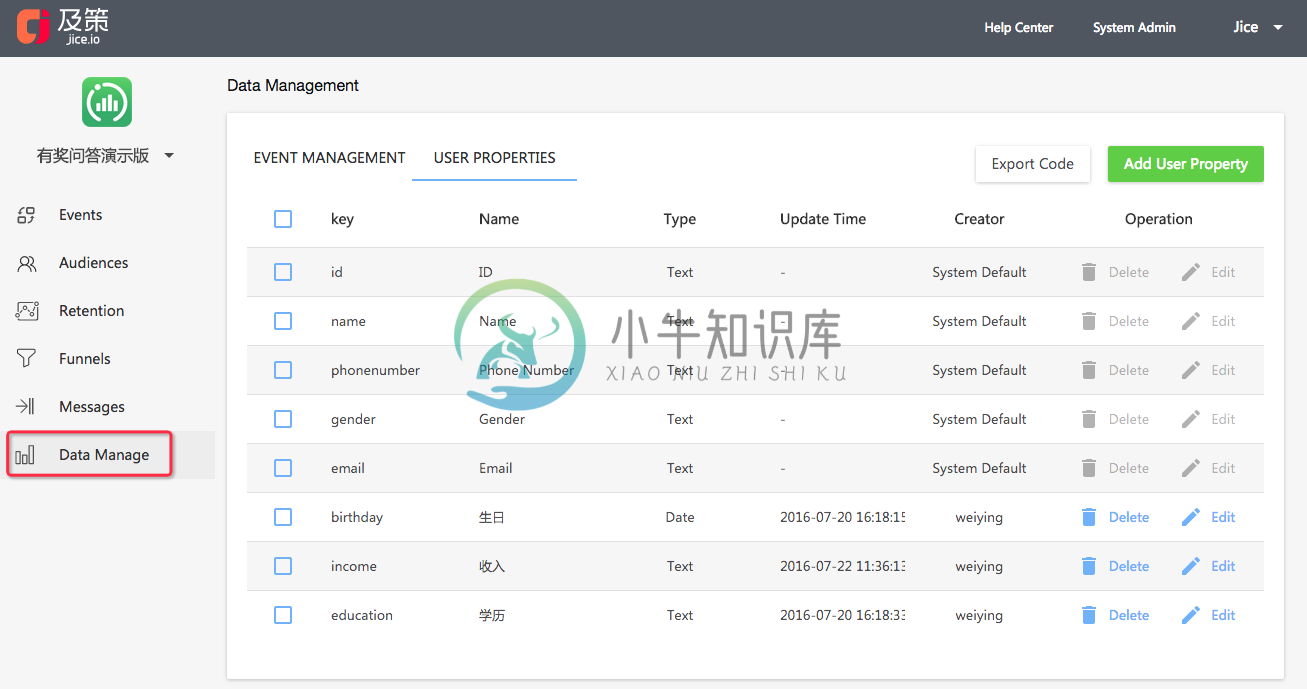
- When a user registers, you can call this method to track user profile, such as name,email,sex etc.
- When a user update profile, you should call this method to update this user profile. Note reseting profile before call the method.
- API Parameters
userid: User unique identifier in your app.It can not be null.properties:User properties, such as email,name,sex etc.
void addUserIdentifier(String userId, HashMap<String, Object> properties)
- Demo
HashMap<String, Object> profile = new HashMap<String, Object>();
profile.put("name", "Jim");//username
profile.put("gender", "Male");//Sex
profile.put("birthday", "1990-10-12");// birthay
profile.put("email","vip@jice.com");// email
mJiceAPI.addUserIdentifier("421484", profile);//421484 is user id
Notice:
- The user property key should be same with the property settings on Jice website. Or you cannot see data on Jice.
Congratulations! You have performed the event track SDK integration. If integrate successfully, Jice will receive user data after a user register. Note that it may take a few minutes for your first datapoints to show up within the Jice.
Sending in-app message
You can create beautiful in-app messages on the Jice website and send them to the people you want. Before using the magic function, you need to finish the following steps.
step #1: Controlling when to show an in-app message
For example, you have a shopping app and would like to show an in-app message when a user visit fresh category.You need to do the following things.
Add in-app message view under application node of AndroidManifest.xml.
<activity
    android:name="com.admaster.jicesdk.api.JicePushActivity"
    android:theme="@android:style/Theme.Translucent.NoTitleBar" />
You need call addJicePushView at the appropriate point(such as onCreate() method of FreshActivity) in your app.
- API Parameters
context: Contex Object.jiceViewCallback:You can implement thejiceViewCallbackif you want do something during the message show or click. View the details in the next step.
void addJicePushView(Context context,JiceViewListener jiceViewCallback)
- Demo
mJiceAPI.addJicePushView(MainActivity.this, new JiceViewListener() {

    @Override
    public void onJiceViewWillShow() {
        //todo something
    }

    @Override
    public void onJiceViewShowed() {
        //todo something
    }

    @Override
    public void onJiceViewError(String errorMsg) {
        //todo something
    }

    @Override
    public void onJiceViewDismissed() {
        //todo something
    }

    @Override
    public void onJiceViewClicked(String clickUrl){
        //todo something
    }
});
step #2: Controlling how to show the info after clicking the in-app message
If you want the user to visit some view after click the in-app message further more, you should Implement the onJiceViewClicked method of JiceViewListener interface. The clickUrl is the url you input on the Jice website and Jice SDK outputs it as strings. You can parse it as you need.
You can do more things in the JiceViewDelegate interface of course.
- Demo
mJiceAPI.addJicePushView(MainActivity.this, new JiceViewListener() {

    @Override
    public void onJiceViewWillShow() {
        //todo something
    }

    @Override
    public void onJiceViewShowed() {
        //todo something
    }

    @Override
    public void onJiceViewError(JicePushShowError errorMsg) {
        //todo something
    }

    @Override
    public void onJiceViewDismissed() {
        //todo something
    }
    //Open clickUrl in the default operater
    @Override
    public void onJiceViewClicked(String clickUrl) {
        Intent intent = new Intent();
        intent.setAction("android.intent.action.VIEW");
        Uri destUri = Uri.parse(clickUrl);
        intent.setData(destUri);
        startActivity(intent);
    }
});
- Error Code used in onJiceViewError method
JicePushShowError.JicePushNoData = 1000, // There are no messages
JicePushShowError.JicePushIsShowing = 1001, //Some message are on show now
JicePushShowError.JicePushNoNet = 1002, //There is no network currently
JicePushShowError.JicePushIsDownloading = 1003;//Downloading
step #3: Integrate online test
We suggest you to test the message before send it to the online. During the online test, you can see if the message is shown as you want. Before using the online test,You need to take a few steps. After doing these, you can use your mobile scan QRCode in the jice website to test the message.
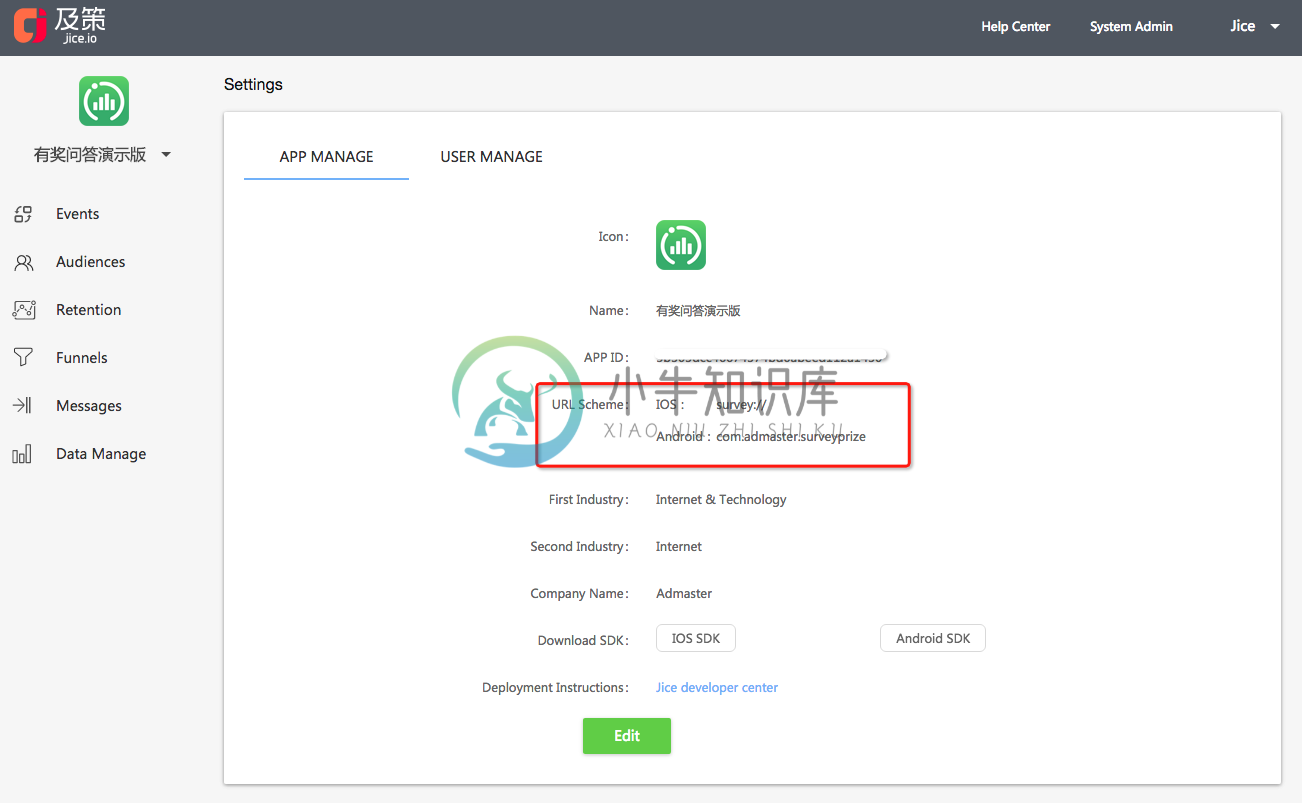
- Define URL Scheme,Add
schemeproperties under the MainActivity tag inMainfest.
<intent-filter>
    <action android:name="android.intent.action.VIEW" />
    <category android:name="android.intent.category.DEFAULT" />
    <category android:name="android.intent.category.BROWSABLE" />
    <!-- url scheme -->
    <data android:scheme="com.admaster.jicedemo" />
</intent-filter>
- Login Jice website and input this URL Scheme in the setting tab of Jice website.
- Add the following code in the method
onCreate()ofMainActivity.getIntent()method returns the related in-app message properties from QR code.
mJiceAPI.handleOpenURL(getIntent());
Congratulations! You have performed the in-app message SDK integration. If integrate successfully, your app will receive an in-app message after scaning QR code of a message created on Jice website.
Custom SDK configuration
If you want to custom SDK configuratins, for example, config the network strategry for sending data, you can instantiate a JiceConfig object. And pass this object when calling JiceSDK.getInstance(Context context, JiceConfig config).
API Parameters
isEventWifiOnly: Network strategy for sending tracking data, you can sending it to false or true.The default value is false which means send track data under wifi or data network.isPushWifiOnly:Network strategy for showing in-app message . you can set it to false or true.The default value is false which means showing in-app message under wifi or data network.debugMode: IfisDebugModeis set to true, you can see console log when the tracking data is sent.isOldUser: set up the equipment has been activated, and identifies the user is in the SDK has been activated before using equipment, developers if set to true, then the background will not put this equipment is for the new active users, the default is false.pushServerURL: support privatisation plan, set the address of the server push issued by, the default will be sent to the jice push the address of the server.trackServerURL: support privatisation plan, set up the event reported to the address of the server, the default will be sent to the server address jice events.
JiceConfig(boolean isEventWifiOnly, boolean isPushWifiOnly, boolean debugMode, boolean isOldUser, String pushServerURL, String trackServerURL)
- Demo
@Override
public void onCreate(Bundle savedInstanceState) {
    super.onCreate(savedInstanceState);

    JiceSDK.getInstance(this, new JiceConfig(false,false,true,false,null,null));

    //If you don't need to identify the old users and privatization deployment, you can use the three parameters initialization function
    //JiceSDK.getInstance(this, new JiceConfig(false, false, false));

}
Code obfuscation config
If you use Proguard obfuscate your code, please add the following codes in proguard-project.txt file to avoid jice SDK being obfuscated twice.
-dontwarn com.admaster.**
-keep class com.admaster.** {
    *;
}

