Struts2 bean 标签
bean标签的设置和push 标签的组合,它可以创建一个新的对象实例,然后设置变量的值。然后,它的bean可以在值栈,因此,它可用于在JSP页面。
bean标签需要一个Java Bean来工作。所以,标准的java bean规律应遵循。这是bean 应该有一个无参数的构造函数。要公开和使用的所有属性的getter和setter 方法。对于这个练习的目的,让我们用下面的计数器类,在struts util包。Counter 类是一个bean,可以使用一个计数器来跟踪。
因此,让我们所有的文件保持不变,并修改的helloWorld.jsp文件。
创建动作类:
package com.yiibai.struts2;

public class HelloWorldAction{
   private String name;

   public String execute() throws Exception {
      return "success";
   }

   public String getName() {
      return name;
   }

   public void setName(String name) {
      this.name = name;
   }
}
创建视图
让我们包含以下内容 helloWorld.jsp:
<%@ page contentType="text/html; charset=UTF-8" %>
<%@ taglib prefix="s" uri="/struts-tags" %>
<html>
<head>
<title>Hello World</title>
</head>
<body>

<s:bean name="org.apache.struts2.util.Counter" var="counter">
   <s:param name="first" value="20"/>
   <s:param name="last" value="25" />
</s:bean>
<ul>
   <s:iterator value="#counter">
      <li><s:property /></li>
   </s:iterator>
</ul>

</body>
</html>
接下来让我们有employees.jsp包含以下内容:
<%@ page contentType="text/html; charset=UTF-8"%>
<%@ taglib prefix="s" uri="/struts-tags"%>
<html>
<head>
<title>Employees</title>
</head>
<body>
   <p>An example of the include tag: </p>
   <s:include value="HelloWorld.jsp"/>
</body>
</html>
配置文件
你的struts.xml应该像这样:
<?xml version="1.0" encoding="UTF-8"?>
<!DOCTYPE struts PUBLIC
   "-//Apache Software Foundation//DTD Struts Configuration 2.0//EN"
   "http://struts.apache.org/dtds/struts-2.0.dtd">
<struts>
<constant name="struts.devMode" value="true" />
   <package name="helloworld" extends="struts-default">

   <action name="hello"
      class="com.yiibai.struts2.HelloWorldAction"
      method="execute">
      <result name="success">/HelloWorld.jsp</result>
   </action>
   <action name="employee"
      class="com.yiibai.struts2.Employee"
      method="execute">
      <result name="success">/employee.jsp</result>
   </action>

   </package>
</struts>
web.xml中应该像这样:
<?xml version="1.0" encoding="UTF-8"?>
<web-app xmlns:xsi="http://www.w3.org/2001/XMLSchema-instance"
   xmlns="http://java.sun.com/xml/ns/javaee"
   xmlns:web="http://java.sun.com/xml/ns/javaee/web-app_2_5.xsd"
   xsi:schemaLocation="http://java.sun.com/xml/ns/javaee
   http://java.sun.com/xml/ns/javaee/web-app_3_0.xsd"
   id="WebApp_ID" version="3.0">

   <display-name>Struts 2</display-name>
   <welcome-file-list>
      <welcome-file>index.jsp</welcome-file>
   </welcome-file-list>
   <filter>
      <filter-name>struts2</filter-name>
      <filter-class>
         org.apache.struts2.dispatcher.FilterDispatcher
      </filter-class>
   </filter>

   <filter-mapping>
      <filter-name>struts2</filter-name>
      <url-pattern>/*</url-pattern>
   </filter-mapping>
</web-app>
右键点击项目名称,并单击Export > WAR File创建一个WAR文件。然后部署此WAR在Tomcat的webapps目录下。最后,启动Tomcat服务器和尝试访问URL http://localhost:8080/HelloWorldStruts2/hello.action。这会给出以下画面:
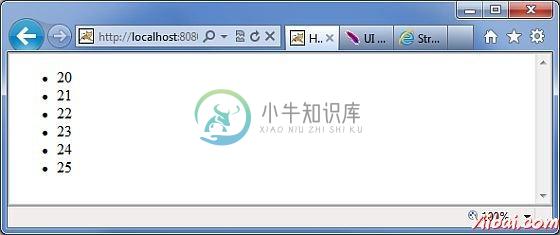
在这个例子中,我们实例化一个新的org.apache.struts2.util.Counter bean实例。然后我们的第一个属性设置为20和25最后一个属性。这意味着计数器的值分别为20,21,22,23,24和25。我们给一个名为“Counter”的bean。 struts的bean标签将bean实例化,并把它值栈中的。现在我们可以使用迭代器去,通过计数器bean的nd打印出计数器的值。.