API
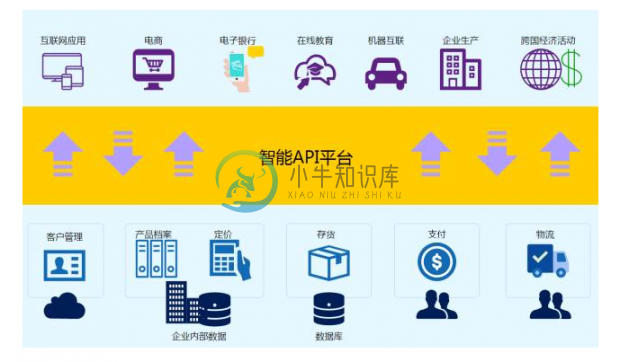
API 经济 - 从封闭走向开放
透过 API 的开放,提升服务平台价值,进一步形成生态系,带来「API经济」正快速崛起。Intel、IBM、Red Hat 等大厂皆展开布局与併购行动,新创业者也相继成立抢食市场大饼。

随着云运算、社交网路、移动应用等新兴科技的发展,一些创新的商业模式陆续出现下,API(Application Programming Interface 应用程序接口)已从系统应用开发中的信息交互/相互调运,转变为成为可获利的商品。透过 API 的开放,可提升服务平台价值,进一步形成生态系,带来「API经济」。新世纪以来,一些创新型公司,如互联网电子商务行业,网络科技的相关从业者,即以开放 API 的方式,快速扩张业务规模,创造庞大经济效益。
拍卖网站 eBay 在 2000 年开放 API,目前已累积约 2,000 个应用服务,透过 API 而来的交易约占总交易的 6 成。
Amazon 于 2002 年开放 API,让小型零售商在其电子商务平台开店,Amazon 因此也增加商品种类与提高交易金额,之后在 Amazon Web Services 云端服务也开放服务接口,协助新创企业以较低成本构建所需资讯应用环境,造就 Amazon 在云端服务市场的领先地位。
阿里也是 API 经济的实践者,天猫、淘宝、物流、支付等核心系统都是基于 API 去构建。
目前 API 经济已从网络服务拓展到电信、金融、政府,在中国可以说是拓展到了各行各业,包括一些中小科技企业、民营企业,一个有力的例子即 BATJ(阿里巴巴、腾讯、百度、京东)积极开放自家 API、广泛的参与到金融、政府等各领域 IT 建设,并将这些领域与自家的生态挂钩。
3Scale 安装
安装准备
1. 确保 OpenShift 安装并正常运行.
2. 下载
下载 3Scale 2.4 - https://github.com/3scale/3scale-amp-openshift-templates/tree/2.4.0.GA/amp
下载 3Scale 2.2 - 3scale-amp-2.2.yml
3. 创建 4 个 PV
| 类型 | 描述 |
|---|---|
RWO | redis backend, 1Gi |
RWO | redis system, 1Gi |
RWO | mysql, 1Gi |
RWX | system, 100Mi |
# oc get pv | grep pv-3scale-24
pv-3scale-24-mysql           1Gi        RWO            Recycle          Available                   15s
pv-3scale-24-redis-backend   1Gi        RWO            Recycle          Available                   15s
pv-3scale-24-redis-system    1Gi        RWO            Recycle          Available                   15s
pv-3scale-24-system 100Mi RWX Retain Available 15sregistry.access.redhat.com/3scale-amp24/backend
registry.access.redhat.com/3scale-amp24/zync
registry.access.redhat.com/3scale-amp24/apicast-gateway
registry.access.redhat.com/3scale-amp22/wildcard-router
registry.access.redhat.com/3scale-amp24/system
registry.access.redhat.com/rhscl/postgresql-95-rhel7:9.5
registry.access.redhat.com/rhscl/mysql-57-rhel7:5.7
registry.access.redhat.com/3scale-amp20/memcached
registry.access.redhat.com/rhscl/redis-32-rhel7:3.2$ export OCP_WILDCARD_DOMAIN=apps.example.com
$ export ADMIN_PASSWORD=admin
$ export MASTER_PASSWORD=master安装
1 - 创建一个工程oc new-project 3scale-amp --display-name="3scale APM 2.4" --description="3scale AMP 2.4"oc new-app -f 3scale-amp-2.4.yml \
--param ADMIN_PASSWORD=$ADMIN_PASSWORD \
--param TENANT_NAME=3scale \
--param MASTER_NAME=master \
--param MASTER_PASSWORD=$MASTER_PASSWORD \
--param WILDCARD_DOMAIN=$OCP_WILDCARD_DOMAIN > /tmp/3scale_amp_provision_details.txt$ for x in backend-redis system-memcache system-mysql system-redis zync-database; do echo Resuming dc: $x; sleep 2; oc rollout resume dc/$x; done$ for x in backend-listener backend-worker; do echo Resuming dc: $x; sleep 2; oc rollout resume dc/$x; done$ oc rollout resume dc/system-app$ for x in system-resque system-sidekiq backend-cron system-sphinx; do echo Resuming dc: $x; sleep 2; oc rollout resume dc/$x; done$ for x in apicast-staging apicast-production; do echo Resuming dc: $x; sleep 2; oc rollout resume dc/$x; done$ for x in apicast-wildcard-router zync; do echo Resuming dc: $x; sleep 2; oc rollout resume dc/$x; done安装验证
1 - 查看运行的容器$ oc get pods
NAME READY STATUS RESTARTS AGE
apicast-production-1-zxwkn 1/1 Running 0 22h
apicast-staging-1-2t79s 1/1 Running 0 22h
apicast-wildcard-router-1-vs8nn 1/1 Running 0 22h
backend-cron-1-t5c5l 1/1 Running 0 22h
backend-listener-1-88j9x 1/1 Running 0 23h
backend-redis-1-qpdsq 1/1 Running 0 23h
backend-worker-1-hvkjz 1/1 Running 0 23h
system-app-1-2m8bf 3/3 Running 0 22h
system-memcache-1-znf26 1/1 Running 0 23h
system-mysql-1-bl7p9 1/1 Running 0 23h
system-redis-1-52zs4 1/1 Running 0 23h
system-resque-1-r2bw5 2/2 Running 0 22h
system-sidekiq-1-4rdxv 1/1 Running 0 22h
system-sphinx-1-999xt 1/1 Running 0 22h
zync-1-nr4st 1/1 Running 0 22h
zync-database-1-tw4gs 1/1 Running 0 23h使用 https://registry-console-default.apps.example.com/registry 可以查看内部镜像仓库。
3 - 查看创建的 PVC# oc get pvc
NAME STATUS VOLUME CAPACITY ACCESS MODES STORAGECLASS AGE
backend-redis-storage Bound pv10 5Gi RWO 26m
mysql-storage Bound pv2 5Gi RWO 26m
system-redis-storage Bound pv4 5Gi RWO 26m
system-storage Bound pv15 5Gi RWX 26m$ oc rsh $(oc get pod | grep mysql | awk '{print $1}')
$ mysql -uroot system
mysql> show tables;$ cat /tmp/3scale_amp_provision_details.txt | grep Login
Login on https://api-3scale-admin.apps.example.com as admin/admin登录 https://api-3scale-admin.apps.example.com 查看欢迎页面。

CoolStore 服务
本部分部署 https://github.com/jbossdemocentral/coolstore-microservice 中提供的部分服务。coolstore-template.yml 为服务部署所需的模版。
服务部署
1 - 创建一个 Project$ oc new-project $OCP_PROJECT_PREFIX-coolstore --display-name="CoolStore API" --description="CoolStore API Business Services"$ oc create -f https://www.xnip.cn/wp-content/uploads/2021/12/coolstore-template.yml$ oc new-app --template=coolstore$ oc create route edge inventory-route --service=inventory
$ oc create route edge catalog-route --service=catalog$ oc get pods | grep Running
cart-1-xjg94 1/1 Running 0 2h
catalog-1-kpff9 1/1 Running 0 11m
catalog-mongodb-1-ssbl5 1/1 Running 0 2h
inventory-1-clq7v 1/1 Running 0 2h
inventory-postgresql-1-d7l7c 1/1 Running 0 2h$ oc get routes
NAME HOST/PORT PATH SERVICES PORT TERMINATION WILDCARD
catalog-route catalog-route-ksoong-coolstore.apps.na39.openshift.opentlc.com catalog <all> edge None
inventory-route inventory-route-ksoong-coolstore.apps.na39.openshift.opentlc.com inventory <all> edge None服务测试
服务描述 Swagger 文件路径如下:
https://catalog-route-ksoong-coolstore.apps.na39.openshift.opentlc.com/api/swagger.json
https://inventory-route-ksoong-coolstore.apps.na39.openshift.opentlc.com/api/swagger.json
可以通过 http://editor.swagger.io/ 进行服务测试。
有效的 Inventory itemId 有:
329299
329199
165613
165954
444434
444435
444436
REST 服务管理
REST 服务管理具体要求如下:
Both the services Inventory & Catalog should be managed separately.
Each service should have a basic plan and a premium plan, so that WebRetail Inc. can provide differentiated plans to users.
basic plan should not have the ability to invoke CRUD operations on the services.
premium plan should not have impose any restrictions.
basic plan users should be limited to only 5 API requests per hour for each service.
Metrics should be set up such that usage details can be viewed for each method separately.
创建账户和用户
根据如下步骤创建两个账户和两个用户。
在 3Scale 管理门户选择
Developers→Accounts,点击绿色Create按钮。在 Create new Account 界面填入如下内容
Username -
catalog_userEmail -
catalog@example.comPassword -
redhatOrganization/Group Name -
catalog_account
重复如上步骤,在 Create new Account 界面填入如下内容,创建另一个用户
Username -
inventory_userEmail -
inventory@example.comPassword -
redhatOrganization/Group Name -
inventory_account
Catalog 服务
本部分创建 3Scale Service,对接 Catalog 服务。
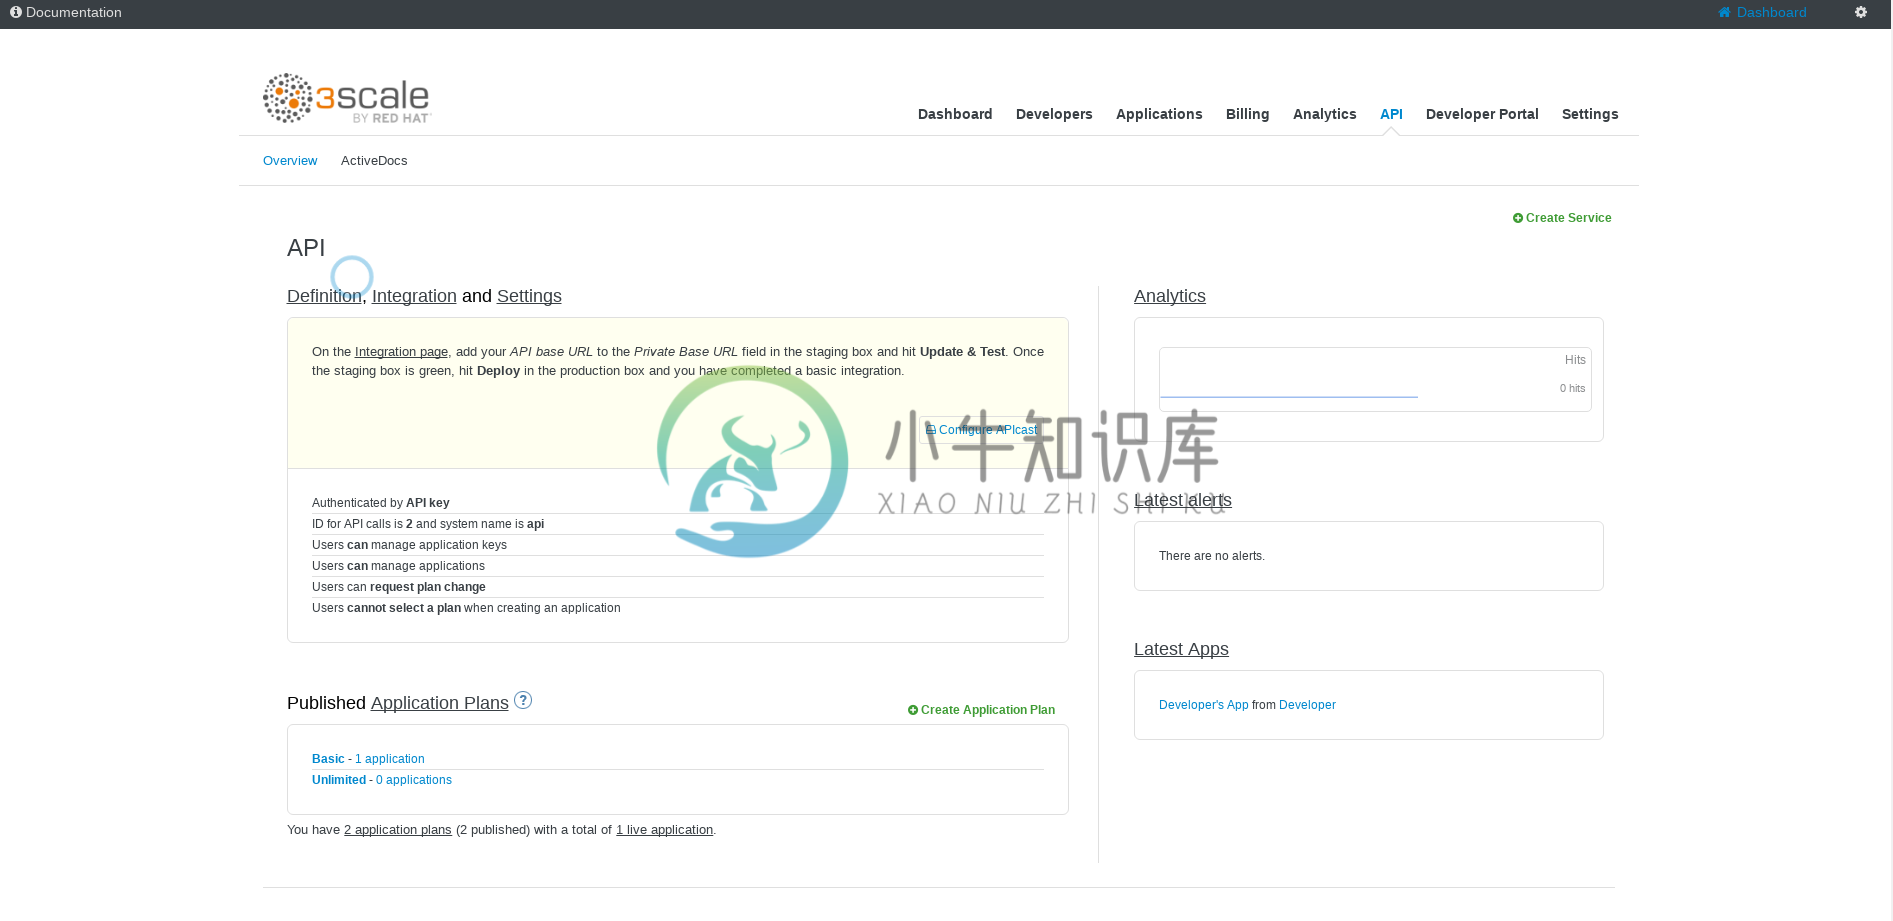
创建 Service
在 3Scale 管理门户选择
API在 API 页面右上角,点击
Create Service按钮Name - catalog_service
System Name - catalog_service
点击 Create Service,创建服务
创建 Application Plan
选择
catalog_service→Published Application Plans→Create Application Plan,Name - catalog_app_plan
System name - catalog_app_plan
点击 Create Application Plan
创建 Application
本部分关联 Application 和 用户。
选择
Developers→inventory_account,创建 ApplicationApplication plan - catalog_app_plan
Service plan - Default
Name - catalog_app
Description - catalog_app
点击 Create Application 后生成了一个 User Key
a1fb905cd95c19cd9341ddd514e6ec65
在 AMP 中创建 route
$ oc create route edge catalog-apicast-prod --service=apicast-production --hostname=catalog-apicast-prod-$OCP_PROJECT_PREFIX.$OCP_WILDCARD_DOMAIN
$ oc create route edge catalog-apicast-staging --service=apicast-staging --hostname=catalog-apicast-staging-$OCP_PROJECT_PREFIX.$OCP_WILDCARD_DOMAIN

$ oc get route | grep catalog
catalog-apicast-prod            catalog-apicast-prod-ksoong.apps.na39.openshift.opentlc.com                      apicast-production        gateway   edge          None
catalog-apicast-staging         catalog-apicast-staging-ksoong.apps.na39.openshift.opentlc.com                   apicast-staging           gateway   edge          None
Service Integration
在 3Scale 管理门户选择
APIs在 Application Plans 中 publish APP Plan
在 Integration 关联 Base, Production, Staging URL:
服务测试
$ curl -k https://catalog-apicast-prod-ksoong.apps.na39.openshift.opentlc.com/api/products?user_key=a1fb905cd95c19cd9341ddd514e6ec65Inventory 服务
$ oc create route edge inventory-apicast-prod --service=apicast-production --hostname=inventory-apicast-prod-$OCP_PROJECT_PREFIX.$OCP_WILDCARD_DOMAIN
$ oc create route edge inventory-apicast-staging --service=apicast-staging --hostname=inventory-apicast-staging-$OCP_PROJECT_PREFIX.$OCP_WILDCARD_DOMAIN

$ oc get routes | grep inventory
inventory-apicast-prod          inventory-apicast-prod-ksoong.apps.na39.openshift.opentlc.com                    apicast-production        gateway   edge          None
inventory-apicast-staging       inventory-apicast-staging-ksoong.apps.na39.openshift.opentlc.com                 apicast-staging           gateway   edge          None
同样的步骤配置 Inventory 服务,服务测试通过
$ curl -k https://inventory-apicast-staging-ksoong.apps.na39.openshift.opentlc.com:443/api/availability/329299?user_key=a9c469c13e637421225e82c3a0f665a5
$ curl "https://inventory-apicast-prod-ksoong.apps.na39.openshift.opentlc.com:443/api/availability/329299?user_key=a9c469c13e637421225e82c3a0f665a5"
