像素操作
在前面我们已经了解到图像的数据结构、栅格、坐标系和坐标转下标的方法,仅凭 LCUI 提供的这点图形 API 无法让我们轻松绘制复杂的图形,所以我们有必要学会如何操作像素数据,以便自己手动编码或借助其它图形库的能力来绘制图形。
注意,虽然像素数据的类型名是 LCUI_ARGB,但这些颜色通道的值在内存中存储的顺序是 BGRA。之所以采用这种顺序,是因为 Linux 中的帧缓存(FrameBuffer) 和 Windows 中的位图对象(HBITMAP) 都是这样。
图片灰度和反相颜色
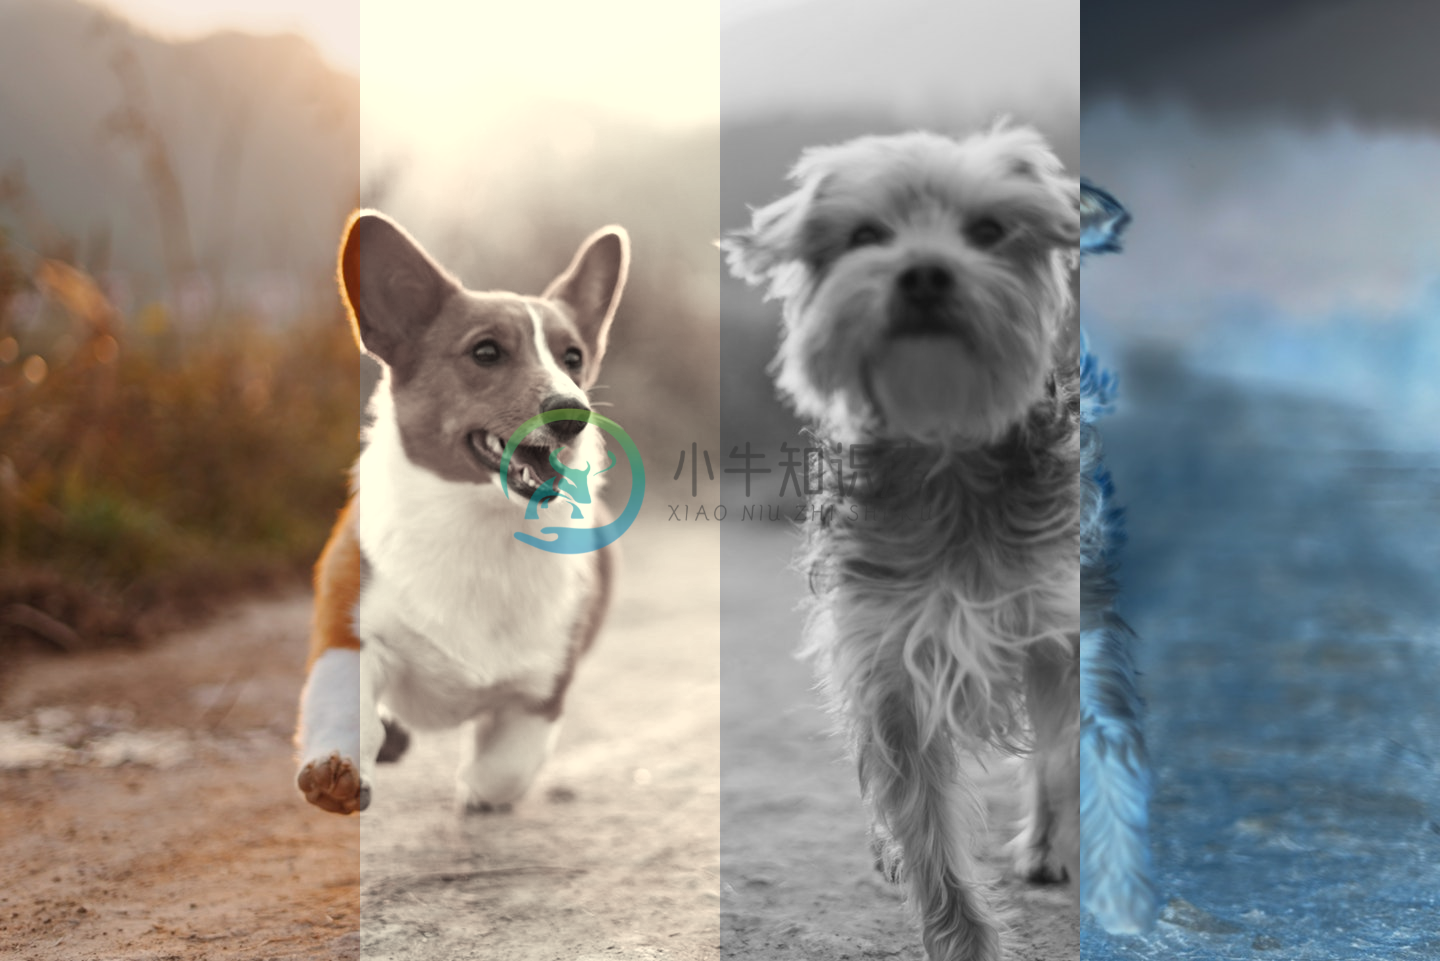
在这个例子里,我们将图片分成四个部分,其中三个分别进行反色(inverted)、灰度(grayscale)、褐色(sepia)处理,然后将处理结果输出到图片文件中。invert() 函数将颜色的最大色值 255 减去像素的色值作为结果,grayscale() 函数将红绿蓝三色值的平均值作为结果,你也可以用加权平均,例如 x = 0.299r + 0.587g + 0.114b 这个公式,更多资料请参考维基百科的 Grayscale。sepia() 函数与 grayscale() 函数采用了类似的算法。
像素操作的流程是相似的,先使用两层 for 循环在指定区域内定位要操作的像素点,然后获取像素数据进行处理,之后写入数据到图像中。为了减少代码量,我们将重复的代码定义成 PixelManipulationBegin 宏和 PixelManipulationEnd 宏,其中像素操作用到GraphGetPixel() 和 GraphSetPixel() 是函数式宏,它封装了坐标转下标的计算代码,使得我们无需再编写冗长的代码,但需要注意的是,它会为每个像素点计算下标,而这计算中包含重复计算,所以效率比较低,如果你在实际项目中比较注重性能的话可以做一点优化,例如在 y 轴的循环里提前计算每行起点下标:row_start = y * graph.width + rect.x。
#include <math.h>
#include <LCUI.h>
#include <LCUI/image.h>
#define PixelManipulationBegin \
int x, y; \
LCUI_Color pixel; \
\
for (y = rect.y; y < rect.y + rect.height; ++y) { \
for (x = rect.x; x < rect.x + rect.width; ++x) { \
Graph_GetPixel(graph, x, y, pixel);
#define PixelManipulationEnd \
Graph_SetPixel(graph, x, y, pixel); \
} \
}
void invert(LCUI_Graph *graph, LCUI_Rect rect)
{
PixelManipulationBegin;
pixel.red = (unsigned char)(255 - pixel.red);
pixel.green = (unsigned char)(255 - pixel.green);
pixel.blue = (unsigned char)(255 - pixel.blue);
PixelManipulationEnd;
}
void grayscale(LCUI_Graph *graph, LCUI_Rect rect)
{
unsigned char avg;
PixelManipulationBegin;
avg = (unsigned char)((pixel.red + pixel.green + pixel.blue) / 3);
pixel.red = avg;
pixel.green = avg;
pixel.blue = avg;
PixelManipulationEnd;
}
void sepia(LCUI_Graph *graph, LCUI_Rect rect)
{
PixelManipulationBegin;
pixel.red = (unsigned char)min(
round(0.393 * pixel.red + 0.769 * pixel.green + 0.189 * pixel.blue),
255);
pixel.green = (unsigned char)min(
round(0.349 * pixel.red + 0.686 * pixel.green + 0.168 * pixel.blue),
255);
pixel.blue = (unsigned char)min(
round(0.272 * pixel.red + 0.534 * pixel.green + 0.131 * pixel.blue),
255);
PixelManipulationEnd;
}
int main(void)
{
int i;
LCUI_Graph graph = { 0 };
LCUI_Rect rects[4];
if (LCUI_ReadImageFile("dog.jpg", &graph) != 0) {
return -1;
}
for (i = 0; i < 4; ++i) {
rects[i].height = graph.height;
rects[i].width = graph.width / 4;
rects[i].x = i * rects[i].width;
rects[i].y = 0;
}
sepia(&graph, rects[1]);
grayscale(&graph, rects[2]);
invert(&graph, rects[3]);
LCUI_WritePNGFile("test_pixel_manipulation.png", &graph);
return 0;
}
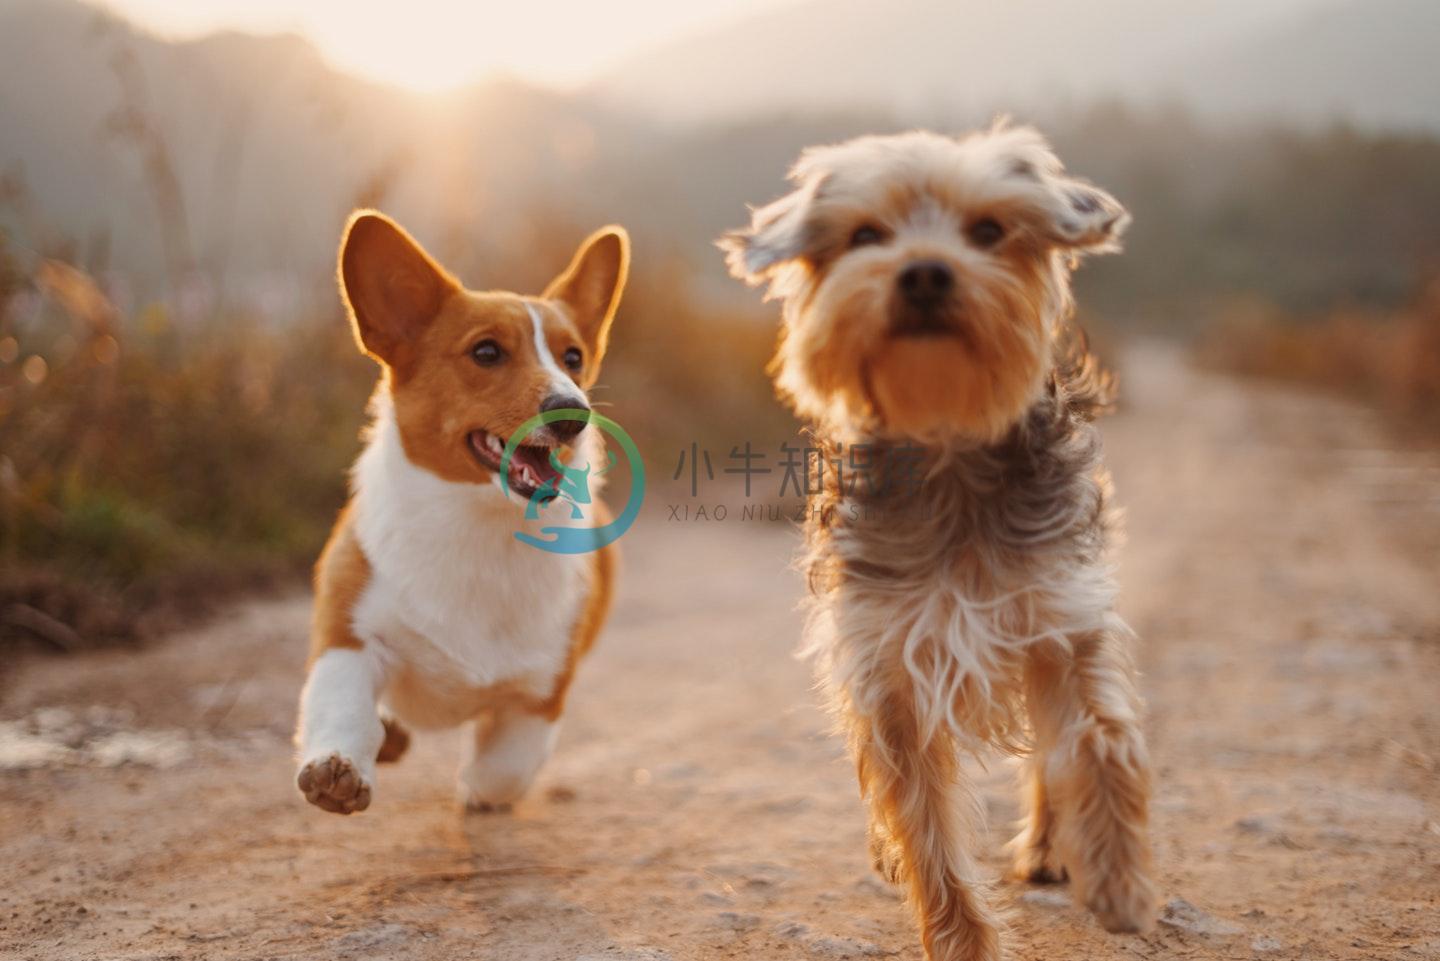
源图片:

处理结果(原始,褐色,灰度,反色):


