Serverless 的 hello, world
原文链接:Serverless 应用开发指南:serverless 的 hello, world
在翻译了几篇 serverless 与物联网相关的文章之后,我开始想着好好掌握一下 serverless 的相关知识。
我对于 serverless 的第一认知是:Serverless 是由一堆云服务构建后端服务的,如存储、计算、授权都是由不同的服务来构建的。而作为一个开发人员,我们所要做的就是了解如何搭配不同的云服务。
因此,在进行更多的定义之前,我打算先熟悉一下 serverless,以便于我更好地了解什么是 serverless 应用开发。
Serverless 框架 hello, world
考虑到直接使用 aws lambda 编写 serverless,对于我这样的新手相当的有挑战性。于是,我便先选择了 Serverless 框架,GitHub: https://github.com/serverless/serverless。
先让我们按官网的 demo,进行实验。开始之前,除了拥有一台电脑,你还需要有一个 AWS 账号。AWS 提供一年的免费试用,你所需要做的就是办一张支持 visa 的信用卡。
一、安装 serverless 框架
npm install -g serverless或者,和我一样使用:
yarn global add serverless二、设置 aws 凭证。
1.登录 AWS 账号,然后点击进入 IAM (即,Identity & Access Management)。
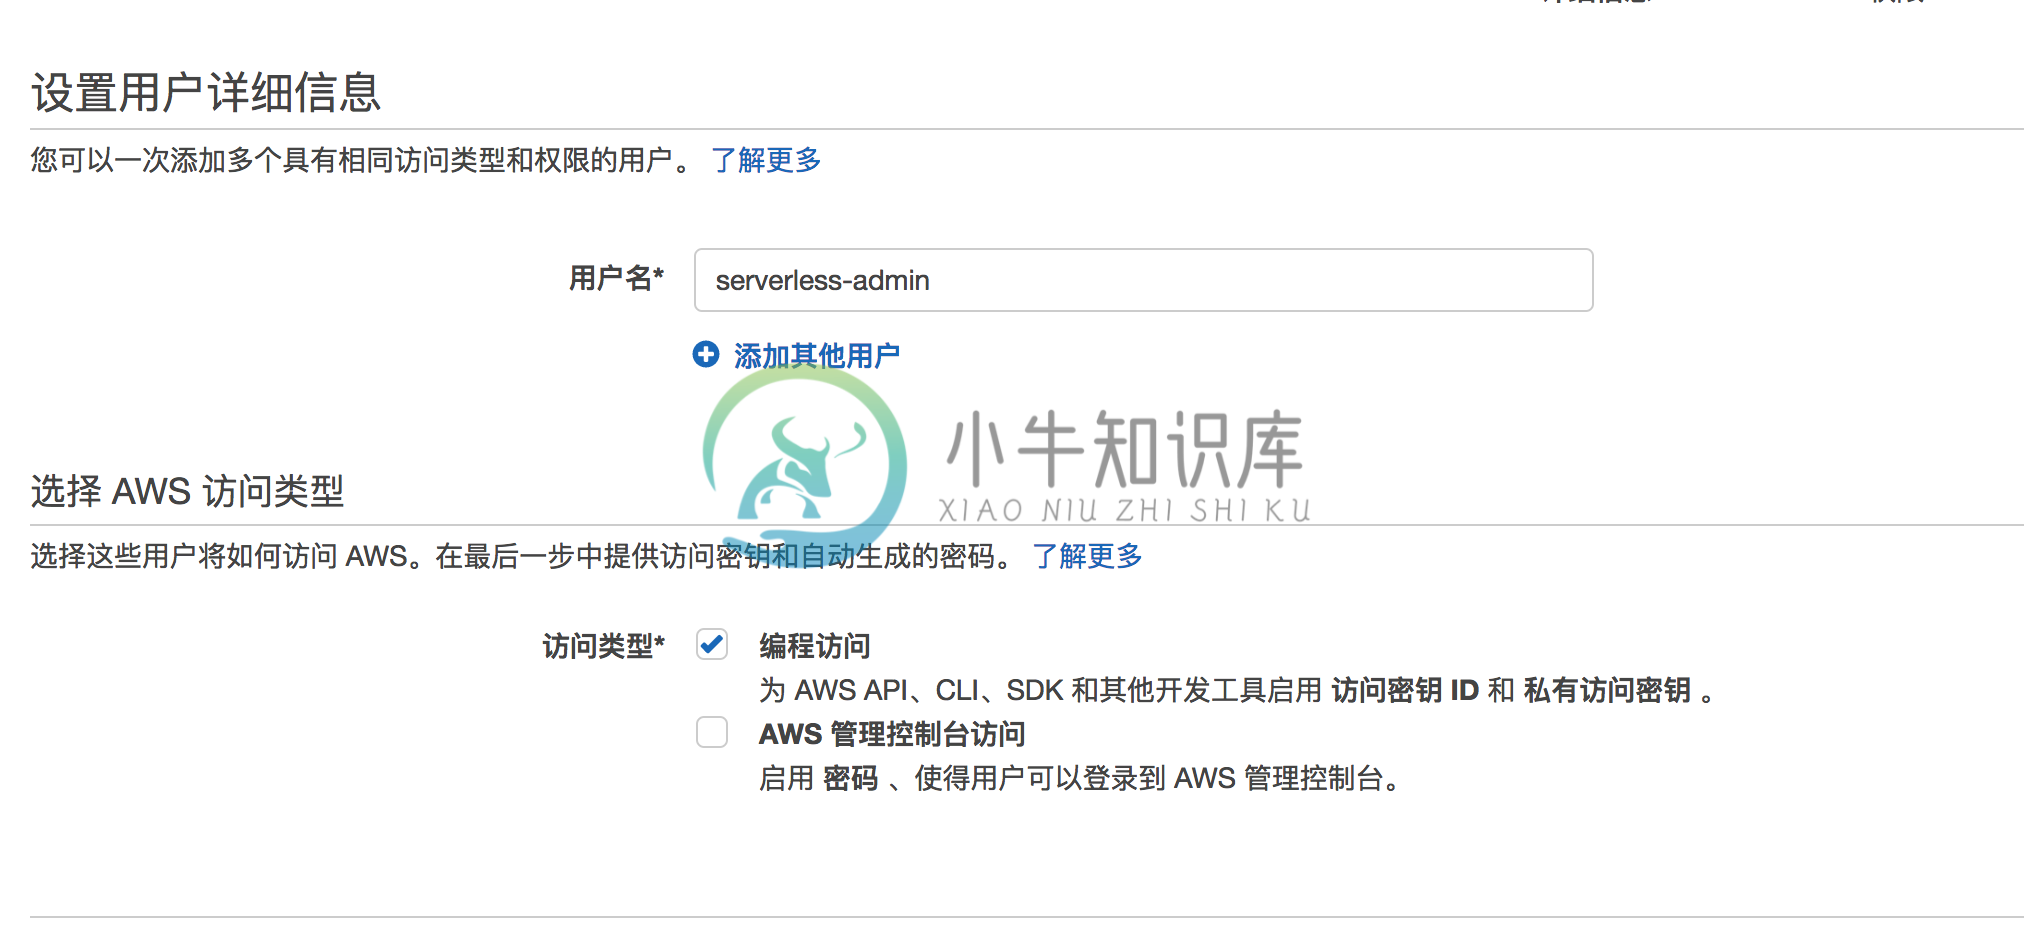
2.点击用户,然后添加用户,如 serveless-admin,并在『选择 AWS 访问类型』里,勾上编程访问。

3.点击下一步权限,选择『直接附加现有策略』,输入AdministratorAccess,然后创建用户。
注意:由于是 AdministratorAccess 权限,所以不要泄漏你的密钥出去。
- 创建用户。随后,会生成访问密钥 ID 和 私有访问密钥。请妥善保存好。
然后导出证书,并使用 serverless depoy 保存到本地。
export AWS_ACCESS_KEY_ID=<your-key-here>
export AWS_SECRET_ACCESS_KEY=<your-secret-key-here>

serverless deploy
将会自动生成配置到 ~/.aws/credentials
或者,如官方的示例:
serverless config credentials --provider aws --key AKIAIOSFODNN7EXAMPLE --secret wJalrXUtnFEMI/K7MDENG/bPxRfiCYEXAMPLEKEY三、创建 hello-world 服务
serverless create --template aws-nodejs --path hello-worldServerless: Generating boilerplate...
Serverless: Generating boilerplate in "/Users/fdhuang/learing/serverless-guide/hello-world"
_______ __
| _ .-----.----.--.--.-----.----| .-----.-----.-----.
| |___| -__| _| | | -__| _| | -__|__ --|__ --|
|____ |_____|__| \___/|_____|__| |__|_____|_____|_____|
| | | The Serverless Application Framework
| | serverless.com, v1.23.0
-------'
Serverless: Successfully generated boilerplate for template: "aws-nodejs"
(play-env)生成两个文件;
├── handler.js
└── serverless.yml
其中的 handler.js 的内容是:
'use strict';

module.exports.hello = (event, context, callback) => {
  const response = {
    statusCode: 200,
    body: JSON.stringify({
      message: 'Go Serverless v1.0! Your function executed successfully!',
      input: event,
    }),
  };

  callback(null, response);

  // Use this code if you don't use the http event with the LAMBDA-PROXY integration
  // callback(null, { message: 'Go Serverless v1.0! Your function executed successfully!', event });
};
而 serverless.yml 的内容,因为注释所有的内容,因此相当于是空的。
四、部署及测试:
$serverless deploy -v日志如下:
Serverless: Packaging service...
Serverless: Excluding development dependencies...
Serverless: Uploading CloudFormation file to S3...
Serverless: Uploading artifacts...
Serverless: Uploading service .zip file to S3 (409 B)...
Serverless: Validating template...
Serverless: Updating Stack...
Serverless: Checking Stack update progress...
CloudFormation - UPDATE_IN_PROGRESS - AWS::CloudFormation::Stack - hello-world-dev
CloudFormation - CREATE_IN_PROGRESS - AWS::Logs::LogGroup - HelloLogGroup
CloudFormation - CREATE_IN_PROGRESS - AWS::IAM::Role - IamRoleLambdaExecution
CloudFormation - CREATE_IN_PROGRESS - AWS::Logs::LogGroup - HelloLogGroup
CloudFormation - CREATE_IN_PROGRESS - AWS::IAM::Role - IamRoleLambdaExecution
CloudFormation - CREATE_COMPLETE - AWS::Logs::LogGroup - HelloLogGroup
CloudFormation - CREATE_COMPLETE - AWS::IAM::Role - IamRoleLambdaExecution
CloudFormation - CREATE_IN_PROGRESS - AWS::Lambda::Function - HelloLambdaFunction
CloudFormation - CREATE_IN_PROGRESS - AWS::Lambda::Function - HelloLambdaFunction
CloudFormation - CREATE_COMPLETE - AWS::Lambda::Function - HelloLambdaFunction
CloudFormation - CREATE_IN_PROGRESS - AWS::Lambda::Version - HelloLambdaVersionPSzzisjnTvvYknuXwQOlAvdkQZ67qXYSvgoAi9T8W0
CloudFormation - CREATE_IN_PROGRESS - AWS::Lambda::Version - HelloLambdaVersionPSzzisjnTvvYknuXwQOlAvdkQZ67qXYSvgoAi9T8W0
CloudFormation - CREATE_COMPLETE - AWS::Lambda::Version - HelloLambdaVersionPSzzisjnTvvYknuXwQOlAvdkQZ67qXYSvgoAi9T8W0
CloudFormation - UPDATE_COMPLETE_CLEANUP_IN_PROGRESS - AWS::CloudFormation::Stack - hello-world-dev
CloudFormation - UPDATE_COMPLETE - AWS::CloudFormation::Stack - hello-world-dev
Serverless: Stack update finished...
Service Information
service: hello-world
stage: dev
region: us-east-1
stack: hello-world-dev
api keys:
  None
endpoints:
  None
functions:
  hello: hello-world-dev-hello

Stack Outputs
HelloLambdaFunctionQualifiedArn: arn:aws:lambda:us-east-1:706605665335:function:hello-world-dev-hello:1
ServerlessDeploymentBucketName: hello-world-dev-serverlessdeploymentbucket-bk066p5c9zgl
然后,让我们来触发一下这个函数:
$ serverless invoke -f hello -l服务器返回了下面的结果:
{
    "statusCode": 200,
    "body": "{\"message\":\"Go Serverless v1.0! Your function executed successfully!\",\"input\":{}}"
}
--------------------------------------------------------------------
START RequestId: 041138f9-bc81-11e7-aa63-0dbab83f773d Version: $LATEST
END RequestId: 041138f9-bc81-11e7-aa63-0dbab83f773d
REPORT RequestId: 041138f9-bc81-11e7-aa63-0dbab83f773d  Duration: 2.49 ms   Billed Duration: 100 ms     Memory Size: 1024 MB    Max Memory Used: 20 MB
这意味着,我们的第一个服务已经成功上线了。
我们也可以通过下面的命令来获取相应的日志:
serverless logs -f hello -t
