express调试实例
优质
小牛编辑
168浏览
2023-12-01
这是我们最常用的调试
通过创建express项目构建,调试来演示vsc的具体用法
创建express项目
使用express-generator
examples git:(master) ✗ express helloworld create : helloworld create : helloworld/package.json create : helloworld/app.js create : helloworld/public create : helloworld/public/javascripts create : helloworld/public/images create : helloworld/public/stylesheets create : helloworld/public/stylesheets/style.css create : helloworld/routes create : helloworld/routes/index.js create : helloworld/routes/users.js create : helloworld/views create : helloworld/views/index.jade create : helloworld/views/layout.jade create : helloworld/views/error.jade create : helloworld/bin create : helloworld/bin/www install dependencies: $ cd helloworld && npm install run the app: $ DEBUG=helloworld:* npm start examples git:(master) ✗ cd helloworld helloworld git:(master) ✗ npm install helloworld git:(master) ✗ npm start 测试express项目是正常的。
说明:如果是自己的项目,需要自己构建git版本控制的,faq里有具体说明。
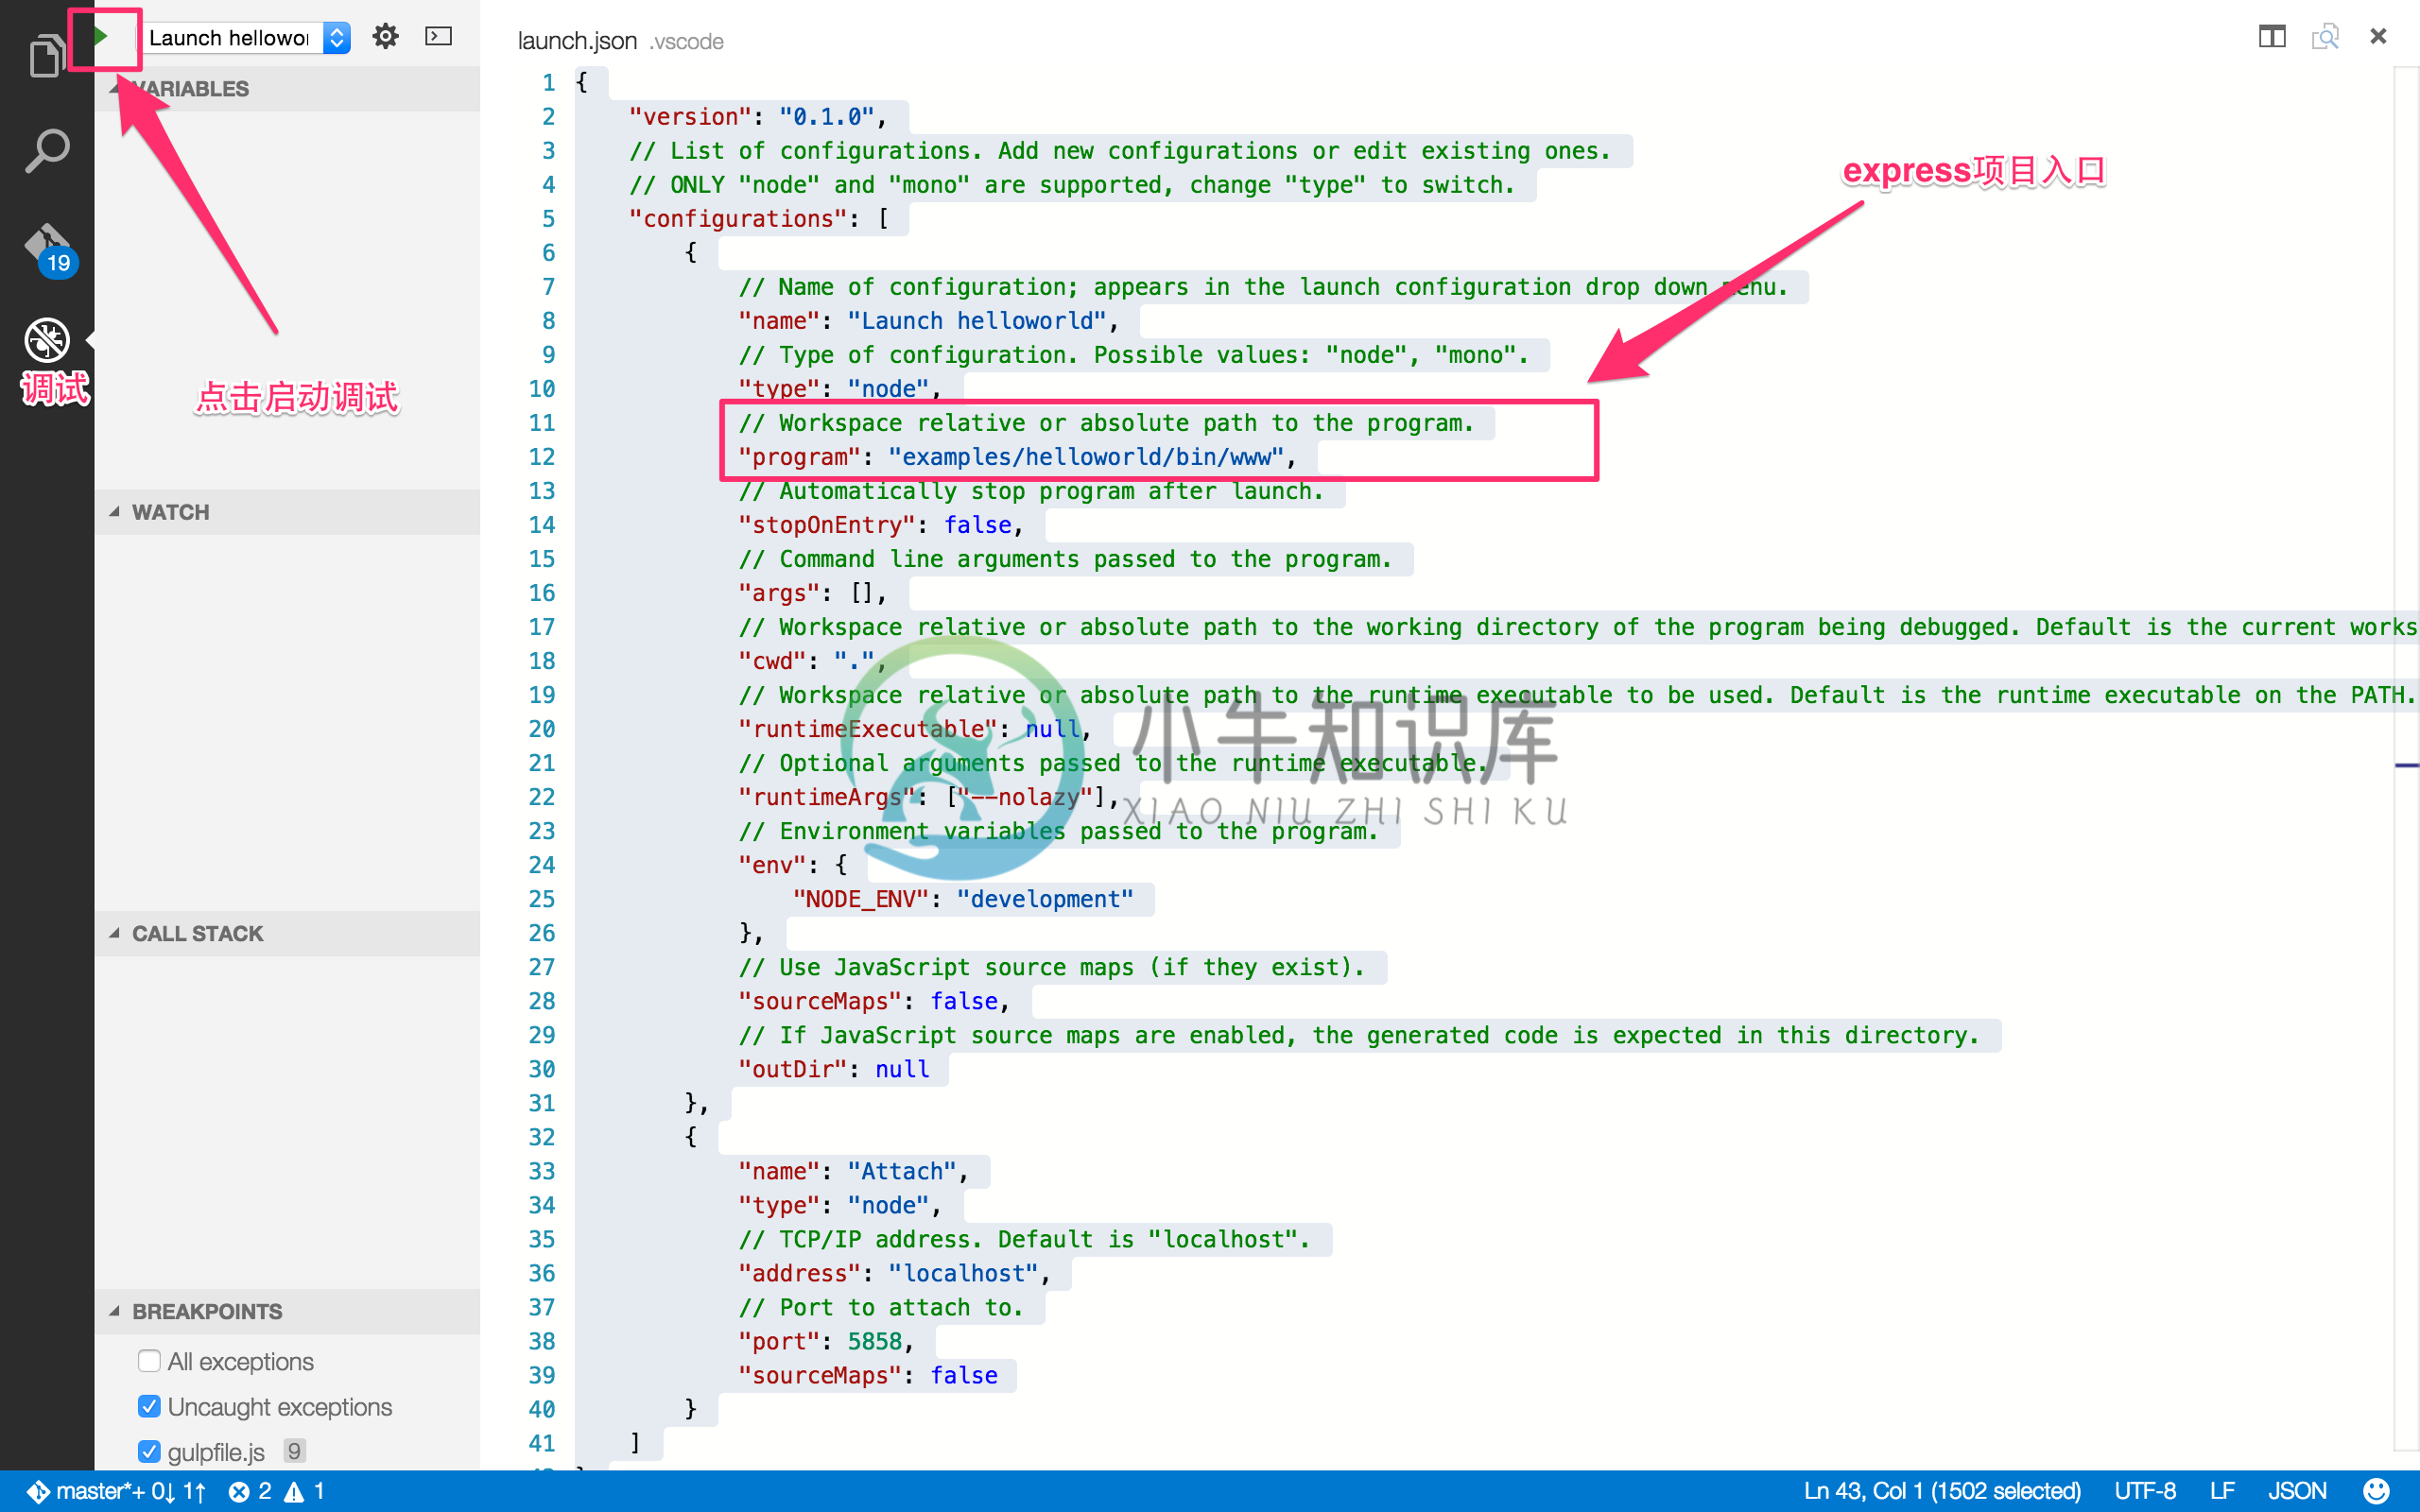
修改launch.json的内容
输入command + t快速定位文件:.vscode/launch.json
修改launch.json的内容
{ "version": "0.1.0", // List of configurations. Add new configurations or edit existing ones. // ONLY "node" and "mono" are supported, change "type" to switch. "configurations": [ { // Name of configuration; appears in the launch configuration drop down menu. "name": "Launch helloworld", // Type of configuration. Possible values: "node", "mono". "type": "node", // Workspace relative or absolute path to the program. "program": "examples/helloworld/bin/www", // Automatically stop program after launch. "stopOnEntry": false, // Command line arguments passed to the program. "args": [], // Workspace relative or absolute path to the working directory of the program being debugged. Default is the current workspace. "cwd": ".", // Workspace relative or absolute path to the runtime executable to be used. Default is the runtime executable on the PATH. "runtimeExecutable": null, // Optional arguments passed to the runtime executable. "runtimeArgs": ["--nolazy"], // Environment variables passed to the program. "env": { "NODE_ENV": "development" }, // Use JavaScript source maps (if they exist). "sourceMaps": false, // If JavaScript source maps are enabled, the generated code is expected in this directory. "outDir": null }, { "name": "Attach", "type": "node", // TCP/IP address. Default is "localhost". "address": "localhost", // Port to attach to. "port": 5858, "sourceMaps": false } ] } 核心内容
"name": "Launch helloworld", "type": "node", "program": "examples/helloworld/bin/www", program是要执行的express的入口。
这里的helloworld是项目,所以找到/bin/www目录即可。
点击调试按钮

会弹出一个窗口,执行如下命令
cd '/Users/sang/workspace/github/vsc-doc'; env 'NODE_ENV=development' 'node' '--debug-brk=44412' '--nolazy' 'examples/helloworld/bin/www' Debugger listening on port 44412 其实node-inspector也是这个原理的。
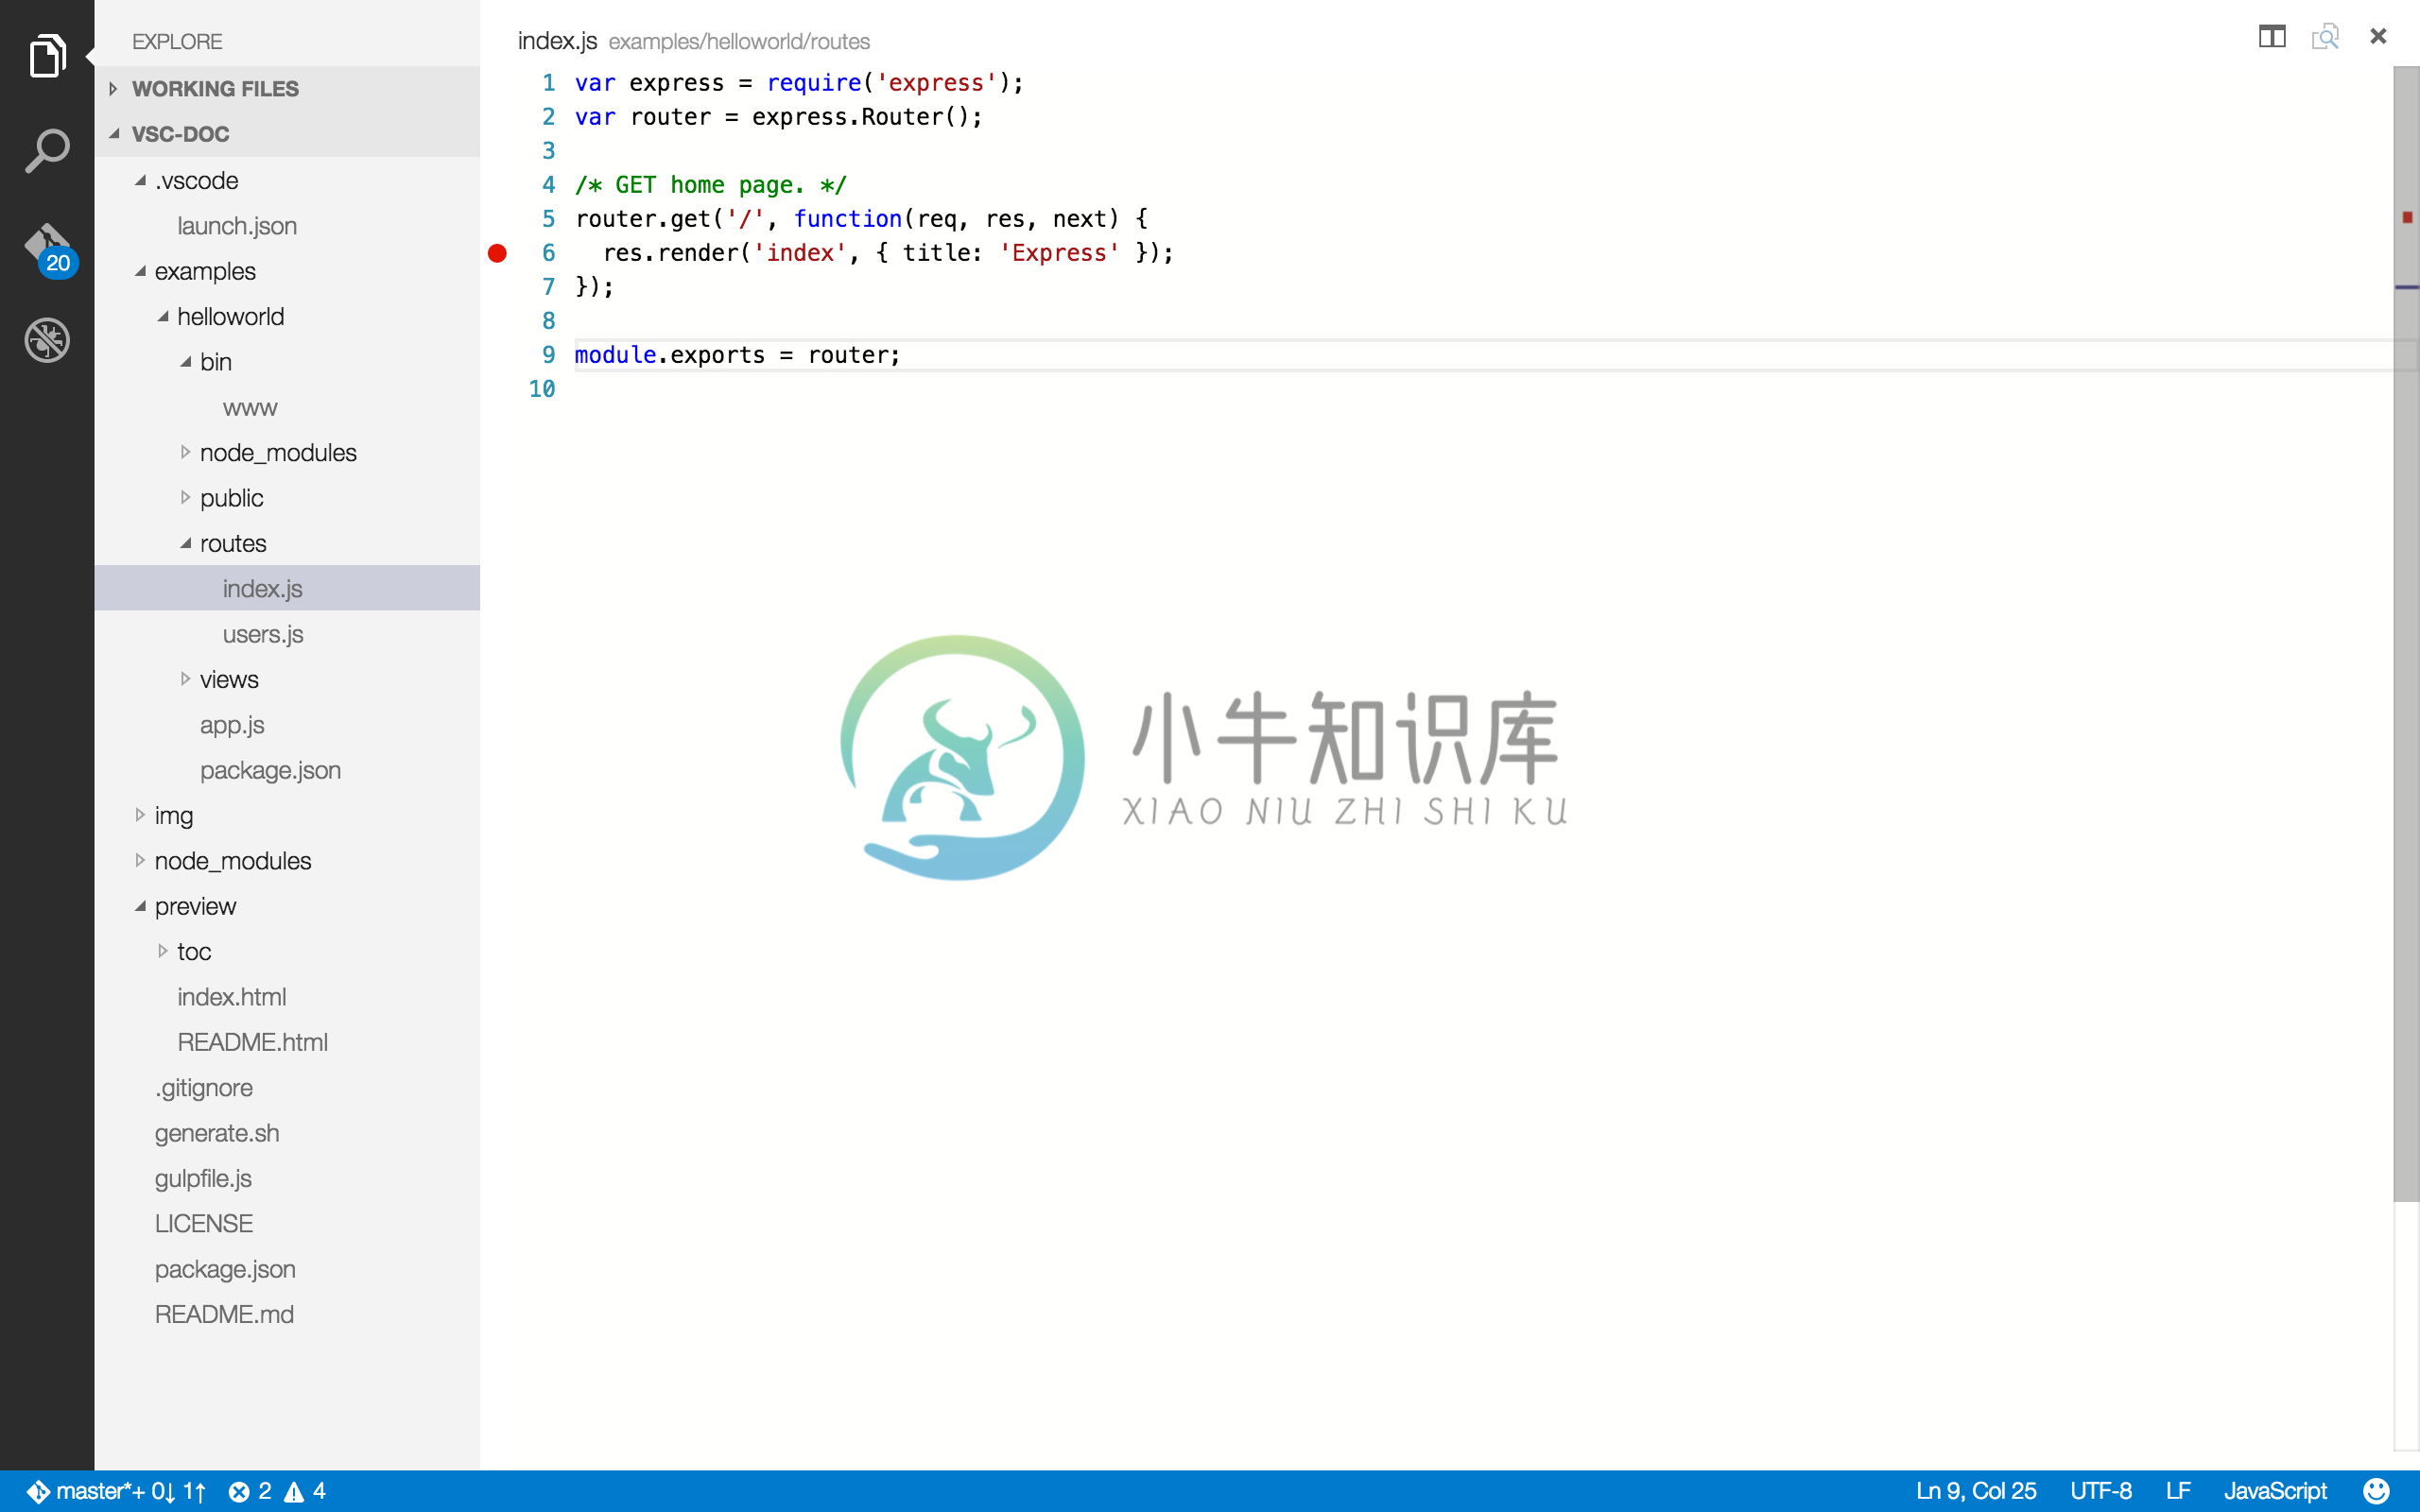
增加断点

此时访问
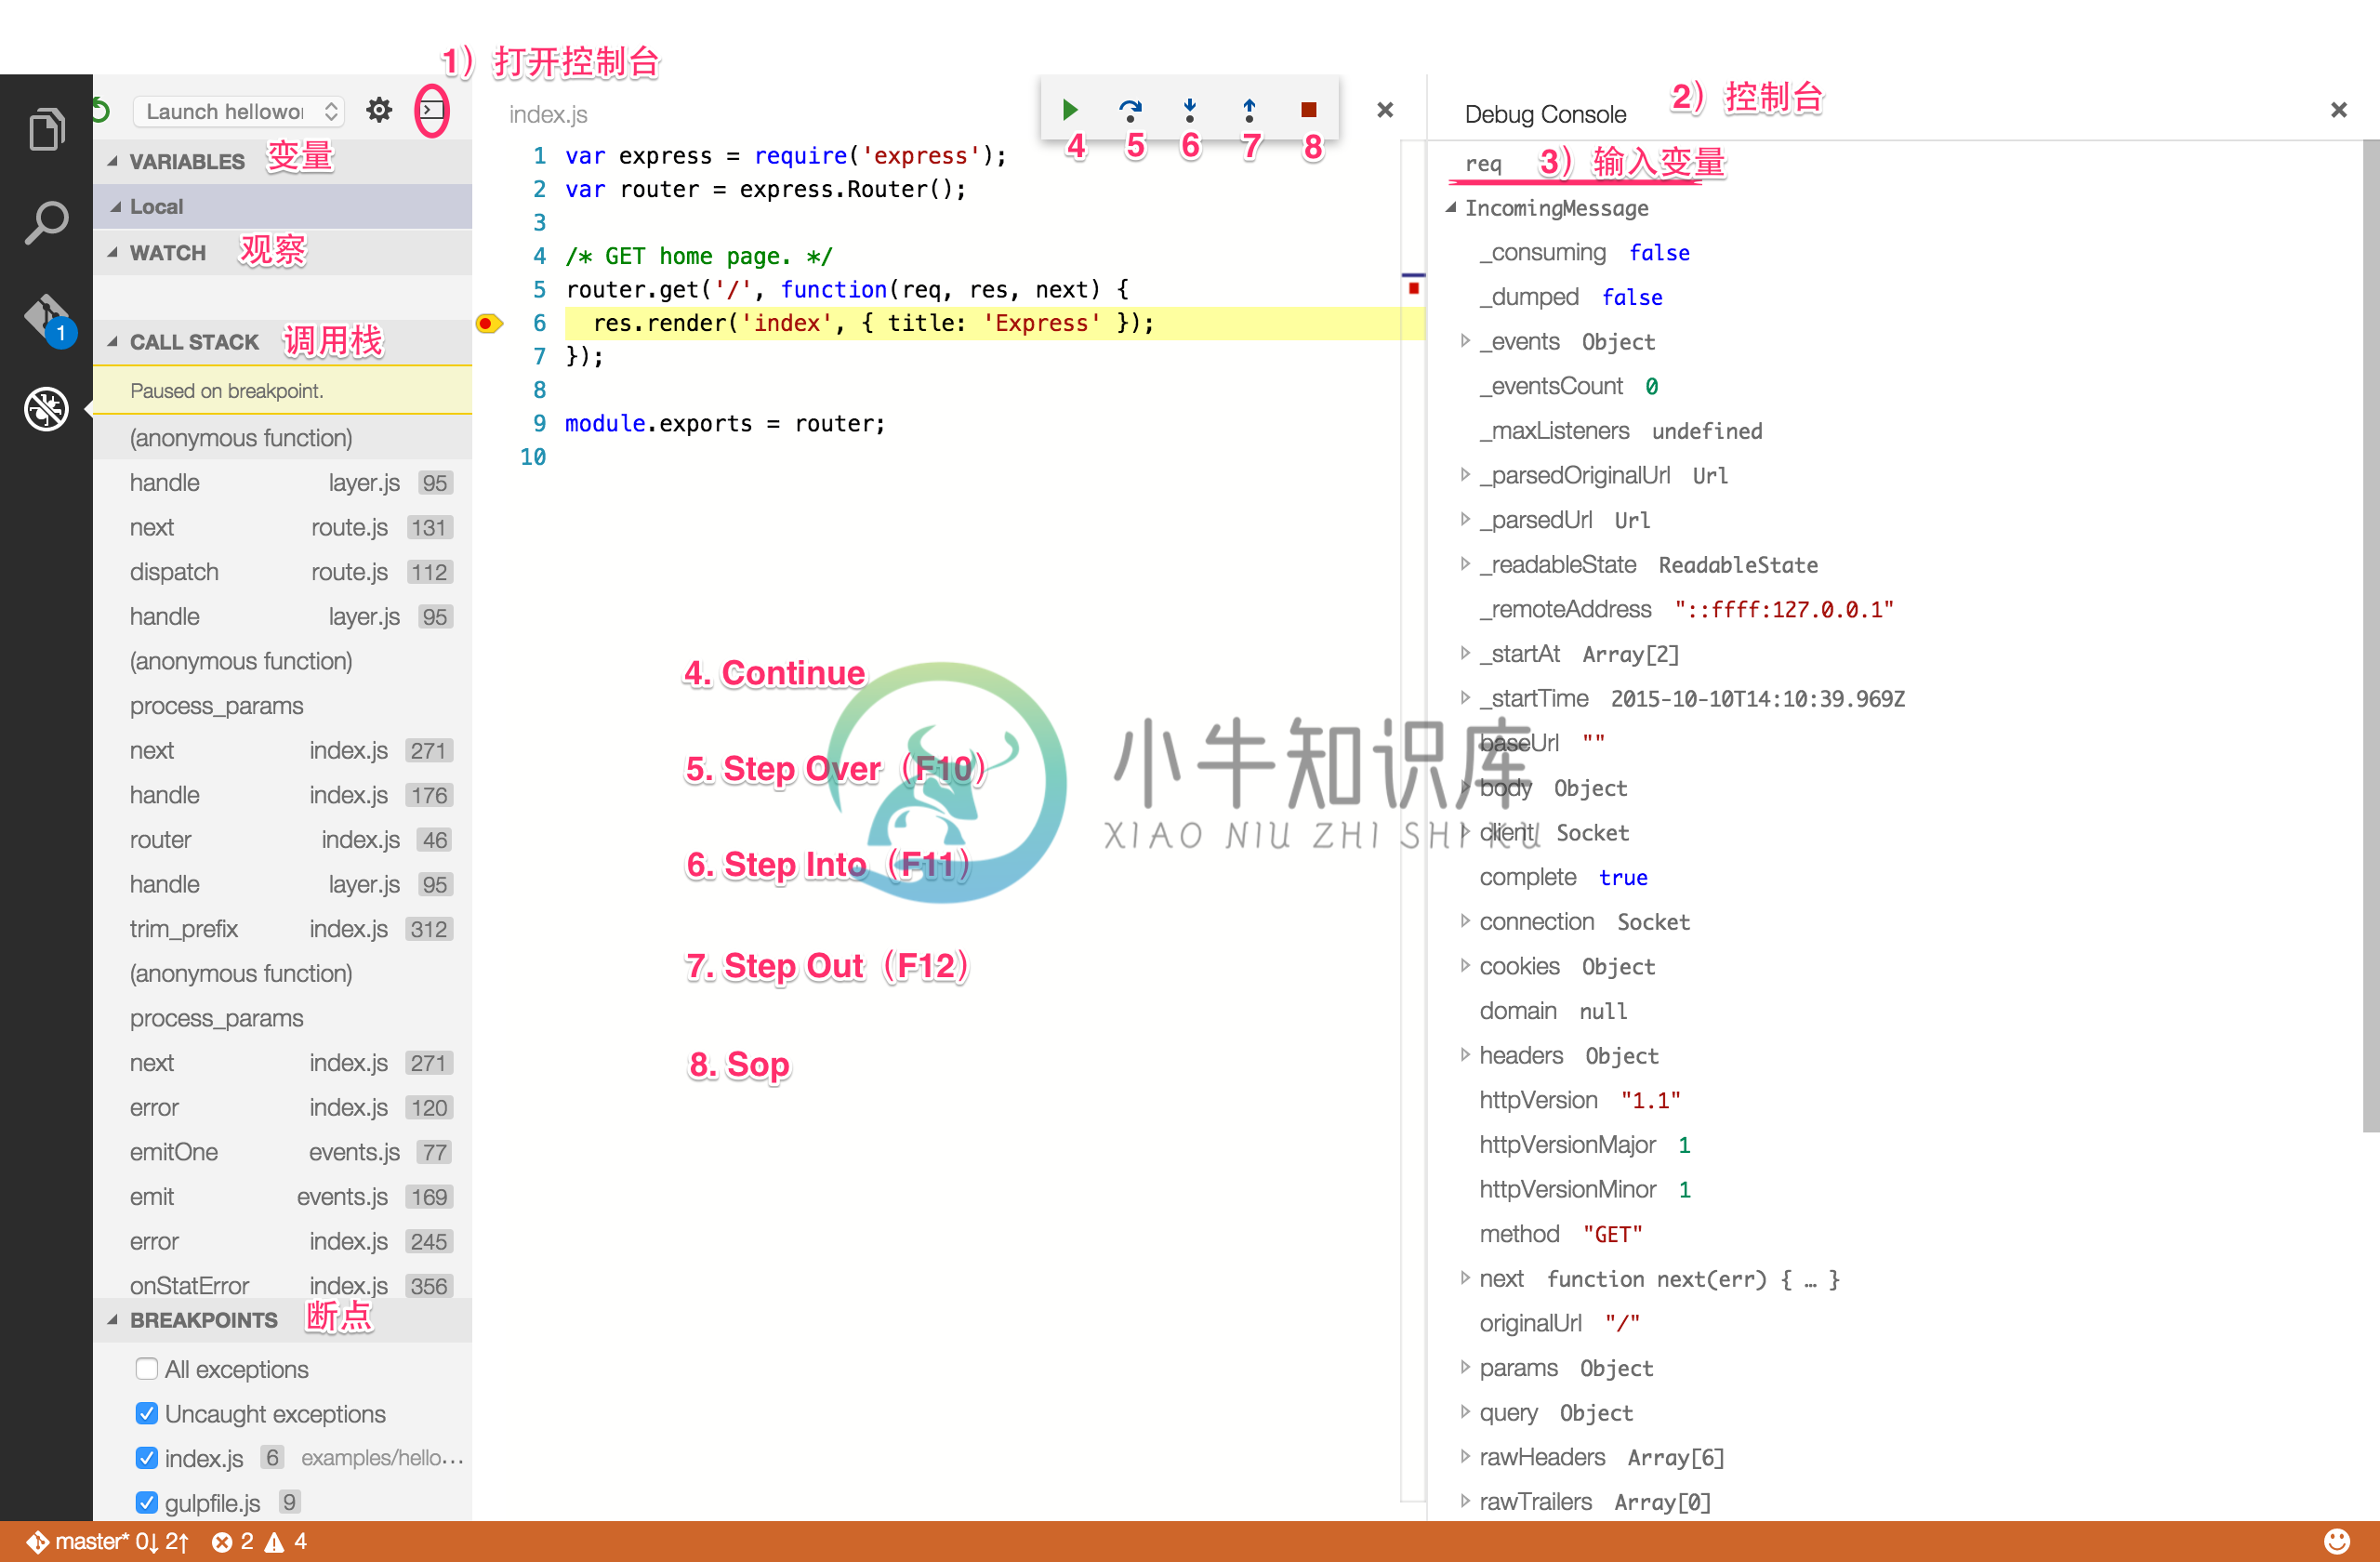
curl http://127.0.0.1:3200/ 进入调试界面

和chrome的调试是一样的。
点击1)处按钮,打开控制台,配合调试,在控制台里查看对应的变量值
另外值得说明的是二级菜单里4个部分
- a)variables变量
- b)watch观察
- c)call stack 调用栈
- d)break points 断点
它和chrome的调试也是一样的,此处就不多讲了。
更多
课后作业:亲手debug一次,感受一下vsc的魅力

