Ops Manager
概述
本文档说明如何安装一个可用于生产的 MongoDB Ops Manager, 以及如何通过 Ops Manager 监控和警告的功能对一个 MongoDB 分片集群进行管理。具体内容包括:
MongoDB Ops Manager 4.1 安装
基本监控报警展示
HTTPS 配置
备份和 恢复
本部分操作可以在 AWS Linux 或 RHEL 7 上进行。如果所有操作在 AWS 上,所使用到的 AWS 服务包括:
EC2 - 运行 Ops Manager 及所需的组件、数据库等
Route 53 - 确保 EC2 节点之间可以通过域名访问
VPC - 确保 Ops Manager 及所需的组件在虚拟私有网络。
详细关于 EC2、Route 53、VPC 参照 AWS 相关文档及 说明。
确保 aws 命令行已安装,相关认证完毕,可以通过命令行执行命令启动,配置 EC2 等$ aws --version
aws-cli/1.16.204 Python/2.7.10 Darwin/18.7.0 botocore/1.12.194MongoDB Ops Manager 安装
安装架构
Ops Manager 安装架构如下图:
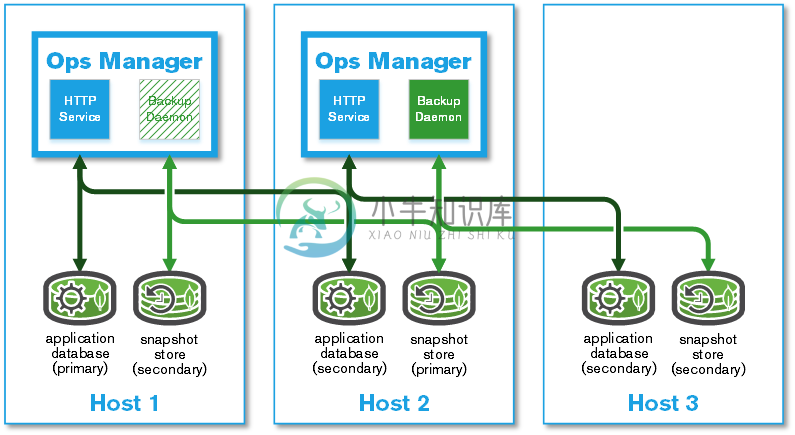
本部分采用简单高可用的生产部署架构,详细参照 MongoDB 官方文档。
环境准备
如安装架构所示,准备三台服务器,相关配置如下
| 主机编号 | 域名 | CPU | 内存 | 磁盘 |
|---|---|---|---|---|
Host 1 | host01.example.com | 4 | 16 GB | 80 GB |
Host 2 | host02.example.com | 4 | 16 GB | 80 GB |
Host 3 | host03.example.com | 4 | 16 GB | 80 GB |
// set hostname
sudo hostnamectl set-hostname host01.example.com
sudo hostnamectl set-hostname host02.example.com
sudo hostnamectl set-hostname host03.example.com

// register a DNS A record hostname with private IP to Route 53
PRIVATEIPS="IP01 IP02 IP03"
HOSTNUM=1
for IP in $PRIVATEIPS
do
 export FQDN="host0$HOSTNUM.example.com"
 echo "Registering $host as $FQDN"
cat <<EOF> newhost0$HOSTNUM.json
{
  "Comment": "CREATE an A record ",
  "Changes": [{
    "Action": "UPSERT",
    "ResourceRecordSet": {
      "Name": "$FQDN",
      "Type": "A",
      "TTL": 300,
      "ResourceRecords": [{ "Value":"$IP"}]
    }
  }]
}
EOF
aws route53 change-resource-record-sets --hosted-zone-id XXXOOOZZZJJ --change-batch file://newhost0$HOSTNUM.json
let "HOSTNUM=HOSTNUM+1"
done

// check in 3 hosts, to make sure the DNS is work as expect, the referenced A record IP will list hints the DNS work as expected.
for i in 1 2 3 ; do dig host0$i.example.com +short ; donesudo mkfs -t xfs /dev/nvme1n1
sudo mkdir /data
sudo mount /dev/nvme1n1 /data
grep -q /dev/nvme1n1 /etc/fstab || echo "/dev/nvme1n1 /data xfs defaults,noatime 1 1" | sudo tee --append /etc/fstab
sudo findmnt --verify
grep -q 'vm.zone_reclaim_mode' /etc/sysctl.conf || echo "vm.zone_reclaim_mode=0
" | sudo tee --append /etc/sysctl.conf
sudo sysctl -w vm.zone_reclaim_mode=0
grep -q 'vm.swappiness' /etc/sysctl.conf || echo "vm.swappiness=1" | sudo tee --append /etc/sysctl.conf
sudo sysctl -w vm.swappiness=1
for limit in fsize cpu as memlock
do
grep "mongodb" /etc/security/limits.conf | grep -q $limit || echo -e "mongod hard $limit unlimited\nmongod soft $limit unlimited" | sudo tee --append /etc/security/limits.conf
done
for limit in nofile noproc
do
grep "mongodb" /etc/security/limits.conf | grep -q $limit || echo -e "mongod hard $limit 64000\nmongod soft $limit 64000" | sudo tee --append /etc/security/limits.conf
done
sudo reboot安装 appDB
本部分在三个 host 上都执行。
1. 配置 yum 源(如果离线安装,可提前下载 rpm 包)cat << 'ENDOFDOC' | sudo tee /etc/yum.repos.d/mongodb-enterprise.repo
[mongodb-enterprise]
name=MongoDB Enterprise Repository
baseurl=https://repo.mongodb.com/yum/amazon/2/mongodb-enterprise/4.0/$basearch/
gpgcheck=1
enabled=1
gpgkey=https://www.mongodb.org/static/pgp/server-4.0.asc
ENDOFDOCsudo yum install -y mongodb-enterprisesudo mkdir /data/appdb
sudo chown mongod:mongod /data/appdbcat << 'ENDCONF' | sudo tee /etc/mongod.conf
# mongod.conf
# for documentation of all options, see:
# http://docs.mongodb.org/manual/reference/configuration-options/
# where to write logging data.
systemLog:
destination: file
logAppend: true
path: /data/appdb/mongod.log
# Where and how to store data.
storage:
dbPath: /data/appdb
journal:
enabled: true
wiredTiger:
engineConfig:
cacheSizeGB: 2
# how the process runs
processManagement:
fork: true # fork and run in background
pidFilePath: /var/run/mongodb/mongod.pid # location of pidfile
timeZoneInfo: /usr/share/zoneinfo
# network interfaces
net:
port: 27017
bindIpAll: true
replication:
replSetName: appdbRS
ENDCONFNOET: 生产环境下最佳实践配置安全,启用内部认证。
5. 启动 MongoDBsudo systemctl start mongod
sudo systemctl enable mongodmongo -eval 'rs.initiate()'
mongo -eval 'rs.add("host02.mongosa.net:27017")'
mongo -eval 'rs.add("host03.mongosa.net:27017")'Ops Manager 安装
1. 到 https://www.mongodb.com/subscription/downloads/archived 下载相应的版本$ curl -OL https://downloads.mongodb.com/on-prem-mms/rpm/mongodb-mms-4.0.16.50586.20191101T1422Z-1.x86_64.rpm
$ ls
mongodb-mms-4.0.16.50586.20191101T1422Z-1.x86_64.rpm$ sudo yum localinstall mongodb-mms-4.0.16.50586.20191101T1422Z-1.x86_64.rpm -ymongo.mongoUri=mongodb://host01.example.com:27017,host02.example.com:27017,host03.example.com:27017/?maxPoolSize=150&replicaSet=appdbRS$ sudo service mongodb-mms start$ sudo netstat -antulop | grep 8080
tcp 0 0 0.0.0.0:8080 0.0.0.0:* LISTEN 3258/mms-app off (0.00/0/0)Ops Manager 初始化配置
Ops Manager 安装成功后 HTTP 服务会启动,通过 HTTP 服务可以完成对 Ops Manager 初始化配置。
1. 访问 http://host02.example.com:8080 时,点击 Register 链接注册一个全局管理账户
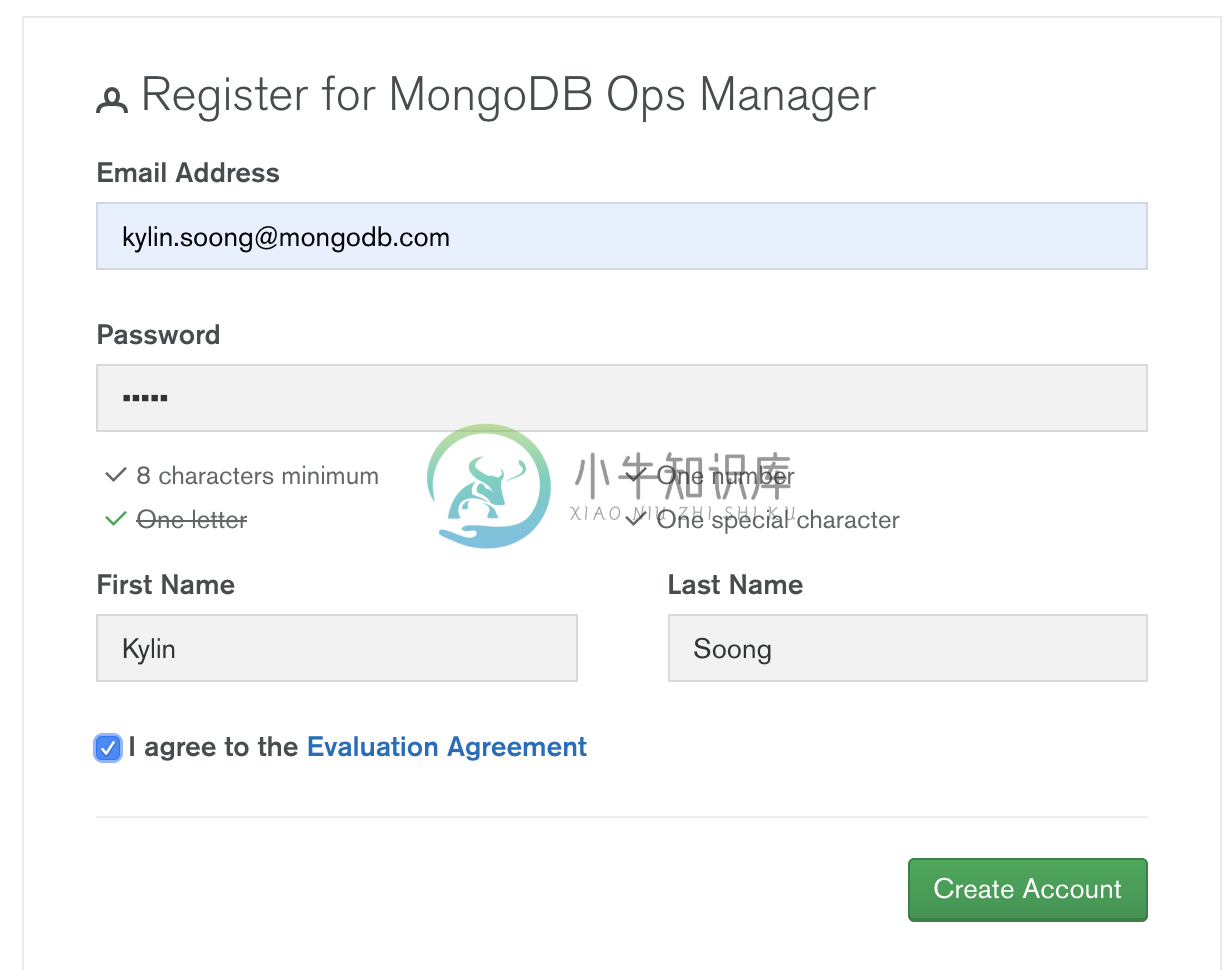
在弹出的页面配置如下:
Email Address : kylin.soong@mongodb.com
Password : password1!
First Name : Kylin
Last Name : Soong
2. 注册完成初次登陆会定向到 Configure Ops Manager 页面
在 Configure Ops Manager 页面完成初始化配置
Web Server
URL To Access Ops Manager - http://host02.example.com:8080
Client Certificate Mode - None
其它项使用默认配置
Email(本部分需要对接相关邮件服务器)
"From" Email Address - opsmanager@example.com
"Reply To" Email Address - admin@example.com
Admin Email Address - admin@example.com
Email Delivery Method Configuration - SMTP Email Server
Transport - smtp
SMTP Server Hostname - smtp.example.com
SMTP Server Port - 587
其它项使用默认配置
User Authentication
User Authentication Method - Application Database
其它项使用默认配置
Multi-Factor Authentication (MFA)
所有项使用默认配置
Other Authentication Options
所有项使用默认配置
Permissions
所有项使用默认配置
Backup Snapshots
所有项使用默认配置
Backup Snapshots Schedule
Snapshot Interval (Hours) - 24
Base Retention Of Snapshots (In Days) - 2
Daily Retention Of Snapshots (In Days) - No daily retention
Weekly Retention Of Snapshots (In Weeks) - 2
Monthly Retention Of Snapshots (In Months) - 1
其它项使用默认配置
KMIP Server Configuration
所有项使用默认配置
Queryable Snapshot Configuration
所有项使用默认配置
HTTP/HTTPS Proxy
所有项使用默认配置
Twilio Integration
所有项使用默认配置
MongoDB Version Management
所有项使用默认配置
Alerts
所有项使用默认配置
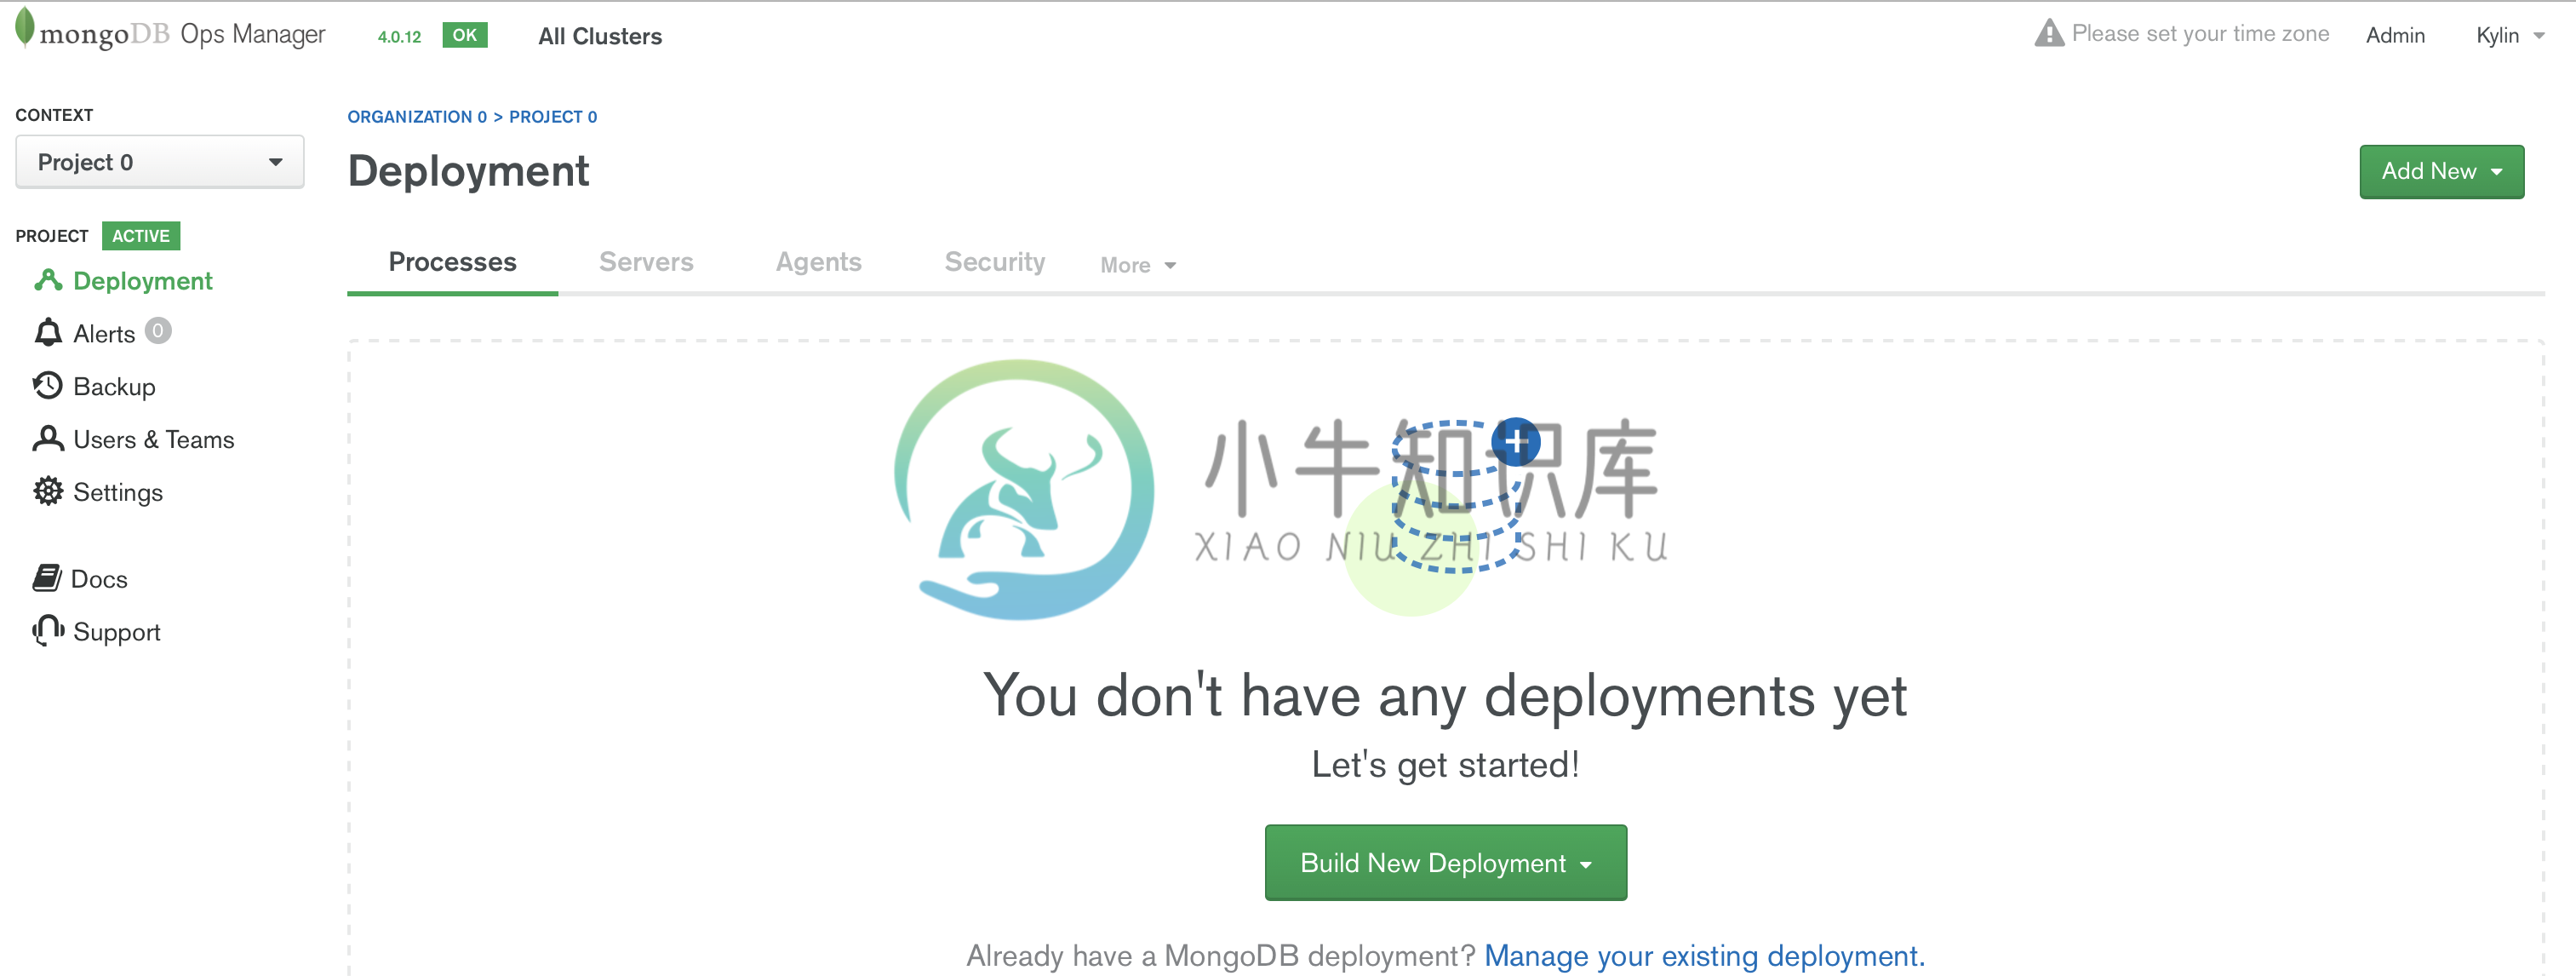
配置完成后进入到如下Deployment 界面
Agent 安装
| Note | 在 Ops Manager 新版本中 Agent 不需要手动安装,本部分可以跳过。 |
安装 Automation Agent
| Note | Automation Agent 可以在需要部署导入时安装 |
在 Ops Manager 界面,选择 Deployment → Agents → Downloads & Settings,选择相应的版本,例如 Automation Agent Installation Instructions,在弹出的界面根据步骤完成 agent 安装。
$ curl -OL http://opsmgr.example.com:8080/download/agent/automation/mongodb-mms-automation-agent-manager-5.4.19.5537-1.x86_64.rhel7.rpm

$ sudo chmod a+x mongodb-mms-automation-agent-manager-5.4.19.5537-1.x86_64.rhel7.rpm
$ sudo yum localinstall mongodb-mms-automation-agent-manager-5.4.19.5537-1.x86_64.rhel7.rpmsudo vi /etc/mongodb-mms/automation-agent.configsudo systemctl start mongodb-mms-automation-agent.service| Note | 部署界面有 安装 agent 的介绍。 |
安装 Monitoring Agent
| Note | 可以在创建完 Project 后执行这部分。 |
在 Ops Manager 界面,选择 Deployment → Agents → Downloads & Settings,选择相应的版本,例如 Install or Update the Monitoring Agent。
1. 安装curl -OL http://opsmgr.example.com:8080/download/agent/monitoring/mongodb-mms-monitoring-agent-6.6.2.466-1.x86_64.rhel7.rpm
chmod 777 mongodb-mms-monitoring-agent-6.6.2.466-1.x86_64.rhel7.rpm
sudo yum localinstall mongodb-mms-monitoring-agent-6.6.2.466-1.x86_64.rhel7.rpm -ysudo vi /etc/mongodb-mms/monitoring-agent.config
mmsGroupId=5d08a1af8a49a31b324ec641
mmsApiKey=5d08a41a8a49a31b324ec86d3dd0a7d168167e4fdb7ec454c450666b
mmsBaseUrl=http://opsmgr.example.com:8080
globalAuthUsername=mms-monitoring-agent
globalAuthPassword=mongosudo systemctl start mongodb-mms-monitoring-agent.service创建 MongoDB HA Blockstore
MongoDB Ops Manager 支持的数据备份选择包括:
文件系统 + SAN
文件系统 + NAS
AWS S3 Blockstore
MongoDB HA Blockstore
MongoDB Blockstore
关于不同的备份选择的优缺点参照 官方翁当,本部分选择 MongoDB HA Blockstore。
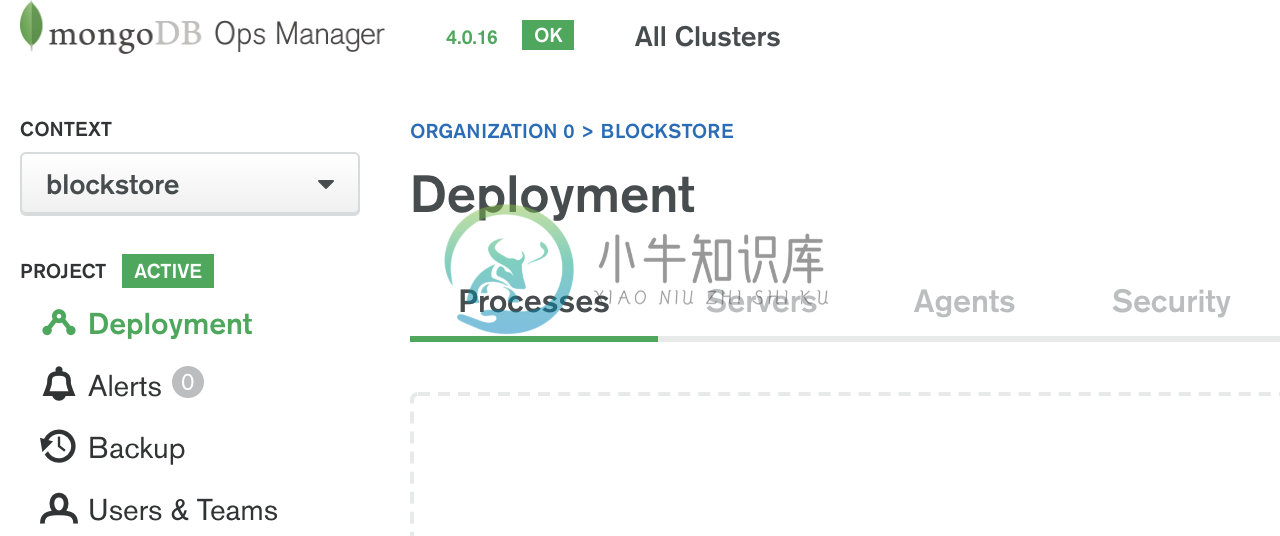
首先在 Ops Manager 创建一个 Project `blockstore'
然后在这个工程下创建一个 MongoDB 三节点复制集,分别运行在三个 Host 上,监听的端口都是 27018:
host01.example.com:27018,host02.example.com:27018,host03.example.com:27018Backup 配置
要开启 Ops Manager 的备份功能,需要完成 Backup 配置。Backup 配置主要包括:
HEAD DB - HEAD DB 中的数据和生产部署中的数据一致,它根据 快照策略,周期性生成快照。配置包括 HEAD 目录等。
Blockstore - 使用上面步骤准备的 MongoDB HA Blockstore,具体配置包括连接 URL,认证等
sudo mkdir /data/heads
sudo chown mongodb-mms:mongodb-mms /data/heads
2. Backup Initial Configuration
在 Ops Manger 右上角点击 Admin,在最左边导航栏选择 Backup,在弹出界面中 Head Directory 输入框中输入 /data/heads

点击 Set 按钮,然后继续点击 Enable Daemon 按钮,

在弹出的界面上选择 Configure a Blockstore,然后在 <hostname>:<port> 输入
host01.example.com:27018,host02.example.com:27018,host03.example.com:27018配置完其他输入项后点击 Save 完成 Backup 配置。
备份
备份一个集群
1. 点击 Backup
在 Ops Manager 控制台点击左边 Backup,进入 Backup 配置界面
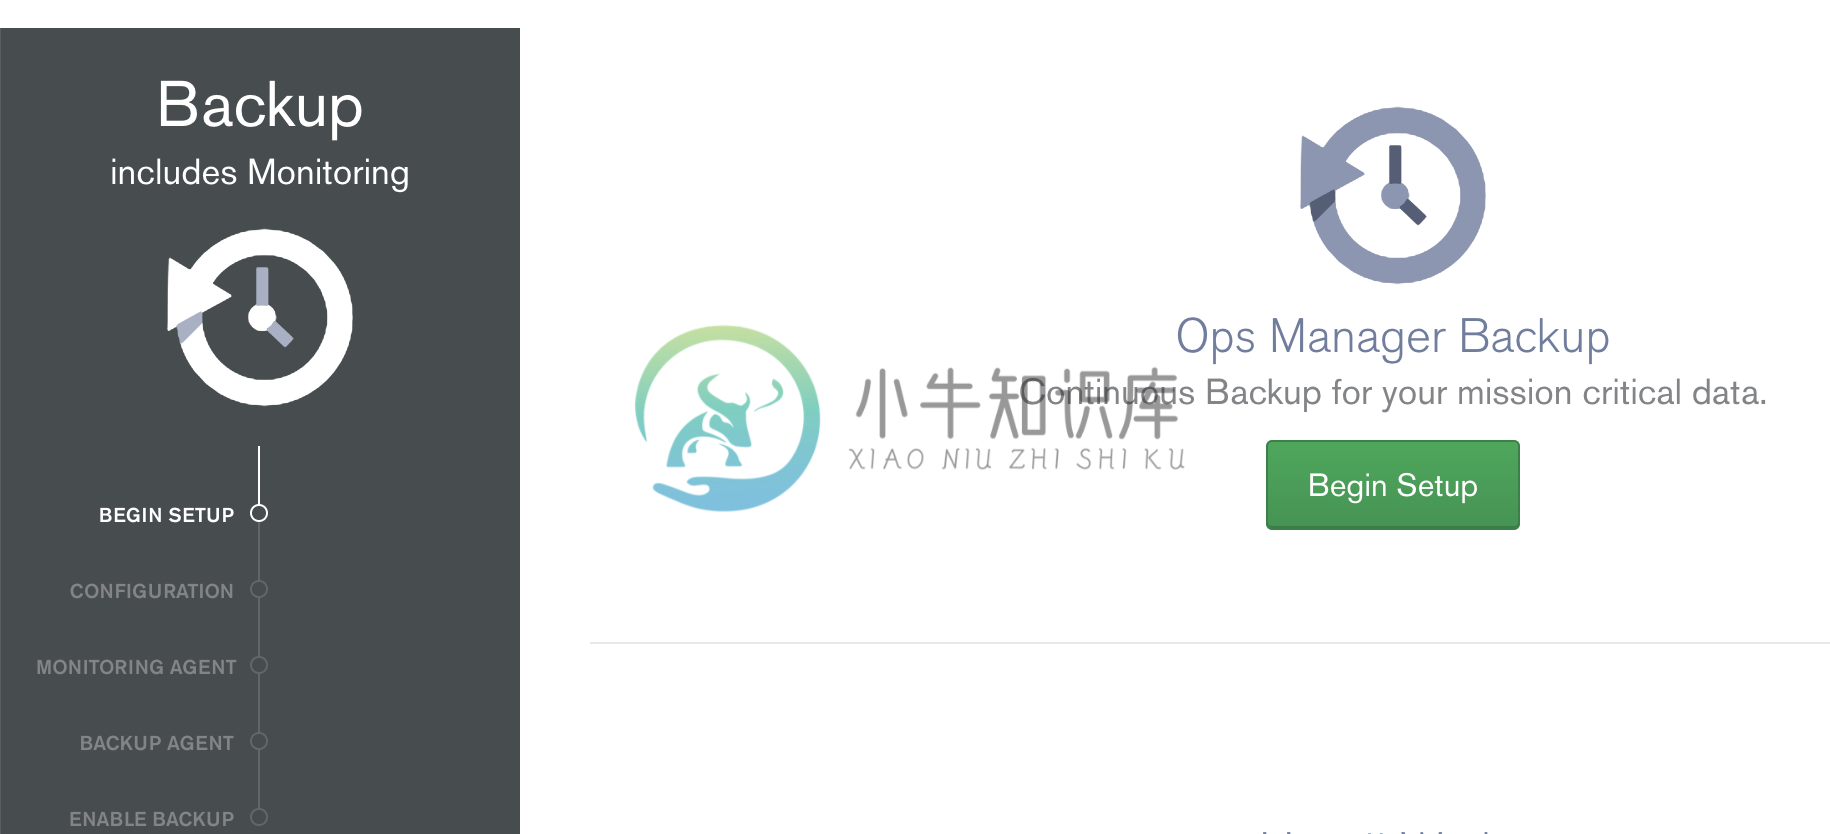
点击 Begin Setup 按钮开始备份一个集群
点击 Next 按钮进入 Configration 界面开始配置备份
点击 Next 按钮进入 Monitor Agent 验证
点击 Next 按钮进入 Backup Agent 验证
点击 Next 按钮进入 Enable Backup 界面
导入一个存在的集群
本部分将上面步骤创建的测试集群导入到 Ops Manager.
创建 clusterMonitor 用户
在集群中的所有分片复制集,ConfigServer 复制集合中执行如下命令创建一个 clusterMonitor 用户db.createUser({user: "mms-monitoring-agent", pwd: "mongo", roles: [{ role:"clusterMonitor", db: "admin" }]})| Note | mms-monitoring-agent/mongo 用户会被 Monitor Agent 导入集群时使用 |
创建一个 Project
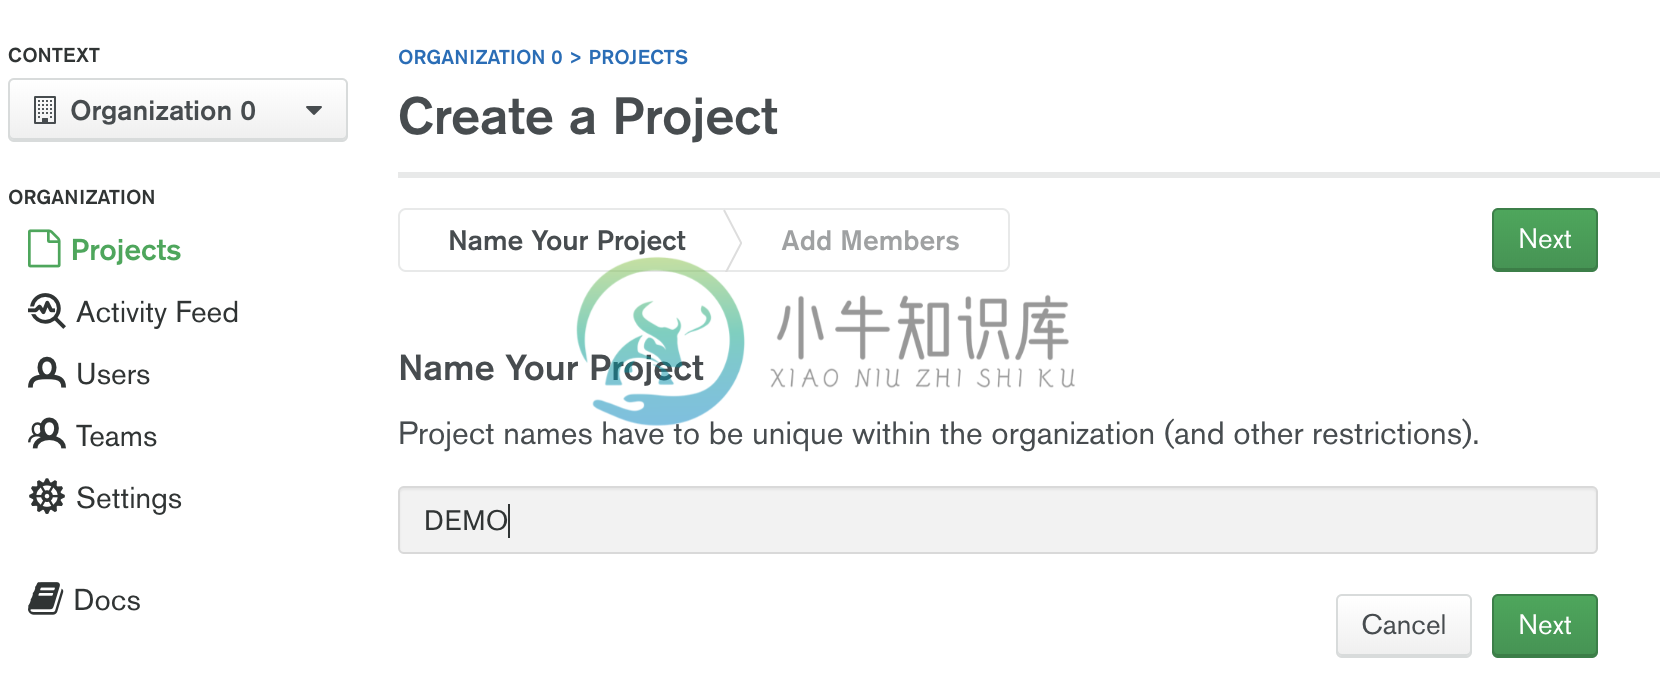
在 Ops Manager 界面创建一个 DEMO project
从 Ops Manager 界选择 Deployment → Agents → All Agents 下列表中可看到对应 Agent

| Note | 如上显示导入成功后 Project 对应所有 Agent,可执行完后回过头查看。 |
执行导入
在 Ops Manager 界面 DEMO Project 下选择 Deployment → Add New → Existing MongoDB Deployment
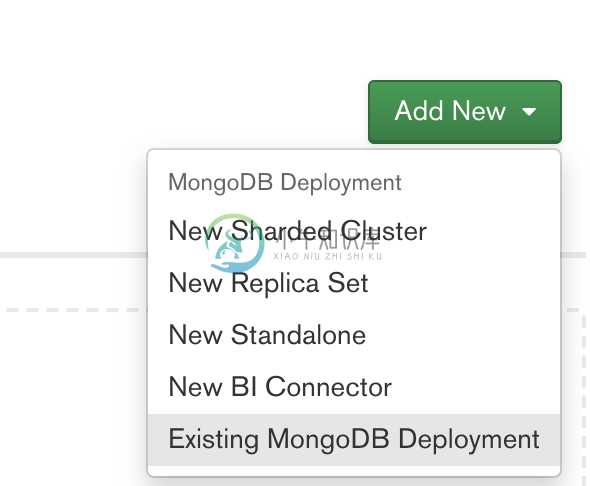
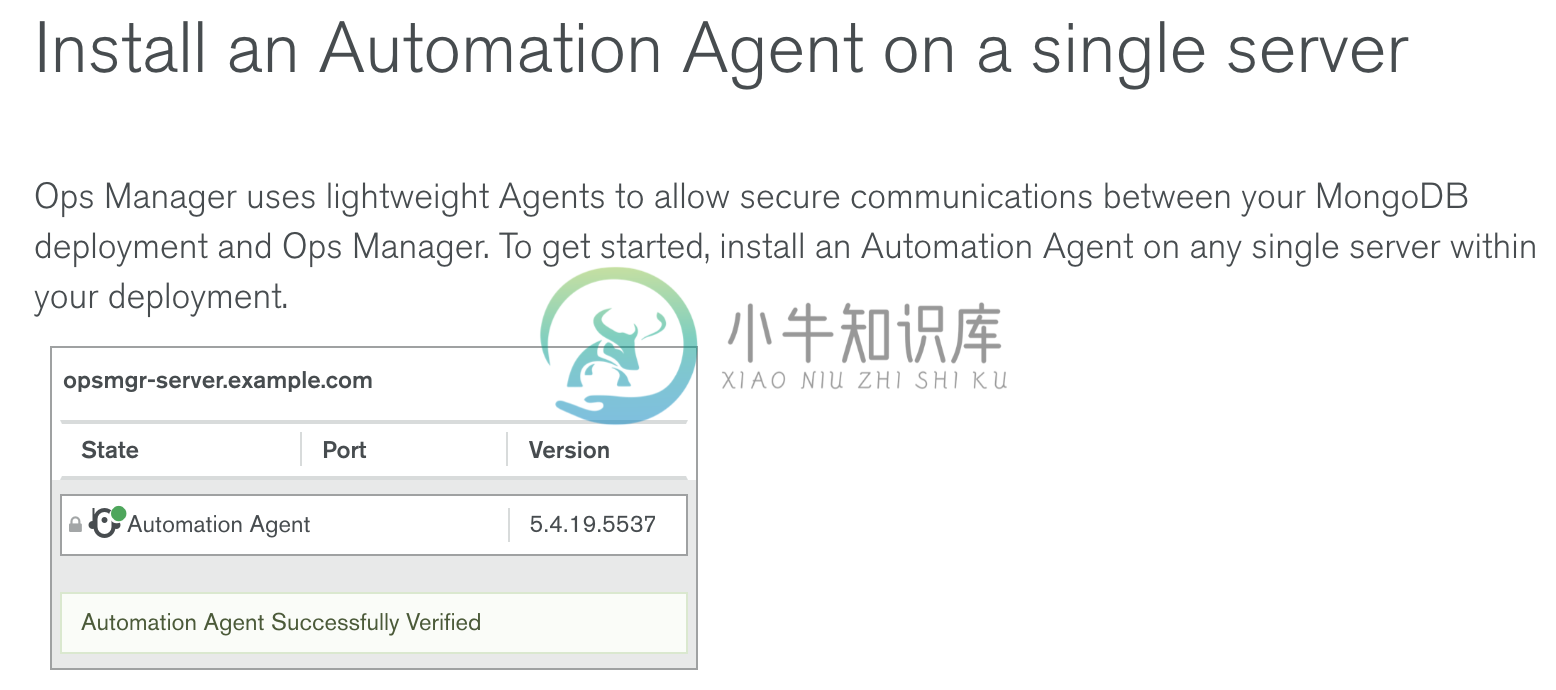
点击继续,进入到 Install an Automation Agent on a single server 界面,在该界面点击 Install Agent 按钮,根据弹出的说明步骤配置一个 Automation Agent, 配置成功后界面如下界面如下
点击继续进入到 Set up Ops Manager Monitoring 界面,Automation Agent 会自动安装 Monitoring Agent 和 Backup Agent,安装完成后界面如下
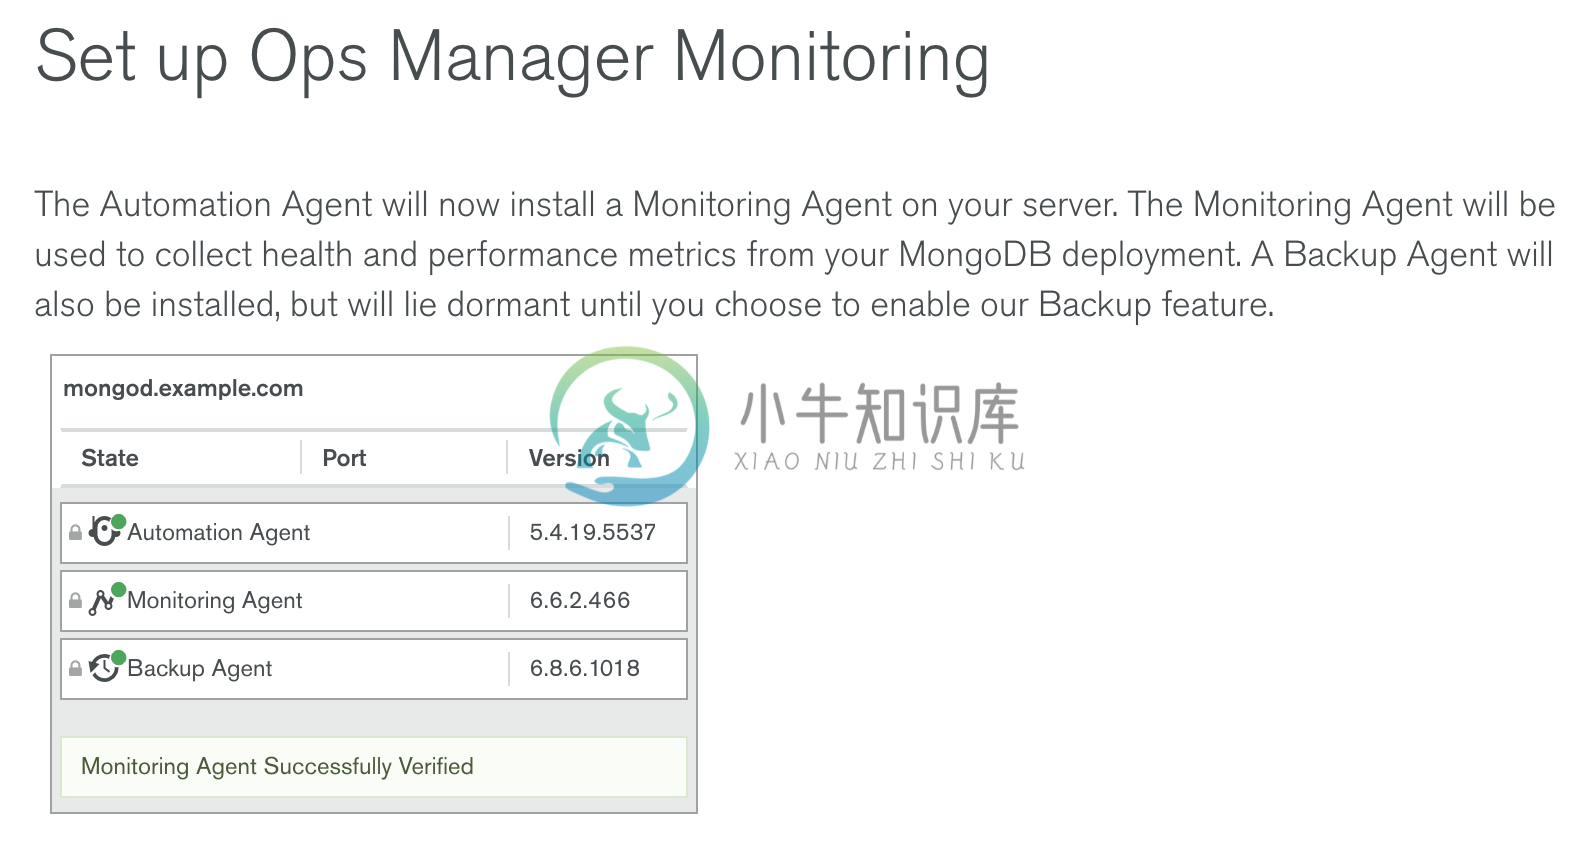
点击继续,进入到 Import your deployment for monitoring 界面输入相应的值
Hostname              -  192.168.33.101
Port                  -  27017
Enable Authentication -  Yes
Username              -  mms-monitoring-agent
Password              -  mongo
点击继续,导入界面开始 ping 操作,执行成功后,会有如下输出界面

点击继续,进入 Adding your deployment to Ops Manager 界面,会检测到导入的 Server 如下
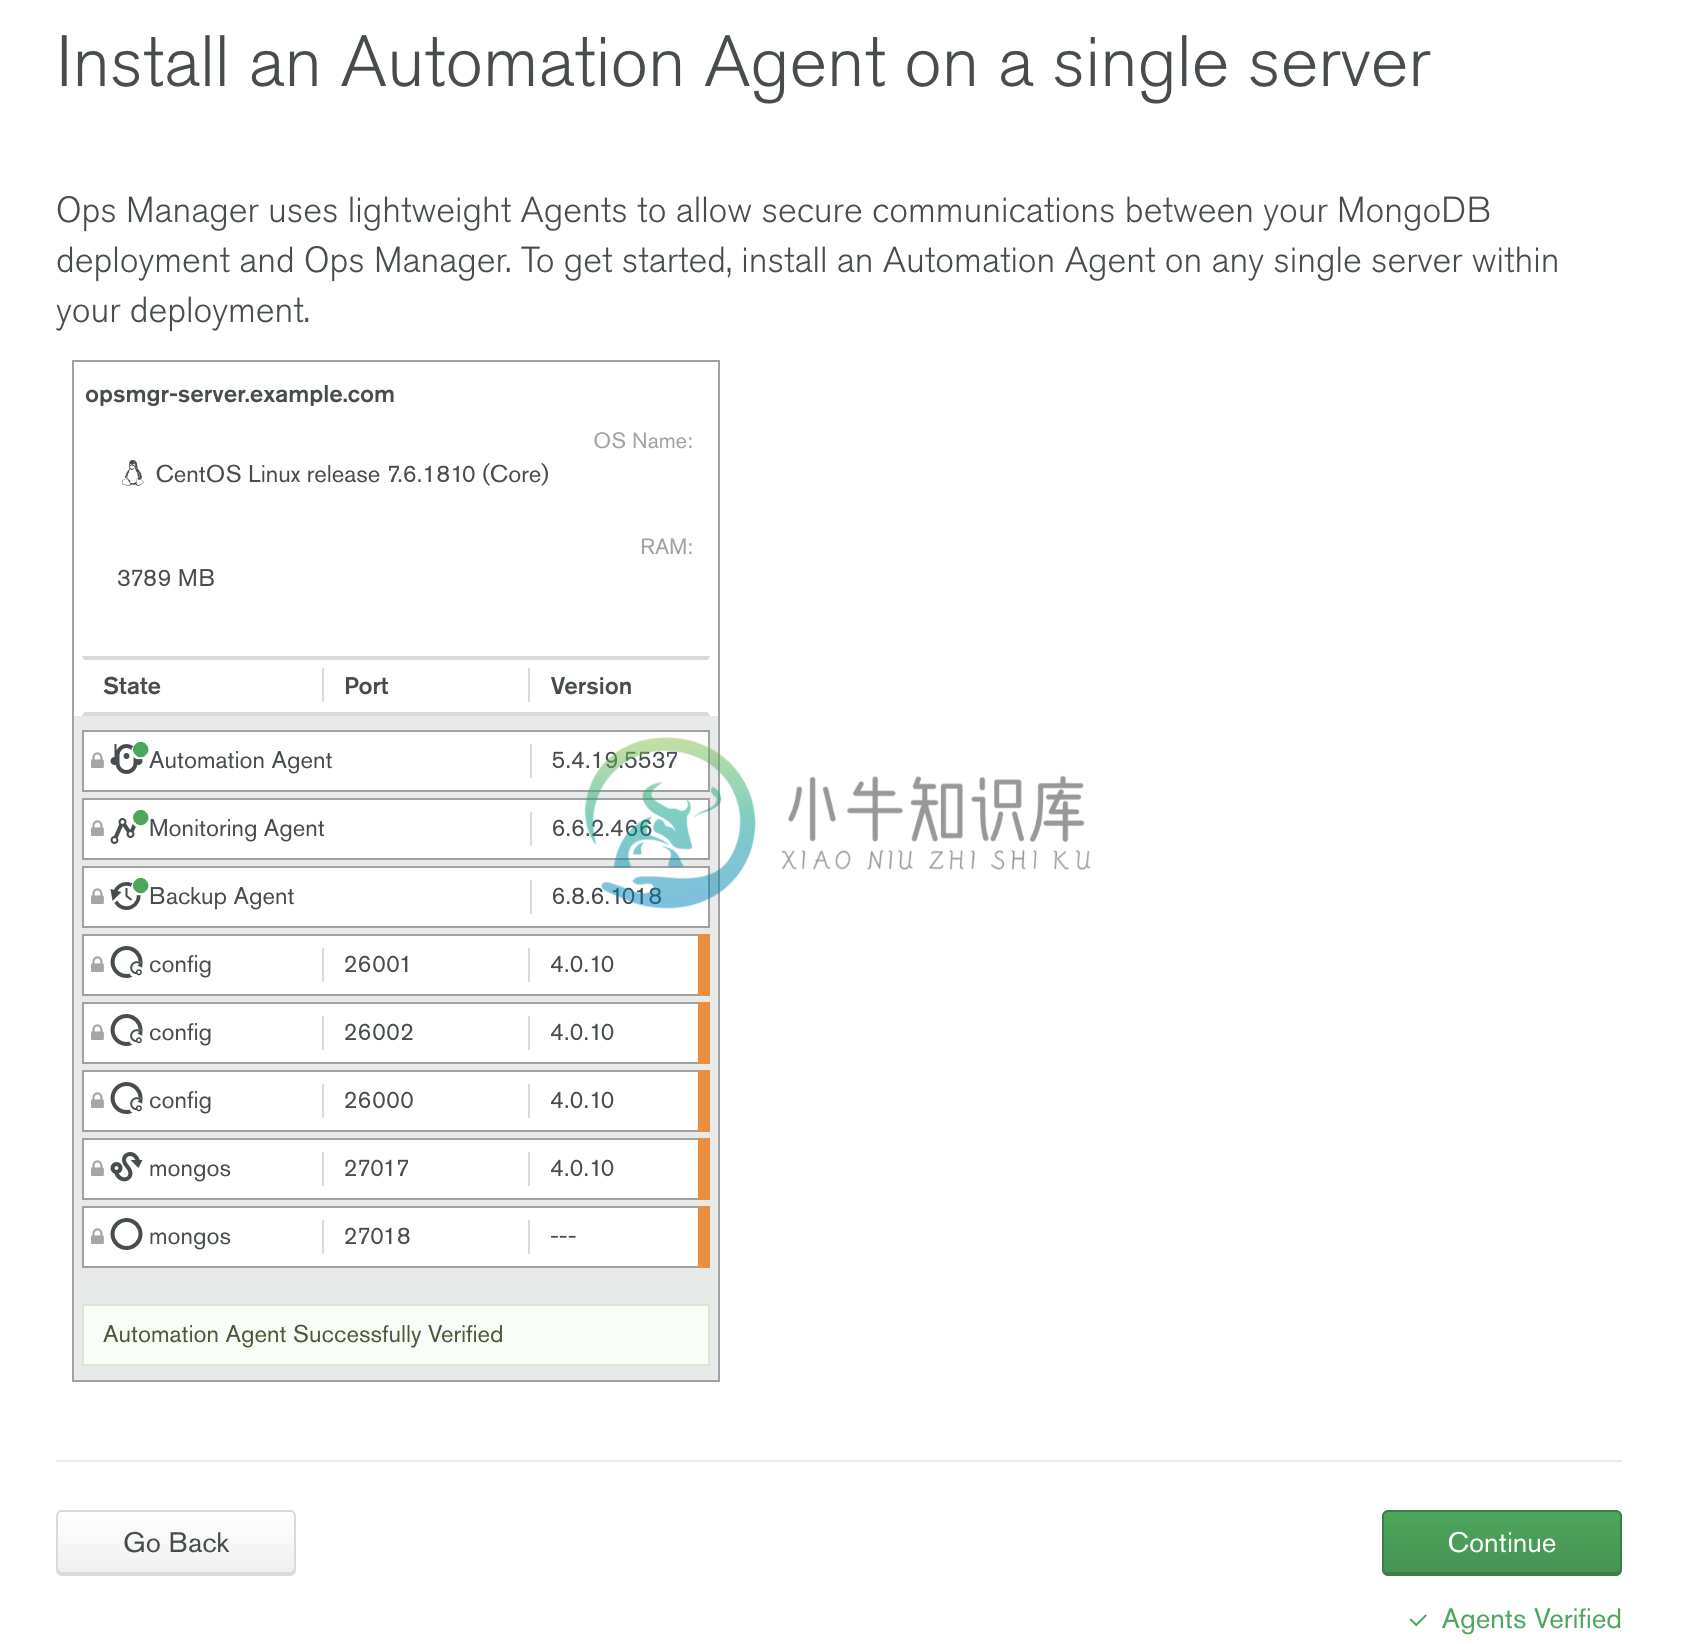
点击继续,进入到 Do you want to add Ops Manager Automation to this deployment? 页面
在页面的底部,选择接受 I understand that this requires the installation of an automation agent on each of the servers in my deployment and I have read the requirements/risks above,
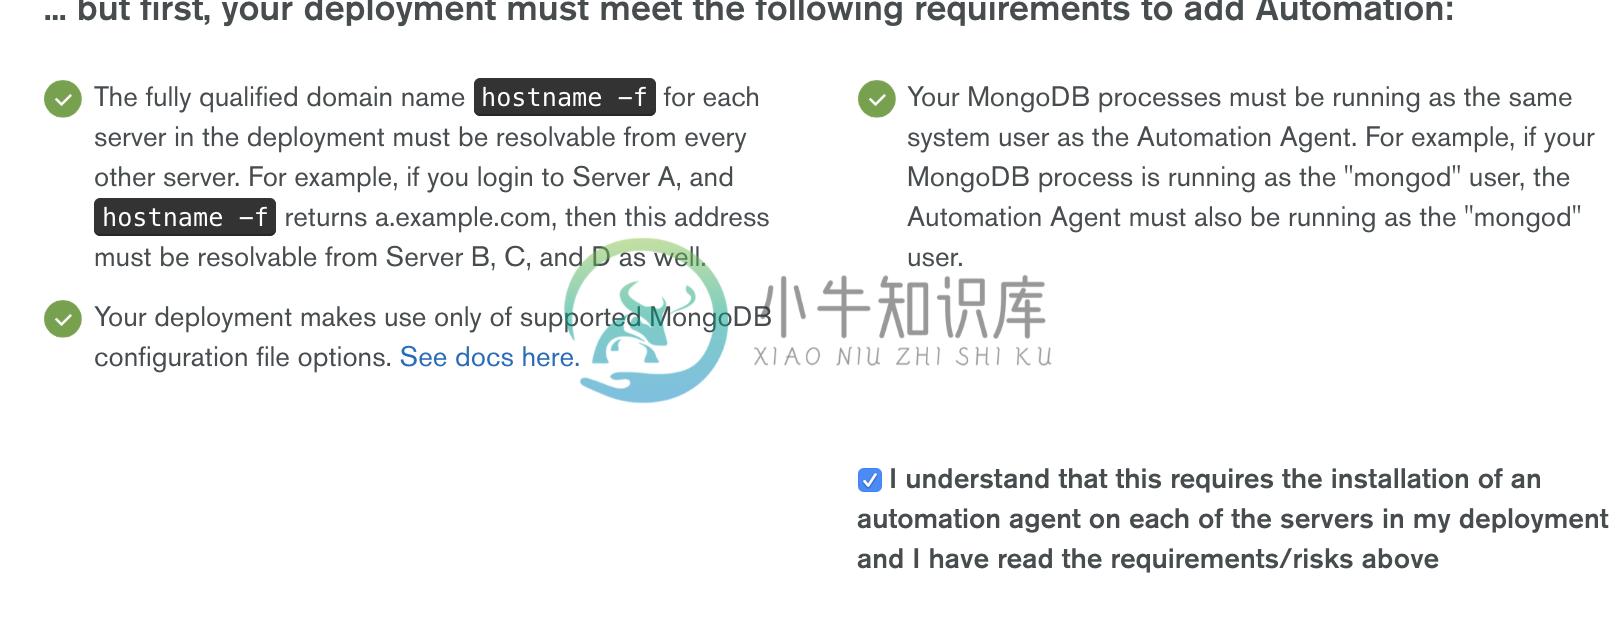
点击继续,进入到 * Configure authentication for Automation* 页面
根据页面的提示,在集群中的所有分片复制集,ConfigServer 复制集合中执行如下命令创建一个用户:
use admin
db.createUser({user: 'mms-automation', pwd: 'mongo', roles: ['clusterAdmin', 'dbAdminAnyDatabase', 'readWriteAnyDatabase', 'restore', 'userAdminAnyDatabase']})
然后在 Provide authentication settings 部分输入上面创建的用户
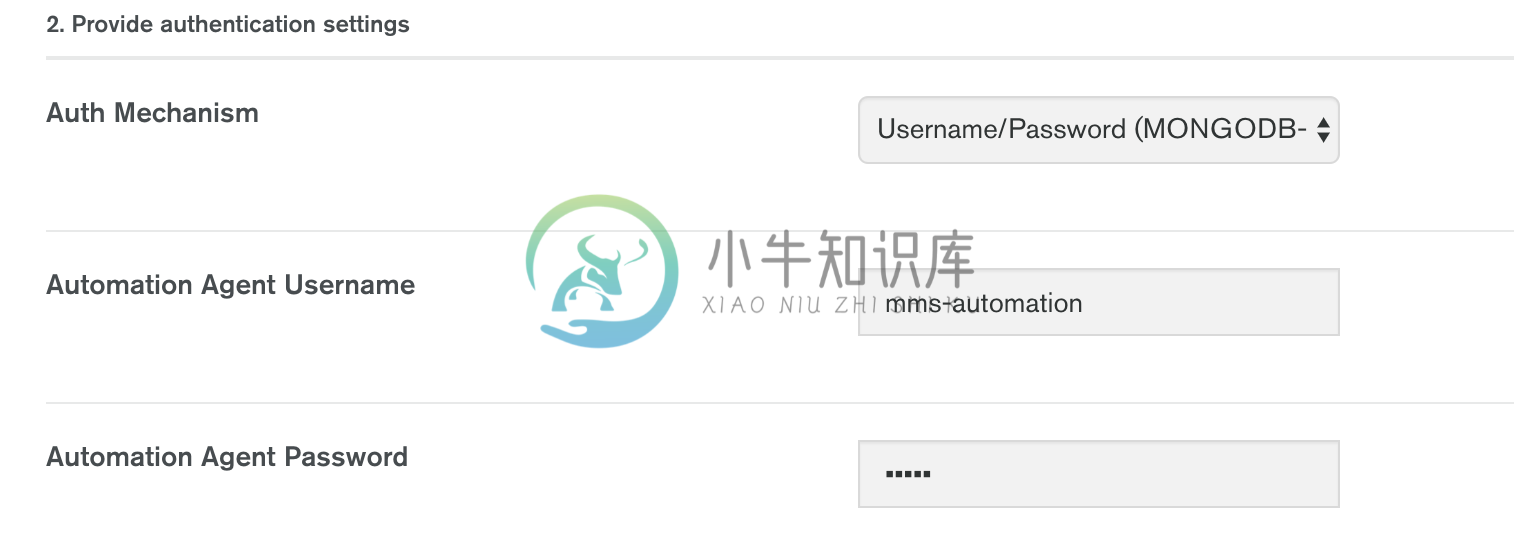
点击继续,进入到 Install an Automation Agent on each of your servers 页面
确保所有的界面上都安装了 Agent。
完成后点击 Initialize Automation 按钮,会进入到 Initializing Automation for your Deployment 页面,收集信息完成后,会有如下输出

点击 Review Deployment 按钮,进入到 Deployment 界面
点击 Deployment 界面上端黄色背景横条中 REVIEW & DEPLOY 按钮,Review 相关的变化,

Review 完成后点击 Confirm & Deploy 按钮。
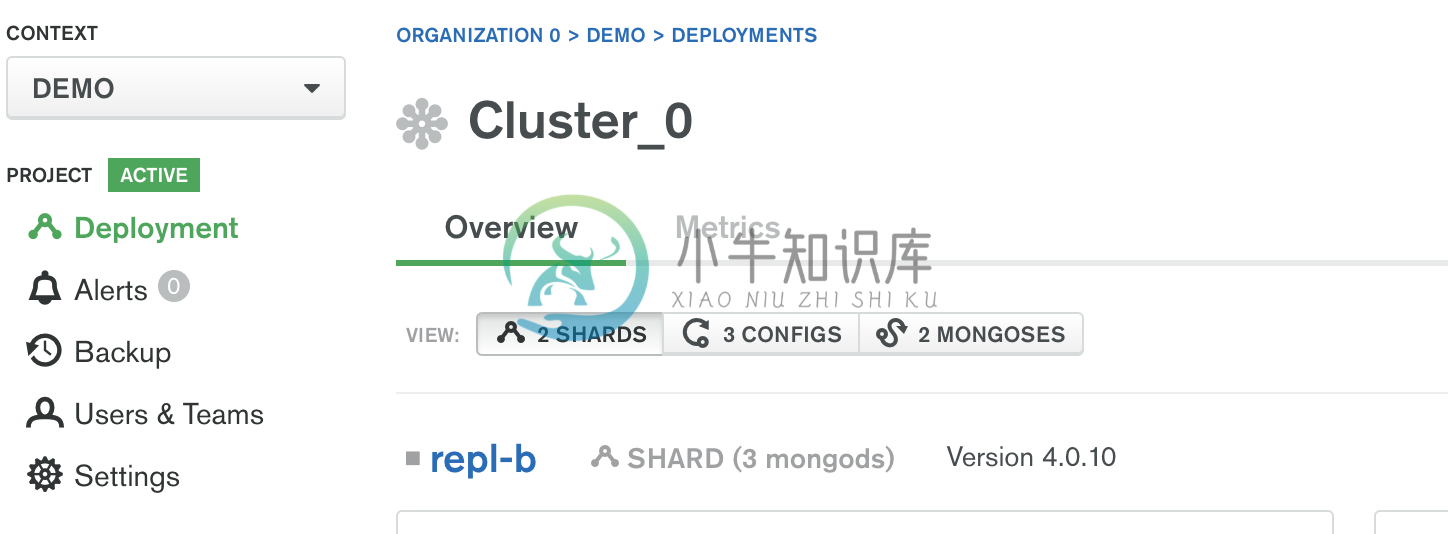
导入成功后,在 Cluster_0 中会有 2 个分片,3 个 CONFIGS,连个 mongos
Ops Manager 自动化管理
Overview
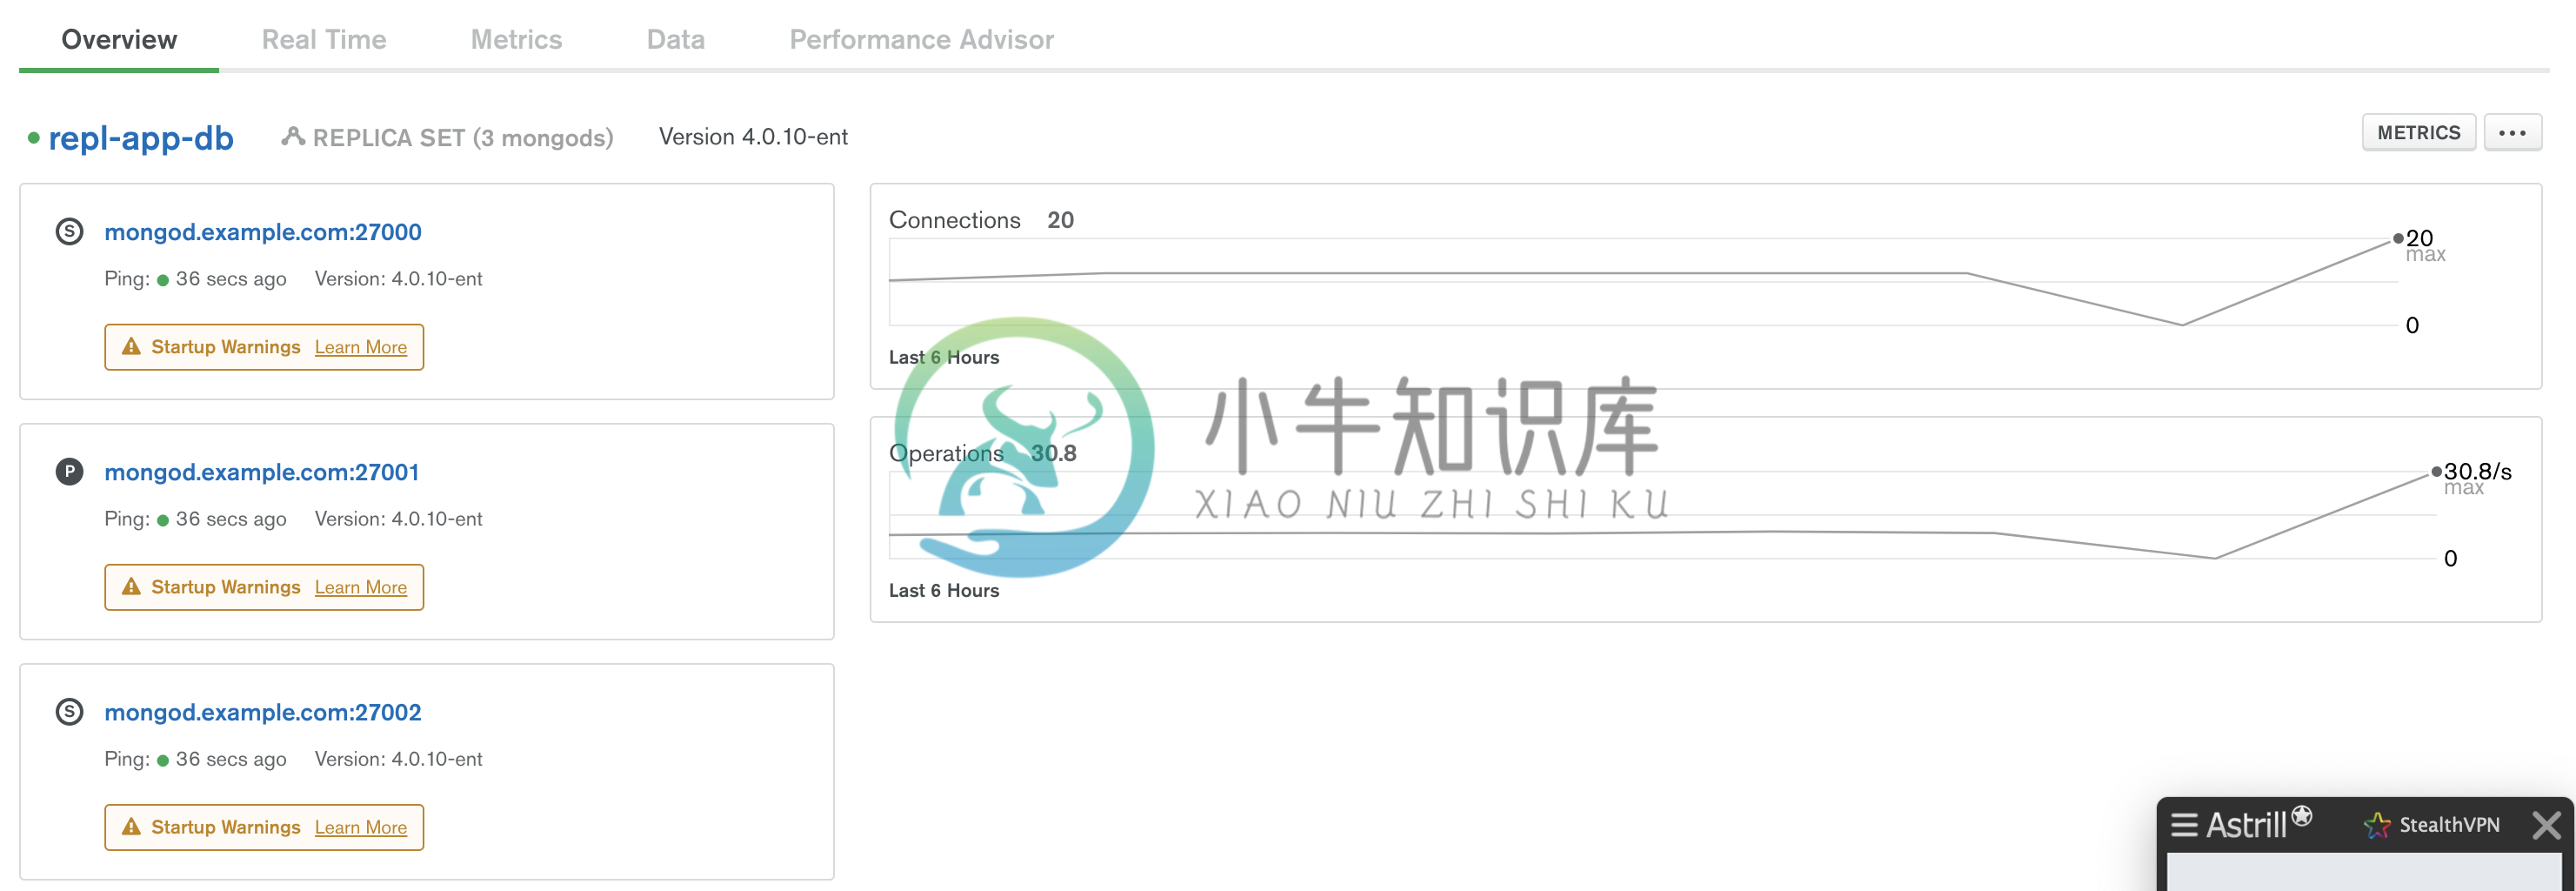
在部署完成界面,如果点击某一个复制集,会进入到 Overview 界面,该界面下会有整体概述界面
Real Time
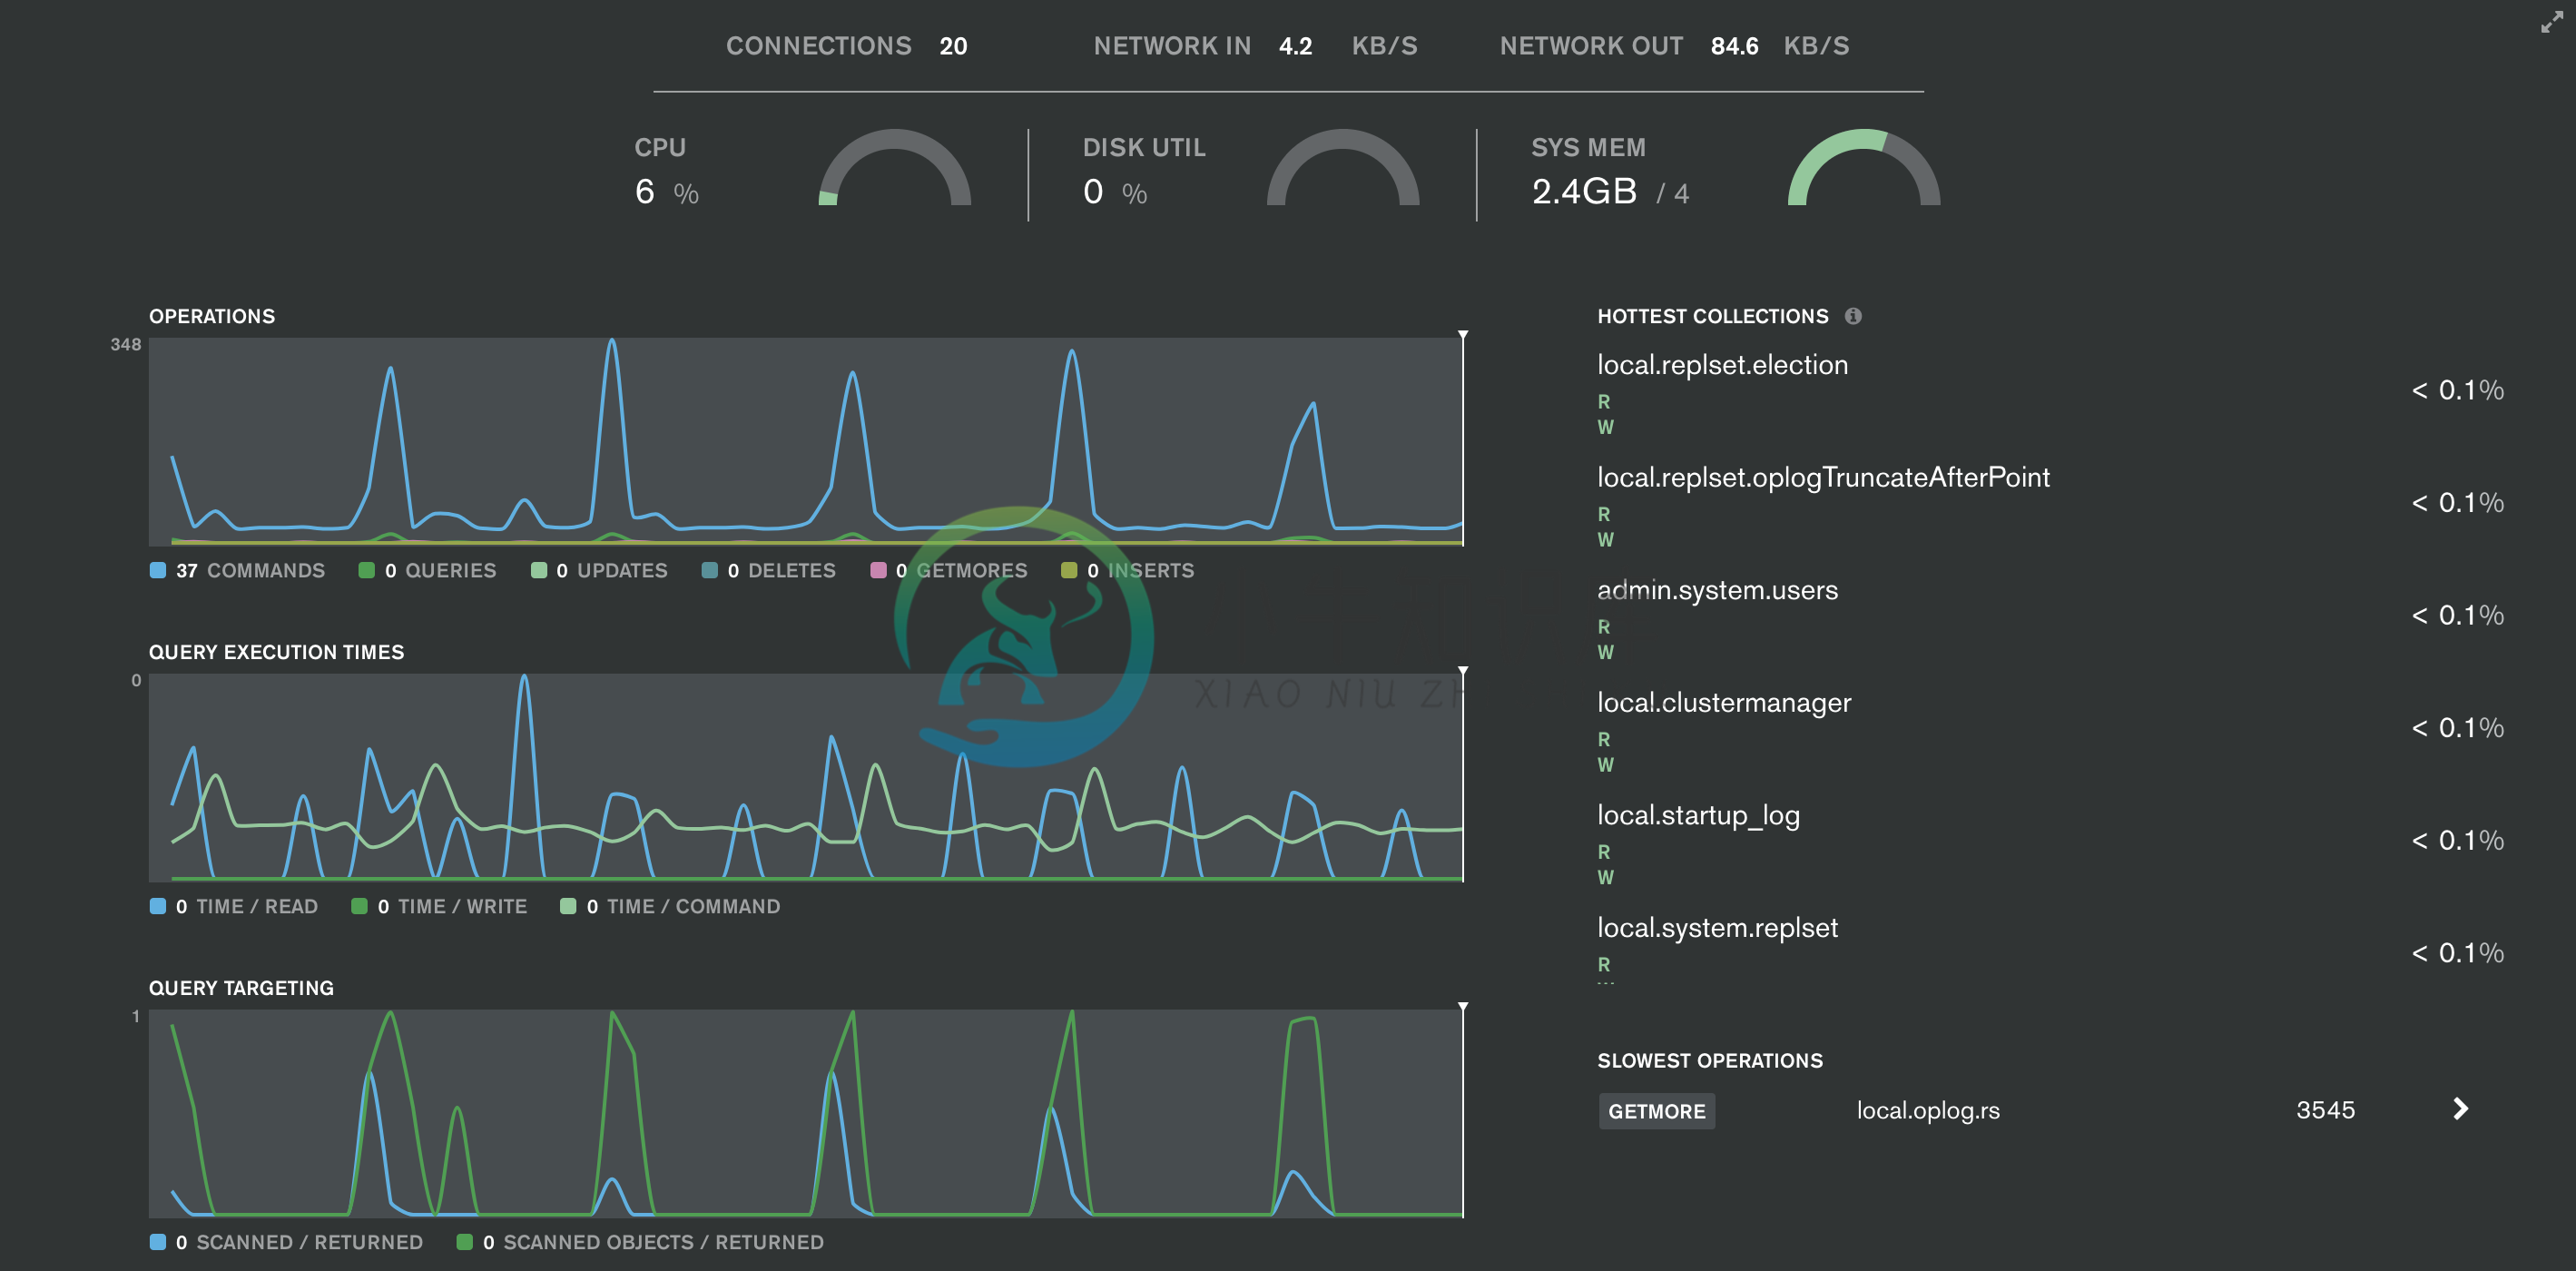
该界面下会有实时的监控数据,监控项目主要有 4 个种类
系统相关: CPU、磁盘使用率、系统内存、连接总数、网路进出等
MongoDB 监控指标: OPERATIONS、QUERY EXECUTION TIMES、QUERY TARGETING、READS & WRITES
最高负载的集合,主要从读写两个方面去衡量负载
慢操作
Metrics
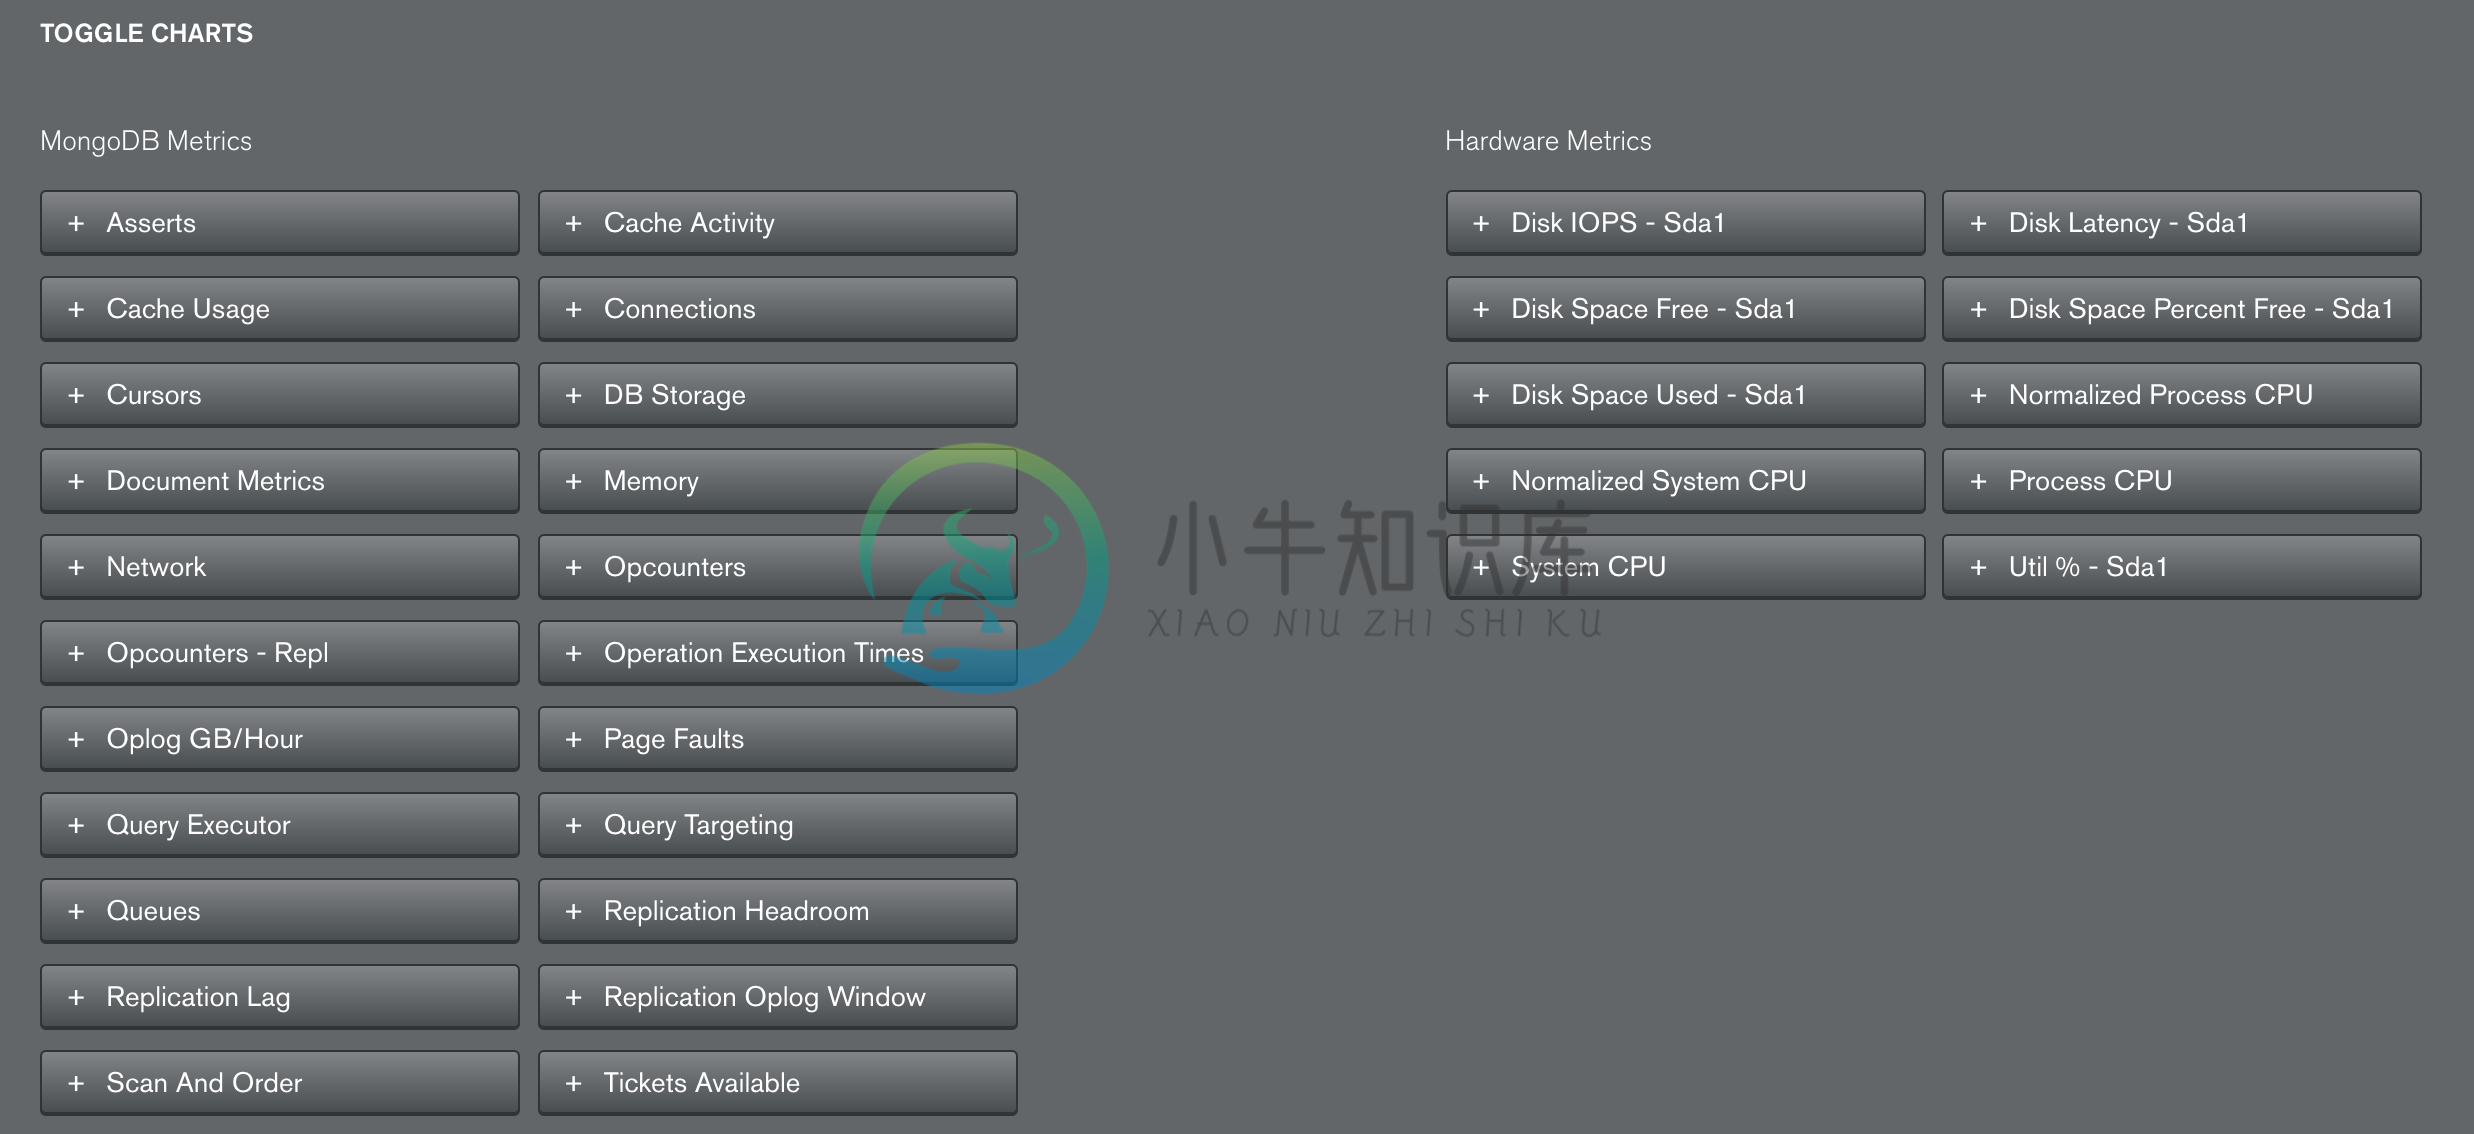
可以根据不同的时间间隔,收集一些监控项目,具体监控项有 30 多种,分为两类,即系统相关,和 MongoDB 相关,选择任意一个监控项,对应的监控报表会显示出来
Data
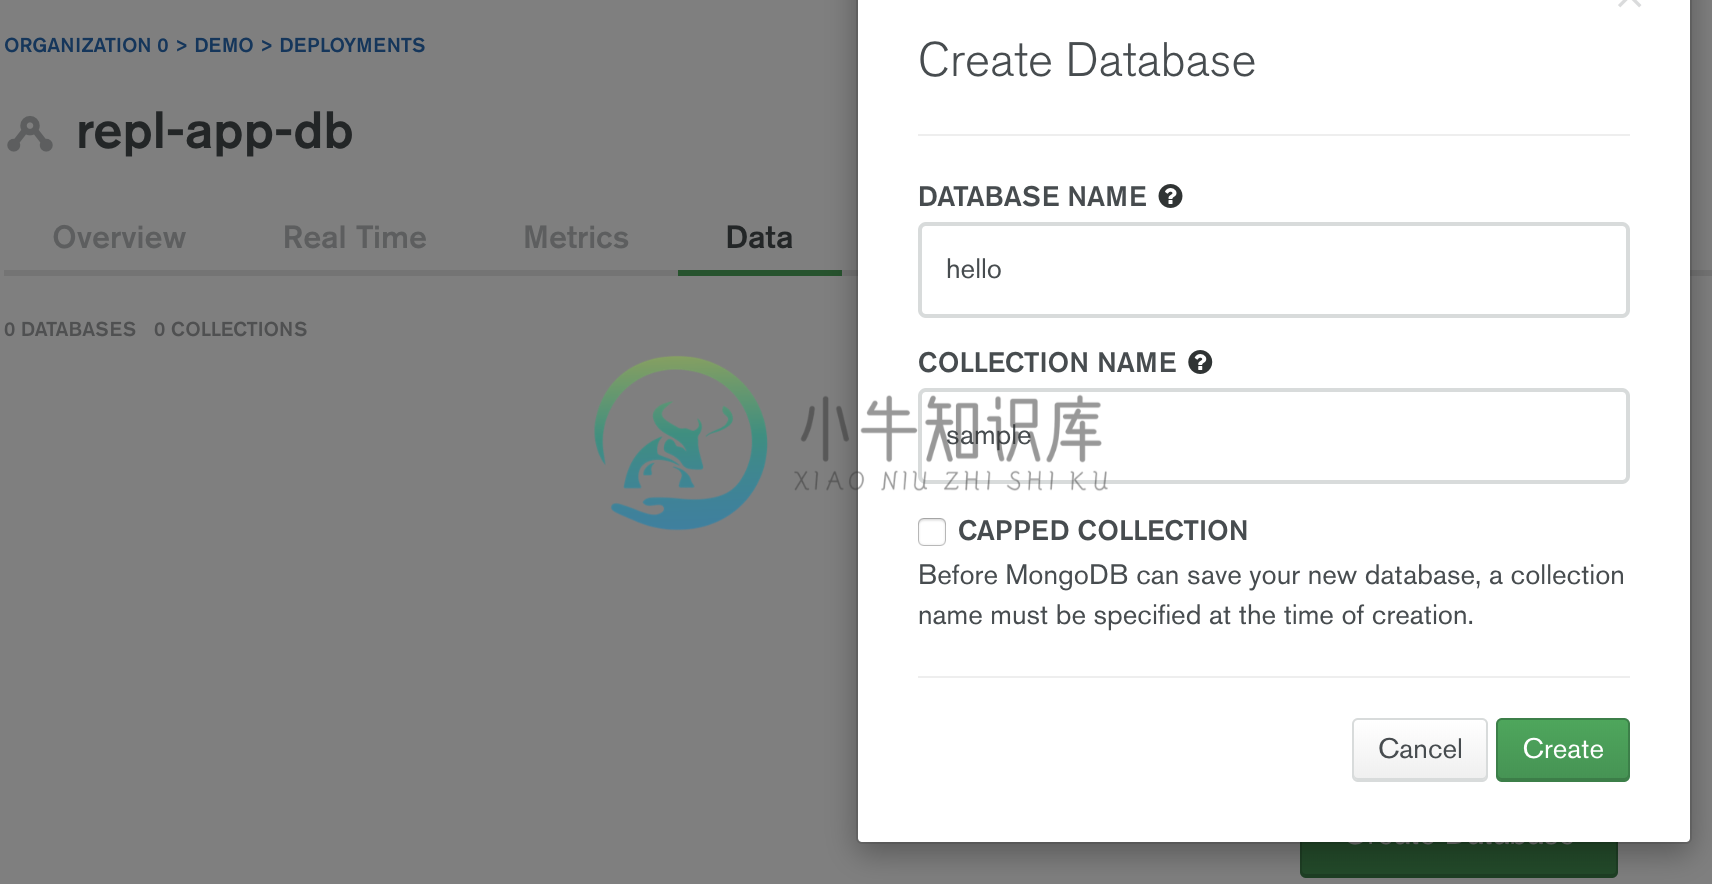
在该界面点击 Create Database 可以创建一个数据库
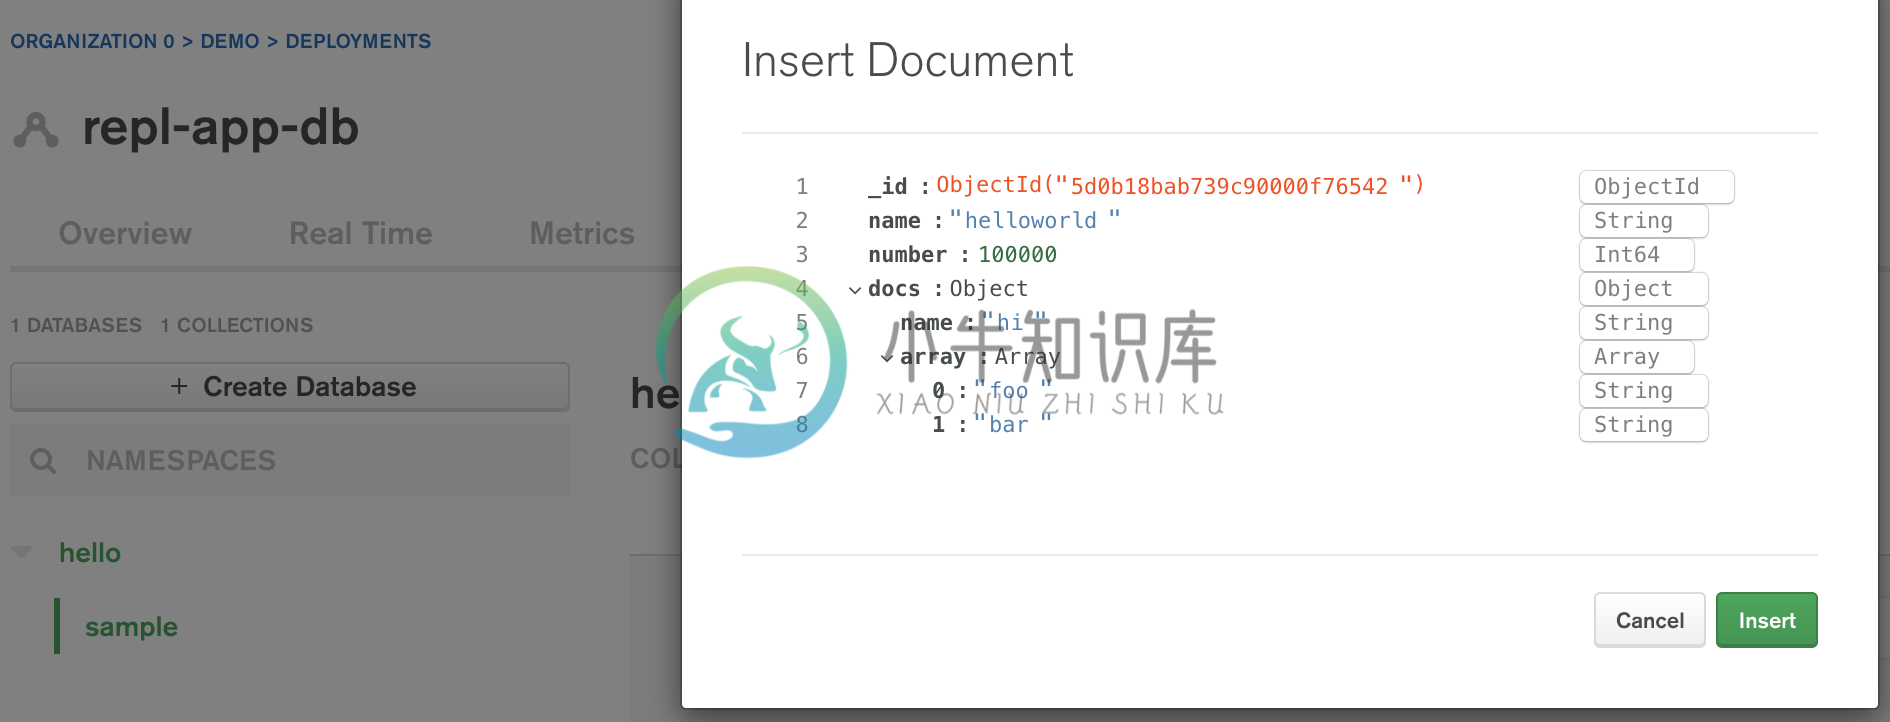
同样在该界面如果选定一个数据库中的集合,可以创建文档。
Performance Advisor
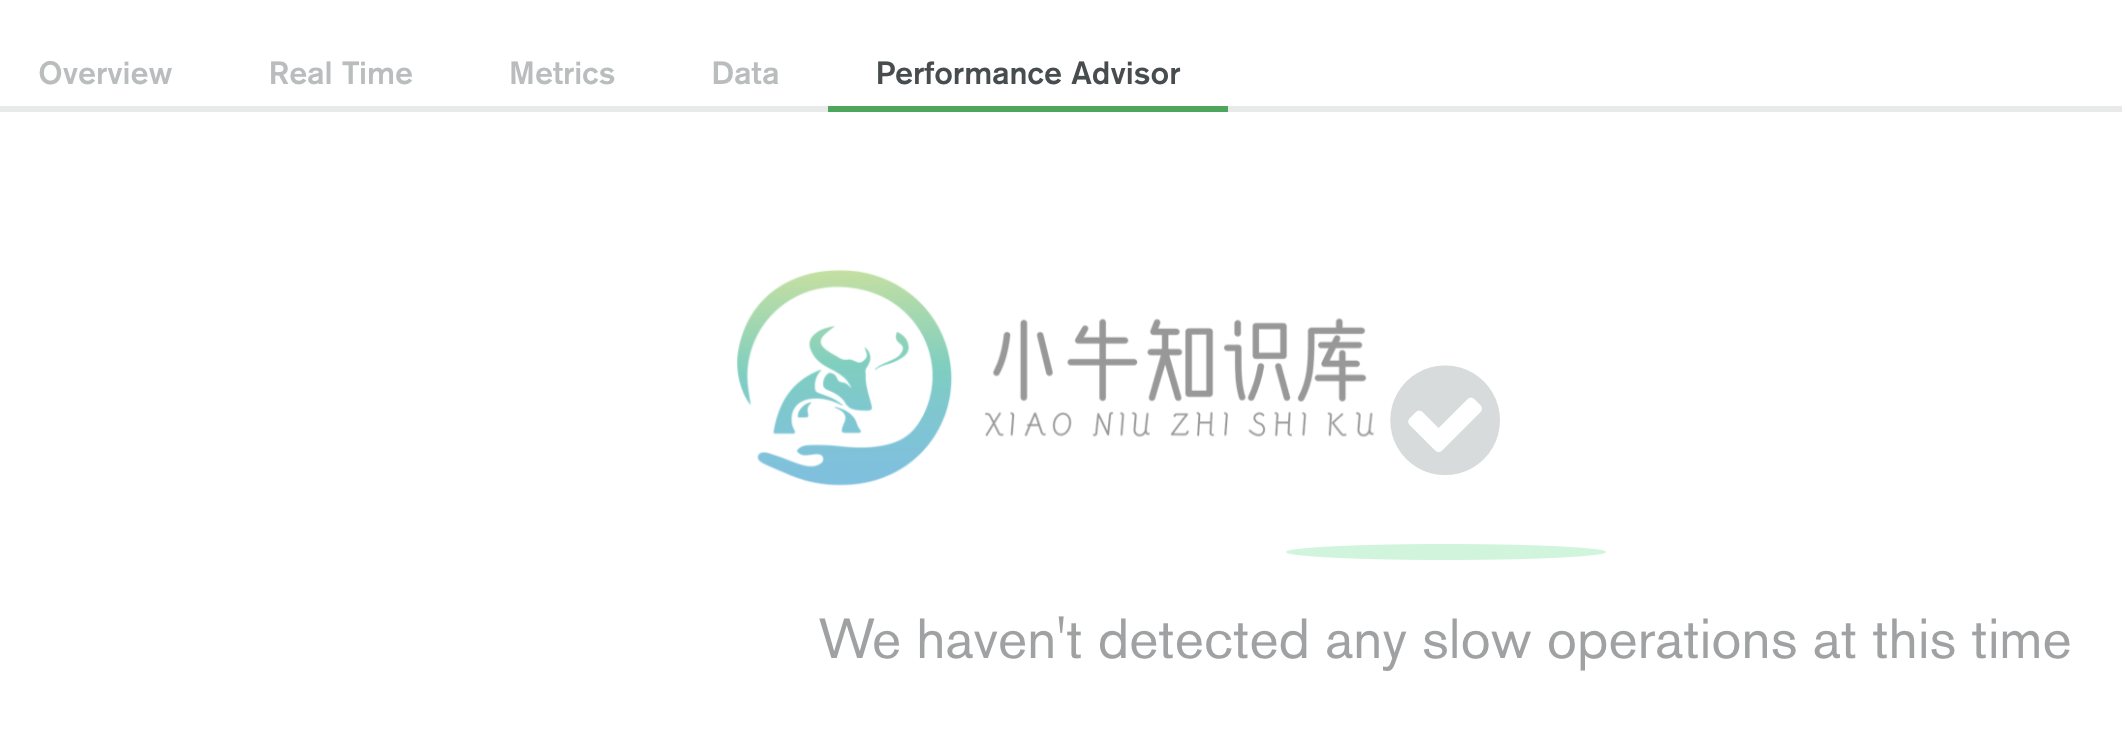
该页面会列出一定时间段内 Ops Manager 检测到的慢查询。
TODO
**
