iOS实现裁剪框和图片剪裁功能
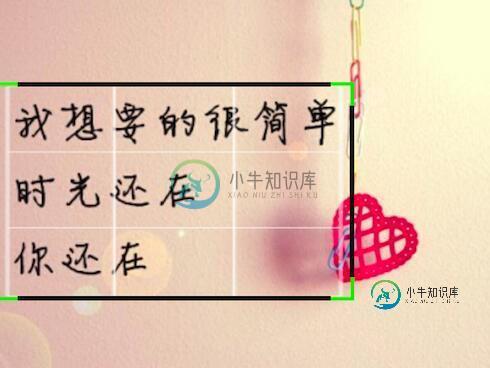
图片处理中经常用的图片剪裁,就是通过剪裁框确定图片剪裁的区域,然后剪去该区域的图片,今天实现了一下,其实图片剪裁本身不难,主要剪裁框封装发了点时间,主要功能可以拖动四个角缩放,但不能超出父视图,拖动四个边单方向缩放,不能超出父视图,拖动中间部分单单移动,不改变大小,不能超出父视图。下面列举一些主要代码。
四个角的处理代码:
-(void)btnPanGesture:(UIPanGestureRecognizer*)panGesture
{
 UIView *vw = panGesture.view;
 CGRect oldFrame = self.frame;
 CGRect oldIntersectRect = CGRectIntersection(self.frame, self.superview.bounds);

 CGPoint transport = [panGesture translationInView:vw];
 if (vw.tag == 4) {
 self.width = self.preFrame.size.width + transport.x;
 self.height = self.preFrame.size.height + transport.y;
 }
 else if(vw.tag == 3)
 {
 self.x = self.preFrame.origin.x + transport.x;
 self.width = self.preFrame.size.width - transport.x;
 self.height = self.preFrame.size.height + transport.y;
 }
 else if(vw.tag == 2)
 {
 self.width = self.preFrame.size.width + transport.x;
 self.y = self.preFrame.origin.y + transport.y;
 self.height = self.preFrame.size.height - transport.y;
 }
 else if(vw.tag == 1)
 {
 self.x = self.preFrame.origin.x + transport.x;
 self.width = self.preFrame.size.width - transport.x;
 self.y = self.preFrame.origin.y + transport.y;
 self.height = self.preFrame.size.height - transport.y;
 }
 if (panGesture.state == UIGestureRecognizerStateEnded) {
 self.preFrame = self.frame;
 }
 if (self.width < MinWidth || self.height < MinHeight) {
 self.frame = oldFrame;
 }
 CGRect newFrame = self.frame;
 if (newFrame.size.width * newFrame.size.height > oldFrame.size.height * oldFrame.size.width) {

 CGRect newIntersectRect = CGRectIntersection(self.frame, self.superview.bounds);
 if (newFrame.size.width * newFrame.size.height > newIntersectRect.size.width * newIntersectRect.size.height) {
 self.frame = oldFrame;
 }
 }
 self.preCenter = self.center;
}
我是通过视图于父视图的frame的交集部分的面积判断是否超出父视图的。
四个边的控制代码:
-(void)viewPanGesture:(UIPanGestureRecognizer*)panGesture
{
 UIView *vw = panGesture.view;
 CGRect oldFrame = self.frame;
 CGRect oldIntersectRect = CGRectIntersection(self.frame, self.superview.bounds);

 CGPoint transport = [panGesture translationInView:vw];
 if (vw.tag == 1) {
 self.y = self.preFrame.origin.y + transport.y;
 self.height = self.preFrame.size.height - transport.y;
 }
 else if(vw.tag == 2)
 {
 self.x = self.preFrame.origin.x + transport.x;
 self.width = self.preFrame.size.width - transport.x;
 }
 else if(vw.tag == 3)
 {
 self.height = self.preFrame.size.height + transport.y;
 }
 else if(vw.tag == 4)
 {
 self.width = self.preFrame.size.width + transport.x;
 }
 if (panGesture.state == UIGestureRecognizerStateEnded) {
 self.preFrame = self.frame;
 }
 if (self.width < MinWidth || self.height < MinHeight) {
 self.frame = oldFrame;

 }
 self.preCenter = self.center;
 CGRect newFrame = self.frame;
 if (newFrame.size.width * newFrame.size.height > oldFrame.size.height * oldFrame.size.width) {

 CGRect newIntersectRect = CGRectIntersection(self.frame, self.superview.bounds);
 if (oldIntersectRect.size.width * oldIntersectRect.size.height >= newIntersectRect.size.width * newIntersectRect.size.height) {
 self.frame = oldFrame;
 self.preCenter = self.preCenter;
 }

 }

}
中间部分移动的控制代码:
-(void)contentViewPanGestureAction:(UIPanGestureRecognizer*)panGesture
{
 CGPoint transport = [panGesture translationInView:self];
 CGRect oldFrame = self.frame;
 CGRect oldIntersectRect = CGRectIntersection(self.frame, self.superview.bounds);
 CGFloat oldMj = oldIntersectRect.size.width * oldIntersectRect.size.height;

 self.center = CGPointMake(self.preCenter.x + transport.x, self.preCenter.y + transport.y);

 if (panGesture.state == UIGestureRecognizerStateEnded) {

 self.preCenter = self.center;
 }
 CGRect newIntersectRect = CGRectIntersection(self.frame, self.superview.bounds);
 CGFloat newMj = newIntersectRect.size.width * newIntersectRect.size.height;

 if (newMj < oldMj) {
 self.frame = oldFrame;
 self.preCenter = self.center;
 }
}
剪裁框实现的核心代码如上,个人觉得最不好处理的是对超出父视图的控制,要保证不能超出父视图,个人主要用到的是通过子视图与父视图的交集部分的面积的改变来获知是否超出父视图,如果超出父视图,就会退到之前的frame,不知道是否还有其他好的方法,有的话可以一起交流一下。
图片剪裁部分
代码如下:
-(void)cropImg
{
 CGRect cropFrame = self.cropView.frame;
 CGFloat orgX = cropFrame.origin.x * (self.img.size.width / self.imgView.frame.size.width);
 CGFloat orgY = cropFrame.origin.y * (self.img.size.height / self.imgView.frame.size.height);
 CGFloat width = cropFrame.size.width * (self.img.size.width / self.imgView.frame.size.width);
 CGFloat height = cropFrame.size.height * (self.img.size.height / self.imgView.frame.size.height);
 CGRect cropRect = CGRectMake(orgX, orgY, width, height);
 CGImageRef imgRef = CGImageCreateWithImageInRect(self.img.CGImage, cropRect);

 CGFloat deviceScale = [UIScreen mainScreen].scale;
 UIGraphicsBeginImageContextWithOptions(cropFrame.size, 0, deviceScale);
 CGContextRef context = UIGraphicsGetCurrentContext();
 CGContextTranslateCTM(context, 0, cropFrame.size.height);
 CGContextScaleCTM(context, 1, -1);
 CGContextDrawImage(context, CGRectMake(0, 0, cropFrame.size.width, cropFrame.size.height), imgRef);
 UIImage *newImg = UIGraphicsGetImageFromCurrentImageContext();
 CGImageRelease(imgRef);
 UIGraphicsEndImageContext();

 ALAssetsLibrary *library = [[ALAssetsLibrary alloc] init];
 [library toolWriteImageToSavedPhotosAlbum:newImg.CGImage metadata:nil completionBlock:^(NSURL *assetURL, NSError *error) {
 if(error)
 {
 JGLog(@"写入出错");
 }
 } groupName:@"相册名称"];
}
这里要注意一点CGContextDrawImage这个函数的坐标系和UIKIt的坐标系上下颠倒,需对坐标系处理如下:
CGContextTranslateCTM(context, 0, cropFrame.size.height);
CGContextScaleCTM(context, 1, -1);
看看效果:

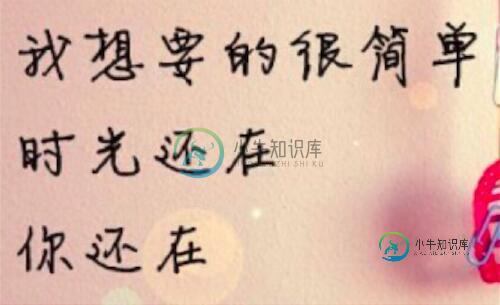
剪裁之后的图片:

以上就是本文的全部内容,希望对大家的学习有所帮助。
-
本文向大家介绍Android实现图片区域裁剪功能,包括了Android实现图片区域裁剪功能的使用技巧和注意事项,需要的朋友参考一下 今天做的就是关于实现图片的区域裁剪功能。由于项目功能的需要笔者需要实现PDF文档的阅读,并且就某个页面实现“图片”裁剪(一个页面理解为一张图片)。笔者对着方面是一点儿也不熟悉,因此就得上网查资料了。之后笔者找到了Android可以通过调用系统相册、拍照实现图片的裁剪、
-
我试图在从图库中选择图像后使用intent来裁剪图像。以下是我的代码片段 在这里,我使用PICK_IMAGE_REQUEST意图句柄调用上面的代码段 由于我在裁剪后使用了相同的意图,即PICK_IMAGE_REQUEST,可能会出现什么问题
-
本文向大家介绍Python基于tkinter canvas实现图片裁剪功能,包括了Python基于tkinter canvas实现图片裁剪功能的使用技巧和注意事项,需要的朋友参考一下 实现:tkinter 画布上显示图片,按下鼠标左键并且移动,实现截图 代码如下 原图one.png 运行 one_corp.png 源码(https://github.com/rainbow-tan/rainbow/
-
本文向大家介绍WEB前端实现裁剪上传图片功能,包括了WEB前端实现裁剪上传图片功能的使用技巧和注意事项,需要的朋友参考一下 最后的效果如下: 这里面有几个功能,第一个是支持拖拽,第二个压缩,第三个是裁剪编辑,第四个是上传和上传进度显示,下面依次介绍每个功能的实现: 1. 拖拽显示图片 拖拽读取的功能主要是要兼听html5的drag事件,这个没什么好说的,查查api就知道怎么做了,主要在于怎么读取用
-
本文向大家介绍php结合imgareaselect实现图片裁剪,包括了php结合imgareaselect实现图片裁剪的使用技巧和注意事项,需要的朋友参考一下 引用CSS 引用js html jQuery代码 确定裁剪 服务器端php代码 以上所述就是本文的全部内容了,希望大家能够喜欢。
-
本文向大家介绍vue实现图片裁剪后上传,包括了vue实现图片裁剪后上传的使用技巧和注意事项,需要的朋友参考一下 本文实例为大家分享了vue实现图片裁剪后上传的具体代码,供大家参考,具体内容如下 一、背景 目前负责的系统(商城后台管理系统)里面有这么一个需求,为了配合前台的展示,上传的商品图片比较必须是1:1的正方形。(其它地方有时会有5:4或者16:9的需求,但较少)。所以需要对上传的图片先进行裁

