A plugin for JupyterLab that lets you set up and use as many filebrowsers as you like, connected to whatever local and/or remote filesystem-like resources you want.
The backend is built on top of PyFilesystem, while the frontend is built on top of JupyterLab Filetree.
Install
pip install jupyter-fs
Configure
Add the following to your jupyter_server_config.json:
{
  "ServerApp": {
    "contents_manager_class": "jupyterfs.metamanager.MetaManager",
    "jpserver_extensions": {
      "jupyterfs.extension": true
    }
  }
}
Simple use (no auth/credentials)
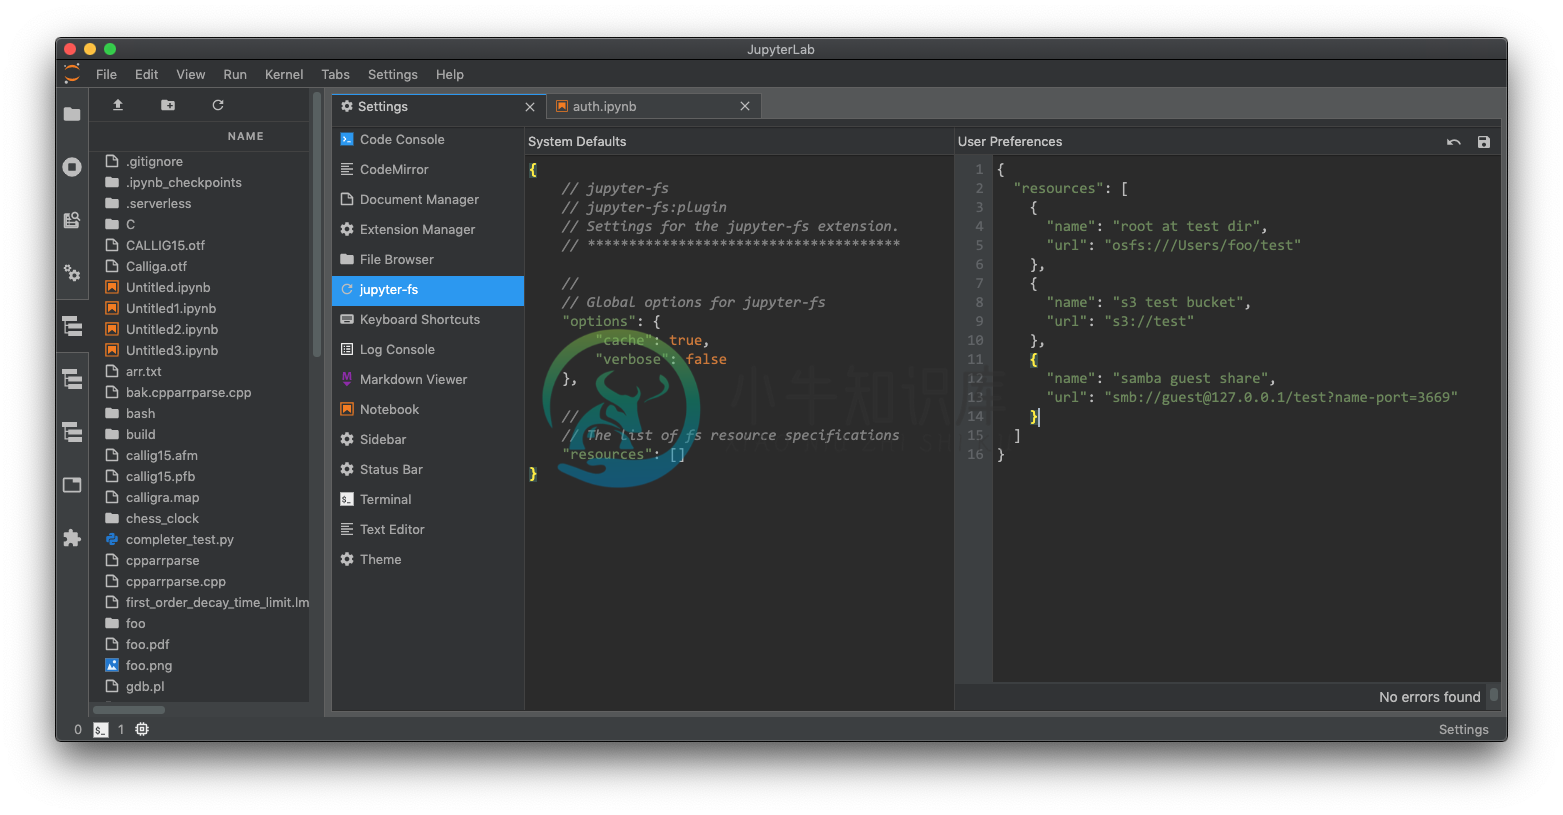
Add specifications for additional contents managers in your user settings (in the Settings menu under Advanced Settings Editor -> jupyter-fs). Here's an example config that sets up several new filebrowsers side-by-side:
{
  "resources": [
    {
      "name": "root at test dir",
      "url": "osfs:///Users/foo/test"
    },
    {
      "name": "s3 test bucket",
      "url": "s3://test"
    },
    {
      "name": "s3 test key",
      "url": "s3://test-2/prefix/",
      "defaultWritable": false
    },
    {
      "name": "samba guest share",
      "url": "smb://guest@127.0.0.1/test?name-port=3669"
    }
  ]
}
You should see your new filebrowsers pop up in the left-hand sidebar instantly when you save your settings:
Use with auth/credentials
Any stretch of a "url" that is enclosed in double-brackets {{VAR}} will be treated as a template, and will be handled by jupyter-fs's auth system. For example, you can pass a username/password to the "samba guest share" resource in the Simple use example above by modifying its "url" like so:
{
  "resources": [
    ...

    {
      "name": "samba share",
      "url": "smb://{{user}}:{{passwd}}@127.0.0.1/test?name-port=3669"
    }
  ]
}
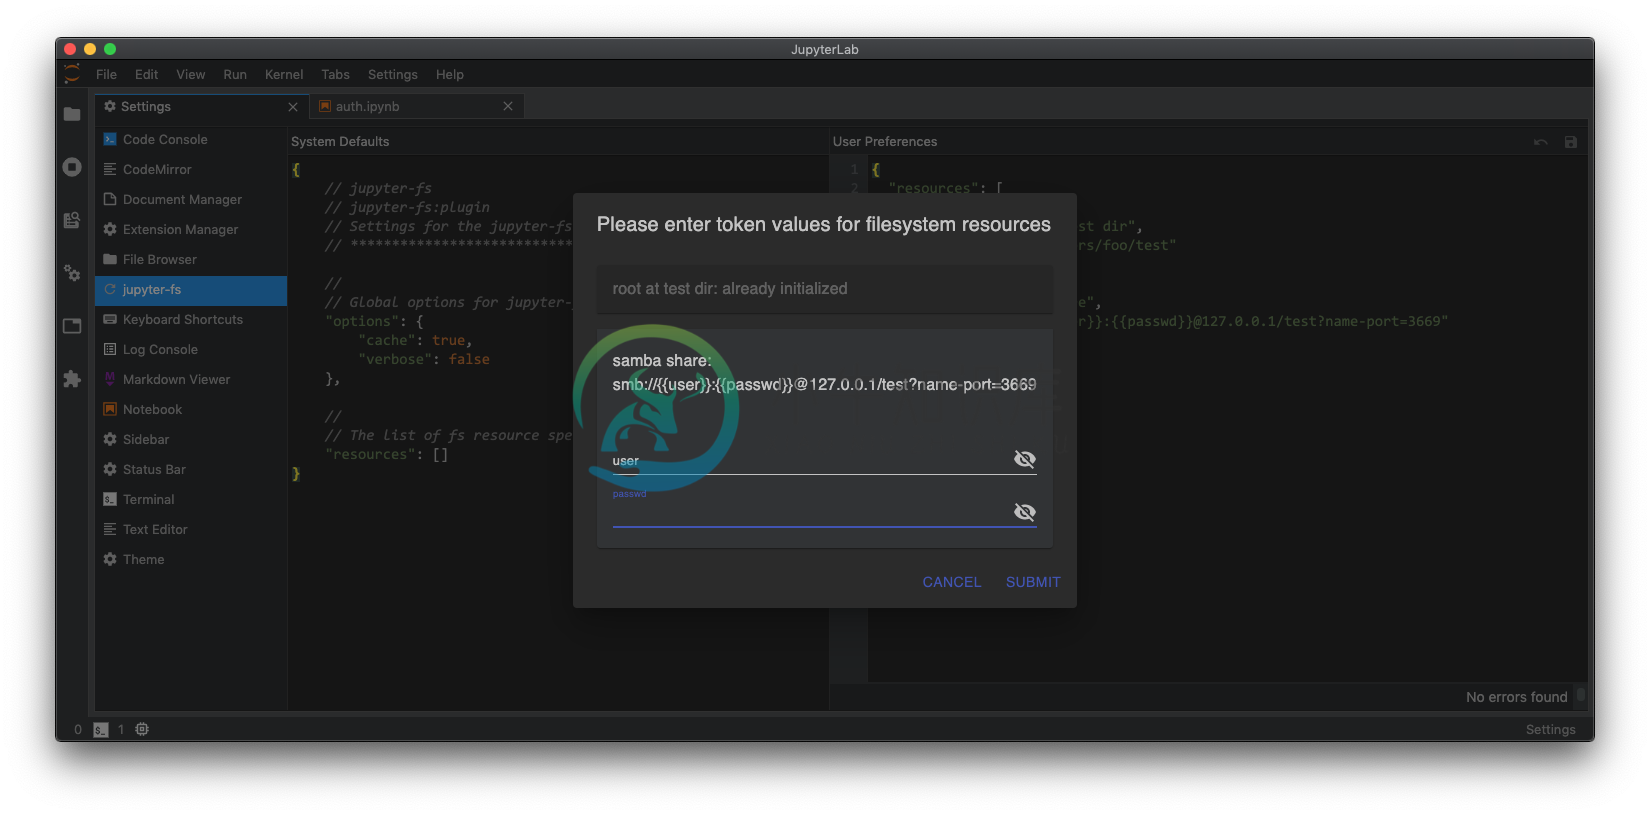
When you save the above "resouces" config, a dialog box will pop asking for the username and passwd values:
Once you enter those values and hit ok, the new filebrowsers will then immediately appear in the sidebar:
The auth dialog will only appear when needed
The jupyter-fs auth dialog will only appear when:
- JupyterLab first loads, if any fs resources reqiure auth
- a new fs resouce is added that requires auth, or its
"url"field is modified
Supported filesystems
The type of resource each filebrowser will point to is determined by the protocol at the start of its url:
- osfs: os filesystem. The will open a new view of your local filesystem, with the specified root
- s3: opens a filesystem pointing to an Amazon S3 bucket
- smb: opens a filesystem pointing to a Samba share
jupyter-fs can open a filebrowser pointing to any of the diverse resources supported by PyFilesystem. Currently, we test only test the S3 and smb/samba backends as part of our CI, so your milleage may vary with the other PyFilesystem backends.
The filesystem url
The "url" field jupyter-fs config is based on the PyFilesystem opener url standard. For more info on how to write these urls, see the documentation of the relevant PyFilesystem plugin:
- S3: S3FS docs
- smb: fs.smbfs docs
Server-side settings
If you prefer to set up your filesystem resources in the server-side config, you can do so. For example, you can set up a local filesystem by adding the following to your jupyter_server_config.py file:
c.Jupyterfs.resources = [
    {
        "name": "local_test",
        "url": "osfs:///Users/foo/test"
    },
]
ALternatively, you can add resource specifications alongside the basic jupyter-fs config in your jupyter_server_config.json file:
{
  "ServerApp": {
    "contents_manager_class": "jupyterfs.metamanager.MetaManager",
    "jpserver_extensions": {
      "jupyterfs.extension": true
    }
  },
  "Jupyterfs": {
    "resources": [
      {
        "name": "local_test",
        "url": "osfs:///Users/foo/test"
      }
    ]
  }
}
Any filesystem resources specified in any server-side config file will be merged with the resources given in a user's settings.
Development
See CONTRIBUTING.md for guidelines.
License
This software is licensed under the Apache 2.0 license. See theLICENSE and AUTHORS files for details.
-
安装指令:sudo pip3 install jupyter jupyterlab 生成配置文件:jupyter notebook --generate-config 修改此配置文件:sudo vi ~/.jupyter/jupyter_notebook_config.py,将下面的文件修改为对应的值 c.NotebookApp.ip = '0.0.0.0' // 第2
-
hadoop fs -mkdir -p /user/hadoop 创建一个目录 hadoop fs -rm-r /user/hadoop 删除目录 hadoop fs -put data.txt 上传文件 hadoop fs -cat data.txt 查看文件 exit() 退出 source 更新 start-dfs.sh 启动hadoop 三个Node start-yarn.
-
电脑用了很多年了,原来的8G内存也不那么够用,安装Ubuntu的桌面版虚拟机后消耗资源比较大,导致虚拟机和主机都很卡。所以打算安装Ubuntu Server 20.04 虚拟机,在主机的浏览器上使用jupyter notebook,这样分配给虚拟机的CPU和内存可以大大减少,系统能稍稍流畅一点;同时可以直接从Web页面上传和下载文件,主机和虚拟机之间的文件传输也很方便。 这里记录一下基本的安装和配
-
官网 https://jupyter.org/ 运行 Anaconda Prompt 安装 conda install jupyter 更换工作目录 cd D:\quantization\jupyter 安装插件选择工具栏 conda install -c conda-forge jupyter_contrib_nbextensions conda install -c conda-forge
-
自动补全 操作步骤: 安装nbextensions:输入如下命令 pip install jupyter_contrib_nbextensions jupyter contrib nbextension install --user 安装nbextensions_configurator:输入如下命令 pip install jupyter_nbextensions_configurator j
-
Jupyter notebook is formerly known as IPython notebook, it is a tool that helps you create readable analyses. Jupyter works with python kernel by default, but it also supports many other kernels. Keyb
-
Beyond Jupyter Notebooks �� All material from the PyCon.DE 2018 Talk "Beyond Jupyter Notebooks - Building your own data science platform with Python & Docker" Resources of the presentation Video of th
-
OCaml Jupyter An OCaml kernel for Jupyter notebook. This provides an OCaml REPL with a great user interface such as markdown/HTML documentation, LaTeX formula by MathJax, and image embedding. Getting
-
mkdocs-jupyter: Use Jupyter Notebooks in mkdocs Add Jupyter Notebooks directly to the mkdocs navigation Support for multiple formats: .ipynb and .py files (using jupytext) Same style as regular Jupyte
-
Guide for Reproducible Research and Data Science in Jupyter Notebooks This guide is a community-resource of crowdsourced guidelines and tutorials for reproducible research in Jupyter Notebooks. This r
-
Jupyter DataTables Jupyter Notebook extension to leverage pandas DataFrames by integrating DataTables JS. About Data scientists and in fact many developers work with pd.DataFrame on daily basis to int


