iOS如何用100行代码实现简单的抽屉效果
前言
iOS中抽屉效果的简单实现现在很多应用中都使用到了,网上也有很多了例子,本文主要是通过简单的一些代码来实现的,有需要的可以一起学习学习。
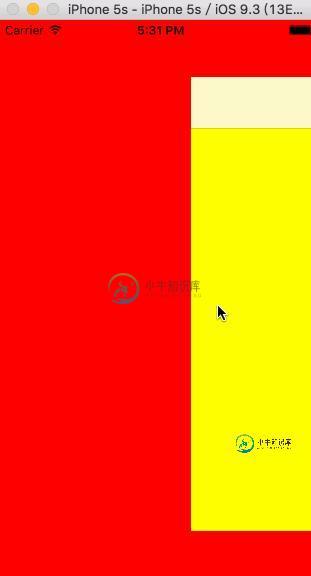
下面是效果图

示例代码如下
#import <UIKit/UIKit.h>

@interface MainViewController : UIViewController
+ (instancetype)mainViewControllerWithLeftViewController:(UIViewController *)leftViewController withMainPageViewController:(UIViewController *)mainPageViewController;
@end
#import "MainViewController.h"

#define KWidth self.view.frame.size.width
#define KHeight self.view.frame.size.height

@interface MainViewController ()
@property (nonatomic,strong)UIViewController *leftVC;
@property (nonatomic,strong)UIViewController *centerVC;
@property (nonatomic,assign)BOOL isSlider;
@property (nonatomic,strong)UIView *corverView;
@end


@implementation MainViewController
+ (instancetype)mainViewControllerWithLeftViewController:(UIViewController *)leftViewController withMainPageViewController:(UIViewController *)mainPageViewController{

  MainViewController *mainVC = [[MainViewController alloc] init];
  mainVC.leftVC = leftViewController;
  mainVC.centerVC = mainPageViewController;
  return mainVC;
}
- (void)viewDidLoad{
  [super viewDidLoad];
  self.isSlider = NO;
  self.view.backgroundColor = [UIColor whiteColor];
  [self addChildViewController:self.leftVC];
  [self.view addSubview:self.leftVC.view];
  [self addChildViewController:self.centerVC];
  [self.view addSubview:self.centerVC.view];
  // 给左视图和主视图添加手势
  [self addGestureForView];
}
// 给主视图添加遮盖
- (void)addCorverView{
  if (self.corverView) {
    [self.corverView removeFromSuperview];
    self.corverView = nil;
  }
  self.corverView = [[UIView alloc] initWithFrame:self.centerVC.view.bounds];
  _corverView.backgroundColor = [[UIColor blackColor] colorWithAlphaComponent:0.0];
  [self.centerVC.view addSubview:self.corverView];
}
// 移除主视图遮盖
- (void)removeCoverView{
  if (self.corverView) {
    [self.corverView removeFromSuperview];
    self.corverView = nil;
  }
}
// 给左视图和主视图添加手势
- (void)addGestureForView{
  UISwipeGestureRecognizer *rightGesture = [[UISwipeGestureRecognizer alloc] initWithTarget:self action:@selector(swipeRightAction:)];
  rightGesture.direction = UISwipeGestureRecognizerDirectionRight;
  [self.centerVC.view addGestureRecognizer:rightGesture];
  UISwipeGestureRecognizer *leftGesture = [[UISwipeGestureRecognizer alloc] initWithTarget:self action:@selector(swipeLeftAction:)];
  leftGesture.direction = UISwipeGestureRecognizerDirectionLeft;
  [self.centerVC.view addGestureRecognizer:leftGesture];
  UISwipeGestureRecognizer *leftVCLeftSwipeGesture = [[UISwipeGestureRecognizer alloc] initWithTarget:self action:@selector(leftVCLeftSwipeAction:)];
  leftVCLeftSwipeGesture.direction = UISwipeGestureRecognizerDirectionLeft;
  [self.leftVC.view addGestureRecognizer:leftVCLeftSwipeGesture];
}
- (void)swipeRightAction:(id)sender{
  [self moveView:self.centerVC.view scale:0.8 panValue:KWidth];
  self.isSlider = YES;
  [self addCorverView];
}
- (void)swipeLeftAction:(id)sender{
  [self moveView:self.centerVC.view scale:1 panValue:KWidth / 2];
  self.isSlider = NO;
  [self removeCoverView];
}
- (void)leftVCLeftSwipeAction:(id)sender{
  [self moveView:self.centerVC.view scale:1 panValue:KWidth / 2];
  self.isSlider = NO;
  [self removeCoverView];
}
// 平移和缩放一个视图
- (void)moveView:(UIView *)view scale:(CGFloat)scale panValue:(CGFloat)value{
  [UIView beginAnimations:nil context:nil];
  view.transform = CGAffineTransformScale(CGAffineTransformIdentity,scale,scale);
  view.center = CGPointMake(value, view.center.y);
  [UIView commitAnimations];
}
@end
总结
以上就是这篇文章的全部内容了,希望本文的内容对大家的学习或者工作能有所帮助,如果有疑问大家可以留言交流。
-
本文向大家介绍IOS实现点击滑动抽屉效果,包括了IOS实现点击滑动抽屉效果的使用技巧和注意事项,需要的朋友参考一下 最近,看到好多Android上的抽屉效果,也忍不住想要自己写一个。在Android里面可以用SlidingDrawer,很方便的实现。IOS上面就只有自己写了。其实原理很简单就是 UIView 的移动,和一些手势的操作。 效果图: 以上就是本文的全部内容,希望对大家的学习有所帮助。
-
本文向大家介绍iOS本地推送简单实现代码,包括了iOS本地推送简单实现代码的使用技巧和注意事项,需要的朋友参考一下 本文为大家分解介绍了iOS本地推送代码的三步骤,供大家参考,具体内容如下 第一步:创建本地推送 第二步:接收本地推送 第三步:解除本地推送 以上就是本文的全部内容,希望对大家的学习有所帮助,也希望大家多多支持呐喊教程。
-
本文向大家介绍Jquery实现简单的轮播效果(代码管用),包括了Jquery实现简单的轮播效果(代码管用)的使用技巧和注意事项,需要的朋友参考一下 废话不多说了,直接给大家贴jquery代码了,具体代码如下所示: 以上所述是小编给大家介绍的Jquery实现简单的轮播效果,希望对大家有所帮助!
-
本文向大家介绍jquery输入数字随机抽奖特效的简单实现代码,包括了jquery输入数字随机抽奖特效的简单实现代码的使用技巧和注意事项,需要的朋友参考一下 简介:jQuery自定义数值抽奖活动代码是一款点击开始按钮计算机会产生玩家输入范围内的随机数,点击停止按钮,将显示数字最终结果的效果。 效果图如下: 代码如下: js文件代码如下: 以上这篇jquery输入数字随机抽奖特效的简单实现代码就是小编
-
本文向大家介绍JavaScript实现的简单烟花特效代码,包括了JavaScript实现的简单烟花特效代码的使用技巧和注意事项,需要的朋友参考一下 本文实例讲述了JavaScript实现的简单烟花特效代码。分享给大家供大家参考,具体如下: 这是一款JavaScript烟花特效,过年的时候放到你的网页上祝贺大家牛年大吉吧,是不是很不错? 运行效果截图如下: 在线演示地址如下: http://demo
-
本文向大家介绍jquery实现最简单的滑动菜单效果代码,包括了jquery实现最简单的滑动菜单效果代码的使用技巧和注意事项,需要的朋友参考一下 本文实例讲述了jquery实现最简单的滑动菜单效果代码。分享给大家供大家参考。具体如下: 这是一款最简单的jQuery下拉滑出菜单,jQuery代码实现,这里没有过多的去修饰菜单,仅是一些基本的实现,特别是对学习jQuery是个不错的参考实例,这里使用了一

