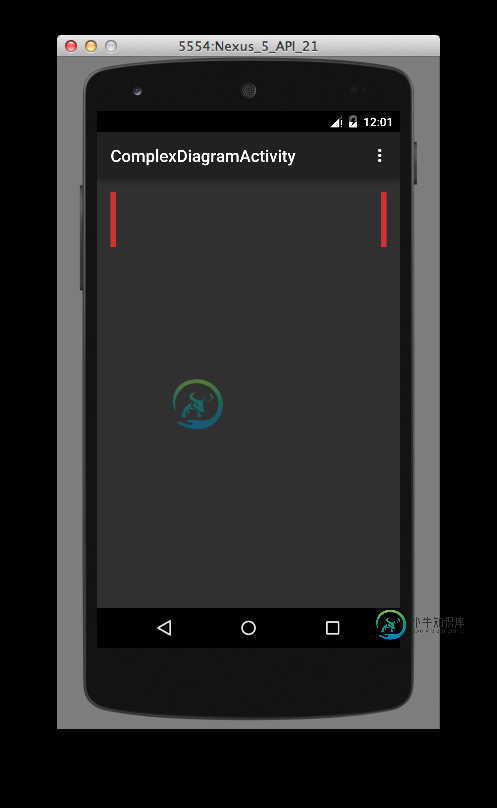
绘制多个矩形,中间有分隔符
我试着画下面的图片,但是我不确定如何画灰色和黑色的矩形。红色矩形我做得很完美,因此,如果有人能告诉我如何实现以下目标,我将不胜感激:
-
< li>7个相同宽度的灰色矩形 < li>6个黑色矩形,每个1px < li >将上述所有内容绘制在红色矩形之间,使其看起来与图像爆炸一模一样。
如果可以的话,请尽量避免在灰色和黑色矩形的x位置使用像素编号,因为我希望所有屏幕尺寸的图形看起来都一样。
所有的帮助将不胜感激。
先谢过了。


项目代码
@Override
    protected void onDraw(Canvas canvas) {
        super.onDraw(canvas);

        //red shapes
        mRedRect0F = new RectF(0, 0, 10, measuredHeight);
        mRedRect1F = new RectF(getWidth() - 10, 0, getWidth(), getHeight());

        //grey shapes
        mGreyRect0F = new RectF(10, 0, getWidth() / 7, measuredHeight);
        mGreyRect1F = new RectF(10, 0, getWidth() / 7 - 20, measuredHeight);
        mGreyRect2F = new RectF(10, 0, getWidth() / 7 - 20, measuredHeight);
        mGreyRect3F = new RectF(10, 0, getWidth() / 7 - 20, measuredHeight);
        mGreyRect4F = new RectF(10, 0, getWidth() / 7 - 20, measuredHeight);
        mGreyRect5F = new RectF(10, 0, getWidth() / 7 - 20, measuredHeight);
        mGreyRect6F = new RectF(10, 0, getWidth() / 7 - 20, measuredHeight);

        //black shapes
        mBlackRect0F = new RectF(0, 0, 1, measuredHeight);
        mBlackRect1F = new RectF(0, 0, 1, measuredHeight);
        mBlackRect2F = new RectF(0, 0, 1, measuredHeight);
        mBlackRect3F = new RectF(0, 0, 1, measuredHeight);
        mBlackRect4F = new RectF(0, 0, 1, measuredHeight);
        mBlackRect5F = new RectF(0, 0, 1, measuredHeight);
        mBlackRect6F = new RectF(0, 0, 1, measuredHeight);


        //draw red shapes
        canvas.drawRect(mRedRect0F, mRedRectPaint);
        canvas.drawRect(mRedRect1F, mRedRectPaint);

        //draw grey shapes
        canvas.drawRect(mGreyRect0F, mGreyRectPaint);
        canvas.drawRect(mGreyRect1F, mGreyRectPaint);
        canvas.drawRect(mGreyRect2F, mGreyRectPaint);
        canvas.drawRect(mGreyRect3F, mGreyRectPaint);
        canvas.drawRect(mGreyRect4F, mGreyRectPaint);
        canvas.drawRect(mGreyRect5F, mGreyRectPaint);
        canvas.drawRect(mGreyRect6F, mGreyRectPaint);

        //draw black shapes
        canvas.drawRect(mBlackRect0F, mGreyRectPaint);
        canvas.drawRect(mBlackRect1F, mGreyRectPaint);
        canvas.drawRect(mBlackRect2F, mGreyRectPaint);
        canvas.drawRect(mBlackRect3F, mGreyRectPaint);
        canvas.drawRect(mBlackRect4F, mGreyRectPaint);
        canvas.drawRect(mBlackRect5F, mGreyRectPaint);
        canvas.drawRect(mBlackRect6F, mGreyRectPaint);
    }

共有3个答案
这里有一个小例子,这不是一个完整的答案,但应该有助于理解这个想法。请根据您的需要进行修改:
  <LinearLayout xmlns:android="http://schemas.android.com/apk/res/android"
    xmlns:tools="http://schemas.android.com/tools"
    xmlns:app="http://schemas.android.com/apk/res-auto"
    android:layout_width="fill_parent"
    android:layout_height="wrap_content"
    android:background="#FFFFFF"
    android:orientation="horizontal" >

    <View
        android:layout_width="wrap_content"
        android:layout_height="20dp"
        android:layout_weight="2"
        android:background="#DDFF44" />

    <View
        android:layout_width="02dp"
        android:layout_height="20dp"
        android:background="#000000" />

    <View
        android:layout_width="wrap_content"
        android:layout_height="20dp"
        android:layout_weight="2"
        android:background="#DDFF44" />

    <View
        android:layout_width="02dp"
        android:layout_height="20dp"
        android:background="#000000" />

    <View
        android:layout_width="wrap_content"
        android:layout_height="20dp"
        android:layout_weight="2"
        android:background="#DDFF44" />

    <View
        android:layout_width="02dp"
        android:layout_height="20dp"
        android:background="#000000" />

    <View
        android:layout_width="wrap_content"
        android:layout_height="20dp"
        android:layout_weight="2"
        android:background="#DDFF44" />

</LinearLayout>
这是一个完整的答案,非常适合你,
  <?xml version="1.0" encoding="utf-8"?>
<LinearLayout xmlns:android="http://schemas.android.com/apk/res/android"
    android:layout_width="match_parent"
    android:layout_height="50dp"
    android:orientation="horizontal" >

    <View
        android:layout_width="5dp"
        android:layout_height="wrap_content"
        android:background="#CC3333" />

    <RelativeLayout
        android:layout_width="0dp"
        android:layout_height="match_parent"
        android:layout_weight="1"
        android:background="#808080" >

        <View
            android:layout_width="10dp"
            android:layout_height="10dp"
            android:layout_alignParentLeft="true"
            android:background="@android:color/black" />

        <View
            android:layout_width="10dp"
            android:layout_height="10dp"
            android:layout_centerHorizontal="true"
            android:background="@android:color/black" />

        <View
            android:layout_width="10dp"
            android:layout_height="10dp"
            android:layout_alignParentRight="true"
            android:background="@android:color/black" />

        <TextView
            android:layout_width="wrap_content"
            android:layout_height="wrap_content"
            android:layout_centerInParent="true"
            android:gravity="center"
            android:text="1" />

        <View
            android:layout_width="10dp"
            android:layout_height="10dp"
            android:layout_alignParentBottom="true"
            android:layout_alignParentLeft="true"
            android:background="@android:color/black" />

        <View
            android:layout_width="10dp"
            android:layout_height="10dp"
            android:layout_alignParentBottom="true"
            android:layout_centerHorizontal="true"
            android:background="@android:color/black" />

        <View
            android:layout_width="10dp"
            android:layout_height="10dp"
            android:layout_alignParentBottom="true"
            android:layout_alignParentRight="true"
            android:background="@android:color/black" />
    </RelativeLayout>

    <View
        android:layout_width="1dp"
        android:layout_height="wrap_content"
        android:background="#1D1D1D" />

    <TextView
        android:layout_width="0dp"
        android:layout_height="match_parent"
        android:layout_weight="1"
        android:background="#808080"
        android:gravity="center"
        android:text="1" />

    <View
        android:layout_width="1dp"
        android:layout_height="wrap_content"
        android:background="#1D1D1D" />

    <TextView
        android:layout_width="0dp"
        android:layout_height="match_parent"
        android:layout_weight="1"
        android:background="#808080"
        android:gravity="center"
        android:text="2" />

    <View
        android:layout_width="1dp"
        android:layout_height="wrap_content"
        android:background="#1D1D1D" />

    <TextView
        android:layout_width="0dp"
        android:layout_height="match_parent"
        android:layout_weight="1"
        android:background="#808080"
        android:gravity="center"
        android:text="3" />

    <View
        android:layout_width="1dp"
        android:layout_height="wrap_content"
        android:background="#1D1D1D" />

    <TextView
        android:layout_width="0dp"
        android:layout_height="match_parent"
        android:layout_weight="1"
        android:background="#808080"
        android:gravity="center"
        android:text="4" />

    <View
        android:layout_width="1dp"
        android:layout_height="wrap_content"
        android:background="#1D1D1D" />

    <TextView
        android:layout_width="0dp"
        android:layout_height="match_parent"
        android:layout_weight="1"
        android:background="#808080"
        android:gravity="center"
        android:text="5" />

    <View
        android:layout_width="1dp"
        android:layout_height="wrap_content"
        android:background="#1D1D1D" />

    <TextView
        android:layout_width="0dp"
        android:layout_height="match_parent"
        android:layout_weight="1"
        android:background="#808080"
        android:gravity="center"
        android:text="6" />

    <View
        android:layout_width="1dp"
        android:layout_height="wrap_content"
        android:background="#1D1D1D" />

    <TextView
        android:layout_width="0dp"
        android:layout_height="match_parent"
        android:layout_weight="1"
        android:background="#808080"
        android:gravity="center"
        android:text="7" />

    <View
        android:layout_width="5dp"
        android:layout_height="wrap_content"
        android:background="#CC3333" />

</LinearLayout>
您使用Rect的方法可能太多了,如果您想用代码来实现,类似这样的方法应该可以完成这项工作:
public class Rectangle extends View {
    private final Paint mBackPaint = new Paint();
    private final Paint mRedPaint = new Paint();
    private int mSideRectWidth = 10;

    public Rectangle(Context context, AttributeSet attrs) {
        super(context, attrs);
        mBackPaint.setColor(Color.BLACK);
        mRedPaint.setColor(Color.RED);
        mSideRectWidth = context.getResources().getDimensionPixelSize(R.dimen.side_rect_width);
    }

    @Override protected void onDraw(Canvas canvas) {
        super.onDraw(canvas);
        if (getWidth() == 0)
            return;

        setBackgroundColor(Color.GRAY);

        //draw black line
        int boxWidth = (getWidth() - 2 * mSideRectWidth) / 7;
        for (int i = 0; i < 7; i++) {
            canvas.drawLine(mSideRectWidth + boxWidth * i, 0, mSideRectWidth + boxWidth * i, getHeight(), mBackPaint);
        }

        //draw left rectangle
        canvas.drawRect(0, 0, mSideRectWidth, getHeight(), mRedPaint);

        //draw right rectangle
        canvas.drawRect(getWidth() - mSideRectWidth, 0, getWidth(), getHeight(), mRedPaint);
    }
}
-
使用closePath()闭合图形 首先我们用上节课的方法绘制一个矩形。 <!DOCTYPE html> <html lang="en"> <head> <meta charset="UTF-8"> <title></title> </head> <body> <!DOCTYPE html> <html lang="zh"> <head> <meta charset="UT
-
本节课通过绘制一个矩形边框效果,对WebGL整个渲染流程有一个简单认知。 学习建议 学习本节课,建议先结合注释看看案例源码,对于不熟悉的WebGL API可以在MDN搜索文档,不过刚开始学习,没必要去掌握每一个WebGL API,把主要精力放在理解WebGL的整个渲染流程上面,如果你能建立渲染管线的概念,自然对WebGL系统会有一个基本的认知。 源码体验测试 //类型数组构造函数Float32Ar
-
在片段中绘制该图像的最佳方式是什么(所有矩形都应该使用屏幕的整个宽度,高度应该以特定的dp度量)?显然需要画矩形,但我不知道如何在下面的灰色大矩形上画白色和黄色的矩形。同样,使用相同的片段java类,而不是创建一个新的,可以实现这一点吗?
-
绘制矩形 点击菜单栏中的“绘制矩形”按钮可以绘制矩形,绘制矩形在数据下载的时候经常要用到,绘制矩形操作及信息与绘制面相同。 修改矩形 添加后可以使用“选中对象”后双击更改面的样式,也可右键“属性”修改线的属性信息。点击属性信息框下方的整体移动(单点修改)键对面进行位置的更改。在“空间信息”栏修改矩形的节点坐标后,需要注意的是修改完可能就不是标准矩形了,要调整。 删除矩形
-
绘制矩形 点击菜单栏中的“绘制矩形”按钮可以绘制矩形,绘制矩形在数据下载的时候经常要用到,绘制矩形操作及信息与绘制面相同。 修改矩形 添加后可以使用“选中对象”后双击更改面的样式,也可右键“属性”修改线的属性信息。点击属性信息框下方的整体移动(单点修改)键对面进行位置的更改。在“空间信息”栏修改矩形的节点坐标后,需要注意的是修改完可能就不是标准矩形了,要调整。 删除矩形
-
上一节,我们使用lineTo()方法绘制一个封闭的矩形。其实,canvas的API提供了rect()方法可以绘制矩形。rect()方法是路径方法,它会把指定的矩形添加到当前路径的子路径中。它只添加路径,绘制图形还是由stroke()或fill()方法完成。 除了rect()方法之外,Canvas 的API还提供了三个直接处理矩形的方法: fillRect(x, y, width, height)

