多说 Markdown 和代码高亮
添加多说
在Django1.5版本前是有内置的评论系统的, 不过现在已经放弃使用了, 在国内比较常用的是多说, 在国外是disqus, 因为文章主要面对 国内用户, 所以采用多说
在网站上注册账号或者直接用社交账号进行登录,并会生成一个short_name, 可以在个人界面中的工具中找到一段通用代码, 这段代码非常重要, 用于多说评论框的代码段:
<!-- 多说评论框 start -->
    <div class="ds-thread" data-thread-key="请将此处替换成文章在你的站点中的ID" data-title="请替换成文章的标题" data-url="请替换成文章的网址"></div>
<!-- 多说评论框 end -->
<!-- 多说公共JS代码 start (一个网页只需插入一次) -->
<script type="text/javascript">
var duoshuoQuery = {short_name:"请在此处替换成自己的短名"};
    (function() {
        var ds = document.createElement('script');
        ds.type = 'text/javascript';ds.async = true;
        ds.src = (document.location.protocol == 'https:' ? 'https:' : 'http:') + '//static.duoshuo.com/embed.js';
        ds.charset = 'UTF-8';
        (document.getElementsByTagName('head')[0]
         || document.getElementsByTagName('body')[0]).appendChild(ds);
    })();
    </script>
<!-- 多说公共JS代码 end -->
在templates中新建一个duoshuo.html并将代码放入其中, 并做一些修改
<!-- 多说评论框 start -->
    <div class="ds-thread" data-thread-key="{{ post.id }}" data-title="{{ post.title }}" data-url="{{ post.get_absolute_url }}"></div>
<!-- 多说评论框 end -->
<!-- 多说公共JS代码 start (一个网页只需插入一次) -->
<script type="text/javascript">
var duoshuoQuery = {short_name:"andrewliu"};
    (function() {
        var ds = document.createElement('script');
        ds.type = 'text/javascript';ds.async = true;
        ds.src = (document.location.protocol == 'https:' ? 'https:' : 'http:') + '//static.duoshuo.com/embed.js';
        ds.charset = 'UTF-8';
        (document.getElementsByTagName('head')[0]
         || document.getElementsByTagName('body')[0]).appendChild(ds);
    })();
    </script>
<!-- 多说公共JS代码 end -->
然后在my_blog/article/models.py中重写get_absolute_url方法
from django.db import models
from django.core.urlresolvers import reverse

# Create your models here.
class Article(models.Model) :
    title = models.CharField(max_length = 100)  #博客题目
    category = models.CharField(max_length = 50, blank = True)  #博客标签
    date_time = models.DateTimeField(auto_now_add = True)  #博客日期
    content = models.TextField(blank = True, null = True)  #博客文章正文

 #获取URL并转换成url的表示格式
    def get_absolute_url(self):
        path = reverse('detail', kwargs={'id':self.id})
        return "http://127.0.0.1:8000%s" % path

    def __str__(self) :
        return self.title

    class Meta:
ordering = ['-date_time']然后修改post.html
{% extends "base.html" %}
{% load custom_markdown %}

{% block content %}
<div class="posts">
        <section class="post">
            <header class="post-header">
                <h2 class="post-title">{{ post.title }}</h2>

                    <p class="post-meta">
                        Time:  <a class="post-author" href="#">{{ post.date_time|date:'Y /m /d'}}</a> <a class="post-category post-category-js" href="{% url 'search_tag' tag=post.category %}">{{ post.category }}</a>
                    </p>
            </header>

                <div class="post-description">
                    <p>
                        {{ post.content|custom_markdown }}
                    </p>
                </div>
        </section>
        {% include "duoshuo.html" %}
</div><!-- /.blog-post -->
{% endblock %}只需要将duoshuo.html加入到当前页面中, {% include "duoshuo.html" %}这句代码就是将duoshuo.html加入到当前的页面中
现在启动web服务器, 在浏览器中输入, 看看是不是每个博文页面下都有一个多说评论框了..

markdown你的博文
markdown越来越流行, 越来越多的写博客的博主都喜欢上了makrdown这种标记性语言的易用性和美观性. 像简书, 作业部落, Mou都是比较出名的markdown在线或者离线形式
现在我们就来markdown自己的博客吗, 首先是安装markdown库, 使用下面命令
    #首先是安装markdown
    $ pip install markdown  #记得激活虚拟环境
现在说说怎么markdown你的博文, 在article下建立新文件夹templatetags,然后我们来定义的自己的 template filter, 然后在templatetags中建立__init__.py, 让文件夹可以被看做一个包, 然后在文件夹中新建custom_markdown.py文件, 添加代码
    import markdown

    from django import template
    from django.template.defaultfilters import stringfilter
    from django.utils.encoding import force_text
    from django.utils.safestring import mark_safe

    register = template.Library()  #自定义filter时必须加上

    @register.filter(is_safe=True)  #注册template filter
    @stringfilter  #希望字符串作为参数
    def custom_markdown(value):
        return mark_safe(markdown.markdown(value,
            extensions = ['markdown.extensions.fenced_code', 'markdown.extensions.codehilite'],
                                           safe_mode=True,
                                           enable_attributes=False))
然后只需要对需要进行markdown化的地方进行简单的修改,
{% extends "base.html" %}
{% load custom_markdown %}

{% block content %}
<div class="posts">
        <section class="post">
            <header class="post-header">
                <h2 class="post-title">{{ post.title }}</h2>

                    <p class="post-meta">
                        Time:  <a class="post-author" href="#">{{ post.date_time|date:'Y /m /d'}}</a> <a class="post-category post-category-js" href="{% url 'search_tag' tag=post.category %}">{{ post.category }}</a>
                    </p>
            </header>

                <div class="post-description">
                    <p>
                        {{ post.content|custom_markdown }}
                    </p>
                </div>
        </section>
        {% include "duoshuo.html" %}
</div><!-- /.blog-post -->
{% endblock %}
{% load custom_markdown %}添加自定义的filter, 然后使用filter的方式为{{ post.content|custom_markdown }}, 只需要对需要使用markdown格式的文本添加管道然后再添加一个自定义filter就好了.
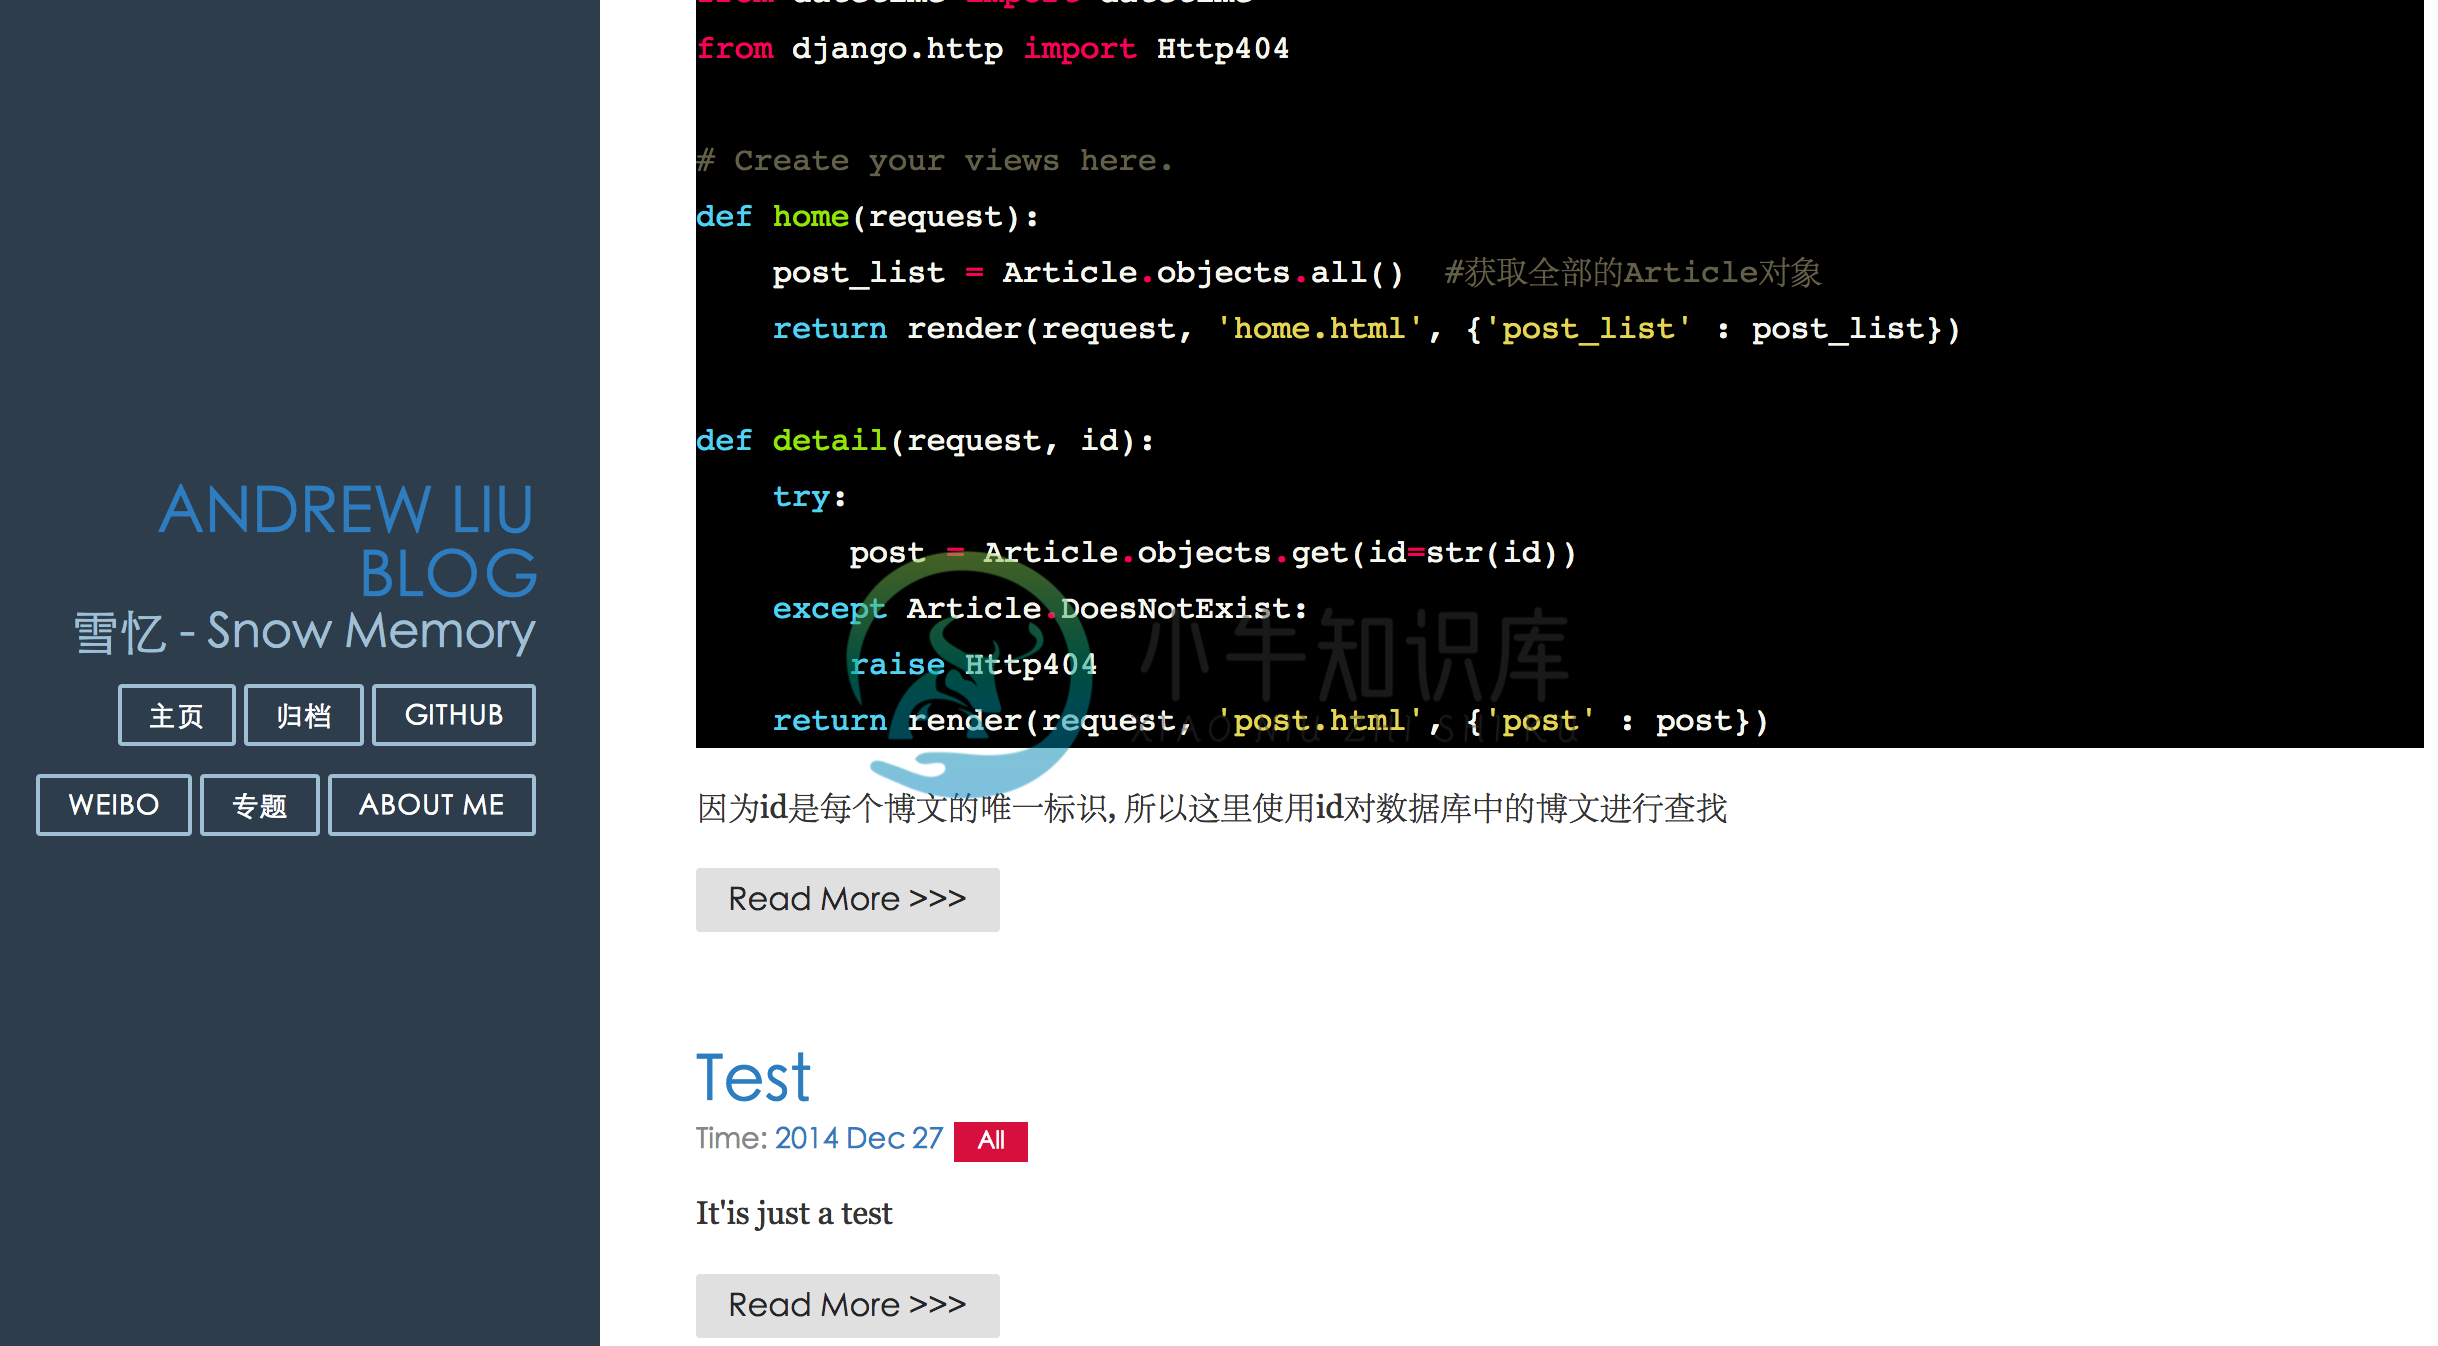
现在启动web服务器, 在浏览器中输入, 可以看到全新的的markdown效果
代码高亮
这里代码高亮使用一个CSS文件导入到网页中就可以实现了, 因为在上面写markdown的filter中已经添加了扩展高亮的功能, 所以现在只要下载CSS文件就好了.
在pygments找到你想要的代码主题, 我比较喜欢monokai, 然后在pygments-css下载你喜欢的CSS主题, 然后加入当博客目录的static目录下, 或者最简单的直接上传七牛进行CDN加速
修改base.html的头部
<!doctype html>
<html lang="en">
<head>
    <meta charset="utf-8">
<meta name="viewport" content="width=device-width, initial-scale=1.0">
<meta name="description" content="A layout example that shows off a blog page with a list of posts.">

    <title>{% block title %} Andrew Liu Blog {% endblock %}</title>
    <link rel="stylesheet" href="http://yui.yahooapis.com/pure/0.5.0/pure-min.css">
    <link rel="stylesheet" href="http://yui.yahooapis.com/pure/0.5.0/grids-responsive-min.css">
    <link rel="stylesheet" href="http://picturebag.qiniudn.com/blog.css">
    <link rel="stylesheet" href="http://picturebag.qiniudn.com/monokai.css">
</head>
<link rel="stylesheet" href="http://picturebag.qiniudn.com/monokai.css">添加CSS样式到base.html就可以了.">`添加CSS样式到base.html就可以了">http://picturebag.qiniudn.com/monokai.css">`添加CSS样式到base.html就可以了.
现在启动web服务器, 添加一个带有markdown样式的代码的文章, 就能看到效果了, 在浏览器中输入http://127.0.0.1:8000/


