visTypes案例之clock
优质
小牛编辑
145浏览
2023-12-01
简介
在这个案例中,项目目标是实现一个clock插件,在插件中可以设置时间格式。在这个案例能讲解如何定义一个visType 插件,在visType 插件有哪些特性可以使用。
实践
在 开始写项目之前,先说一下kibana插件对于kibana版本绑定,官方给的已知kibana plugin ,可能大家下载下来在自己 的版本中无法运行,这个时候需要修改一下package.json中的version,该成自己需要使用的版本即可。
在开发之前,先说一下,由于本人不是专业的前端开发人员,对于es6,angular.js经验为零,只能边看教程,边学习,难免存在一些旧思想,欢迎大家指正交流。
准备
首先新建项目 clock(源码详见)
然后利用模板工具生成项目
PS E:\github\kibana\kibana\plugins\clock> sao kibana-plugin
? Name of your plugin? clock
? Provide a short description An awesome Kibana plugin for clock !
? What Kibana version are you targeting? master
? Should an app component be generated? No
? Should translation files be generated? No
? Should an hack component be generated? No
? Should a server API be generated? No
Initialized empty Git repository in E:/github/kibana/kibana/plugins/clock/.git/

> spawn-sync@1.0.15 postinstall E:\github\kibana\kibana\plugins\clock\node_modules\spawn-sync
> node postinstall


> clock@0.0.0 postinstall E:\github\kibana\kibana\plugins\clock
> plugin-helpers postinstall

npm notice created a lockfile as package-lock.json. You should commit this file.
npm WARN clock@0.0.0 No repository field.
npm WARN clock@0.0.0 No license field.

added 361 packages in 32.334s
success Your plugin has been created, use `npm start` to run it
1. 修改index.js
这个文件主要是根据kibana api 定义该插件类型,本次demo 定义插件类型为visTypes.修改内容如下:
export default function (kibana) {
  return new kibana.Plugin({
    name: 'clock',
    uiExports: {
      visTypes:['plugins/clock/clock']
    }
  });
}
2.新增clock.js
该文件根据TemplateVisType定义VisType类型,然后将该类型通过VisVisTypeProvider注册到kibana 中,同时新建一个ClockController,实现时间定时刷新。
const ClockProvider = Private=>{
  const VisFactory = Private(VisFactoryProvider);

  return VisFactory.createAngularVisualization({
    name: 'clock',
    title: 'My Clock',
    icon: 'fa-clock-o',
    category: CATEGORY.OTHER, //指定图标所在分类
    description: 'An awesome Kibana plugin for clock',
    visConfig: {
      defaults: {
        format: 'HH:mm:ss'
      },
      template: ClockTemplate,
    },
    editorConfig: {
      optionsTemplate: EditorTemplate,
    },
    requestHandler: 'none',
    responseHandler: 'none',
    options: {
      showIndexSelection: false,
      showQueryBar: false,
      showFilterBar: false,
    },
  });
};
VisTypesRegistryProvider.register(ClockProvider);
在使用kibana系统中组件时,需要将该资源导入一下,才能够使用,例如:
import {
  uiModules
} from 'ui/modules';
import { VisFactoryProvider } from 'ui/vis/vis_factory';
import { VisTypesRegistryProvider } from 'ui/registry/vis_types';
import { CATEGORY } from 'ui/vis/vis_category';

import ClockTemplate from './clock.html';
import EditorTemplate from './edit.html';
import './clock.css';
通过以下方式新增一个angular.js 的controller.
const module = uiModules.get('kibana/clock', ['kibana']);

// Add a controller to this module
module.controller('ClockController', function ($scope, $timeout) {

  const setTime = function () {
    $scope.time = Date.now();
    $timeout(setTime, 1000);
  };
  setTime();

});
3.新增页面文件
clock.html
该页面显示controller中定义的时钟函数
<div class="clockVis" ng-controller="ClockController">
    {{ time | date:vis.params.format }}
</div>
clock.css
定义页面时钟展示样式
.clockVis {
    width: 100%;
    display: flex;
    align-items: center;
    justify-content: center;
    color: #555;
    font-weight: bold;
    font-size: 2.5em;
}
edit.html
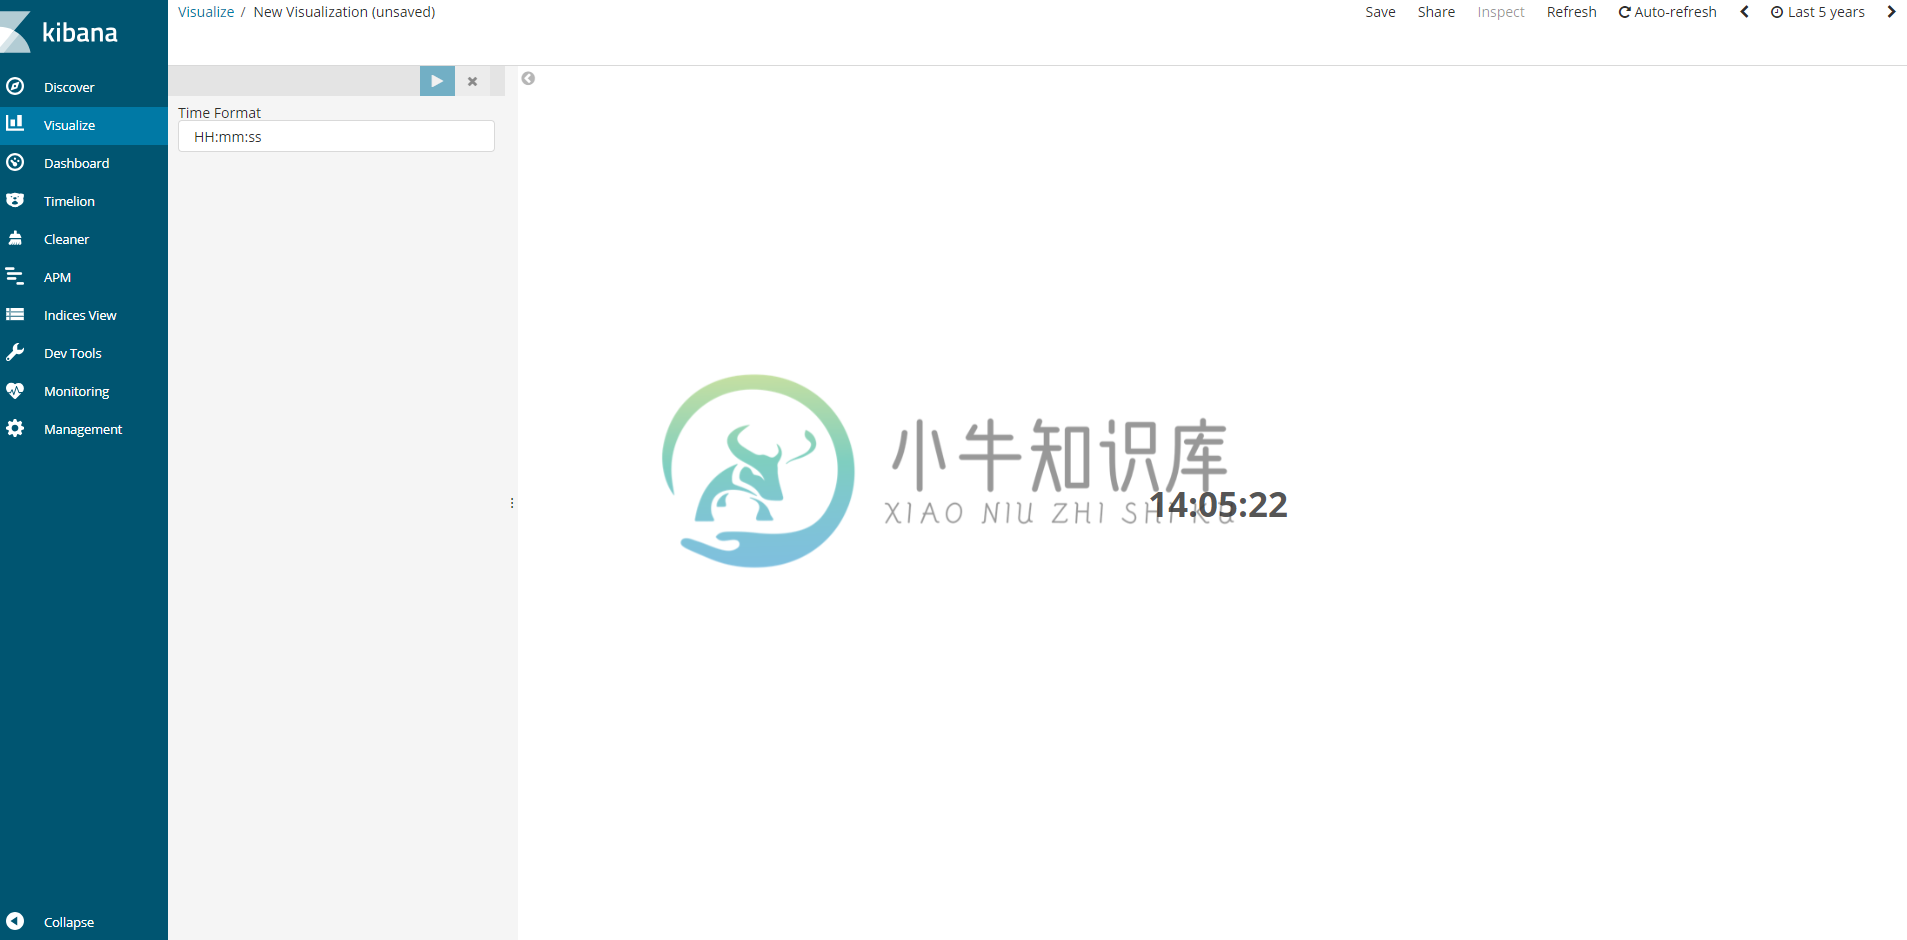
这个页面主要是 作为visTypes组件中Edit,可视化修改中的参数配置。
<div class="form-group">
    <label>Time Format</label>
    <input type="text" ng-model="vis.params.format" class="form-control">
</div>
4.运行
在kibana 根目录下执行 npm start命令即可,效果如下: 


