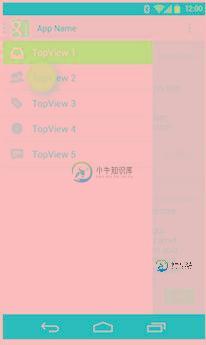
Android App中DrawerLayout抽屉效果的菜单编写实例
抽屉效果的导航菜单
看了很多应用,觉得这种侧滑的抽屉效果的菜单很好。

不用切换到另一个页面,也不用去按菜单的硬件按钮,直接在界面上一个按钮点击,菜单就滑出来,而且感觉能放很多东西。
库的引用:
首先, DrawerLayout这个类是在Support Library里的,需要加上android-support-v4.jar这个包。
然后程序中用时在前面导入import android.support.v4.widget.DrawerLayout;
如果找不到这个类,首先用SDK Manager更新一下Android Support Library,然后在Android SDK\extras\android\support\v4路径下找到android-support-v4.jar,复制到项目的libs路径,将其Add to Build Path.
代码1
布局:
<RelativeLayout xmlns:android="http://schemas.android.com/apk/res/android"
  xmlns:tools="http://schemas.android.com/tools"
  android:layout_width="match_parent"
  android:layout_height="match_parent" >

  <android.support.v4.widget.DrawerLayout
    xmlns:android="http://schemas.android.com/apk/res/android"
    android:id="@+id/drawer_layout"
    android:layout_width="match_parent"
    android:layout_height="match_parent" >

    <!-- The main content view -->
    <!-- main content must be the first element of DrawerLayout because it will be drawn first and drawer must be on top of it -->

    <FrameLayout
      android:id="@+id/content_frame"
      android:layout_width="match_parent"
      android:layout_height="match_parent" />

    <!-- The navigation drawer -->

    <ListView
      android:id="@+id/left_drawer"
      android:layout_width="240dp"
      android:layout_height="match_parent"
      android:layout_gravity="left"
      android:background="#111"
      android:choiceMode="singleChoice"
      android:divider="@android:color/transparent"
      android:dividerHeight="0dp" />
  </android.support.v4.widget.DrawerLayout>

</RelativeLayout>
DrawerLayout的第一个子元素是主要内容,即抽屉没有打开时显示的布局。这里采用了一个FrameLayout,里面什么也没放。
DrawerLayout的第二个子元素是抽屉中的内容,即抽屉布局,这里采用了一个ListView。
主要的Activity(从官方实例中扒出来的):
package com.example.hellodrawer;

import android.os.Bundle;
import android.app.Activity;
import android.content.res.Configuration;
import android.view.MenuItem;
import android.view.View;
import android.widget.AdapterView;
import android.widget.AdapterView.OnItemClickListener;
import android.widget.ArrayAdapter;
import android.widget.ListView;
import android.support.v4.app.ActionBarDrawerToggle;
import android.support.v4.view.GravityCompat;
import android.support.v4.widget.DrawerLayout;

public class HelloDrawerActivity extends Activity
{

  private String[] mPlanetTitles;
  private DrawerLayout mDrawerLayout;
  private ActionBarDrawerToggle mDrawerToggle;
  private ListView mDrawerList;

  @Override
  public void onCreate(Bundle savedInstanceState)
  {
    super.onCreate(savedInstanceState);
    setContentView(R.layout.activity_hello_drawer);

    mDrawerLayout = (DrawerLayout) findViewById(R.id.drawer_layout);

    // init the ListView and Adapter, nothing new
    initListView();

    // set a custom shadow that overlays the main content when the drawer
    // opens
    mDrawerLayout.setDrawerShadow(R.drawable.drawer_shadow,
        GravityCompat.START);

    mDrawerToggle = new ActionBarDrawerToggle(this, mDrawerLayout,
        R.drawable.ic_drawer, R.string.drawer_open,
        R.string.drawer_close)
    {

      /** Called when a drawer has settled in a completely closed state. */
      public void onDrawerClosed(View view)
      {

        invalidateOptionsMenu(); // creates call to
                      // onPrepareOptionsMenu()
      }

      /** Called when a drawer has settled in a completely open state. */
      public void onDrawerOpened(View drawerView)
      {

        invalidateOptionsMenu(); // creates call to
                      // onPrepareOptionsMenu()
      }
    };

    // Set the drawer toggle as the DrawerListener
    mDrawerLayout.setDrawerListener(mDrawerToggle);

    // enable ActionBar app icon to behave as action to toggle nav drawer
    getActionBar().setDisplayHomeAsUpEnabled(true);
    // getActionBar().setHomeButtonEnabled(true);
    // Note: getActionBar() Added in API level 11
  }

  private void initListView()
  {
    mDrawerList = (ListView) findViewById(R.id.left_drawer);

    mPlanetTitles = getResources().getStringArray(R.array.planets_array);

    // Set the adapter for the list view
    mDrawerList.setAdapter(new ArrayAdapter<String>(this,
        R.layout.list_item, mPlanetTitles));
    // Set the list's click listener
    mDrawerList.setOnItemClickListener(new OnItemClickListener()
    {

      @Override
      public void onItemClick(AdapterView<?> parent, View view,
          int position, long id)
      {
        // Highlight the selected item, update the title, and close the
        // drawer
        mDrawerList.setItemChecked(position, true);
        setTitle(mPlanetTitles[position]);
        mDrawerLayout.closeDrawer(mDrawerList);
      }
    });
  }

  @Override
  protected void onPostCreate(Bundle savedInstanceState)
  {
    super.onPostCreate(savedInstanceState);
    // Sync the toggle state after onRestoreInstanceState has occurred.
    mDrawerToggle.syncState();
  }

  @Override
  public void onConfigurationChanged(Configuration newConfig)
  {
    super.onConfigurationChanged(newConfig);
    mDrawerToggle.onConfigurationChanged(newConfig);
  }

  @Override
  public boolean onOptionsItemSelected(MenuItem item)
  {
    // Pass the event to ActionBarDrawerToggle, if it returns
    // true, then it has handled the app icon touch event
    if (mDrawerToggle.onOptionsItemSelected(item))
    {
      return true;
    }
    // Handle your other action bar items...

    return super.onOptionsItemSelected(item);
  }

}
比较纠结的是用了Level 11的一个API,这样minSdkVersion就有限制,不能太低。
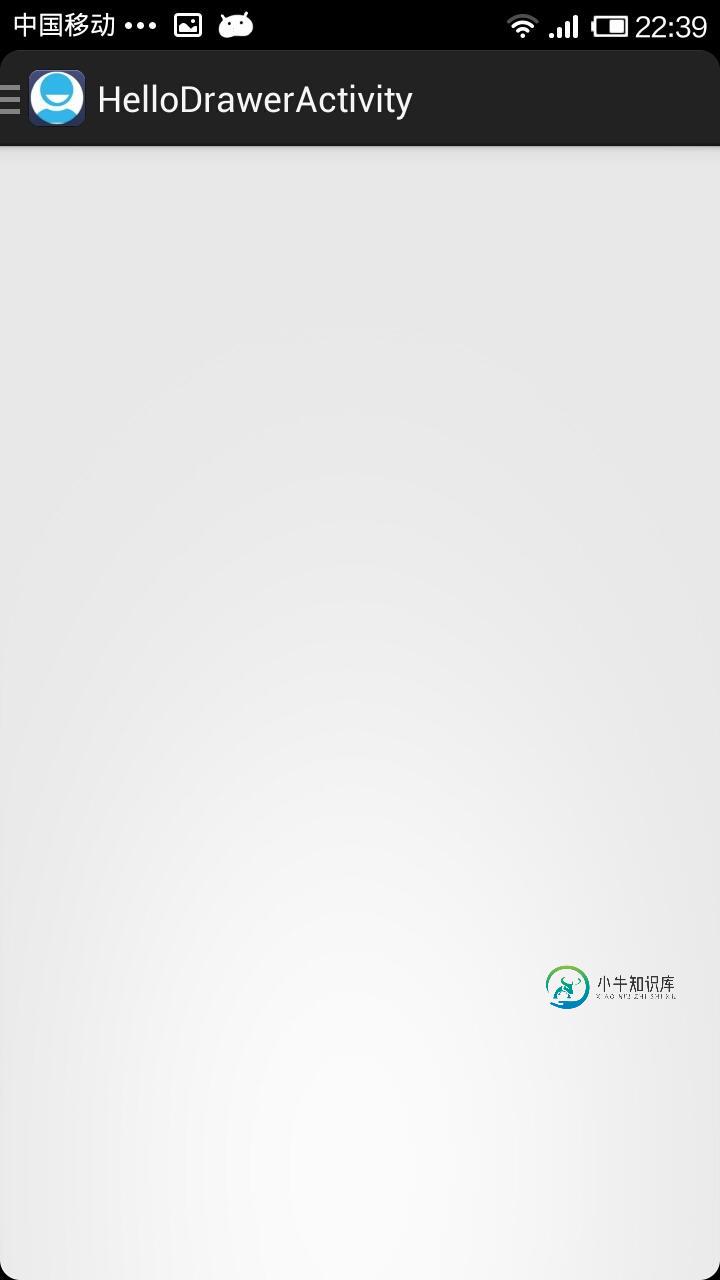
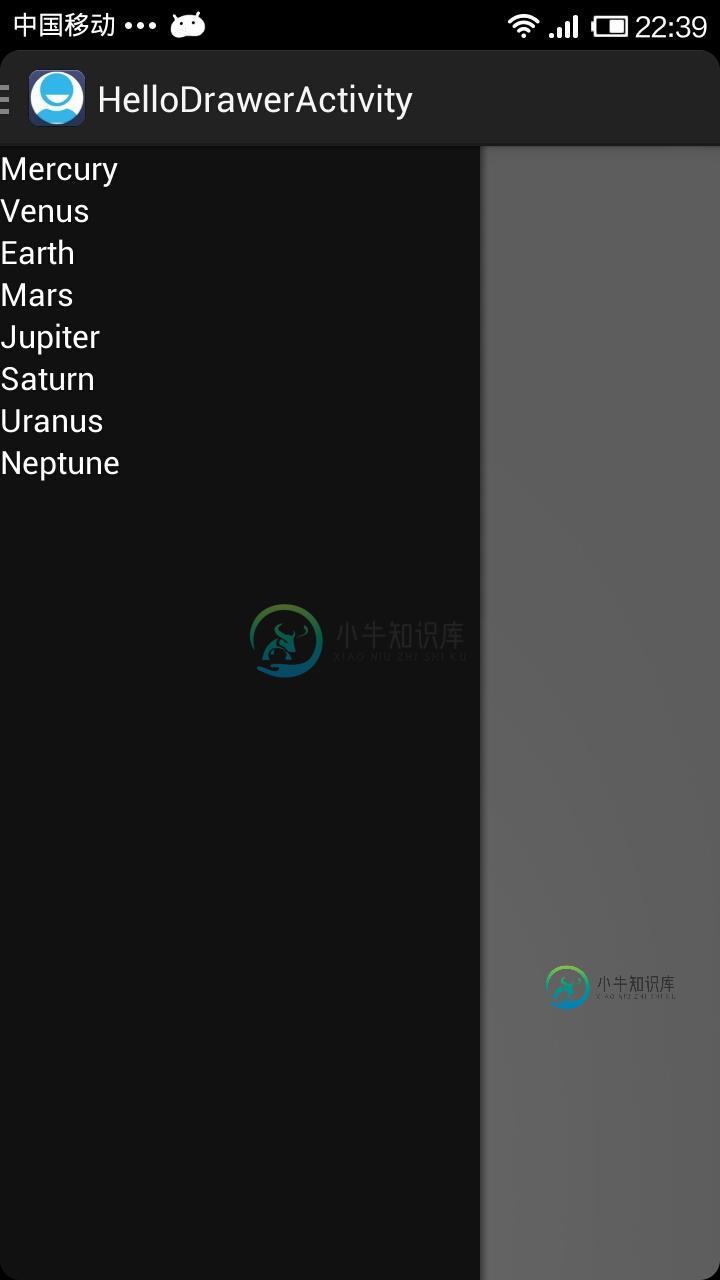
程序运行后效果如下:
抽屉打开前:

抽屉打开后:

代码2
今天又看了一下DrawerLayout的类,发现有很多方法可以直接用的。
重新试了一下,其实不用上面那么麻烦,随便自己定义一个按钮控制抽屉的打开就行:
布局:
<RelativeLayout xmlns:android="http://schemas.android.com/apk/res/android"
  xmlns:tools="http://schemas.android.com/tools"
  android:layout_width="match_parent"
  android:layout_height="match_parent"
  android:paddingBottom="@dimen/activity_vertical_margin"
  android:paddingLeft="@dimen/activity_horizontal_margin"
  android:paddingRight="@dimen/activity_horizontal_margin"
  android:paddingTop="@dimen/activity_vertical_margin"
  tools:context=".DrawerActivity" >

  <android.support.v4.widget.DrawerLayout
    android:id="@+id/drawer_layout"
    android:layout_width="match_parent"
    android:layout_height="match_parent" >

    <!-- The main content view -->

    <FrameLayout
      android:id="@+id/content_frame"
      android:layout_width="match_parent"
      android:layout_height="match_parent" >

      <Button
        android:id="@+id/btn"
        android:layout_width="match_parent"
        android:layout_height="wrap_content"
        android:text="open"
        />
    </FrameLayout>

    <!-- The navigation drawer -->

    <ListView
      android:id="@+id/left_drawer"
      android:layout_width="240dp"
      android:layout_height="match_parent"
      android:layout_gravity="start"
      android:background="#111"
      android:choiceMode="singleChoice"
      android:divider="@android:color/transparent"
      android:dividerHeight="0dp" />
  </android.support.v4.widget.DrawerLayout>

</RelativeLayout>
主要代码:
package com.example.hellodrawer;

import android.os.Bundle;
import android.app.Activity;
import android.support.v4.widget.DrawerLayout;
import android.view.Gravity;
import android.view.View;
import android.view.View.OnClickListener;
import android.widget.Button;

public class DrawerActivity extends Activity
{
  private DrawerLayout mDrawerLayout = null;

  @Override
  protected void onCreate(Bundle savedInstanceState)
  {
    super.onCreate(savedInstanceState);
    setContentView(R.layout.activity_drawer);

    mDrawerLayout = (DrawerLayout) findViewById(R.id.drawer_layout);

    Button button = (Button) findViewById(R.id.btn);
    button.setOnClickListener(new OnClickListener()
    {

      @Override
      public void onClick(View v)
      {
        // 按钮按下,将抽屉打开
        mDrawerLayout.openDrawer(Gravity.LEFT);

      }
    });
  }

}
使用Toolbar + DrawerLayout快速实现高大上菜单侧滑
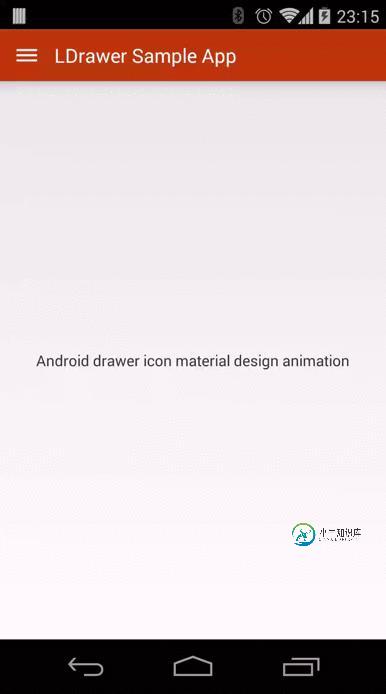
如果你有在关注一些遵循最新的Material Design设计规范的应用的话(如果没有,假设你有!),也许会发现有很多使用了看起来很舒服、很高大上的侧滑菜单动画效果,示例如下(via 参考2):

今天就来使用官方支持库来快速实现这类效果,需要使用到Toolbar和DrawerLayout,详细步骤如下:(如果你还不知道这两个Widget,先自己Google吧~)
首先需要添加appcompat-v7支持:
如果是在Android Studio 1.0 RC4上创建的项目,默认已经添加了appcompat-v7支持了,如果不是最新版AS则需要在build.gradle中添加如下代码:
dependencies {
  ...//其他代码
  compile 'com.android.support:appcompat-v7:21.0.2'
}
添加完成后需要同步一下gradle
添加Toolbar:
由于Toolbar是继承自View,所以可以像其他标准控件一样直接主布局文件添加Toolbar,但是为了提高Toolbar的重用效率,可以在layout创建一个custom_toolbar.xml代码如下:
<?xml version="1.0" encoding="utf-8"?>
  <android.support.v7.widget.Toolbar xmlns:android="http://schemas.android.com/apk/res/android"
    xmlns:app="http://schemas.android.com/apk/res-auto"
    android:id="@+id/tl_custom"
    android:layout_width="match_parent"
    android:layout_height="wrap_content"
    android:background="?attr/colorPrimary"
    android:minHeight="?attr/actionBarSize"
    android:popupTheme="@style/ThemeOverlay.AppCompat.Light"
    app:theme="@style/ThemeOverlay.AppCompat.ActionBar">
</android.support.v7.widget.Toolbar>
说明:
android.support.v7.widget.Toolbar - 当然如果只在Lollipop中可以直接使用Toolbar而不需要加上v7支持
xmlns:app - 自定义xml命名控件,在AS中可以直接指定res-auto而不需要使用完整包名
android:background 和 android:minHeight 均可以在styles.xml中声明
添加DrawerLayout:
和Toolbar类似,为了提高代码重用效率,可以在layout中创建一个custom_drawerlayout.xml代码如下:
<?xml version="1.0" encoding="utf-8"?>
  <android.support.v4.widget.DrawerLayout xmlns:android="http://schemas.android.com/apk/res/android"
    android:id="@+id/dl_left"
    android:layout_width="match_parent"
    android:layout_height="match_parent">
  <!--主布局-->
  <LinearLayout
    android:layout_width="match_parent"
    android:layout_height="match_parent">
    <ImageView
      android:id="@+id/iv_main"
      android:layout_width="100dp"
      android:layout_height="100dp" />
  </LinearLayout>
  <!--侧滑菜单-->
  <LinearLayout
    android:layout_width="match_parent"
    android:layout_height="match_parent"
    android:background="#fff"
    android:layout_gravity="start">
    <ListView
      android:id="@+id/lv_left_menu"
      android:layout_width="match_parent"
      android:layout_height="match_parent"
      android:divider="@null"
      android:text="DrawerLayout" />
  </LinearLayout>
</android.support.v4.widget.DrawerLayout>
Drawerlayout标签中有两个子节点,一个是左边菜单,一个是主布局,另外需要在左边菜单起始位置设置为android:layout_gravity="start"
实现activity_main.xml:
<LinearLayout xmlns:android="http://schemas.android.com/apk/res/android"
  xmlns:tools="http://schemas.android.com/tools"
  android:layout_width="match_parent"
  android:layout_height="match_parent"
  android:orientation="vertical"
  tools:context=".MainActivity">
    <!--Toolbar-->
    <include layout="@layout/custom_toolbar" />
    <!--DrawerLayout-->
    <include layout="@layout/custom_drawerlayout" />
</LinearLayout>
直接使用include标签,简洁明了
完善Java代码:
public class MainActivity extends ActionBarActivity {
  //声明相关变量
  private Toolbar toolbar;
  private DrawerLayout mDrawerLayout;
  private ActionBarDrawerToggle mDrawerToggle;
  private ListView lvLeftMenu;
  private String[] lvs = {"List Item 01", "List Item 02", "List Item 03", "List Item 04"};
  private ArrayAdapter arrayAdapter;
  private ImageView ivRunningMan;
  private AnimationDrawable mAnimationDrawable;
  @Override
  protected void onCreate(Bundle savedInstanceState) {
    super.onCreate(savedInstanceState);
    setContentView(R.layout.activity_main);
    findViews(); //获取控件
    //京东RunningMan动画效果,和本次Toolbar无关
    mAnimationDrawable = (AnimationDrawable) ivRunningMan.getBackground();
    mAnimationDrawable.start();
    toolbar.setTitle("Toolbar");//设置Toolbar标题
    toolbar.setTitleTextColor(Color.parseColor("#ffffff")); //设置标题颜色
    setSupportActionBar(toolbar);
    getSupportActionBar().setHomeButtonEnabled(true); //设置返回键可用
    getSupportActionBar().setDisplayHomeAsUpEnabled(true);
    //创建返回键,并实现打开关/闭监听
    mDrawerToggle = new ActionBarDrawerToggle(this, mDrawerLayout, toolbar, R.string.open, R.string.close) {
      @Override
      public void onDrawerOpened(View drawerView) {
        super.onDrawerOpened(drawerView);
        mAnimationDrawable.stop();
      }
      @Override
      public void onDrawerClosed(View drawerView) {
        super.onDrawerClosed(drawerView);
        mAnimationDrawable.start();
      }
    };
    mDrawerToggle.syncState();
    mDrawerLayout.setDrawerListener(mDrawerToggle);
    //设置菜单列表
    arrayAdapter = new ArrayAdapter(this, android.R.layout.simple_list_item_1, lvs);
    lvLeftMenu.setAdapter(arrayAdapter);
  }
  private void findViews() {
    ivRunningMan = (ImageView) findViewById(R.id.iv_main);
    toolbar = (Toolbar) findViewById(R.id.tl_custom);
    mDrawerLayout = (DrawerLayout) findViewById(R.id.dl_left);
    lvLeftMenu = (ListView) findViewById(R.id.lv_left_menu);
  }
}
当然比较重要还有styles.xml和colors.xml,具体如下:
<resources>
  <style name="AppTheme" parent="Theme.AppCompat.Light.NoActionBar">
    <!--状态栏颜色-->
    <item name="colorPrimaryDark">@color/Indigo_colorPrimaryDark</item>
    <!--Toolbar颜色-->
    <item name="colorPrimary">@color/Indigo_colorPrimary</item>
    <!--返回键样式-->
    <item name="drawerArrowStyle">@style/AppTheme.DrawerArrowToggle</item>
    </style>
    <style name="AppTheme.DrawerArrowToggle" parent="Base.Widget.AppCompat.DrawerArrowToggle">
    <item name="color">@android:color/white</item>
  </style>
</resources>
<?xml version="1.0" encoding="utf-8"?>
<resources>
  <color name="Indigo_colorPrimaryDark">#303f9f</color>
  <color name="Indigo_colorPrimary">#3f51b5</color>
  <color name="Indigo_nav_color">#4675FF</color>
</resources>
到此就实现了高大上菜单侧滑,最终效果如下(注:在Yosemite上貌似直接Record手机屏幕貌似不起作用,而且动画由于帧率原因无法实时,就先这样看吧~)

-
本文向大家介绍Android组件之DrawerLayout实现抽屉菜单,包括了Android组件之DrawerLayout实现抽屉菜单的使用技巧和注意事项,需要的朋友参考一下 DrawerLayout组件同样是V4包中的组件,也是直接继承于ViewGroup类,所以这个类也是一个容器类。 抽屉菜单的摆放和布局通过android:layout_gravity属性来控制,可选值为left、right或
-
本文向大家介绍Android中DrawerLayout实现侧滑菜单效果,包括了Android中DrawerLayout实现侧滑菜单效果的使用技巧和注意事项,需要的朋友参考一下 众所周知,android里面我们很熟悉的一个功能,侧滑菜单效果在以前我们大部分都是用的slidingmenu这个开源框架,自从谷歌官方新出的一个DrawerLayout控件之后,越来越多的应用开始使用谷歌的官方的控件写这个效
-
本文向大家介绍Android实现自定义滑动式抽屉菜单效果,包括了Android实现自定义滑动式抽屉菜单效果的使用技巧和注意事项,需要的朋友参考一下 在Andoird使用Android自带的那些组件,像SlidingDrawer和DrawerLayout都是抽屉效果的菜单,但是在项目很多要实现的功能都收到Android这些自带组件的限制,导致很难完成项目的需求,自定义的组件,各方面都在自己的控制之下
-
我有一个应用程序,在其中我想实现一个双抽屉--一个从左边,一个从右边。左抽屉是app导航,右抽屉是结果过滤。 有几个解决方案我正在尝试: 在右侧使用与左侧相同的行为和动画制作相同的DrawerToggle按钮。 使我试图打开的抽屉对面的抽屉自动关闭(如果左抽屉打开,而我按右抽屉的切换键,反之亦然)。 我还没想好怎么做,因为DrawerToggle接受DrawerLayout本身作为参数,而不是单个
-
你好,我有一个关于Android导航抽屉的问题。我在我的应用程序中包含了导航抽屉,一切都很顺利,但我想将图像添加到列表中的每个菜单中。 我是Android新手,所以如果有人能帮助我,我将不胜感激,这是导航抽屉的源代码 http://javatechig.com/android/navigation-drawer-android-example 这是我的WebViewFragments文件 这是我的
-
我在我的应用程序中以稍微不同的方式实现了抽屉菜单。但是抽屉不能顺利地打开或关闭。它在两者之间滞后。在谷歌应用程序中,抽屉菜单是如此流畅。我是如何实现的?这个问题已经在这里问过了,但它没有满足我的需求。请帮助! XML Java语言

