Dva 中文教程
本章节会引导开发者快速搭建 dva 项目,并熟悉他的所有概念。
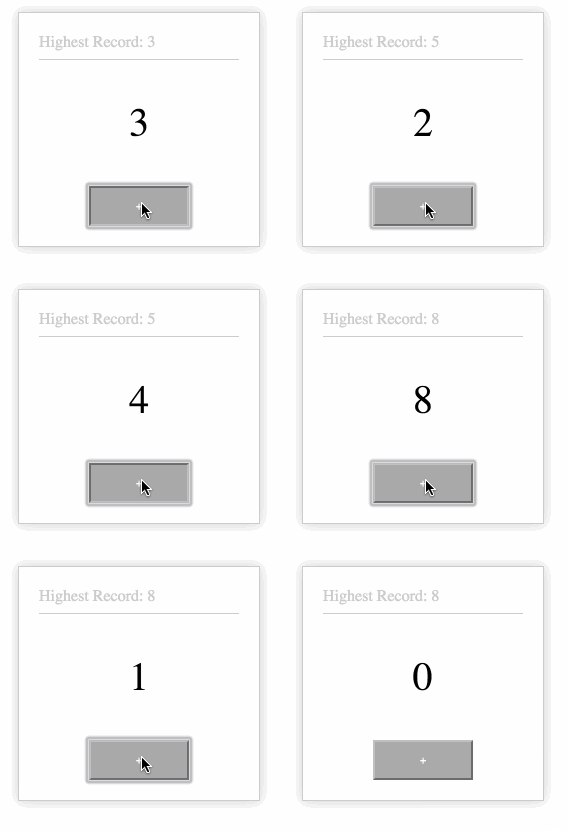
最终效果:

这是一个测试鼠标点击速度的 App,记录 1 秒内用户能最多点几次。顶部的 Highest Record 纪录最高速度;中间的是当前速度,给予即时反馈,让用户更有参与感;下方是供点击的按钮。
看到这个需求,我们可能会想:
- 该如何创建应用?
- 创建完后,该如何一步步组织代码?
- 开发完后,该如何构建、部署和发布?
在代码组织部分,可能会想:
- 如何写 Component ?
- 如何写样式?
- 如何写 Model ?
- 如何 connect Model 和 Component ?
- 用户操作后,如何更新数据到 State ?
- 如何处理异步逻辑? (点击之后 +1,然后延迟一秒 -1)
- 如何处理路由?
以及:
- 不想每次刷新 Highest Record 清 0,想通过 localStorage 记录,这样刷新之后还能保留 Highest Record。该如何处理?
- 希望同时支持键盘的点击测速,又该如何处理?
我们可以带着这些问题来看这篇文章,但不必担心有多复杂,因为全部 JavaScript 代码只有 70 多行。
安装 dva-cli
你应该会更希望关注逻辑本身,而不是手动敲入一行行代码来构建初始的项目结构,以及配置开发环境。
那么,首先需要安装的是 dva-cli 。dva-cli 是 dva 的命令行工具,包含 init、new、generate 等功能,目前最重要的功能是可以快速生成项目以及你所需要的代码片段。
$ npm install -g dva-cli
安装完成后,可以通过 dva -v 查看版本,以及 dva -h 查看帮助信息。
创建新应用
安装完 dva-cli 后,我们用他来创建一个新应用,取名 myApp。
$ dva new myApp --demo
注意:--demo 用于创建简单的 demo 级项目,正常项目初始化不加要这个参数。
然后进入项目目录,并启动。
$ cd myApp
$ npm start
几秒之后,会看到这样的输出:
          proxy: listened on 8989
     livereload: listening on 35729
   173/173 build modules
webpack: bundle build is now finished.
(如需关闭 server,请按 Ctrl-C.)
在浏览器里打开 http://localhost:8989/ ,正常情况下,你会看到一个 "Hello Dva" 页面。
定义 model
接到需求之后推荐的做法不是立刻编码,而是先以上帝模式做整体设计。
- 先设计 model
- 再设计 component
- 最后连接 model 和 component
这个需求里,我们定义 model 如下:
app.model({
  namespace: 'count',
  state: {
    record : 0,
    current: 0,
  },
});
namespace 是 model state 在全局 state 所用的 key,state 是默认数据。然后 state 里的 record 表示 highest record,current 表示当前速度。
完成 component
完成 Model 之后,我们来编写 Component 。推荐尽量通过 stateless functions 的方式组织 Component,在 dva 的架构里我们基本上不需要用到 state 。
import styles from './index.less';
const CountApp = ({count, dispatch}) => {
  return (
    <div className={styles.normal}>
      <div className={styles.record}>Highest Record: {count.record}</div>
      <div className={styles.current}>{count.current}</div>
      <div className={styles.button}>
        <button onClick={() => { dispatch({type: 'count/add'}); }}>+</button>
      </div>
    </div>
  );
};
注意:
- 这里先
import styles from './index.less';,再通过styles.xxx的方式声明 css classname 是基于 css-modules 的方式,后面的样式部分会用上 - 通过 props 传入两个值,
count和dispatch,count对应 model 上的 state,在后面 connect 的时候绑定,dispatch用于分发 action dispatch({type: 'count/add'})表示分发了一个{type: 'count/add'}的 action,至于什么是 action,详见:Actions@redux.js.org
更新 state
更新 state 是通过 reducers 处理的,详见 Reducers@redux.js.org。
reducer 是唯一可以更新 state 的地方,这个唯一性让我们的 App 更具可预测性,所有的数据修改都有据可查。reducer 是 pure function,他接收参数 state 和 action,返回新的 state,通过语句表达即 (state, action) => newState。
这个需求里,我们需要定义两个 reducer,add 和 minus,分别用于计数的增和减。值得注意的是 add 时 record 的逻辑,他只在有更高的记录时才会被记录。
请注意,这里的
add和minus两个action,在countmodel 的定义中是不需要加 namespace 前缀的,但是在自身模型以外是需要加 model 的 namespace
app.model({
  namespace: 'count',
  state: {
    record: 0,
    current: 0,
  },
+ reducers: {
+   add(state) {
+     const newCurrent = state.current + 1;
+     return { ...state,
+       record: newCurrent > state.record ? newCurrent : state.record,
+       current: newCurrent,
+     };
+   },
+   minus(state) {
+     return { ...state, current: state.current - 1};
+   },
+ },
});
注意:
{ ...state }里的...是对象扩展运算符,类似Object.extend,详见:对象的扩展运算符add(state) {}等同于add: function(state) {}
绑定数据
还记得之前的 Component 里用到的 count 和 dispatch 吗? 会不会有疑问他们来自哪里?
在定义了 Model 和 Component 之后,我们需要把他们连接起来。这样 Component 里就能使用 Model 里定义的数据,而 Model 中也能接收到 Component 里 dispatch 的 action 。
这个需求里只要用到 count。
function mapStateToProps(state) {
  return { count: state.count };
}
const HomePage = connect(mapStateToProps)(CountApp);
这里的 connect 来自 react-redux。
定义路由
接收到 url 之后决定渲染哪些 Component,这是由路由决定的。
这个需求只有一个页面,路由的部分不需要修改。
app.router(({history}) =>
  <Router history={history}>
    <Route path="/" component={HomePage} />
  </Router>
);
注意:
history默认是 hashHistory 并且带有_k参数,可以换成 browserHistory,也可以通过配置去掉_k参数。
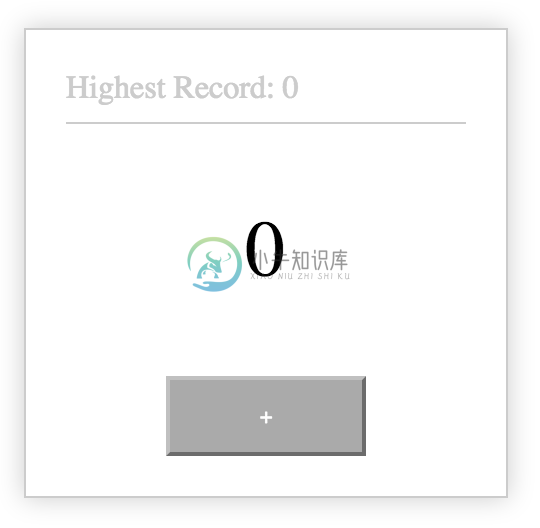
现在刷新浏览器,如果一切正常,应该能看到下面的效果:

添加样式
默认是通过 css modules 的方式来定义样式,这和普通的样式写法并没有太大区别,由于之前已经在 Component 里 hook 了 className,这里只需要在 index.less 里填入以下内容:
.normal {
  width: 200px;
  margin: 100px auto;
  padding: 20px;
  border: 1px solid #ccc;
  box-shadow: 0 0 20px #ccc;
}

.record {
  border-bottom: 1px solid #ccc;
  padding-bottom: 8px;
  color: #ccc;
}

.current {
  text-align: center;
  font-size: 40px;
  padding: 40px 0;
}

.button {
  text-align: center;
  button {
    width: 100px;
    height: 40px;
    background: #aaa;
    color: #fff;
  }
}
效果如下:

异步处理
在此之前,我们所有的操作处理都是同步的,用户点击 + 按钮,数值加 1。
现在我们要开始处理异步任务,dva 通过对 model 增加 effects 属性来处理 side effect(异步任务),这是基于 redux-saga 实现的,语法为 generator。(但是,这里不需要我们理解 generator,知道用法就可以了)
在这个需求里,当用户点 + 按钮,数值加 1 之后,会额外触发一个 side effect,即延迟 1 秒之后数值 1 。
app.model({
  namespace: 'count',
+ effects: {
+   *add(action, { call, put }) {
+     yield call(delay, 1000);
+     yield put({ type: 'minus' });
+   },
+ },
...
+function delay(timeout){
+  return new Promise(resolve => {
+    setTimeout(resolve, timeout);
+  });
+}
注意:
*add() {}等同于add: function*(){}- call 和 put 都是 redux-saga 的 effects,call 表示调用异步函数,put 表示 dispatch action,其他的还有 select, take, fork, cancel 等,详见 redux-saga 文档
- 默认的 effect 触发规则是每次都触发(
takeEvery),还可以选择takeLatest,或者完全自定义take规则
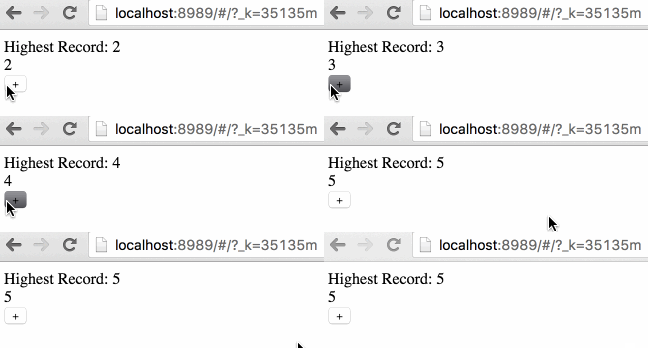
刷新浏览器,正常的话,就应该已经实现了最开始需求图里的所有要求。
订阅键盘事件
在实现了鼠标测速之后,怎么实现键盘测速呢?
在 dva 里有个叫 subscriptions 的概念,他来自于 elm。
Subscription 语义是订阅,用于订阅一个数据源,然后根据条件 dispatch 需要的 action。数据源可以是当前的时间、服务器的 websocket 连接、keyboard 输入、geolocation 变化、history 路由变化等等。
dva 中的 subscriptions 是和 model 绑定的。
+import key from 'keymaster';
...
app.model({
  namespace: 'count',
+ subscriptions: {
+   keyboardWatcher({ dispatch }) {
+     key('⌘+up, ctrl+up', () => { dispatch({type:'add'}) });
+   },
+ },
});
这里我们不需要手动安装 keymaster 依赖,在我们敲入 import key from 'keymaster'; 并保存的时候,dva-cli 会为我们安装 keymaster 依赖并保存到 package.json 中。输出如下:
use npm: tnpm
Installing `keymaster`...
[keymaster@*] installed at node_modules/.npminstall/keymaster/1.6.2/keymaster (1 packages, use 745ms, speed 24.06kB/s, json 2.98kB, tarball 15.08kB)
All packages installed (1 packages installed from npm registry, use 755ms, speed 23.93kB/s, json 1(2.98kB), tarball 15.08kB)
2/2 build modules
webpack: bundle build is now finished.
所有代码
index.js
import dva, { connect } from 'dva';
import { Router, Route } from 'dva/router';
import React from 'react';
import styles from './index.less';
import key from 'keymaster';

const app = dva();

app.model({
  namespace: 'count',
  state: {
    record: 0,
    current: 0,
  },
  reducers: {
    add(state) {
      const newCurrent = state.current + 1;
      return { ...state,
        record: newCurrent > state.record ? newCurrent : state.record,
        current: newCurrent,
      };
    },
    minus(state) {
      return { ...state, current: state.current - 1};
    },
  },
  effects: {
    *add(action, { call, put }) {
      yield call(delay, 1000);
      yield put({ type: 'minus' });
    },
  },
  subscriptions: {
    keyboardWatcher({ dispatch }) {
      key('⌘+up, ctrl+up', () => { dispatch({type:'add'}) });
    },
  },
});

const CountApp = ({count, dispatch}) => {
  return (
    <div className={styles.normal}>
      <div className={styles.record}>Highest Record: {count.record}</div>
      <div className={styles.current}>{count.current}</div>
      <div className={styles.button}>
        <button onClick={() => { dispatch({type: 'count/add'}); }}>+</button>
      </div>
    </div>
  );
};

function mapStateToProps(state) {
  return { count: state.count };
}
const HomePage = connect(mapStateToProps)(CountApp);

app.router(({history}) =>
  <Router history={history}>
    <Route path="/" component={HomePage} />
  </Router>
);

app.start('#root');


// ---------
// Helpers

function delay(timeout){
  return new Promise(resolve => {
    setTimeout(resolve, timeout);
  });
}
构建应用
我们已在开发环境下进行了验证,现在需要部署给用户使用。敲入以下命令:
$ npm run build
输出:
> @ build /private/tmp/dva-quickstart
> atool-build

Child
    Time: 6891ms
        Asset       Size  Chunks             Chunk Names
    common.js    1.18 kB       0  [emitted]  common
     index.js     281 kB    1, 0  [emitted]  index
    index.css  353 bytes    1, 0  [emitted]  index
该命令成功执行后,编译产物就在 dist 目录下。
下一步
通过完成这个简单的例子,大家前面的问题是否都已经有了答案? 以及是否熟悉了 dva 包含的概念:model, router, reducers, effects, subscriptions ?
下一步可以进入 tutorial 了解更多。

