5.8 推荐一个 PHP 管道插件 League\Pipeline

Pipeline 设计模式
水管太长,只要有一处破了,就会漏水了,而且不利于复杂环境弯曲转折使用。所以我们都会把水管分成很短的一节一节管道,然后最大化的让管道大小作用不同,因地制宜,组装在一起,满足各种各样的不同需求。
由此得出 Pipeline 的设计模式,就是将复杂冗长的流程 (processes) 截成各个小流程,小任务。每个最小量化的任务就可以复用,通过组装不同的小任务,构成复杂多样的流程 (processes)。
最后将「输入」引入管道,根据每个小任务对输入进行操作 (加工、过滤),最后输出满足需要的结果。
今天主要学习学习「Pipeline」,顺便推荐一个 PHP 插件:league/pipeline。
gulp
第一次知道「pipe」的概念,来自 gulp 的使用。

gulp 是基于 NodeJS 的自动任务运行器,她能自动化地完成Javascript、sass、less 等文件的测试、检查、合并、压缩、格式化、浏览器自动刷新、部署文件生成,并监听文件在改动后重复指定的这些步骤。在实现上,她借鉴了 Unix 操作系统的管道 (pipe) 思想,前一级的输出,直接变成后一级的输入,使得在操作上非常简单。
var gulp = require('gulp');
var less = require('gulp-less');
var minifyCSS = require('gulp-csso');
var concat = require('gulp-concat');
var sourcemaps = require('gulp-sourcemaps');

gulp.task('css', function(){
  return gulp.src('client/templates/*.less')
    .pipe(less())
    .pipe(minifyCSS())
    .pipe(gulp.dest('build/css'))
});

gulp.task('js', function(){
  return gulp.src('client/javascript/*.js')
    .pipe(sourcemaps.init())
    .pipe(concat('app.min.js'))
    .pipe(sourcemaps.write())
    .pipe(gulp.dest('build/js'))
});

gulp.task('default', [ 'html', 'css', 'js' ]);
上面的两个 task 主要是将 less、所有 js 文件进行解析、压缩、输出等流程操作,然后存到对应的文件夹下;每一步操作的输出就是下一步操作的输入,犹如管道的流水一般。
Illuminate\Pipeline
Laravel 框架中的中间件,就是利用 Illuminate\Pipeline 来实现的,本来想写写我对 「Laravel 中间件」源码的解读,但发现网上已经有很多帖子都有表述了,所以本文就简单说说如何使用 Illuminate\Pipeline。
写个 demo
public function demo(Request $request)
{
    $pipe1 = function ($payload, Closure $next) {
        $payload = $payload + 1;
        return $next($payload);
    };

    $pipe2 = function ($payload, Closure $next) {
        $payload = $payload * 3;
        return $next($payload);
    };

    $data = $request->input('data', 0);

    $pipeline = new Pipeline();

    return $pipeline
        ->send($data)
        ->through([$pipe1, $pipe2])
        ->then(function ($data) {
            return $data;
        });
}


对于该源码的分析,可以推荐看这篇文章,分析的挺透彻了:
Laravel Pipeline 组件的实现 https://www.insp.top/article/realization-of-pipeline-component-for-laravel
League\Pipeline
上面对 gulp 和 Illuminate\Pipeline 的简单使用,只是告诉我们「Pipeline」应用比较广泛。如果让我们自己也写一个类似的插件出来呢,我想应该也不是很难。
下面我拿 League\Pipeline 插件来扒一扒它的源代码,看如何实现的。
简述
This package provides a plug and play implementation of the Pipeline Pattern. It’s an architectural pattern which encapsulates sequential processes. When used, it allows you to mix and match operation, and pipelines, to create new execution chains. The pipeline pattern is often compared to a production line, where each stage performs a certain operation on a given payload/subject. Stages can act on, manipulate, decorate, or even replace the payload.
If you find yourself passing results from one function to another to complete a series of tasks on a given subject, you might want to convert it into a pipeline.
安装插件
composer require league/pipeline
写个 demo
use League\Pipeline\Pipeline;

// 创建两个闭包函数
$pipe1 = function ($payload) {
    return $payload + 1;
};

$pipe2 = function ($payload) {
    return $payload * 3;
};

$route->map(
    'GET',
    '/demo',
    function (ServerRequestInterface $request, ResponseInterface $response
    ) use ($service, $pipe1, $pipe2) {
        $params = $request->getQueryParams();

        // 正常使用
        $pipeline1 = (new Pipeline)
            ->pipe($pipe1)
            ->pipe($pipe2);

        $callback1 = $pipeline1->process($params['data']);

        $response->getBody()->write("<h1>正常使用</h1>");
        $response->getBody()->write("<p>结果:$callback1</p>");

        // 使用魔术方法
        $pipeline2 = (new Pipeline())
            ->pipe($pipe1)
            ->pipe($pipe2);

        $callback2 = $pipeline2($params['data']);

        $response->getBody()->write("<h1>使用魔术方法</h1>");
        $response->getBody()->write("<p>结果:$callback2</p>");

        // 使用 Builder
        $builder = new PipelineBuilder();
        $pipeline3 = $builder
            ->add($pipe1)
            ->add($pipe2)
            ->build();

        $callback3 = $pipeline3($params['data']);

        $response->getBody()->write("<h1>使用 Builder</h1>");
        $response->getBody()->write("<p>结果:$callback3</p>");
        return $response;
    }
);
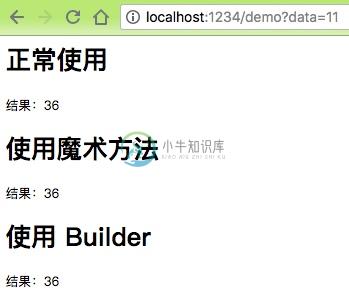
运行结果

解读源代码
整个插件就这几个文件:
PipelineInterface
<?php
declare(strict_types=1);

namespace League\Pipeline;

interface PipelineInterface extends StageInterface
{
    /**
     * Create a new pipeline with an appended stage.
     *
     * @return static
     */
    public function pipe(callable $operation): PipelineInterface;
}

interface StageInterface
{
    /**
     * Process the payload.
     *
     * @param mixed $payload
     *
     * @return mixed
     */
    public function __invoke($payload);
}
该接口主要是利用链式编程的思想,不断添加管道「pipe」,然后增加一个魔术方法,来让传入的参数运转起来。
先看看这个魔术方法的作用:
mixed __invoke ([ $... ] )当尝试以调用函数的方式调用一个对象时,__invoke() 方法会被自动调用。
<?php
class CallableClass
{
    function __invoke($x) {
        var_dump($x);
    }
}
$obj = new CallableClass;
$obj(5);
var_dump(is_callable($obj));
?>
返回结果:
int(5)
bool(true)
Pipeline
<?php
declare(strict_types=1);

namespace League\Pipeline;

class Pipeline implements PipelineInterface
{
    /**
     * @var callable[]
     */
    private $stages = [];

    /**
     * @var ProcessorInterface
     */
    private $processor;

    public function __construct(ProcessorInterface $processor = null, callable ...$stages)
    {
        $this->processor = $processor ?? new FingersCrossedProcessor;
        $this->stages = $stages;
    }

    public function pipe(callable $stage): PipelineInterface
    {
        $pipeline = clone $this;
        $pipeline->stages[] = $stage;

        return $pipeline;
    }

    public function process($payload)
    {
        return $this->processor->process($payload, ...$this->stages);
    }

    public function __invoke($payload)
    {
        return $this->process($payload);
    }
}
其中核心类 Pipeline 的作用主要就是两个:
- 添加组装各个管道「pipe」;
- 组装后,引水流动,执行 process($payload),输出结果。
Processor
接好各种管道后,那就要「引水入渠」了。该插件提供了两个基础执行类,比较简单,直接看代码就能懂。
// 按照 $stages 数组顺利,遍历执行管道方法,再将结果传入下一个管道,让「水」一层层「流动」起来
class FingersCrossedProcessor implements ProcessorInterface
{
    public function process($payload, callable ...$stages)
    {
        foreach ($stages as $stage) {
            $payload = $stage($payload);
        }

        return $payload;
    }
}

// 增加一个额外的「过滤网」,经过每个管道后的结果,都需要 check,一旦满足则终止,直接输出结果。
class InterruptibleProcessor implements ProcessorInterface
{
    /**
     * @var callable
     */
    private $check;

    public function __construct(callable $check)
    {
        $this->check = $check;
    }

    public function process($payload, callable ...$stages)
    {
        $check = $this->check;

        foreach ($stages as $stage) {
            $payload = $stage($payload);

            if (true !== $check($payload)) {
                return $payload;
            }
        }

        return $payload;
    }
}

interface ProcessorInterface
{
    /**
     * Process the payload using multiple stages.
     *
     * @param mixed $payload
     *
     * @return mixed
     */
    public function process($payload, callable ...$stages);
}
我们完全也可以利用该接口,实现我们的方法来组装管道和「过滤网」。
PipelineBuilder
最后提供了一个 Builder,这个也很好理解:
class PipelineBuilder implements PipelineBuilderInterface
{
    /**
     * @var callable[]
     */
    private $stages = [];

    /**
     * @return self
     */
    public function add(callable $stage): PipelineBuilderInterface
    {
        $this->stages[] = $stage;

        return $this;
    }

    public function build(ProcessorInterface $processor = null): PipelineInterface
    {
        return new Pipeline($processor, ...$this->stages);
    }
}

interface PipelineBuilderInterface
{
    /**
     * Add an stage.
     *
     * @return self
     */
    public function add(callable $stage): PipelineBuilderInterface;

    /**
     * Build a new Pipeline object.
     */
    public function build(ProcessorInterface $processor = null): PipelineInterface;
}
总结
无论是对不同技术的横向理解,还是基于 Laravel 或者某些开源插件,我们都能学习到技术之上的通用原理和方法。再将这些原理和方法反作用于我们的实际代码开发中。
最近闲来没事,自己参考 Laravel 去写个简易框架,也将League\Pipeline 引入到框架中使用。
「未完待续」

