分布式服务层 - 集成Swagger UI
5.4 ABP分布式服务 - 集成SwaggerUI
5.4.1 简介
从官网得知,开启Swagger,你可以获得一个交互式的文档,生成和发现客户端SDK。
5.4.2 ASP.NET Core
1. 安装
你可以很容易的集成Swagger到基于ASP.NET Core的 ABP项目。
2. 安装Nuget包
安装 Swashbuckle nuget包到你的Web项目。
3. 配置
在 Startup.cs 文件中找到 ConfigureServices 方法,并在该方法中为Swagger添加配置代码。
public IServiceProvider ConfigureServices(IServiceCollection services){//其它代码...services.AddSwaggerGen();//其它代码...}
然后在 Startup.cs 的 Configure 方法中添加如下配置:
public void Configure(IApplicationBuilder app, IHostingEnvironment env, ILoggerFactory loggerFactory){//其它代码...app.UseSwagger();app.UseSwaggerUi(); //URL: /swagger/ui}
在你使用 swgger ui 测试动态 Web Api 的时候,为了同时能够发送 CSRF token,你需要添加 swgger ui的 index.html 文件到你的web项目。该文件应该精确的放在 wwwroot\swagger\ui 文件夹下。然后你需要更改swagger ui的index.html中已定义的 onComplete 方法,如下所示:
onComplete: function(swaggerApi, swaggerUi){if(typeof initOAuth == "function") {initOAuth({clientId: "your-client-id",clientSecret: "your-client-secret-if-required",realm: "your-realms",appName: "your-app-name",scopeSeparator: " ",additionalQueryStringParams: {}});}if(window.SwaggerTranslator) {window.SwaggerTranslator.translate();}var csrfToken = abp.security.antiForgery.getToken();var csrfCookieAuth = new SwaggerClient.ApiKeyAuthorization(abp.security.antiForgery.tokenHeaderName, csrfToken, "header");swaggerUi.api.clientAuthorizations.add(abp.security.antiForgery.tokenHeaderName, csrfCookieAuth);}
了解更多的配置选项请参考Swashbuckle的文档。
5.4.3 ASP.NET 5.x
1. 安装
你可以很容易的集成Swagger到基于ABP创建的项目中。
2. Nuget安装
安装 Swashbuckle.Core到你的WebApi项目或者Web项目
2. 配置
在你的模块的 Initialize 方法中添加配置Swagger的代码,如下所示:
public class SwaggerIntegrationDemoWebApiModule : AbpModule{public override void Initialize(){//其它代码...ConfigureSwaggerUi();}private void ConfigureSwaggerUi(){Configuration.Modules.AbpWebApi().HttpConfiguration.EnableSwagger(c =>{c.SingleApiVersion("v1", "SwaggerIntegrationDemo.WebApi");c.ResolveConflictingActions(apiDescriptions => apiDescriptions.First());}).EnableSwaggerUi(c =>{c.InjectJavaScript(Assembly.GetAssembly(typeof(AbpProjectNameWebApiModule)), "AbpCompanyName.AbpProjectName.Api.Scripts.Swagger-Custom.js");});}}
注意:在配置swagger ui的时候,我们注入的脚本文件名称是 Swagger-Custom.js。当你使用swagger ui来测试动态web api的时候,这个脚本文件被用来添加 CSRF token 到你的请求头中。你需要添加这个文件到你的WebApi项目中,并使用它的逻辑名(例如:你的项目名称.文件夹名称.脚本文件名称)在InjectJavaScript方法中注入它,该脚本文件一定要设置为 Embedded Resource。
该文件中的脚本内容如下:
var getCookieValue = function(key) {var equalities = document.cookie.split('; ');for (var i = 0; i < equalities.length; i++) {if (!equalities[i]) {continue;}var splitted = equalities[i].split('=');if (splitted.length !== 2) {continue;}if (decodeURIComponent(splitted[0]) === key) {return decodeURIComponent(splitted[1] || '');}}return null;};var csrfCookie = getCookieValue("XSRF-TOKEN");var csrfCookieAuth = new SwaggerClient.ApiKeyAuthorization("X-XSRF-TOKEN", csrfCookie, "header");swaggerUi.api.clientAuthorizations.add("X-XSRF-TOKEN", csrfCookieAuth);
更多配置请参考Swashbuckle文档
5.4.4. 测试
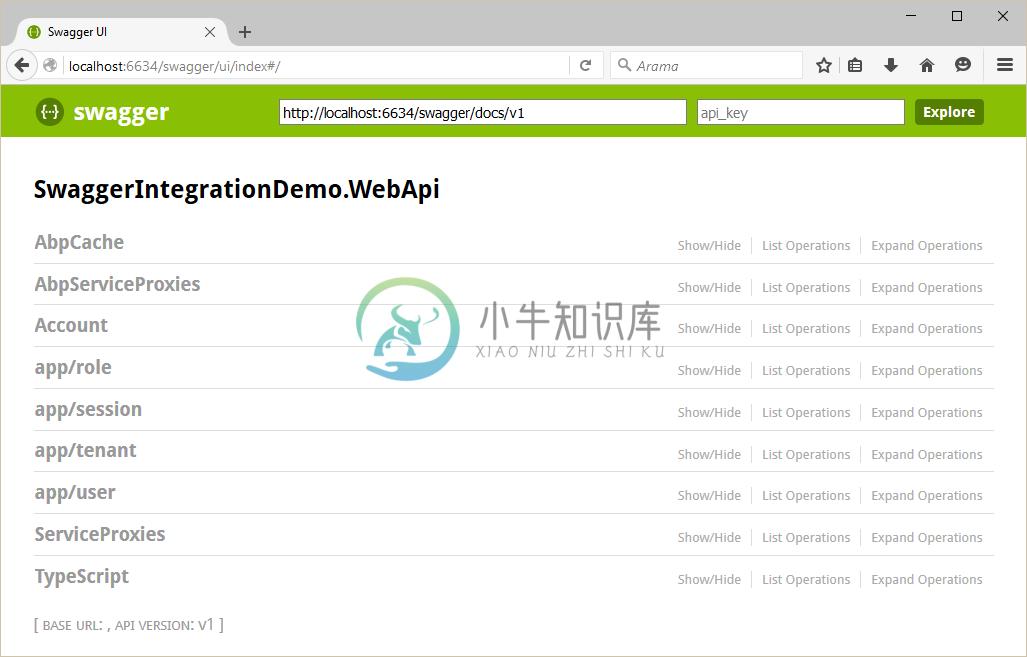
按照如上配置后,让我们来浏览下文档 /swagger/ui/index:

你能看到所有的 Web Api Controllers 包括动态 Web Api Controllers,并且现在你可以测试它们。

