NativeScript Star Printer
That's the demo app in action, printing on a Star Micronics TSP650II
Installation
For NativeScript 7+, please use plugin version 4+
tns plugin add nativescript-star-printer
API
requiring / importing the plugin
All examples below assume you're using TypeScript, but here's how to require the plugin with plain old JS as well:
JavaScript
var StarPrinterPlugin = require("nativescript-star-printer");
var starPrinter = new StarPrinterPlugin.StarPrinter();
TypeScript
import { StarPrinter, SPPrinter, SPCommands } from "nativescript-star-printer";

export Class MyPrintingClass {
  private starPrinter: StarPrinter;

  constructor() {
    this.starPrinter = new StarPrinter();
  }
}
searchPrinters
If you're searching for a Bluetooth printer, enable Bluetooth in the device settingsand pair/connect the printer. Then do:
this.starPrinter.searchPrinters().then(
    (printers: Array<SPPrinter>) => {
      console.log(`Found ${printers.length} printers`);
    }, (err: string) => {
      console.log(`Search printers error: ${err}`);
    });
The most useful property on the SPPrinter class is the portName which you will needin other API methods.
The only other property is modelName.
connect
Once you know the printer port name, you can connect to it.
Note that there's no need to connect if you want to print as the print function does this automatically.
this.starPrinter.connect({
  portName: thePortName
}).then((result: SPPrinterStatusResult) => console.log("Connected: " + result.connected));
getPrinterStatus
After connecting to a printer, you can use this method to poll for the 'online' and 'paper' statuses.
this.starPrinter.getPrinterStatus({
  portName: this.lastConnectedPrinterPort
}).then(result => {
  const online: boolean = result.online;
  const onlineStatus: PrinterOnlineStatus = result.onlineStatus;
  const paperStatus: PrinterPaperStatus = result.paperStatus;
});
print
Once you've got the port of the printer you want to print to, just do:
this.starPrinter.print({
  portName: this.selectedPrinterPort,
  commands: commands
});
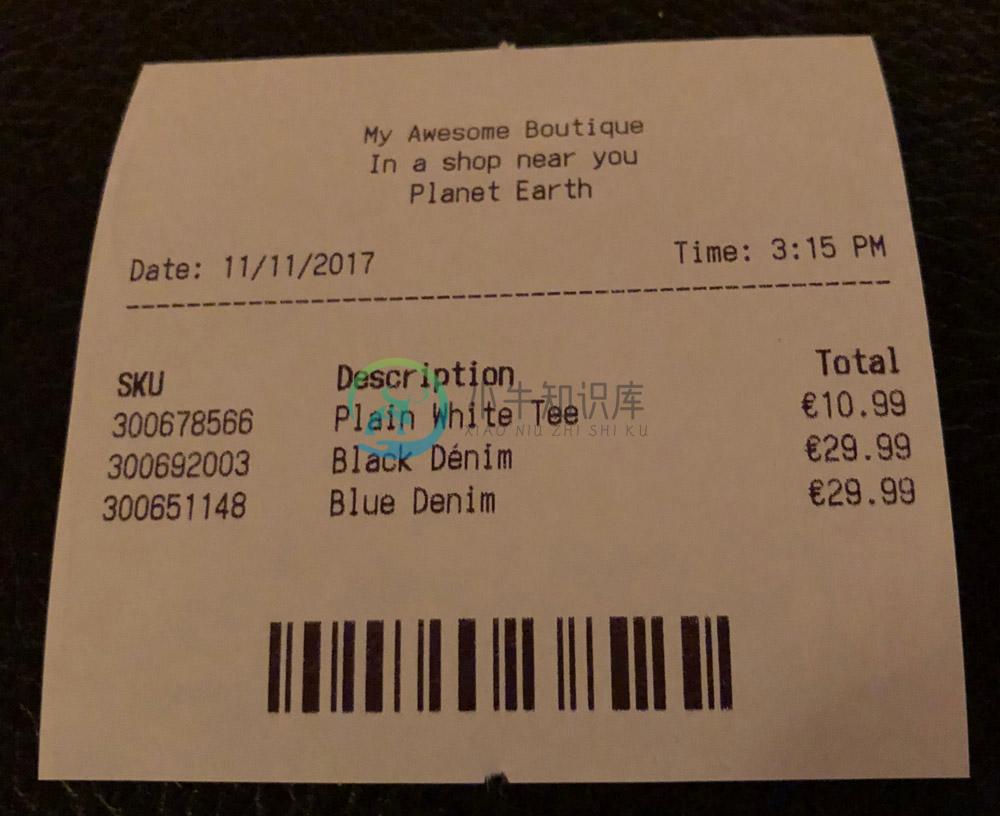
So what are those commands? Let's recreate the fake receipt below to answer that (see the TypeScript definition for all options):
const image = ImageSource.fromFile("~/res/mww-logo.png");

// Note that a standard 3 inch roll is 48 characters wide - we use that knowledge for our "columns"
let commands = new SPCommands()
    .image(
        image,
        true, // diffuse
        true // align center (set to 'false' to align left)
     )
    // alternatively, you can use imagePositioned for a bit more control (on Android this behaves the same as 'image' though)
    .imagePositioned(
        image,
        80, // width
        20, // position
        true, // both scale
        true, // diffuse
        true // align center (set to 'false' to align left)
     )
    .alignCenter()
    .text("My Awesome Boutique").newLine()
    .text("In a shop near you").newLine()
    .setFont("smaller")
    .text("Planet Earth").newLine()
    .setFont("default")
    .newLine()
    .text("Date: 11/11/2017                   Time: 3:15 PM")
    .horizontalLine() // you can pass in the character and the nr of characters (use 48 for a 3" roll, 42 for a smaller one)
    .newLine()
    .textBold("SKU           Description                  Total").newLine()
    .text("300678566     Plain White Tee             €10.99").newLine()
    .text("300692003     Black Dénim                 €29.99").newLine()
    .text("300651148     Blue Denim                  €29.99").newLine()
    .newLine()
    .newLine()
    .barcode({
      type: "Code128",
      value: "12345678",
      width: "large",
      height: 60,
      appendEncodedValue: false
    })
    .newLine()
    .cutPaper();

this.starPrinter.print({
  portName: this.selectedPrinterPort,
  commands: commands
});
openCashDrawer
In case a cash drawer is connected via the UTP (network) connector of the Star printer,you can open the drawer from your code!
this.starPrinter.openCashDrawer({
  portName: this.selectedPrinterPort
});
iOS runtime permission reason
iOS 10+ requires a permission popup when connecting (the first) time to a Bluetooth peripheral explaining why it needs to connect.
You can provide your own reason by adding something like this to app/App_Resources/ios/Info.plist:
<key>NSBluetoothPeripheralUsageDescription</key>
  <string>My reason justifying fooling around with your Bluetooth</string>
To not crash your app in case you forgot to provide the reason this plugin adds an empty reason to the .plist during build. This value gets overridden by anything you specified yourself. You're welcome.
Known limitations
On iOS you want to run this on a real device.
Future work
Possibly add more print formatting options.
-
react-native-printer A React Native Library to support USB/BLE/Net printer for Android platform Installation npm install react-native-printer --save Integrate module To integrate react-native-printer
-
API Star 是用于处理 OpenAPI 或 Swagger 模式的工具包。它允许用户: 构建 API 文档,并提供一系列可用主题。 验证 API 模式文档,并提供上下文错误。 使用 API Star 类型系统验证请求和响应。 使用动态客户端库发出 API 请求。 用户可以使用它来构建静态文档,将其集成到Web框架中,或将其用作与其他API进行交互的客户端库。
-
实现打分效果。点击某颗星星来进行打分。支持0.5分(半颗星星),甚至支持0.1分(十分之一的星星)。 [Code4App.com]
-
A-STAR 寻找一种静态路网(本算法中为二维数组)中求解最短路径的解决办法 我们可以通过: var element = new Element(); 来创建二维数组的一个节点。 element自身包含了一些方法: element.setStatus(2);//设置节点的状态,当status>0,则该区域不可通过。 element.getX();//获取节点在二维数组的横座标。
-
定义 评星组件。 图片展示 代码演示 import Score from 'pile/dist/components/score', {Star} = Score <Star defaultVal={2} len={5} back={(n)=>{console.log(n)}}/> 属性 参数 描述 数据类型 默认值 len 星星显示个数 number 5 defaultVal 默认值
-
It thansform a set of radio input elements to star rating type and remain the radio element name and value, so could be easily integrated with your form. It acts as a normal radio button.
-
The Star Rating widget is a plugin for the jQuery javascript library that creates a non-obstrusive star rating control based on a set of radio input boxes or select options. It gives you the full acce


