
Setting up a distributed Kubernetes cluster along with Istio service mesh locally with Vagrant and VirtualBox
使用Vagrant和VirtualBox在本地搭建分布式Kubernetes集群和Istio Service Mesh - 中文
Setting up a Kubernetes cluster and Istio service mesh with vagrantfile which consists of 1 master(also as node) and 3 nodes. You don't have to create complicated CA files or configuration.
Note: Because of using virtual machines to setup distributed Kubernetes cluster will bring high load on your computer, so I created the lightweight Cloud Native Sandbox using Docker to setup a standalone Kubernetes.
Demo
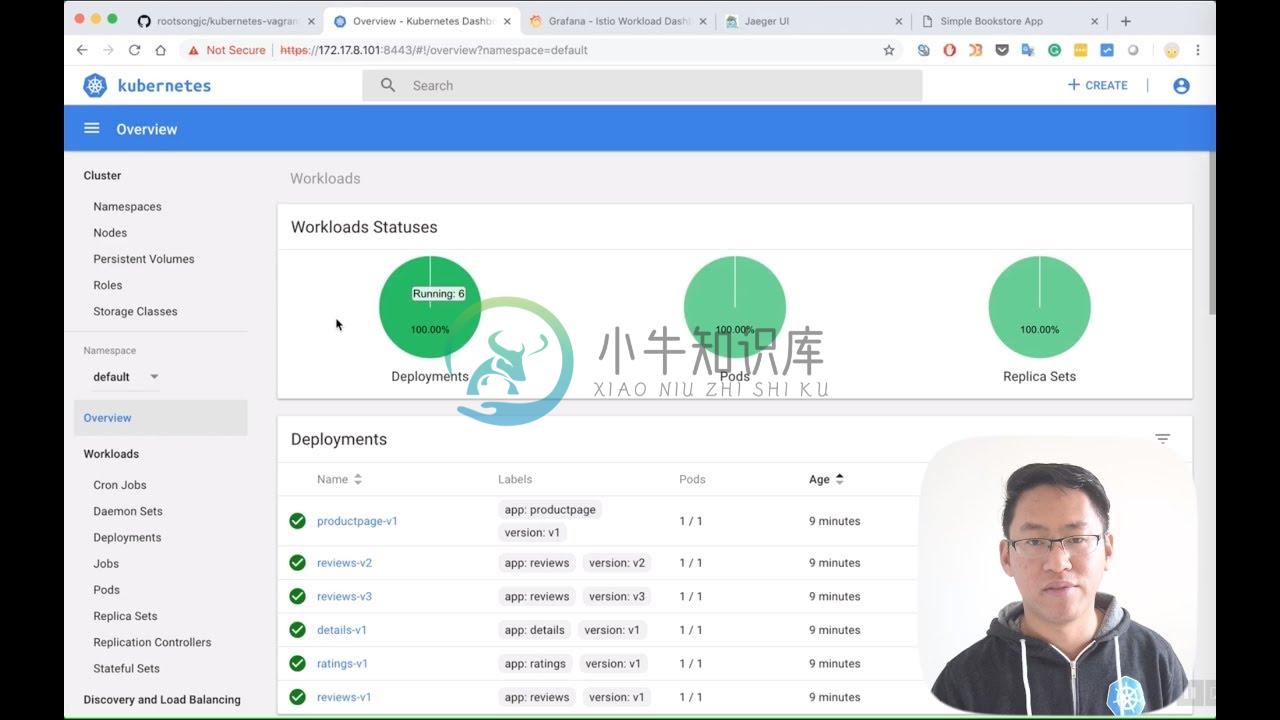
Click the following image to watch the video.
Why not use kubeadm?
Because I want to setup the etcd, apiserver, controller and scheduler without docker container.
Architecture
We will create a Kubernetes 1.15.0 cluster with 3 nodes which contains the components below:
| IP | Hostname | Componets |
|---|---|---|
| 172.17.8.101 | node1 | kube-apiserver, kube-controller-manager, kube-scheduler, etcd, kubelet, docker, flannel, dashboard |
| 172.17.8.102 | node2 | kubelet, docker, flannel、traefik |
| 172.17.8.103 | node3 | kubelet, docker, flannel |
The default setting will create the private network from 172.17.8.101 to 172.17.8.103 for nodes, and it will use the host's DHCP for the public IP.
The kubernetes service's VIP range is 10.254.0.0/16.
The container network range is 170.33.0.0/16 owned by flanneld with host-gw backend.
kube-proxy will run as ipvs mode.
Usage
Prerequisite
- Host server with 8G+ mem(More is better), 60G disk, 8 core cpu at lease
- Vagrant latest(2.2.16 recommended)
- VirtualBox 5.2 (5.2+ is not supported)
- Kubernetes 1.16 (support the latest version 1.16.14)
- Across GFW to download the kubernetes files (For China users only)
- MacOS/Linux (Windows is not supported completely)
- NFS Server Package
Support Add-ons
Required
- CoreDNS
- Dashboard
- Traefik
Optional
- Heapster + InfluxDB + Grafana
- ElasticSearch + Fluentd + Kibana
- Istio service mesh
- Helm
- Vistio
- Kiali
Setup
Clone this repo into your local machine and download kubernetes binary release first and move them into the root directory of this repo (GitBash for the Windows must be run as Administrator to install vagrant-winnfsd plugin).
vagrant plugin install vagrant-winnfsd
git clone https://github.com/rootsongjc/kubernetes-vagrant-centos-cluster.git
cd kubernetes-vagrant-centos-cluster
Note: If this your first time to setup Kubernetes cluster with vagrant, just skip the above step and run the following command, it will download Kubernetes release automatically for you and no need to download the release next time. You can find the download address the Kubernetes releases here. Download the release of version you wanted, move it to the root of this repo, rename it to kubernetes-server-linux-amd64.tar.gz then the install.sh script will skip the download step.
As this repo folder is mounted to /vagrant with NFS in virtual machines, you may be required to enter a password to for administrator privileges during the installation.
Set up Kubernetes cluster with vagrant.
vagrant up
Wait about 10 minutes the kubernetes cluster will be setup automatically.
If you have difficult to vagrant up the cluster because of have no way to download the centos/7 box, you can download the box and add it first.
Add centos/7 box manually
wget -c http://cloud.centos.org/centos/7/vagrant/x86_64/images/CentOS-7-x86_64-Vagrant-1801_02.VirtualBox.box
vagrant box add CentOS-7-x86_64-Vagrant-1804_02.VirtualBox.box --name centos/7
The next time you run vagrant up, vagrant will import the local box automatically.
Note for Mac
VirtualBox may be blocked by Mac's security limit.Go to System Preferences - Security & Privacy - Gerneral click the blocked app and unblock it.
Run sudo "/Library/Application Support/VirtualBox/LaunchDaemons/VirtualBoxStartup.sh" restart in terminal and then vagrant up.
Note for Windows
- The project will run some bash script under the VirtualMachines. These scripts line ending need to be in LF. Git for windows set
core.autocrlftrue by default at the installation time. When you clone this project repository, this parameter (set to true) ask git to change all line ending to CRLF. This behavior need to be changed before cloning the repository (or after for each files by hand). We recommend to turn this off by runninggit config --global core.autocrlf falseandgit config --global core.eol lfbefore cloning. Then, after cloning, do not forget to turn the behavior back if you want to run other windows projects:git config --global core.autocrlf trueandgit config --global core.eol crlf.
If you have executed the previous git global configuration then, you will not see these output while node3 is going to be complete:
node3: Created symlink from /etc/systemd/system/multi-user.target.wants/kubelet.service to /usr/lib/systemd/system/kubelet.service.
    node3: Created symlink from /etc/systemd/system/multi-user.target.wants/kube-proxy.service to /usr/lib/systemd/system/kube-proxy.service.
    node3: deploy coredns
    node3: /tmp/vagrant-shell: ./dns-deploy.sh: /bin/bash^M: bad interpreter: No such file or directory
    node3: error: no objects passed to apply
    node3: /home/vagrant
Solution:
vagrant ssh node3
sudo -i
cd /vagrant/addon/dns
yum -y install dos2unix
dos2unix dns-deploy.sh
./dns-deploy.sh -r 10.254.0.0/16 -i 10.254.0.2 |kubectl apply -f -
Connect to kubernetes cluster
There are 3 ways to access the kubernetes cluster.
- on local
- login to VM
- Kubernetes dashboard
local
In order to manage the cluster on local you should Install kubectl command line tool first(But, you don't need to do it manually because of install.sh script itself does this).
Go to Kubernetes release notes, download the client binaries, unzip it and then move kubectl to your $PATH folder, for MacOS:
wget https://storage.googleapis.com/kubernetes-release/release/v1.16.14/kubernetes-client-darwin-amd64.tar.gz
tar xvf kubernetes-client-darwin-amd64.tar.gz && cp kubernetes/client/bin/kubectl /usr/local/bin
Copy conf/admin.kubeconfig to ~/.kube/config, using kubectl CLI to access the cluster.
mkdir -p ~/.kube
cp conf/admin.kubeconfig ~/.kube/config
We recommend you follow this way.
VM
Login to the virtual machine for debuging. In most situations, you have no need to login the VMs.
vagrant ssh node1
sudo -i
kubectl get nodes
kubectl get pods --namespace=kube-system
Kubernetes dashboard
Kubernetes dashboard URL: https://172.17.8.101:8443
Get the admin token:
kubectl -n kube-system describe secret `kubectl -n kube-system get secret|grep admin-token|cut -d " " -f1`|grep "token:"|tr -s " "|cut -d " " -f2
Note: You can see the token message on console when vagrant up done.
Only if you install the heapter addon bellow that you can see the metrics.
Visit from Chrome/Firefox on Windows
If you see the hint NET::ERR_CERT_INVALID, follow these steps:
vagrant ssh node1
sudo -i
cd /vagrant/addon/dashboard/
mkdir certs
openssl req -nodes -newkey rsa:2048 -keyout certs/dashboard.key -out certs/dashboard.csr -subj "/C=/ST=/L=/O=/OU=/CN=kubernetes-dashboard"
openssl x509 -req -sha256 -days 365 -in certs/dashboard.csr -signkey certs/dashboard.key -out certs/dashboard.crt
kubectl delete secret kubernetes-dashboard-certs -n kube-system
kubectl create secret generic kubernetes-dashboard-certs --from-file=certs -n kube-system
kubectl delete pods $(kubectl get pods -n kube-system|grep kubernetes-dashboard|awk '{print $1}') -n kube-system #re-install dashboard
Refresh the browser and click Advance, skip it. You will see the dashboard page there.
Components
Heapster monitoring
Run this command on your local machine.
kubectl apply -f /vagrant/addon/heapster/
Append the following item to your local /etc/hosts file.
172.17.8.102 grafana.jimmysong.io
Open the URL in browser: http://grafana.jimmysong.io
Traefik
Run this command on your local machine.
kubectl apply -f /vagrant/addon/traefik-ingress
Append the following item to your local file /etc/hosts.
172.17.8.102 traefik.jimmysong.io
Traefik UI URL: http://traefik.jimmysong.io
EFK
Run this command on your local machine.
kubectl apply -f /vagrant/addon/efk/
Note: Powerful CPU and memory allocation required. At least 4G per virtual machine.
Helm
Run this command on your local machine.
/vagrant/hack/deploy-helm.sh
Service Mesh
We use istio as the default service mesh.
Installation
Go to Istio release to download the binary package, install istio command line tool on local and move istioctl to your $PATH folder, for Mac:
wget https://github.com/istio/istio/releases/download/1.0.0/istio-1.0.0-osx.tar.gz
tar xvf istio-1.0.0-osx.tar.gz
mv istio-1.0.0/bin/istioctl /usr/local/bin/
Deploy istio into Kubernetes:
kubectl apply -f /vagrant/addon/istio/istio-demo.yaml
kubectl apply -f /vagrant/addon/istio/istio-ingress.yaml
Run sample
We will let the sidecars be auto injected.
kubectl label namespace default istio-injection=enabled
kubectl apply -n default -f /vagrant/yaml/istio-bookinfo/bookinfo.yaml
kubectl apply -n default -f /vagrant/yaml/istio-bookinfo/bookinfo-gateway.yaml
kubectl apply -n default -f /vagrant/yaml/istio-bookinfo/destination-rule-all.yaml
Add the following items into the file /etc/hosts of your local machine.
172.17.8.102 grafana.istio.jimmysong.io
172.17.8.102 prometheus.istio.jimmysong.io
172.17.8.102 servicegraph.istio.jimmysong.io
172.17.8.102 jaeger-query.istio.jimmysong.io
We can see the services from the following URLs.
More detail see https://istio.io/docs/examples/bookinfo/
Vistio
Vizceral is an open source project released by Netflix to monitor network traffic between applications and clusters in near real time. Vistio is an adaptation of Vizceral for Istio and mesh monitoring. It utilizes metrics generated by Istio Mixer which are then fed into Prometheus. Vistio queries Prometheus and stores that data locally to allow for the replaying of traffic.
Run the following commands in your local machine.
# Deploy vistio via kubectl
kubectl -n default apply -f /vagrant/addon/vistio/

# Expose vistio-api
kubectl -n default port-forward $(kubectl -n default get pod -l app=vistio-api -o jsonpath='{.items[0].metadata.name}') 9091:9091 &

# Expose vistio in another terminal window
kubectl -n default port-forward $(kubectl -n default get pod -l app=vistio-web -o jsonpath='{.items[0].metadata.name}') 8080:8080 &
If everything up until now is working you should be able to load the Vistio UI in your browser http://localhost:8080
More details see Vistio — Visualize your Istio Mesh Using Netflix’s Vizceral.
Kiali
Kiali is a project to help observability for the Istio service mesh, see https://kiali.io.
Run the following commands in your local machine.
kubectl apply -n istio-system -f /vagrant/addon/kiali
Kiali web: http://172.17.8.101:32439
User/password: admin/admin
Note: Kiali use jaeger for tracing. Do not block the pop-up windows for kiali.
Weave scope
Weave scope is a project for monitoring, visualisation & management for Docker & Kubernetes, see https://www.weave.works/oss/scope/
Run the following commands in your local machine.
kubectl apply -f /vagrant/addon/weave-scope
Add a record on your local /etc/hosts.
172.17.8.102 scope.weave.jimmysong.io
Now open your browser on http://scope.weave.jimmysong.io/
Operation
Except for special claim, execute the following commands under the current git repo's root directory.
Suspend
Suspend the current state of VMs.
vagrant suspend
Resume
Resume the last state of VMs.
vagrant resume
Note: every time you resume the VMs you will find that the machine time is still at you last time you suspended it. So consider to halt the VMs and restart them.
Restart
Halt the VMs and up them again.
vagrant halt
vagrant up
# login to node1
vagrant ssh node1
# run the prosivision scripts
/vagrant/hack/k8s-init.sh
exit
# login to node2
vagrant ssh node2
# run the prosivision scripts
/vagrant/hack/k8s-init.sh
exit
# login to node3
vagrant ssh node3
# run the prosivision scripts
/vagrant/hack/k8s-init.sh
sudo -i
cd /vagrant/hack
./deploy-base-services.sh
exit
Now you have provisioned the base kubernetes environments and you can login to kubernetes dashboard, run the following command at the root of this repo to get the admin token.
hack/get-dashboard-token.sh
Following the hint to login.
Clean
Clean up the VMs.
vagrant destroy
rm -rf .vagrant
Note
Only use for development and test, don't use it in production environment.
Reference
- Kubernetes Handbook - jimmysong.io
- duffqiu/centos-vagrant
- coredns/deployment
- kubernetes ipvs
- Vistio — Visualize your Istio Mesh Using Netflix’s Vizceral
Follow the ServiceMesher community on twitter to get more information about Istio and service mesh.
-
简介 本文章主要介绍如何通过使用官方提供 的二进制包安装配置k8s集群 实验环境说明 实验架构 lab1: master 11.11.11.111 lab2: node 11.11.11.112 lab3: node 11.11.11.113 复制代码 实验使用的Vagrantfile # -*- mode: ruby -*- # vi: set ft=ruby : ENV["LC_ALL"]
-
简介 本文章主要介绍如何通过使用官方提供的二进制包安装配置k8s集群 实验环境说明 实验架构 lab1: master 11.11.11.111 lab2: node 11.11.11.112 lab3: node 11.11.11.113 复制代码 实验使用的Vagrantfile # -*- mode: ruby -*- # vi: set ft=ruby : ENV["LC_ALL"] =
-
Vagrant 中文资料 参考资料 Kubernetes 需要一个至少包含三个节点的分布式系统。如果想学习 Kubernetes,或只是在本地搭建测试环境,则可以通过 Vagrant 来简单的实现。 1. 前提条件 电脑内存不小于 8 GB 提前安装好 Vagrant 和 Virtualbox 提前下载好 kubernetes 的安装包,这两个文件后面会用于安装到虚拟机中: kubernetes-
-
目录 kuberadmin离线安装K8s集群 环境准备 基础环境配置 安装docker 准备基础镜像以及安装包 镜像 集群初始化 设置.kube/config 安装网络组件 加入node节点 验证集群 部署dashboard 设置访问dashboard的端口 创建访问账号 令牌访问 安装包 kuberadmin离线安装K8s集群 环境准备 使用vagrant 拉起三台虚拟机,操作系统版本为Cent
-
准备工作 为节约时间,相关文件可以提前下载好,当然也可以在master搭建好后在master上下载 网络规划 vip.kamputer.online=192.168.1.100 master.kamputer.online=192.168.1.101 ubuntu.kamputer.online=192.168.1.102 centos.kamputer.online=192.168.1.103
-
Mac OS(10.13.6)使用 vagrant+VirtualBox +centos7搭建k8s集群步骤 环境准备工作 下载VirtualBox 地址:https://www.virtualbox.org/ 下载最新安装包 6.1 ,安装环境很简单,根据步骤下一步即可 下载vagrant 地址:https://www.vagrantup.com/ 下载最新安装包 Vagrant 2.2.9 ,
-
注意:这里安装测试的k8s版本比较低 k8s核心功能 自我修复 服务发现和负载均衡 自动部署和回滚 弹性伸缩 服务器环境准备 参考 k8s 安装部署 1 - 环境准备 准备3台服务器 192.168.56.101 k8s-node1 192.168.56.102 k8s-node2 192.168.56.103 k8s-node3 #其中k8s-node1作为master节点 Linux修
-
Kubernetes集群安装 使用Vagrant安装Kubernetes集群 本教程参照 https://kuboard.cn/install/install-k8s.html#%E6%96%87%E6%A1%A3%E7%89%B9%E7%82%B9做了部分修改 准备Vagrant文件,使用k8s/base作为镜像,该镜像安装了docker和1.21.4版本的kubectl、kubelet和kub
-
由於在 DevOps 的實務操作上我們常常會同時操作多台機器,所以在正式進入接下來的主題前,我想要先花一點篇幅介紹如何使用 Vagrant 來模擬我們的測試環境。
-
重要提示:Vagrant 所在的 HashiCorp 公司宣布,不允许中国境内使用该公司旗下的产品和软件。 Vagrant 是一个基于 Ruby 的工具,用于创建和部署虚拟化开发环境。它使用 Oracle 的开源 VirtualBox 虚拟化系统,使用 Chef 创建自动化虚拟环境。 功能特性: 支持快速新建虚拟机 支持快速设置端口转发 支持自定义镜像打包(原始镜像方式、增量补丁方式) 基本上日常
-
本文档最初是基于kubenetes1.6版本编写的,对于kuberentes1.8及以上版本同样适用,只是个别位置有稍许变动,变动的地方我将特别注明版本要求。 本系列文档介绍使用二进制部署 kubernetes 集群的所有步骤,而不是使用 kubeadm 等自动化方式来部署集群,同时开启了集群的TLS安全认证,该安装步骤适用于所有bare metal环境、on-premise环境和公有云环境。 如
-
我的问题是我不能连接我们的机器(主和从机)我的连接命令应该是 我被处决了 我发现了错误 [kubelet start]禁止从kube系统命名空间错误执行阶段的“kubelet-config-1.15”配置映射下载kubelet的配置kubelet start:configmaps“kubelet-config-1.15”:用户“系统:引导:a61x22”可以 无法获取命名空间“kube syste
-
vagrant-proxyconf 是 Vagrant 的代理配置插件。 一个 Vagrant 的插件,配置虚拟机使用指定的代理。如果你是一个公司的代理服务器之后,例如这是有用的,或者你有一个代理缓存(例如Polipo)。 该插件可以设置: generic http_proxy etc. environment variables that many programs support defaul
-
vagrant-mesos 是一款运维工具,可以使 Mesos 集群的安装和运行更加容易。 vagrant-mesos 支持 Mesos 0.21.0 集群,同时包括 Marathon (0.8.0) 和 Chronos (2.1.0)正在运行的框架服务器节点。这意味着,你可以使用 vagrant up,打造自己的 Mesos+Marathon+Chronos+Docker PaaS 平台。Mar