This repo is outdated and is not maintained anymore.
For better and cheaper devices see https://github.com/RavenSystem/esp-homekit-devices/wiki/Home-Accessory-Architect
For better RPI camera see https://github.com/brutella/hkcam
This repo will continue at https://github.com/gerarddvb/Homebridge-HKCam-om-Pi-Zero-W/tree/master
[OUTDATED] Homebridge on Raspberry Pi 3
[OUTDATED] Example of Homebridge on RaspberryPi 3
READ: https://github.com/nfarina/homebridge
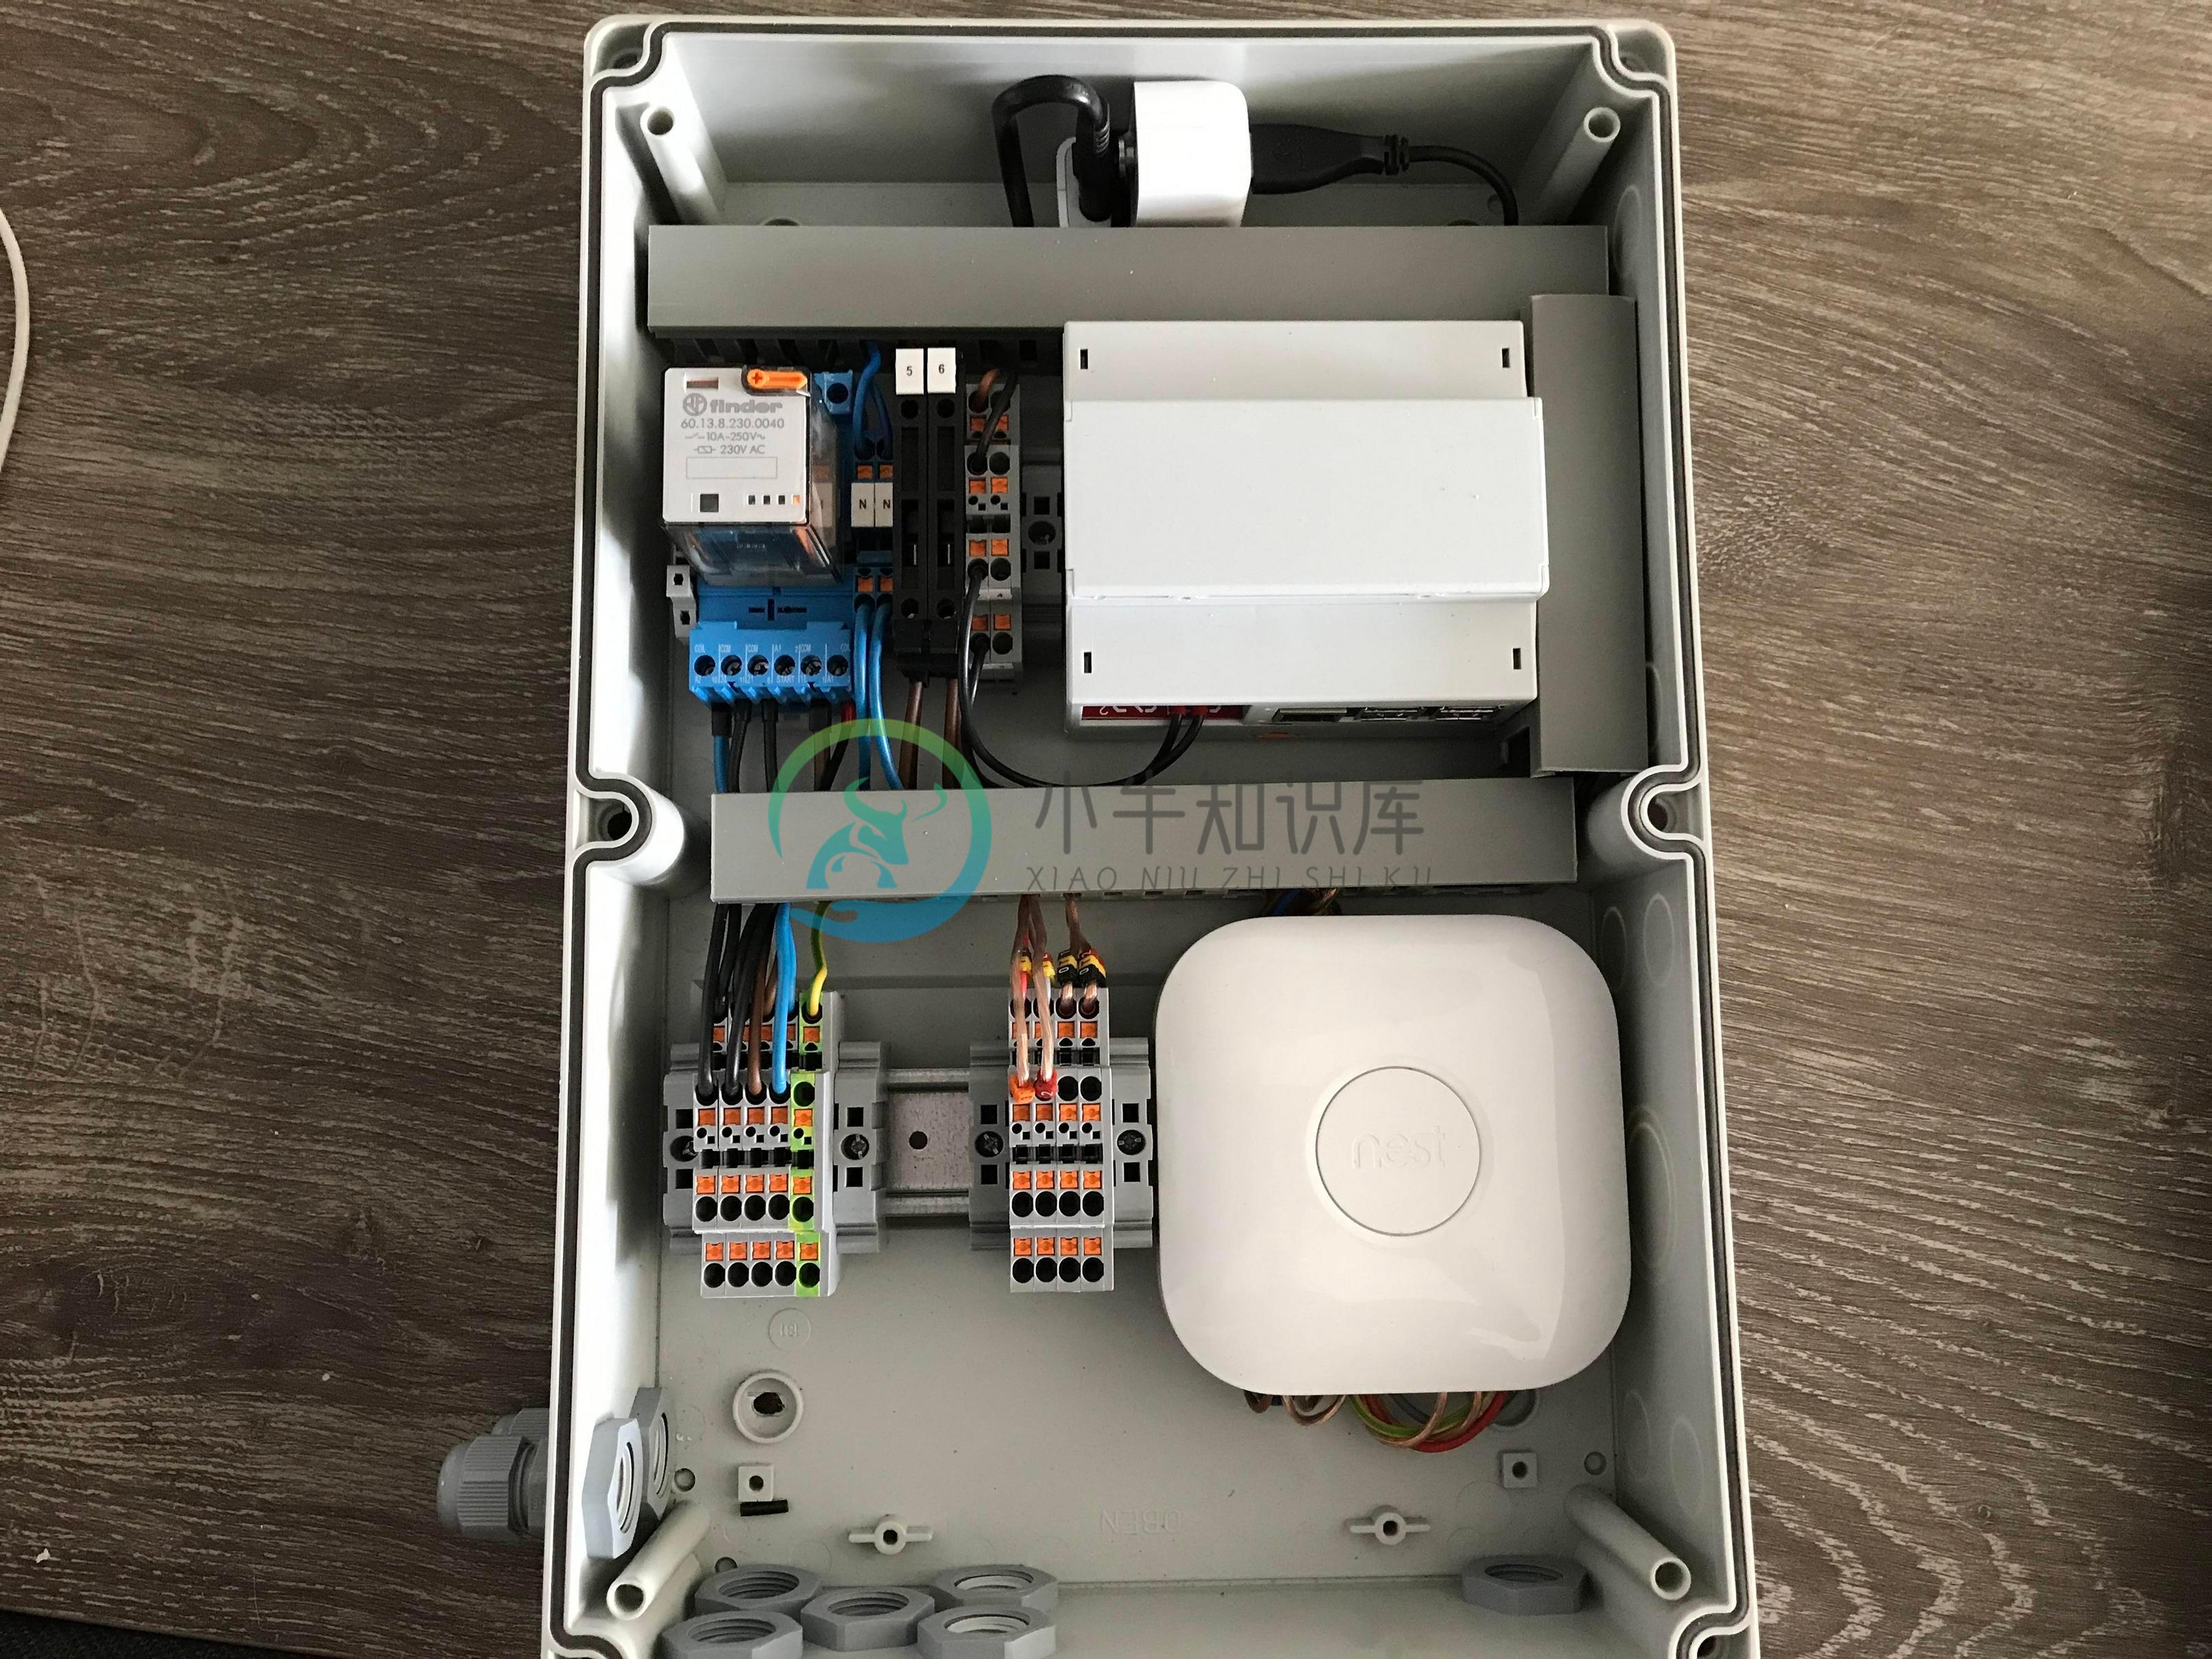
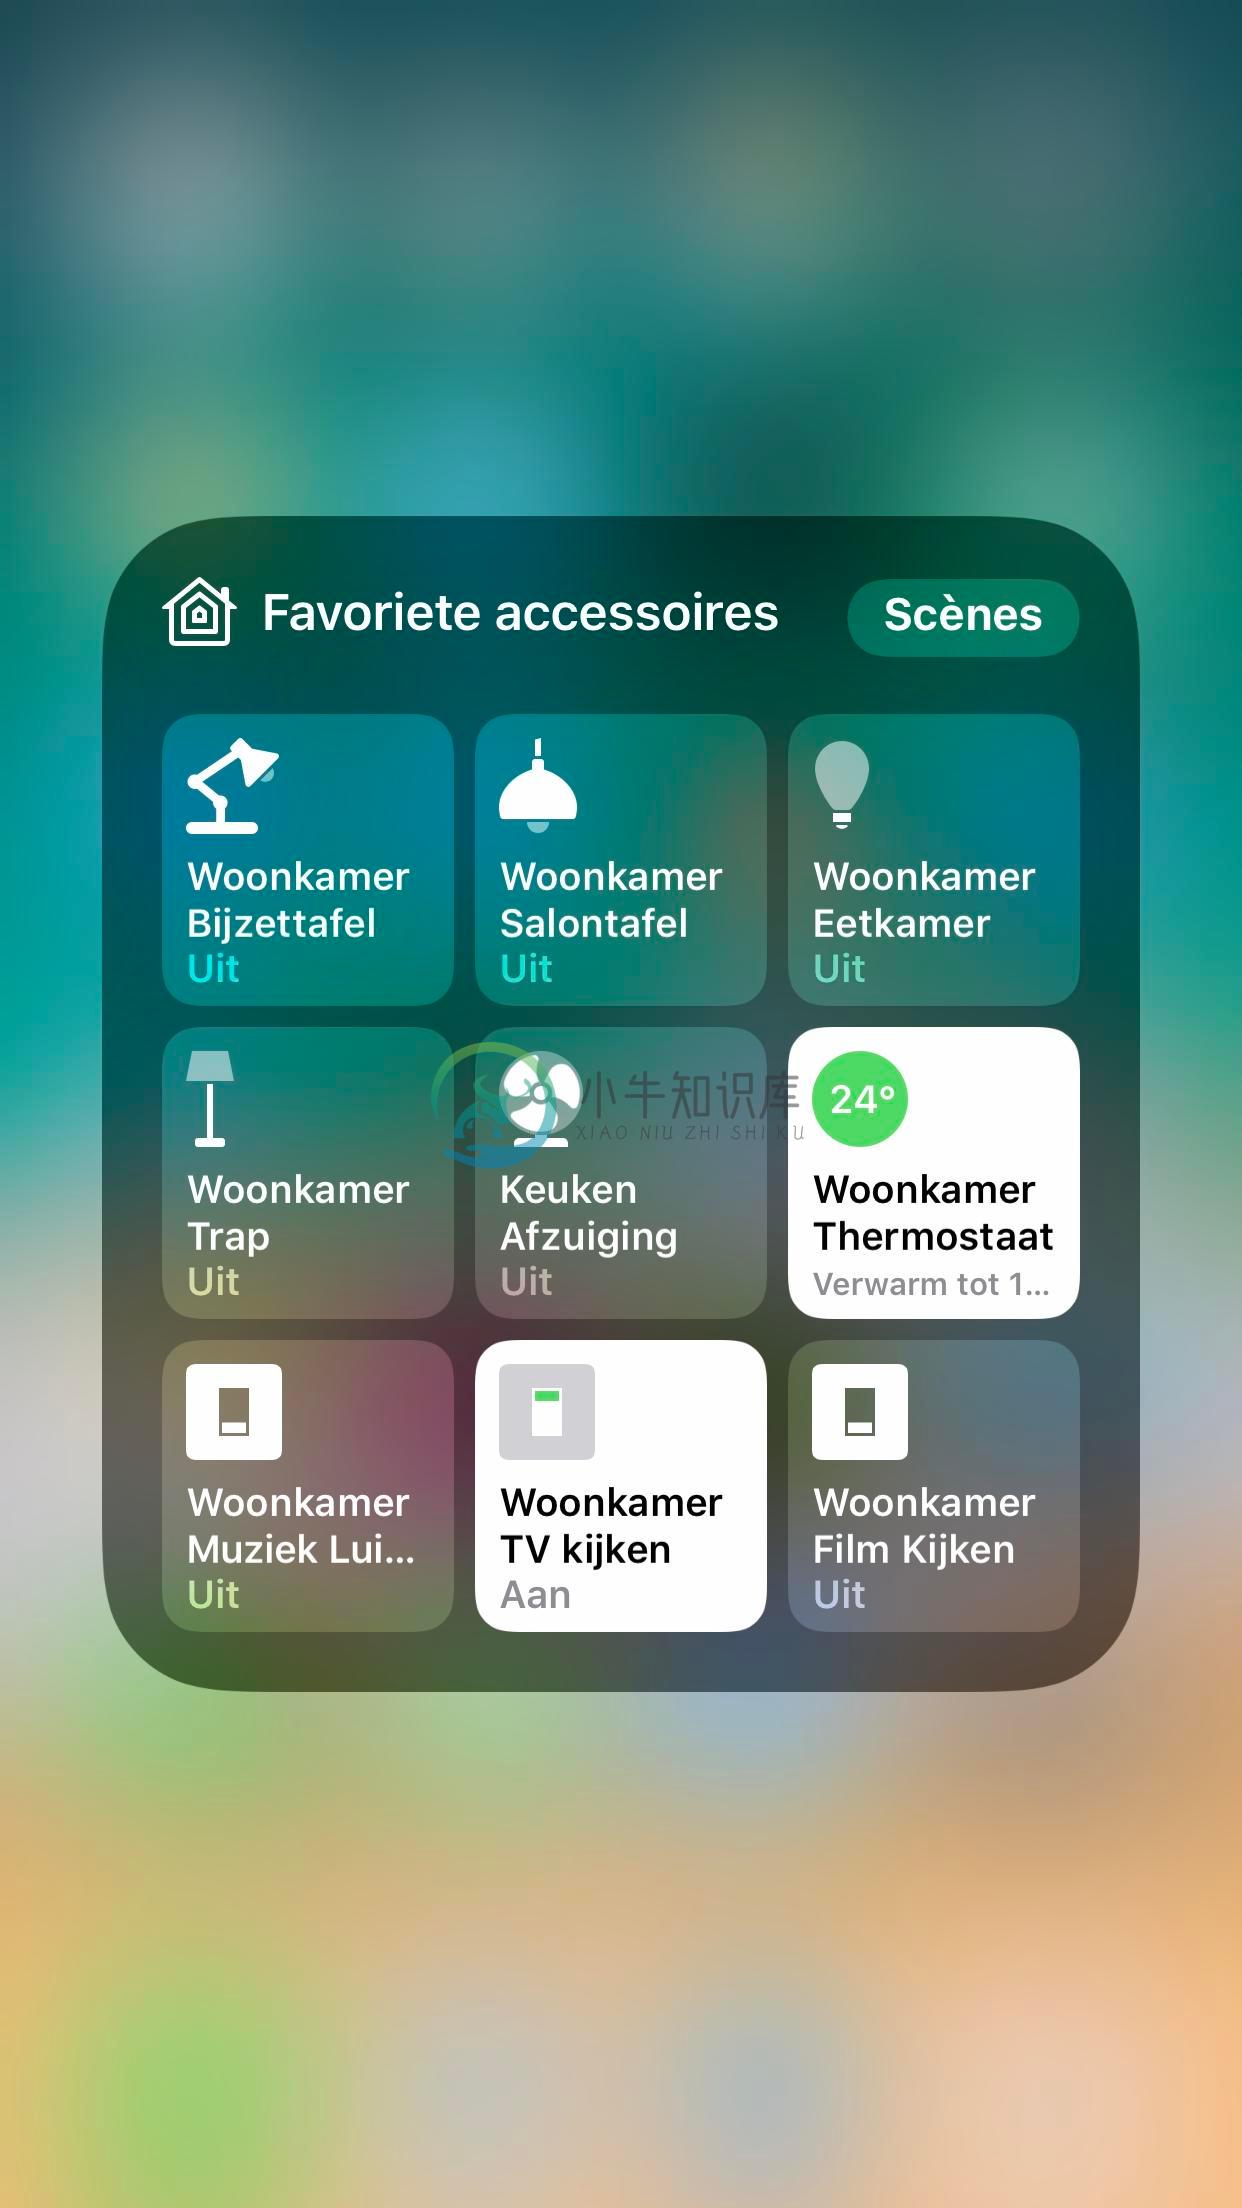
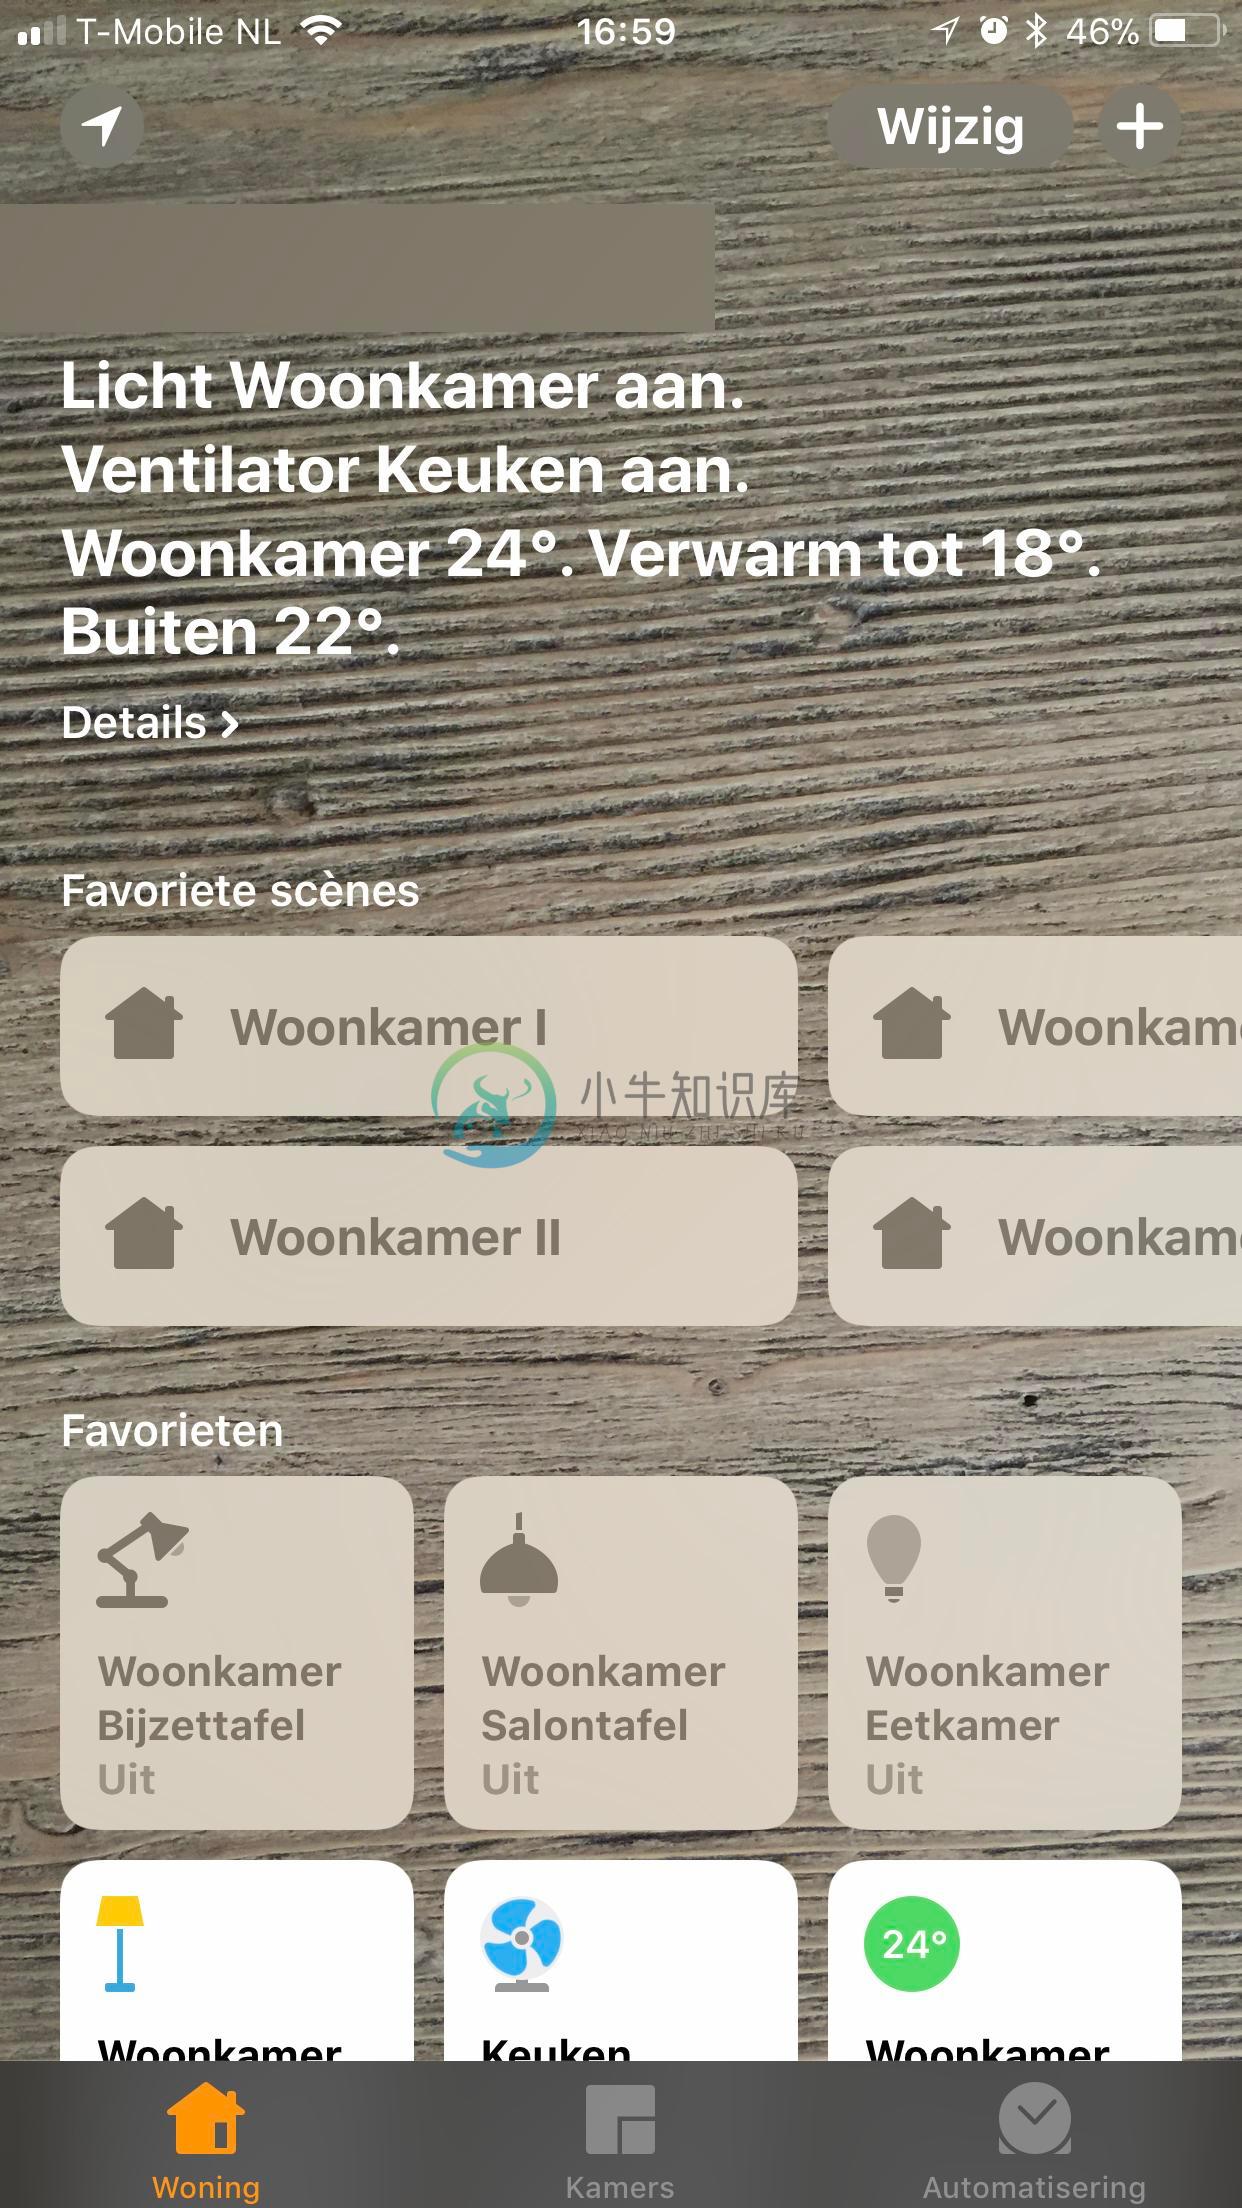
This example gives the configuration of these accessories/devices;
- Nest thermostat (3rd gen)
- Logitech Harmony Hub
- Camera
- Fan
- Smoke Detector
- Motion Detector
- GPS Temperature & humidity sensor
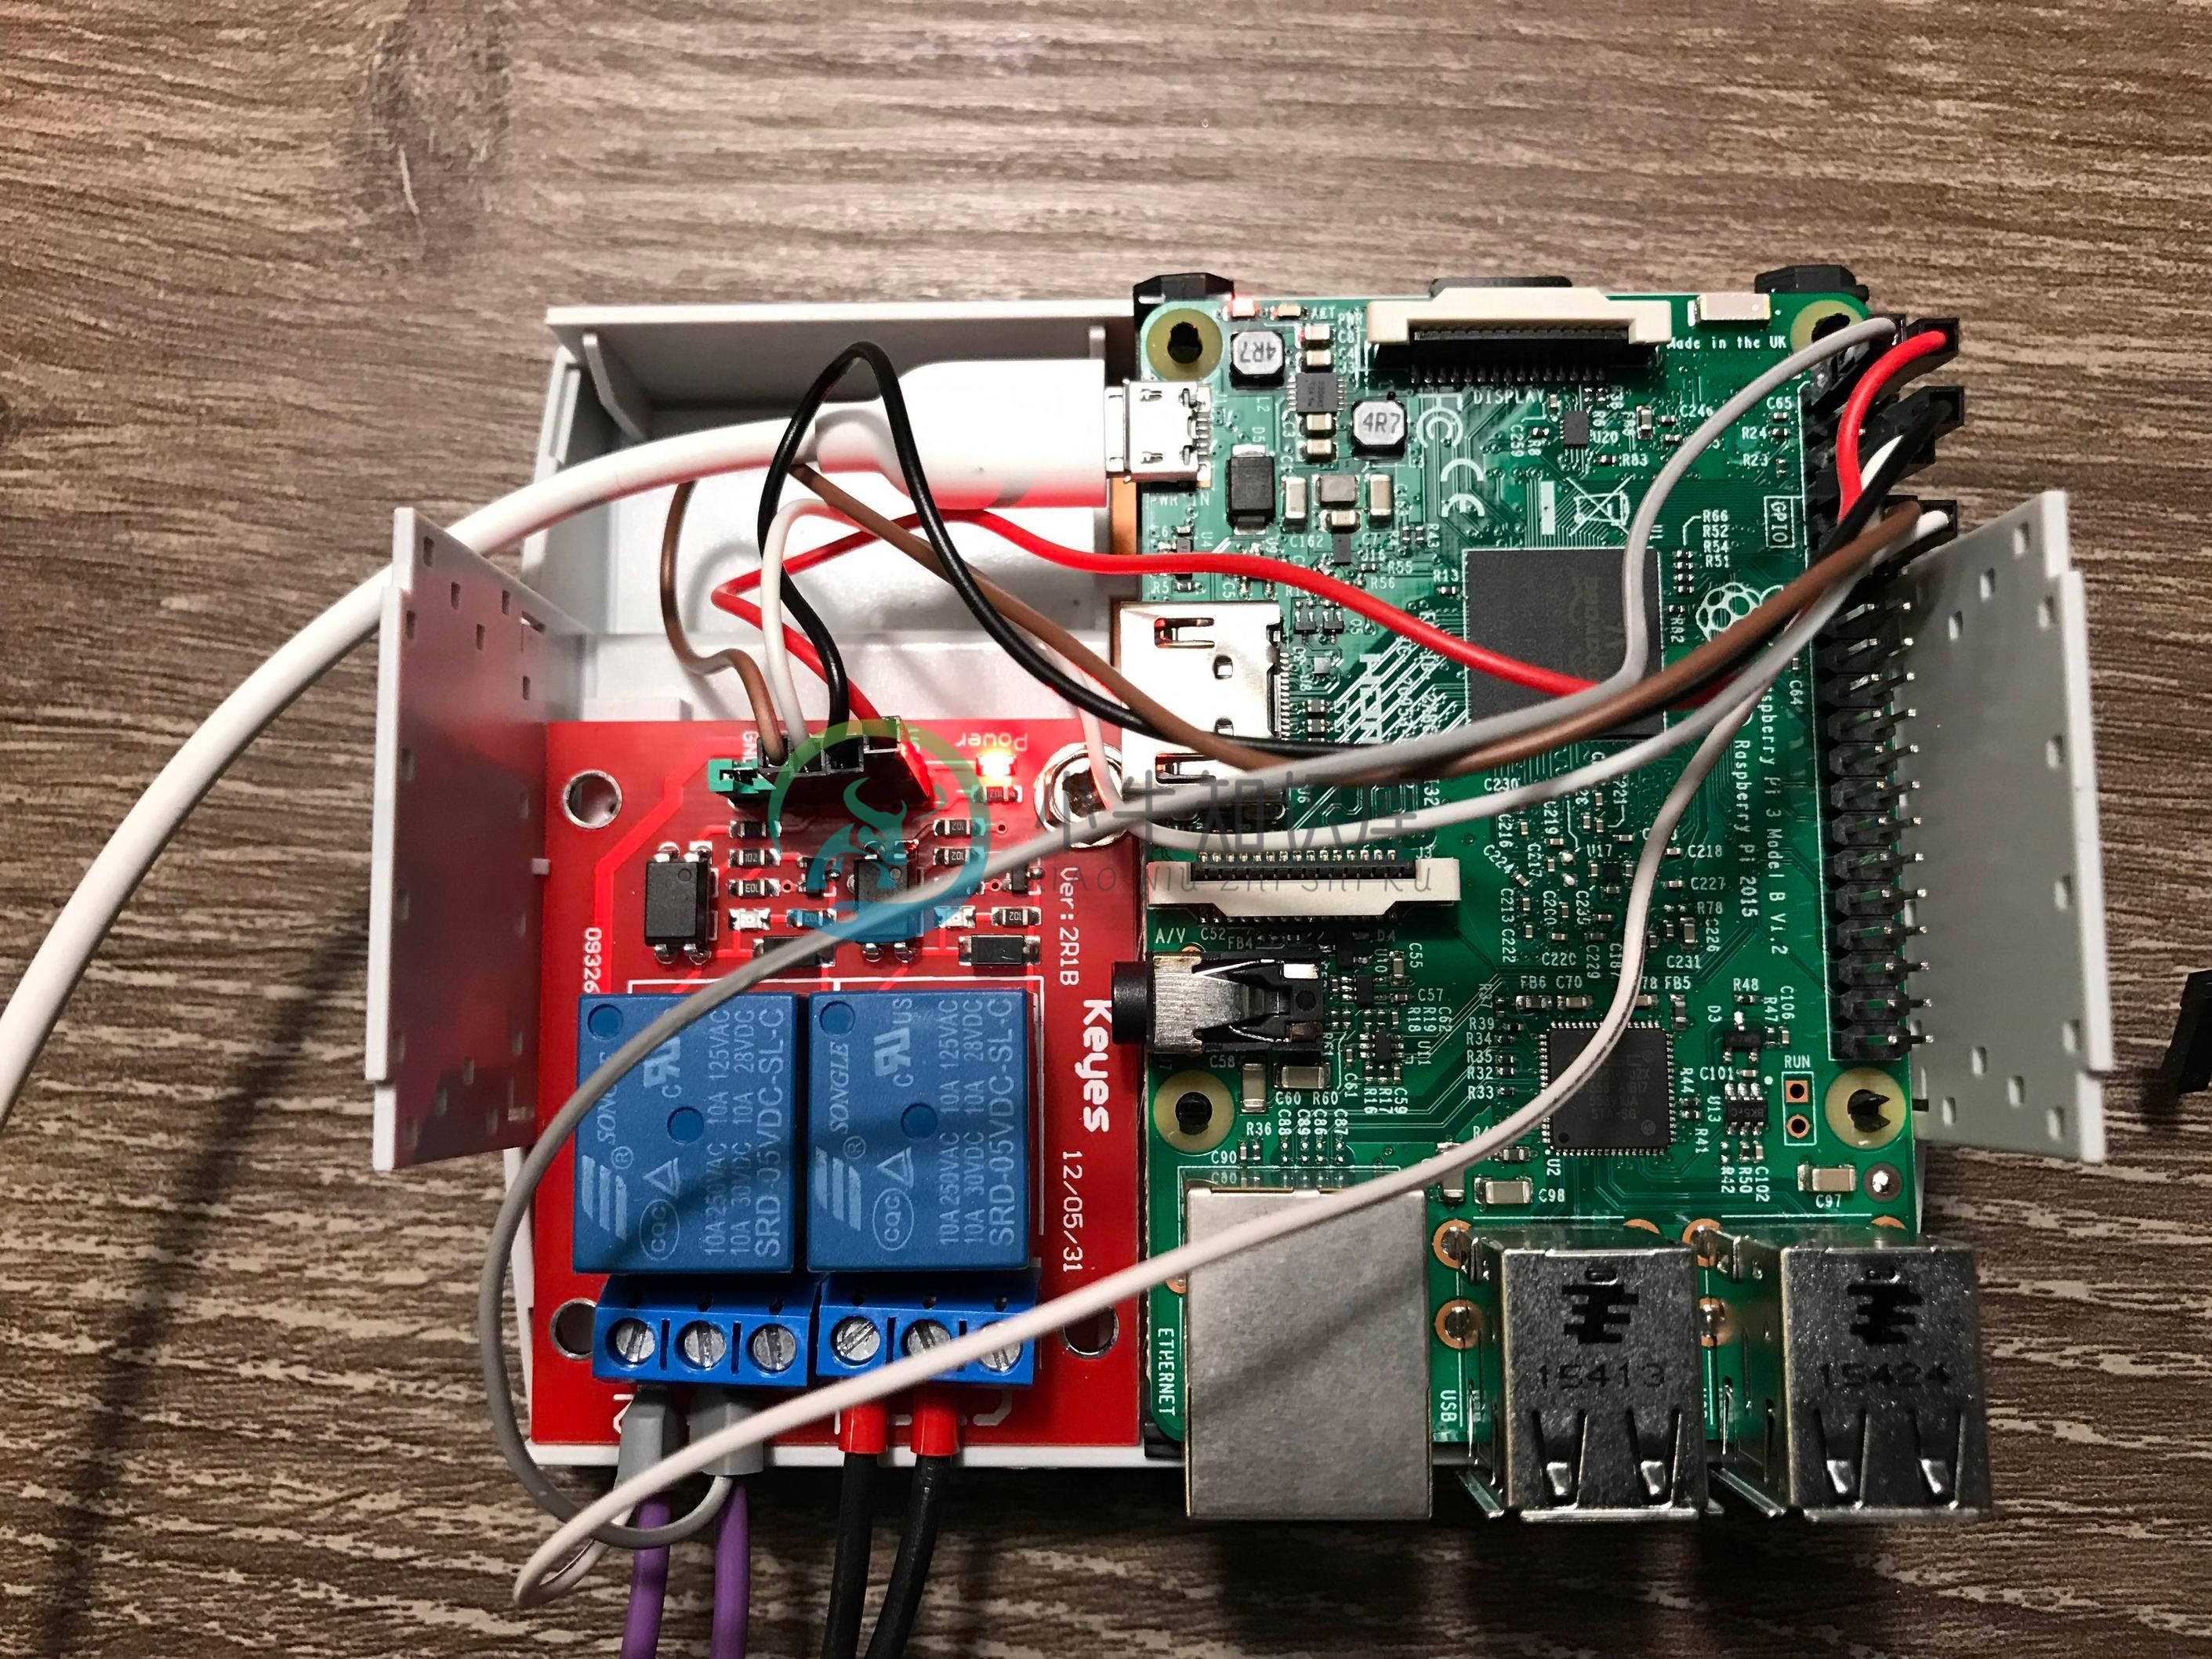
Things I used in this setup;
- Raspberry Pi 3 Model B+
- Raspbian Stretch with Desktop
- Raspberry Pi Camera Module V2
- Keyes Relayboard (2 relays)
- Makeblock MQ2 Gas Sensor
- HC-SR501 PIR Motion Sensor
- Phoenix Contact RPI-BC DIN rail housing
- iPhone/iPad on iOS 11.3
- PC/Mac (For SSH)
- AppleTV 4 (For remote access)
Useful iOS Apps;
- Home (Expensive but better than default iOS app)
- Prompt
- iTeleport
- Eve (Edit Siri commands)
Useful Mac Apps;
- Etcher
- Apple Screen Sharing
- Termius
- Transmit
Setup Raspberry Pi
Connect a display, mouse and keyboard to the Raspberry Pi, open terminal and enter the following command:
sudo raspi-config
In the configuration tool enable SSH, VNC, Autologin, Wifi and change your password.
Open VNC Server settings from the system tray.
Options > Security
Encryption = Prefer On
Authentication = VNC Password
Download the setup files, enter the following command:
git clone https://github.com/gerarddvb/Homebridge-on-RaspberryPi /home/pi/HomeKit/
sudo reboot
After reboot test SSH and VNC connection, when succesful, disconnect display, mouse and keyboard.
Install Homebridge
Setup APT, enter the following commands:
sudo apt-get update
sudo apt-get upgrade
Use these commands to install Homebridge:
sudo apt-get install libavahi-compat-libdnssd-dev
curl -sL https://deb.nodesource.com/setup_8.x | sudo -E bash -
sudo apt-get install -y nodejs
sudo npm install -g --unsafe-perm homebridge
Use these commands to install the Homebridge plugins.
Initial setup of various plugins is nedeed.Follow the instructions on the GitHub link to the plugin below.
sudo npm install -g homebridge-http
sudo npm install -g homebridge-ws
sudo npm install -g homebridge-nest

sudo npm install -g npm@4
sudo npm install -g homebridge-harmonyhub@0.3.0-alpha.2
Test Homebridge
homebridge
Close after succesful test
Now its time to copy the config.json
cd /home/pi/.homebridge/
sudo wget -N <YOUR config.json file>
WebIOPi
To use homebridge-http with GPIO you will need to setup webiopi, skip if you don't want to use GPIO
Setup GPIO
sudo crontab -e
Add the following line at the end:
@reboot sudo python3 /home/pi/HomeKit/gpio.py > /home/pi/HomeKit/webiopilog.txt
Save changes with CTRL-X
Enter the following commands to setup webiopi:
cd /home/pi/HomeKit
sudo wget http://sourceforge.net/projects/webiopi/files/WebIOPi-0.7.1.tar.gz
sudo tar xvzf WebIOPi-0.7.1.tar.gz
cd WebIOPi-0.7.1
sudo wget https://raw.githubusercontent.com/doublebind/raspi/master/webiopi-pi2bplus.patch
patch -p1 -i webiopi-pi2bplus.patch
sudo ./setup.sh
sudo webiopi -d -c /etc/webiopi/config 		(Test, close after successful connection)
sudo update-rc.d webiopi defaults
sudo /etc/init.d/webiopi start
Setup systemd deamon
After all the accessories/devices are configured and tested, it is time to make it run at boot.
Enter the following commands to enable homebridge to run at boot and restart after 10 seconds of inactivity.
The config.json used by the deamon will be located at /var/homebridge/
sudo useradd --system homebridge
sudo mv /home/pi/HomeKit/homebridge /etc/default/
sudo mv /home/pi/HomeKit/homebridge.service /etc/systemd/system/
sudo mkdir /var/homebridge
sudo cp -r /home/pi/.homebridge/accessories/ /var/homebridge/
sudo cp -r /home/pi/.homebridge/persist/ /var/homebridge/
sudo cp /home/pi/.homebridge/config.json /var/homebridge/
sudo chown -R homebridge:homebridge /var/homebridge
sudo chmod 777 -R /var/homebridge
sudo systemctl daemon-reload
sudo systemctl enable homebridge
sudo systemctl start homebridge
sudo reboot
Setup CPU Watchdog
To enable the CPU watchdog enter the following commands, this will reboot the Raspberry Pi after a CPU inactivity of 15 seconds.
sudo nano /boot/config.txt
Add the following lines:
# Watchdog enable
dtparam=watchdog=on

# VNC resolution enable
hdmi_group=2
hdmi_force_hotplug=1

# VNC resolution
# 2=640x400
# 27=1280x800
# 46=1440x900
# 76=2560x1600
# 82=1080p
# 85=720p
hdmi_mode=46
Save changes with CTRL-X
Enter the following commands
sudo apt-get install watchdog
sudo mv /home/pi/HomeKit/watchdog.conf /etc/
sudo mv /home/pi/HomeKit/watchdog.service /lib/systemd/system/
sudo systemctl enable watchdog
sudo systemctl start watchdog
sudo reboot
Test watchdog
To test the watchdog enter the following command, this will freeze your Rapsberry Pi, it should reboot after 15 seconds.
:(){ :|:& };:
Setup Raspberry Pi Camera Module
Use these commands to install the Raspberry Pi Camera Module.
raspi-config 				 Enable Camera
sudo nano /etc/modules		Add: bcm2835-v4l2
sudo reboot
raspistill -o cam.jpg
sudo apt install ffmpeg
cd /opt
sudo mkdir homebridge-camera-rpi
sudo chown pi homebridge-camera-rpi
git clone https://github.com/moritzmhmk/homebridge-camera-rpi
cd homebridge-camera-rpi
npm install
node standalone.js
sudo mv /home/pi/HomeKit/homebridge-camera-rpi.conf.json /etc/
sudo mv /home/pi/HomeKit/hap-camera-rpi.service /etc/systemd/system/
sudo systemctl daemon-reload
sudo systemctl enable hap-camera-rpi
sudo systemctl start hap-camera-rpi
sudo reboot
Status
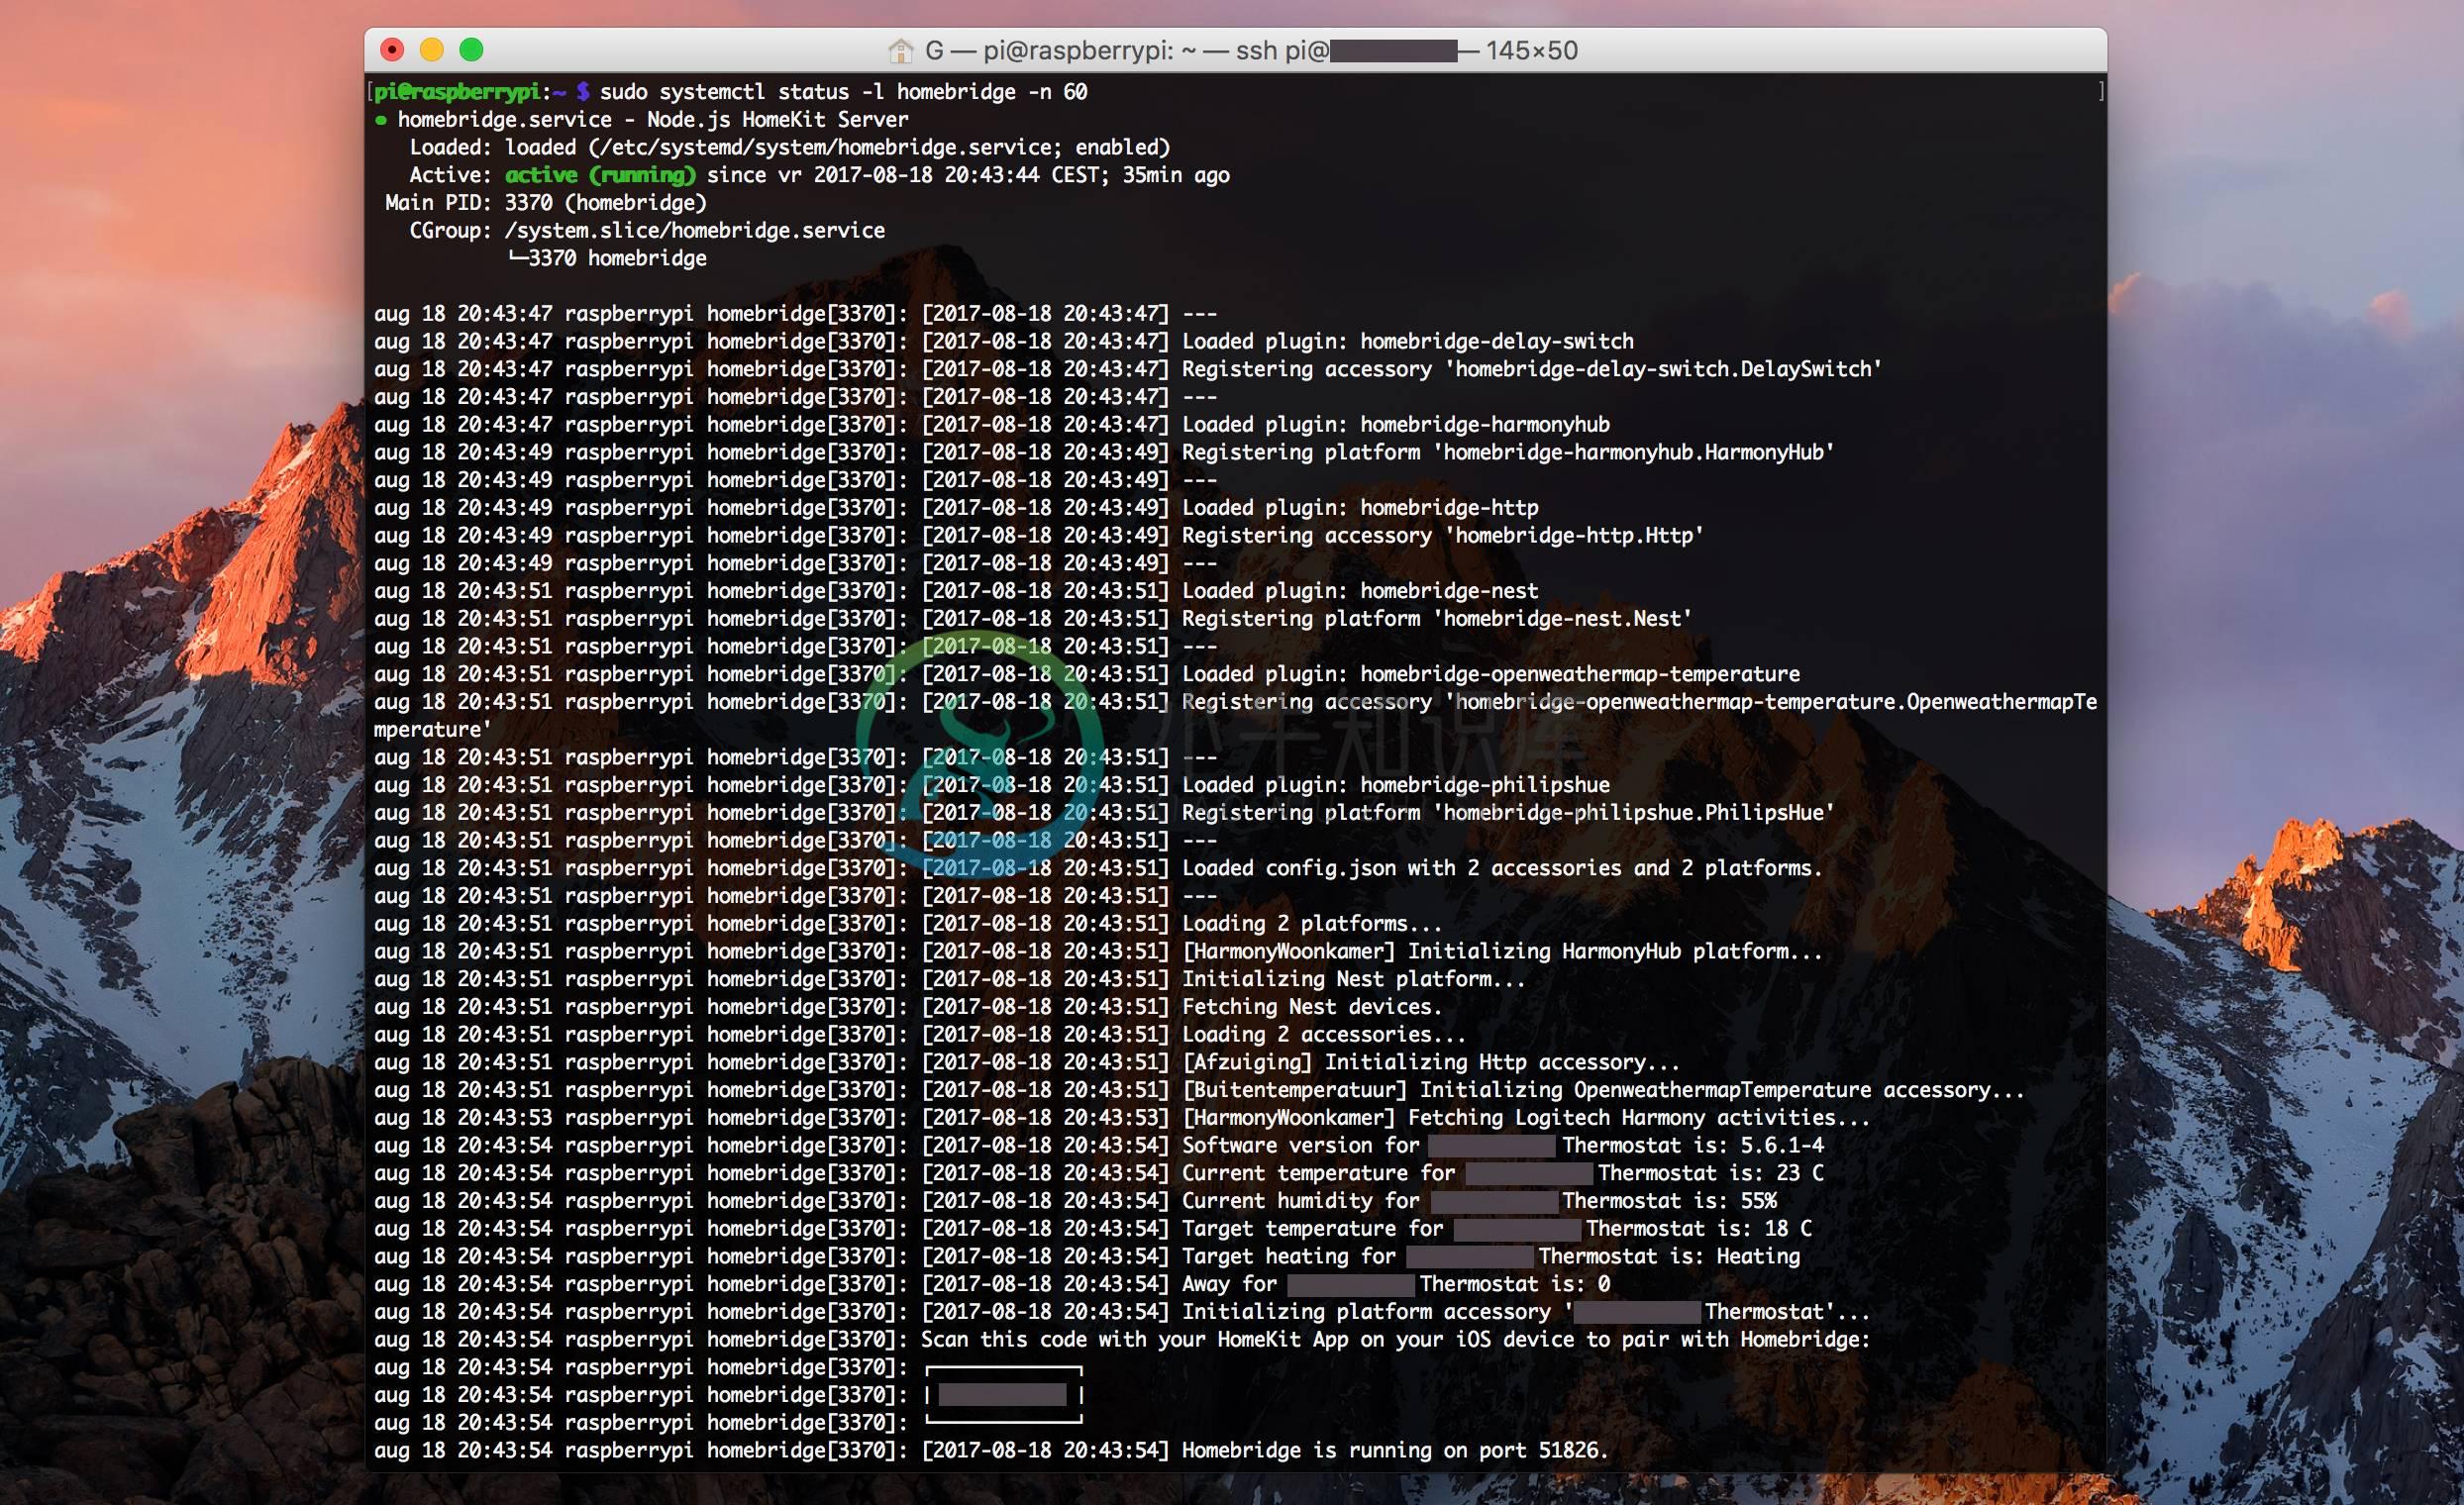
You can check the state of homebridge by entering the following command:
sudo systemctl status -l homebridge -n 200
sudo systemctl status -l hap-camera-rpi -n 200
This will output the last 200 lines, change that number to get more/less info
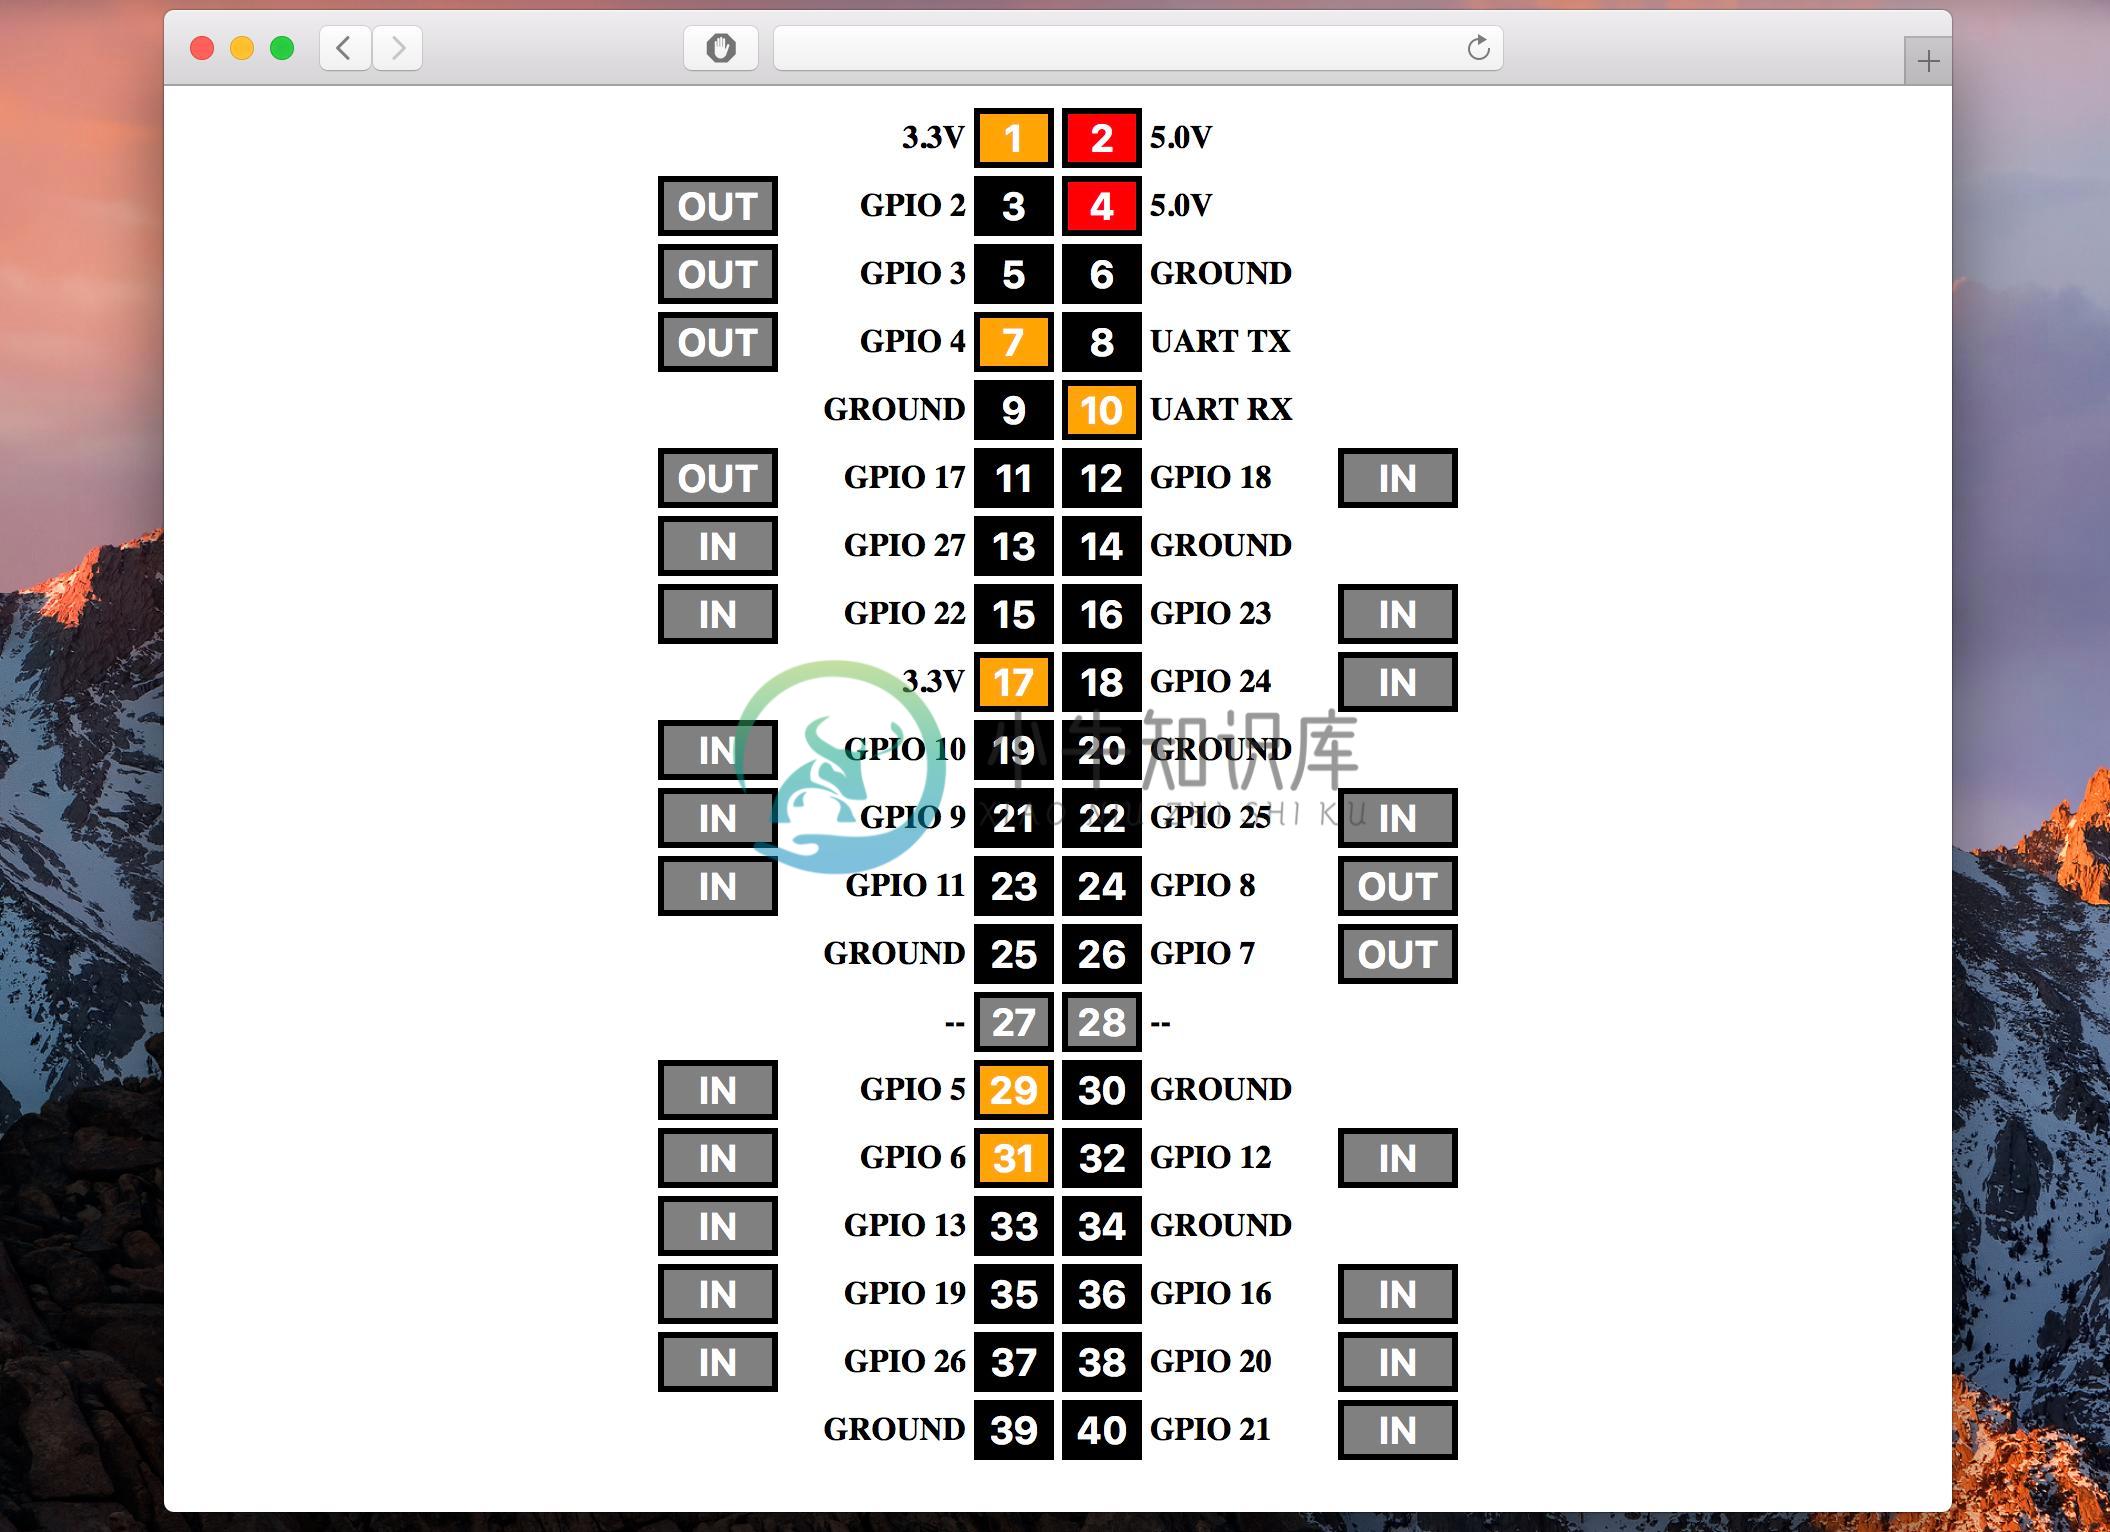
You can check the status of WebIOPi by entering the following address in your browser:
http://RASPBERRYIPADDRESS:8000/
Notes
- The service will restart after 10 seconds if it fails for any reason (or if you kill it for example with 'sudo systemctl stop homebridge')
- The system will restart after 15 seconds of inactivity
- Install packages manually with: sudo npm install -g FOLDERNAME
Sources
https://github.com/nfarina/homebridge/wiki/Running-HomeBridge-on-a-Raspberry-Pi
https://github.com/KhaosT/HAP-NodeJS/blob/master/lib/gen/HomeKitTypes.js
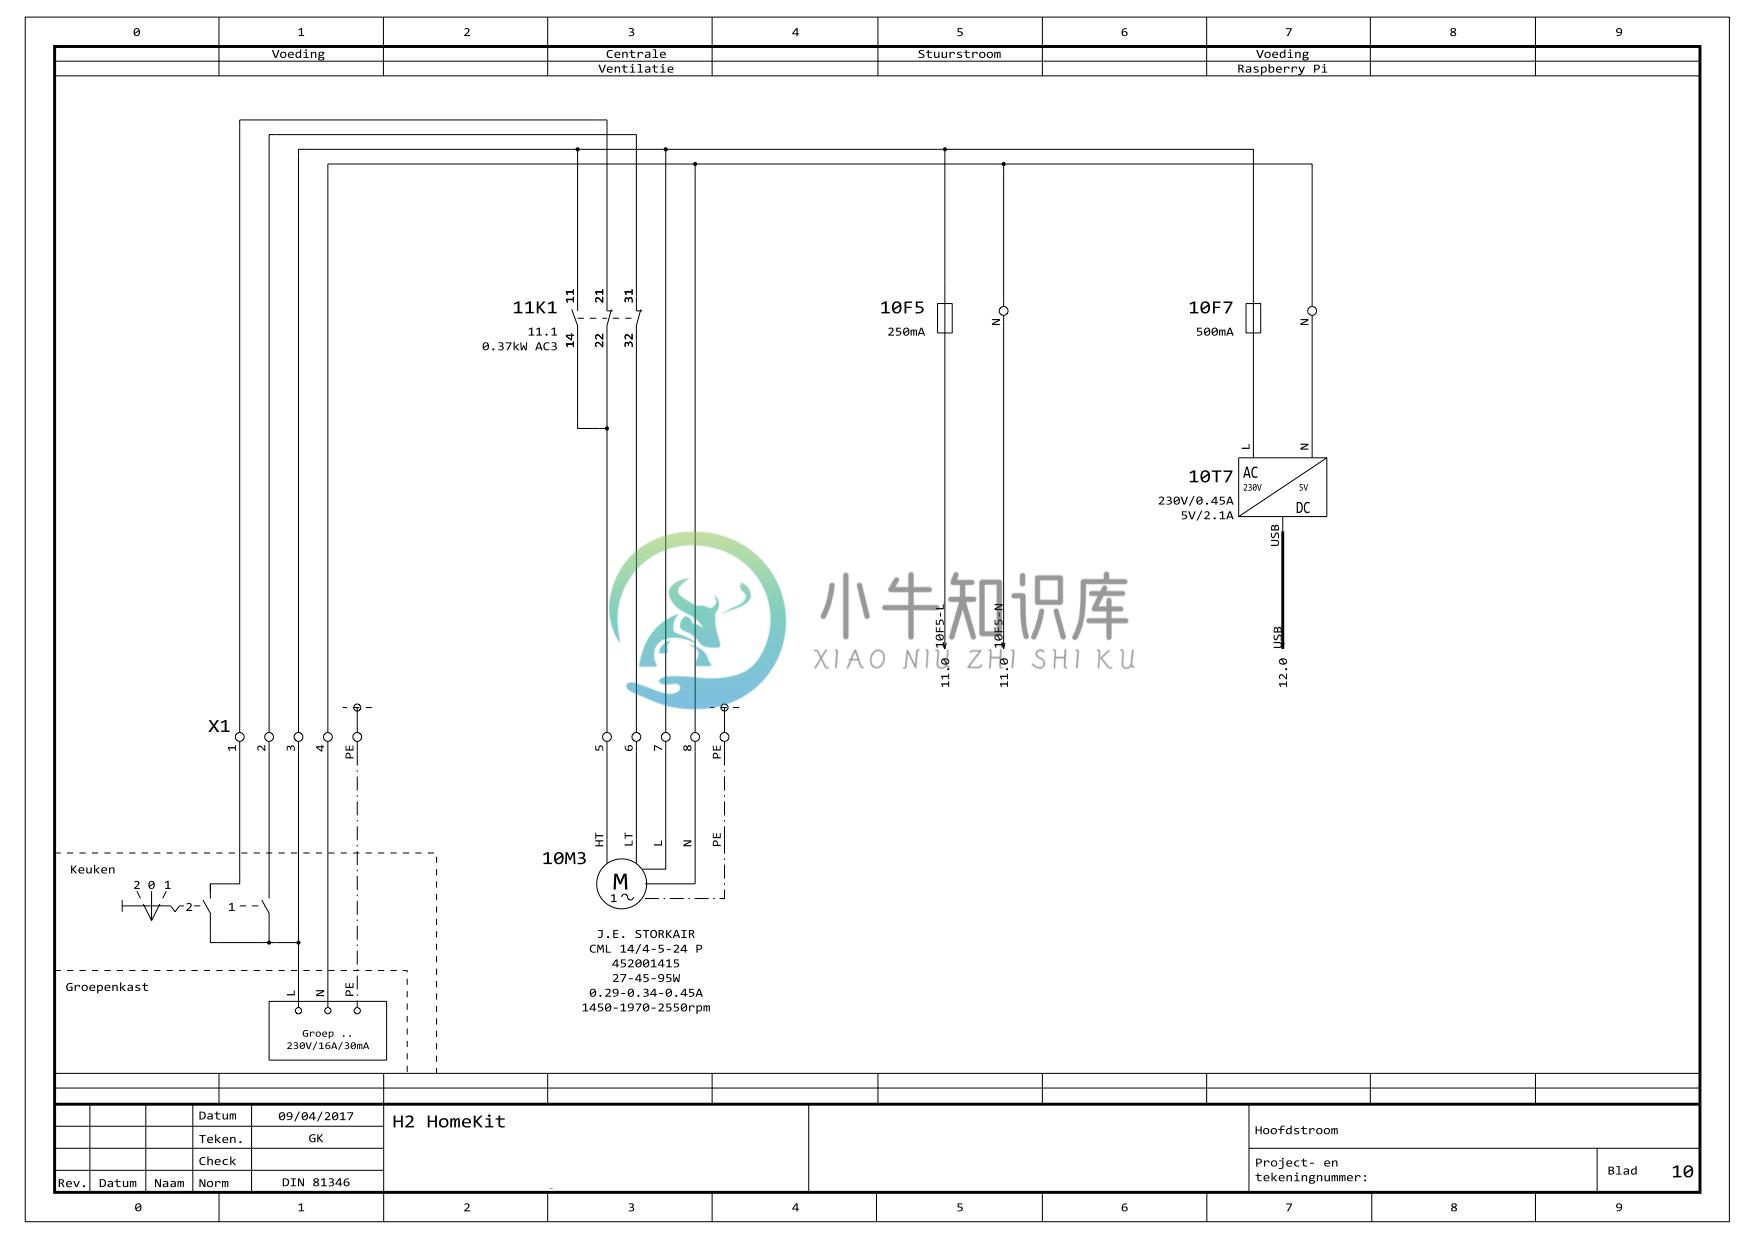
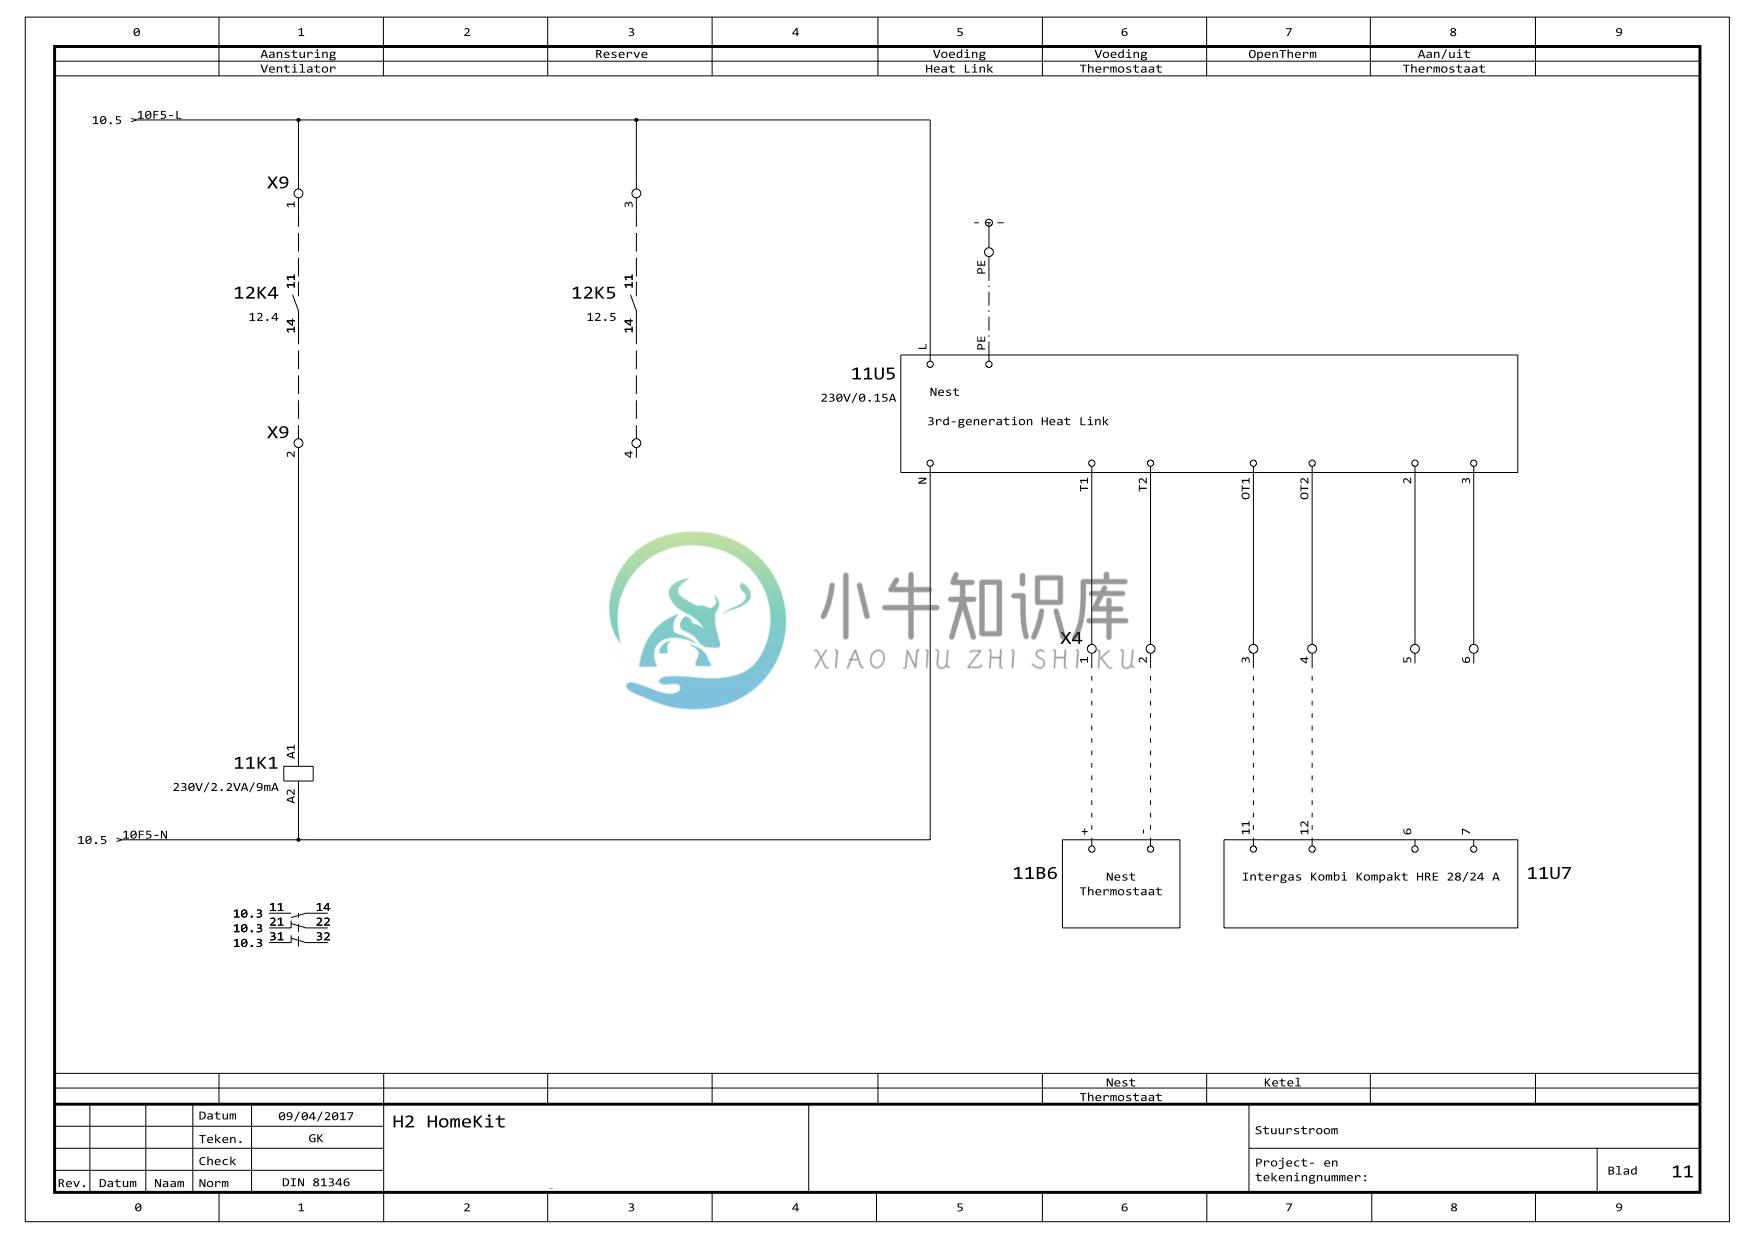
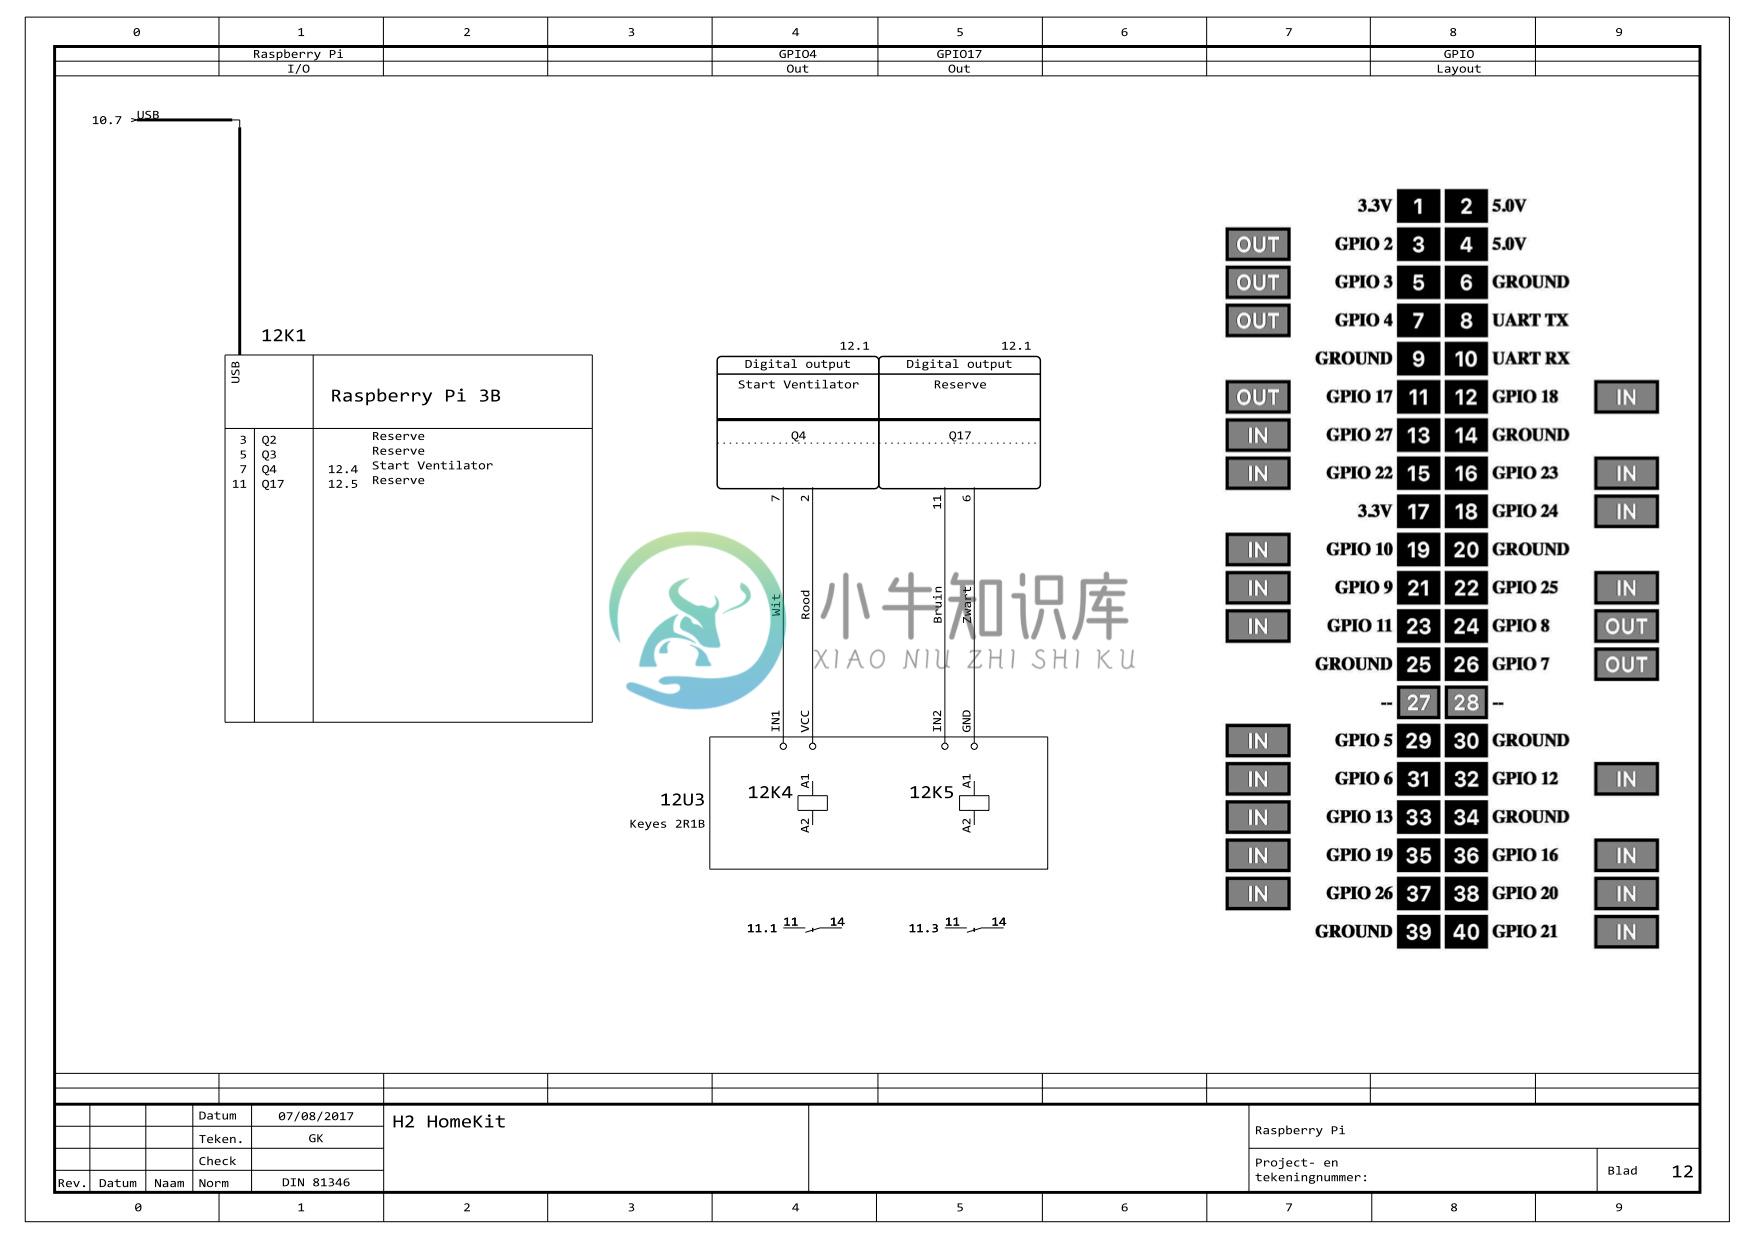
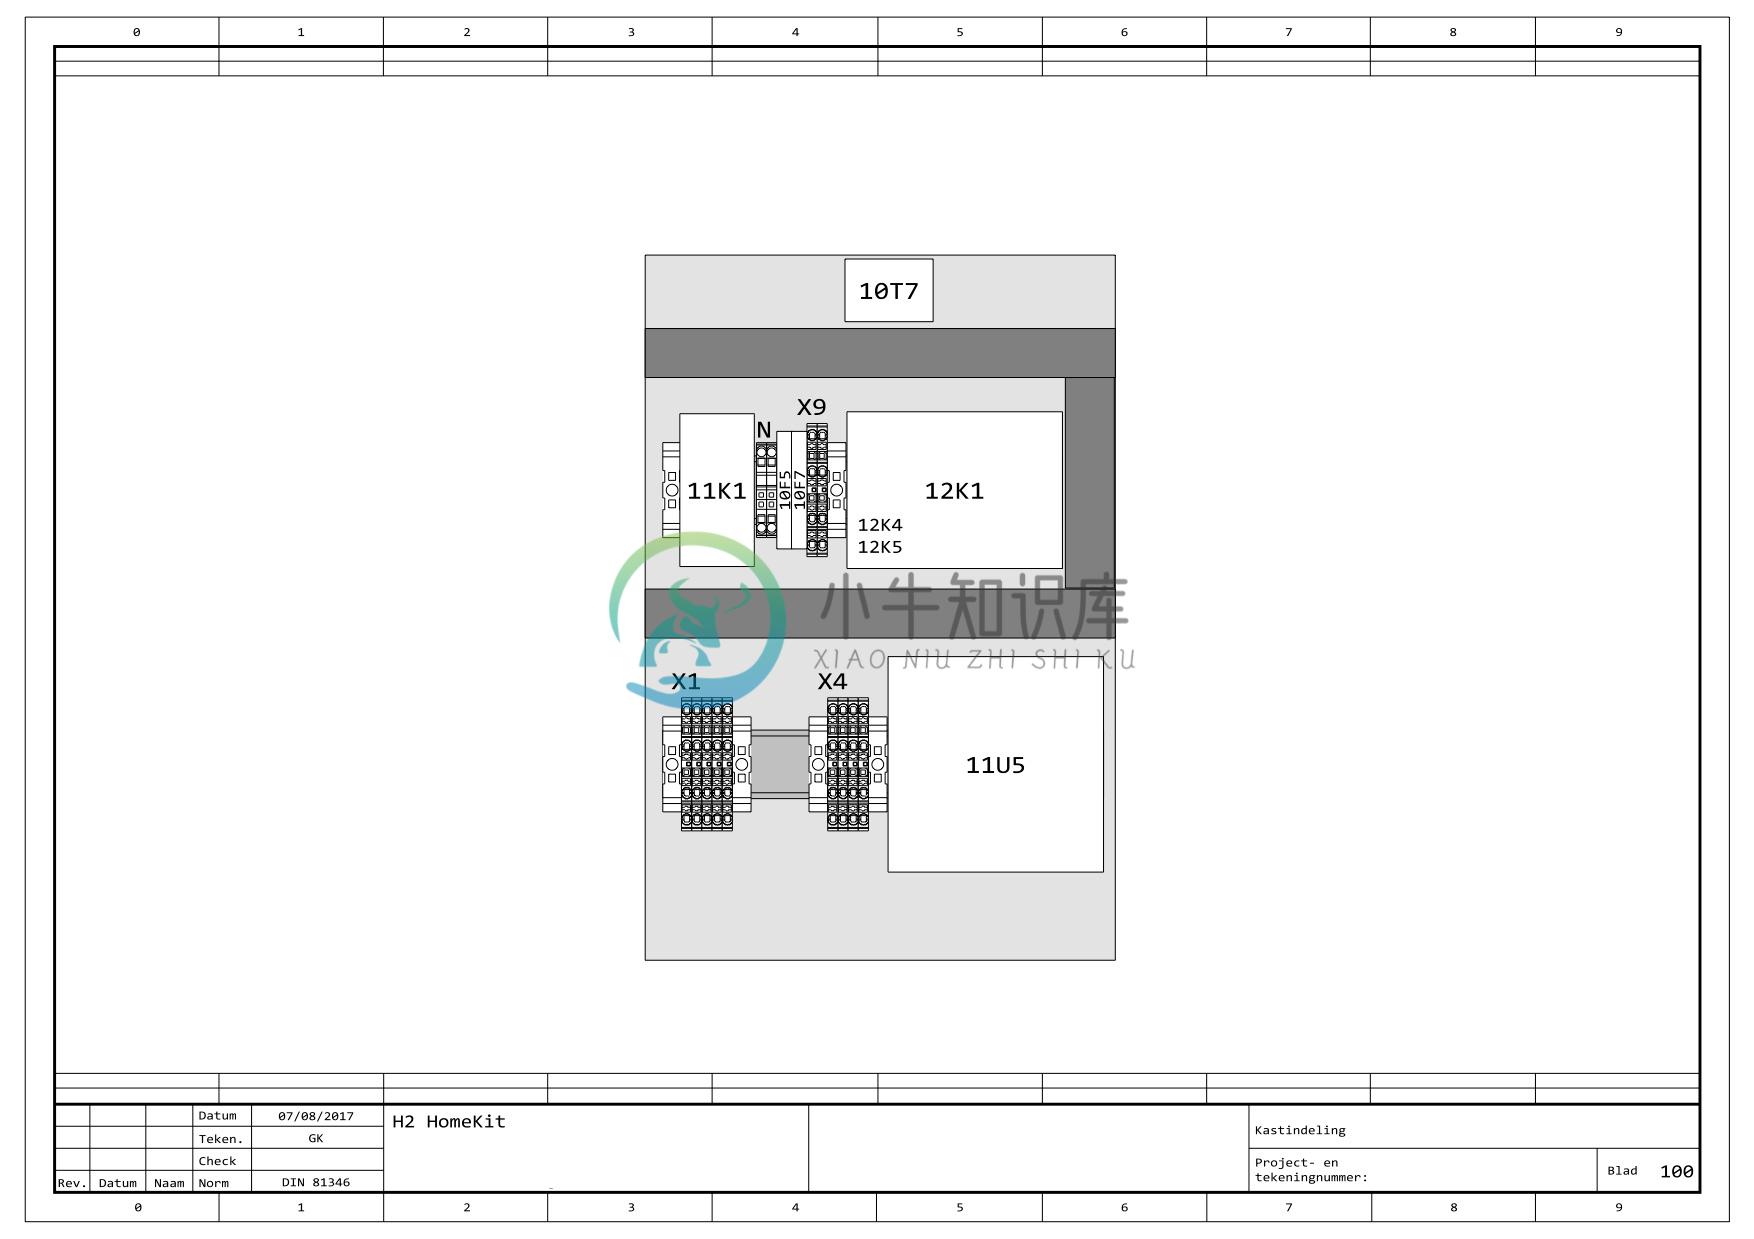
DIN 81346 Electrical Drawing
-
1. 参考 https://bbs.feng.com/read-htm-tid-11483485.html 2. 参考 https://github.com/nfarina/homebridge/wiki/Running-HomeBridge-on-a-Raspberry-Pi 3. 参考 https://sspai.com/post/36617?winzoom=1 4. 参考 https://a
-
0.hass简介 hass即homeassistant,是智能硬件的一个连接平台,它可以通过连接HomeKit、小米网关等控制Apple以及Xiaomi的硬件设备,也可以直接连接硬件设备,通过其Web/App进行控制。同时,它还有自动化的功能,通过配置可以实现智能家居的自动化控制,如进门开灯、室内温度高于阈值启动空调等。在链接中可以查看它所支持的硬件设备,除此之外,还可以自己DIY一些智能硬件,写
-
Homebridge 是一个轻量级 NodeJS 服务器,它模拟 iOS HomeKit API,提供从 HomeKit 到“智能家居”设备制造商提供的各种第三方 API 的基本桥接。通过 Homebridge 的桥接,可以让 Siri 控制完全不支持 HomeKit 的设备。 此外 Homebridge 支持插件。
-
描述 (Description) 它将事件绑定到对象和回调函数。 每当触发事件时,它都会执行回调。 语法 (Syntax) object.on(event, callback function, [context]) 参数 (Parameters) event - 它绑定一个对象。 callback - 它是对代码的引用。 context - 它是一个可以传递给回调函数的对象。 例子 (Exam
-
cPanel的这个接口允许您创建和安装Ruby on Rails应用程序。 如果您开发了Ruby on Rails应用程序,则可以使用此界面将其部署到服务器。 要创建Ruby on Rails应用程序,请按照下列步骤操作 - Step 1 - 单击cPanel Home的Software Section下的Ruby on Rails。 Step 2 - 在Ruby on Rails接口中,您将找到
-
homebridge-vsx homebridge-vsx is a plugin made for homebridge,which allows switching on and off your Pioneer AV receiver. All AV receivers (VSX and SC),which work with the iControl AV5 App are support
-
homebridge-sesame Control and monitor your Sesame smart lock with HomeKit integration. Prerequisites Installation of Homebridge iOS 11 or later Sesame lock with enabled cloud integration Sesame Wifi A
-
homebridge-panasonictv A homebridge plugin for turning on and off your Panasonic Viera TV. The plugin also has experimental support for changing the volume and channel. These characteristics are not r


