Homebridge Plugin Custom UI Utils
The package assists plugin developers creating fully customisable configuration user interfaces for their plugins.
Implementation
A plugin's custom user interface has two main components:
- User Interface - this is the HTML / CSS / JavaScript code the users interact with
- Server - this is an optional server side script that provides endpoints the UI can call
Project Layout
A custom UI should be published under a directory named homebridge-ui:
homebridge-ui/public/index.html- required - this is the plugin UI entry point.homebridge-ui/public/- you can store any other assets (.css,.js, images etc.) in the public folder.homebridge-ui/server.js- optional - this is the server side script containing API endpoints for your plugin UI.config.schema.json- required - setcustomUitotruein the schema to enable custom UI.
Basic structure example:
homebridge-example-plugin/
├── homebridge-ui
│   ├── public
│   │   └── index.html
│   └── server.js
├── config.schema.json
├── package.json
You may customise the location of the homebridge-ui by setting the customUiPath property in the config.schema.json. For example: "customUiPath": "./dist/homebridge-ui".
User Interface API
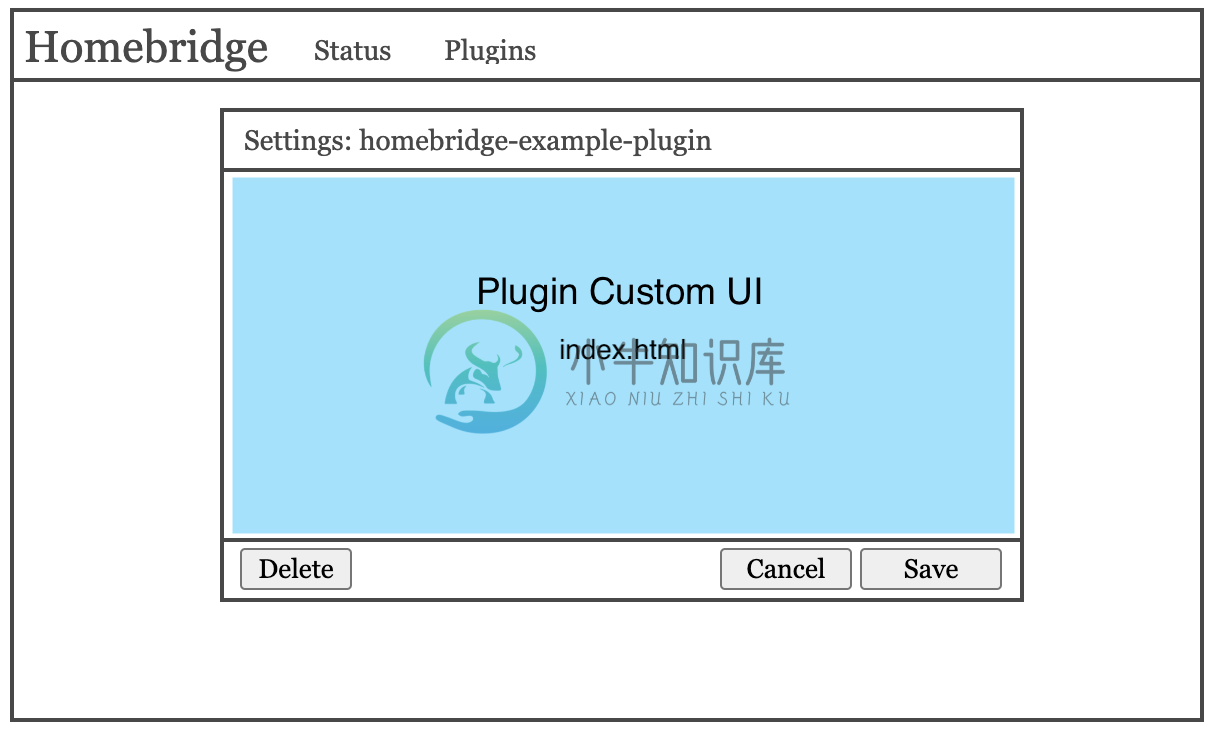
A plugin's custom user interface is displayed inside an iframe in the settings modal, in place of the schema-generated form.
The user interface API is provided to the plugin's custom UI via the window.homebridge object. This is injected into the plugin's custom UI during render.
Note:
- Developers are free to use front end frameworks such as Angular, Vue, or React to create the plugin's custom user interface.
- Developers should make use Bootstrap 4 CSS classes, as these will automatically be styled and themed correctly. There is no need to include the boostrap css yourself, this will be injected by the Homebridge UI during render.
- As the user interface is displayed in an isolated iframe, you can safely use any custom JavaScript and CSS.
- The
index.htmlfile should not include<html>,<head>, or<body>tags, as these are added by the Homebridge UI during the render process. - You may include external assets in your HTML.
Example index.html:
<link rel="stylesheet" href="your-plugin.css">

<div class="card">
  <div class="form-group">
    <label for="exampleInputEmail1">Email address</label>
    <input type="email" class="form-control" id="exampleInputEmail1" aria-describedby="emailHelp">
    <small id="emailHelp" class="form-text text-muted">Help text...</small>
  </div>
</div>

<script>
(async () => {
  // get the current homebridge config
  const pluginConfig = await homebridge.getPluginConfig();

  // make requests to your server.js script
  const result = await homebridge.request('/hello', { name: 'world' });
})();
</script>
Config
homebridge.getPluginConfig
homebridge.getPluginConfig(): Promise<PluginConfig[]>;
Returns a promise that resolves an array of accessory or platform config blocks for the plugin.
An empty array will be returned if the plugin is not currently configured.
const pluginConfigBlocks = await homebridge.getPluginConfig();
// [{ platform: 'ExamplePlatform', name: 'example' }]
homebridge.updatePluginConfig
homebridge.updatePluginConfig(pluginConfig: PluginConfig[]): Promise<PluginConfig[]>;
Update the plugin config.
pluginConfig: A full array of platform and accessory config blocks.
This should be called whenever a change to the config is made.
This does not save the plugin config to disk.
Existing blocks not included will be removed.
const pluginConfig = [
  {
    name: 'my light 1',
    accessory: 'ExampleAccessory'
  },
  {
    name: 'my light 2',
    accessory: 'ExampleAccessory'
  }
]

await homebridge.updatePluginConfig(pluginConfig);
homebridge.savePluginConfig
homebridge.savePluginConfig(): Promise<void>
Saves the plugin config changes to the Homebridge config.json. This is the equivalent of clicking the Save button.
This should be used sparingly, for example, after a access token is generated.
You must call await homebridge.updatePluginConfig() first.
// update config first!
await homebridge.updatePluginConfig(pluginConfig);

// save config
await homebridge.savePluginConfig();
homebridge.getPluginConfigSchema
homebridge.getPluginConfigSchema(): Promise<PluginSchema>;
Returns the plugin's config.schema.json.
const schema = await homebridge.getPluginConfigSchema();
homebridge.getCachedAccessories
homebridge.getCachedAccessories(): Promise<CachedAccessory[]>;
Returns the any cached accessories for the plugin
const cachedAccessories = await homebridge.getCachedAccessories();
Requests
This allows the custom UI to make API requests to their server.js script.
homebridge.request
homebridge.request(path: string, body?: any): Promise<any>
Make a request to the plugin's server side script.
path: the path handler on the server that the request should be sent tobody: an optional payload
Returns a promise with the response from the server.
User Interface Example:
const response = await homebridge.request('/hello', { who: 'world' });
console.log(response); // the response from the server
The corresponding code in the server.js file would look like this:
// server side request handler
this.onRequest('/hello', async (payload) => {
  console.log(payload) // the payload sent from the UI
  return { hello: 'user' };
});
Toast Notifications
Toast notifications are the pop-up notifications displayed in the bottom right corner. A plugin's custom UI can generate custom notifications with custom content.
homebridge.toast.success
homebridge.toast.success(message: string, title?: string): void
Shows a green "success" notification.
message: the toast contenttitle: an optional title
homebridge.toast.error
homebridge.toast.error(message: string, title?: string): void
Shows a red "error" notification.
message: the toast contenttitle: an optional title
homebridge.toast.warning
homebridge.toast.warning(message: string, title?: string): void
Shows an amber "warning" notification.
message: the toast contenttitle: an optional title
homebridge.toast.info
homebridge.toast.info(message: string, title?: string): void
Shows a blue "info" notification.
message: the toast contenttitle: an optional title
Modal
homebridge.closeSettings
homebridge.closeSettings(): void
Close the settings modal.
This action does not save any config changes.
homebridge.closeSettings();
homebridge.showSpinner
homebridge.showSpinner(): void
Displays a spinner / loading overlay, preventing user input until cleared with homebridge.hideSpinner.
// show the spinner overlay
homebridge.showSpinner();

// wait for the request to process
await homebridge.request('/hello');

// hide the spinner overlay
homebridge.hideSpinner();
homebridge.hideSpinner
homebridge.hideSpinner(): void
Hide the spinner / loading overlay.
homebridge.hideSpinner();
Forms
The custom user interface allows you to create two types of forms:
- A form based on your plugin's
config.schema.jsonfile- User input is automatically mapped to the plugin config object
- You can listen for change events from your custom user interface
- The schema must contain all config options
- A standalone form
- Not linked to your
config.schema.jsonform in any way - You must listen for change events, process the event, and update the plugin config
- The form does not need to include all config options
- Not linked to your
Developers are also able to create their own forms using HTML.
homebridge.showSchemaForm
homebridge.showSchemaForm(): void
Show the schema-generated form below the custom user interface.This feature only works for platform plugins that have set singular = true in their config.schema.json file.
homebridge.showSchemaForm();
When enabling the schema form, you should listen for the configChanged event to keep your config in sync. This event is triggered whenever the user makes a change in the schema-generated form (250ms debounce).
window.homebridge.addEventListener('configChanged', (event: MessageEvent) => {
  console.log('Updated config:', event.data);
});
homebridge.hideSchemaForm
homebridge.hideSchemaForm(): void
Hides the schema-generated form.
homebridge.hideSchemaForm();
homebridge.createForm
homebridge.createForm(schema: FormSchema, data: any, submitButton?: string, cancelButton?: string): IHomebridgeUiFormHelper;
Create a new standalone form. You may pass in an arbitrary schema using the same options as the config.schema.json.
Only one standalone form can be displayed at a time. The main config-schema based form cannot be shown while a standalone form is being displayed.
schema: The form schema object, may also contain layout metadatadata: The initial form datasubmitButton: String. Optional label for a submit button, if not provided, no submit button will be displayedcancelButton: String. Optional label for a cancel button, if not provided, no cancel button will be displayed
Example:
// create the form
const myForm = homebridge.createForm(
   {
      schema: {
        type: 'object',
        properties: {
          name: {
            title: 'Name',
            type: 'string',
            required: true,
          }
        }
      },
      layout: null,
      form: null,
   },
   {
      name: 'initial name value'
   }
);

// watch for change events
myForm.onChange((change) => {
  console.log(change);
});

// watch for submit button click events
myForm.onSubmit((form) => {
  console.log(form);
});

// watch for cancel button click events
myForm.onCancel((form) => {
  console.log(form);
});

// stop listening to change events and hide the form
myForm.end();
Events
The homebridge object is an EventTarget, this allows you to use the browsers built in addEventListener and removeEventListener functions to subscribe and unsubscribe from events.
Ready Event
Called when the Homebridge UI has completed rendering the plugin's custom UI.
homebridge.addEventListener('ready', () => {
  // do something with event
});
Custom Events
Custom events can be pushed from the plugin's server.js script.
UI Example:
homebridge.addEventListener('my-event', (event) => {
  console.log(event.data); // the event payload from the server
});
The corresponding code in the server.js file would look like this:
this.pushEvent('my-event', { some: 'data' });
Plugin / Server Information
homebridge.plugin
homebridge.plugin
Is an object that contains plugin metadata.
{
  name: string;
  description: string;
  installedVersion: string;
  latestVersion: string;
  verifiedPlugin: boolean;
  updateAvailable: boolean;
  publicPackage: boolean;
  links: {
    npm: string;
    homepage?: string;
  }
}
homebridge.serverEnv
homebridge.serverEnv
Is an object containing some server metadata
{
  env: {
    platform: string;       // darwin, win32, linux, freebsd etc.
    nodeVersion: string;    // Node.js version
  }
}
Server API
To provide server API endpoints that can be called from the custom UI, a plugin must place a server.js file in the homebridge-ui directory.
You will need to include the @homebridge/plugin-ui-utils library as a prod dependency:
npm install --save @homebridge/plugin-ui-utils
Note:
- This
server.jsscript will be spawned as a child process when the plugin's settings modal is opened, and is terminated when the settings modal is closed. - The
server.jsscript must create a new instance of a class that extendsHomebridgePluginUiServerfrom the@homebridge/plugin-ui-utilslibrary. - This file will be spawned as a child process when the plugin's settings modal is opened, and is terminated when the settings modal is closed.
- The server side script must extend the class provided by the
@homebridge/plugin-ui-utilslibrary.
Example server.js:
const { HomebridgePluginUiServer } = require('@homebridge/plugin-ui-utils');

// your class MUST extend the HomebridgePluginUiServer
class UiServer extends HomebridgePluginUiServer {
  constructor () {
    // super must be called first
    super();

    // Example: create api endpoint request handlers (example only)
    this.onRequest('/hello', this.handleHelloRequest.bind(this));

    // this.ready() must be called to let the UI know you are ready to accept api calls
    this.ready();
  }

  /**
   * Example only.
   * Handle requests made from the UI to the `/hello` endpoint.
   */
  async handleHelloRequest(payload) {
    return { hello: 'world'; }
  }
}

// start the instance of the class
(() => {
  return new UiServer;
})();
Setup
this.ready
this.ready(): void
Let the UI know the server is ready to accept requests.
this.ready();
Request Handling
this.onRequest
this.onRequest(path: string, fn: RequestHandler)
Handle requests sent from the UI to the given path.
path: the request path namefn: a function to handle the incoming requests
The value returned/resolved from the request handler function will be sent back to the UI as the request response.
Example creating a request handler on the server:
// server side code
this.onRequest('/hello', async (payload) => {
  console.log(payload) // the payload sent from the UI
  return { hello: 'user' };
});
The corresponding call in the UI to send requests to this endpoint:
// ui code
const response = await homebridge.request('/hello', { who: 'world' });
console.log(response); // the response from the server
Request Error Handling
If you need to throw an error during your request, you should throw an instance of RequestError instead of a normal Error:
Example:
// server side code
const { RequestError } = require('@homebridge/plugin-ui-utils');

this.onRequest('/hello', async (payload) => {
  // something went wrong, throw a RequestError:
  throw new RequestError('Something went wrong!', { status: 404 });
});
You can then catch this in the UI:
try {
  await homebridge.request('/hello', { who: 'world' });
} catch (e) {
  console.log(e.message); // 'Something went wrong!'
  console.log(e.error); // { status: 404 }
}
Uncaught errors in event handlers, or errors thrown using new Error will still result in the waiting promise in the UI being rejected, however the error stack trace will also be shown in the Homebridge logs which should be avoided.
Push Events
this.pushEvent
this.pushEvent(event: string, data: any)
Push events allow you to send data to the UI, without needed the UI to request it first.
event: a string to describe the event typedata: any data to send as an event payload to the UI.
Example pushing an event payload to the UI:
this.pushEvent('my-event', { some: 'data' });
The corresponding code to watch for the event in the UI:
homebridge.addEventListener('my-event', (event) => {
  console.log(event.data); // the event payload from the server
});
Server Information
this.homebridgeStoragePath
this.homebridgeStoragePath: string
Returns the Homebridge instance's current storage path.
const storagePath = this.homebridgeStoragePath;
this.homebridgeConfigPath
this.homebridgeConfigPath: string
Returns the path to the Homebridge config.json file:
const configPath = this.homebridgeConfigPath;
this.homebridgeUiVersion
this.homebridgeUiVersion: string
Returns the version of the Homebridge UI:
const uiVersion = this.homebridgeUiVersion;
Examples
- Basic Example - demos a minimal custom user interface, interacting with server side scripts, updating the plugin config, and using toast notifications.
- Push Events - demos how to send push events from the server, and listen for them in the custom user interface.
A full list of plugins that have implemented the custom user interface can be found here.
homebridge-mercedesme
The homebridge-mercedesme plugin by @SeydX allows users to pair their vehicle using a custom user interface:
homebridge-bravia-tvos
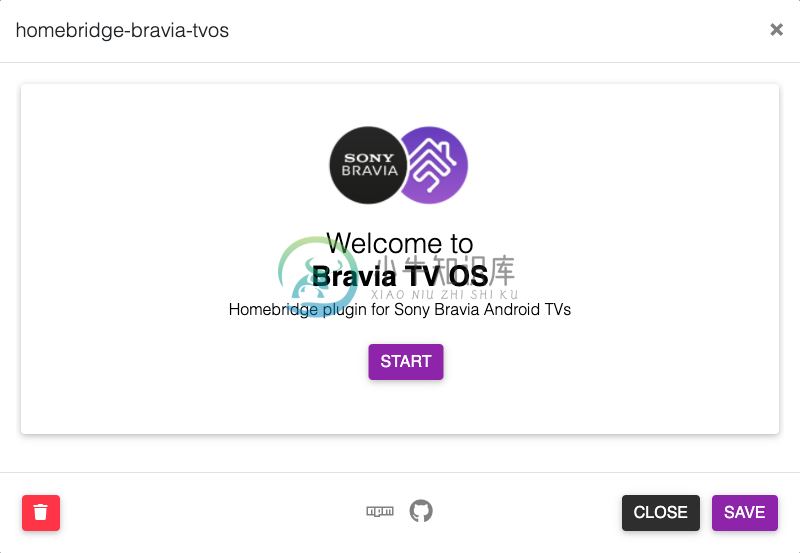
The homebridge-bravia-tvos plugin by @SeydX allows users to pair and dynamically configure a user's TV using a custom user interface:
homebridge-electra-smart
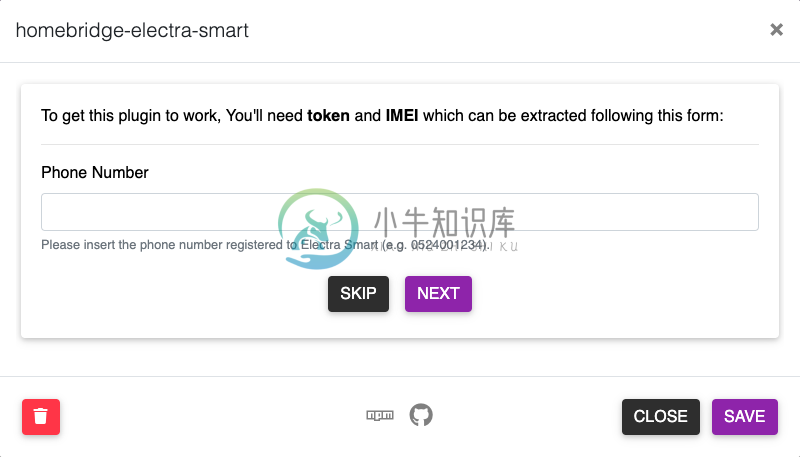
The homebridge-electra-smart plugin by nitaybz allows users to request a OTP and enter it in exchange for an authentication token:
Development
For hints and tips on how to develop your custom user interface, see DEVELOPMENT.md.
-
报错内容: ERROR in ./node_modules/swagger-ui-react/swagger-ui.js 2:107055-107070 Module not found: Error: Can't resolve 'btoa' in 'D:\ant-design-pro\myapp\node_modules\swagger-ui-react' @ ./node_modules
-
babel-plugin-import 在 Babel 配置中引入该插件,可以针对 antd, antd-mobile, lodash, material-ui等库进行按需加载. 为什么需要 babel-plugin-import English Instruction 中文说明 如何在项目中添加 babel-plugin-import babelrc babel-loader 例子 { "lib
-
一、引入css报错 1.引入css代码 import 'element-ui/lib/theme-chalk/index.css'; 2.报错信息 ./node_modules/element-ui/lib/theme-chalk/index.css 1:0 Module parse failed: Unexpected character '@' (1:0) You may need an
-
前述 vue-cli3版本的发布距今已经过了大半年,前后迭代了50多个版本,终于趋于稳定;这里不得不得感叹vue开源团队对vue技术栈的倾力贡献,使得vue社区的前端工程化实践又向前迈了一大步。相比vue-cli2版本的'大锅混',三版本的插件系统卓识令人惊艳了一把,因此组内也在第一时间迁移了vue-cli3,本文算是对插件系统的一次探索与学习,也算是一次抛砖引玉,期待后面继续更新推出优秀的插件并
-
报错:peerDependencies WARNING @vue/cli-plugin-eslint@~4.5.0 requires a peer of eslint@>= 1.6.0 < 7.0.0 but eslint@8.20.0 was installed peerDependencies WARNING eslint-plugin-vue@^6.2.2 requires a peer o
-
所属类别 实用工具(Utilities) | 小部件(Widgets) 用法 描述:jQuery.widget.bridge() 方法是 jQuery 部件库(Widget Factory) 的一部分。它扮演着由 $.widget() 创建的对象和 jQuery API 之间的中介。jQuery.widget.bridge( name, constructor ) 参数 类型 类型 name St
-
import "plugin" Package plugin implements loading and symbol resolution of Go plugins. Currently plugins only work on Linux. A plugin is a Go main package with exported functions and variables that ha
-
从插件开发里面可知,插件里面涉及uiServer,statsServer,https://www.wenjiangs.com/doc/Efo6sGZXpUrulesServer,server,resRulesServer,resStatsServer共6个功能不同的内部server,这几个server都是可选的;如果存在,插件会把匹配的请求按给定方式传给对应的server,并根据server响应内
-
A plugin contains one or more features that can be easily plugged in to Handsontable. Writing a new plugin is not a difficult task, simply cloning the Skeleton template will give you a good starting p
-
The link plugin allows a user to link external resources such as website URLs, to selected text in their document. It also adds a toolbar button and a menu item Insert/edit link under the Insert menu
-
This plugin adds a save button to the TinyMCE toolbar, which will submit the form that the editor is within. Type: String Example tinymce.init({ selector: "textarea", // change this value according


