Scipy Ndimage
SciPy的ndimage子模块专用于图像处理。这里,ndimage表示一个n维图像。
图像处理中一些最常见的任务如下:
- 输入/输出,显示图像
- 基本操作 - 裁剪,翻转,旋转等
- 图像过滤 - 去噪,锐化等
- 图像分割 - 标记对应于不同对象的像素
- 分类
- 特征提取
- 注册/配准
下面来看看如何使用SciPy实现其中的一些功能。
打开和写入图像文件
SciPy中的misc包附带了一些图像。在这里,使用这些图像来学习图像操作。请看看下面的例子。
from scipy import misc
f = misc.face()
misc.imsave('face.png', f) # uses the Image module (PIL)

import matplotlib.pyplot as plt
plt.imshow(f)
plt.show()
执行上面示例代码,得到以下输出结果 -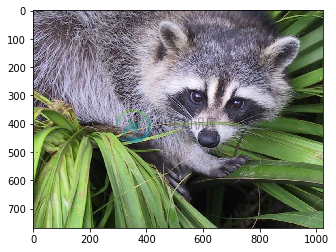
原始格式的任何图像是由矩阵格式中的数字表示的颜色的组合。机器只能根据这些数字理解和操作图像。RGB是一种流行的表示方式。
下面来看看上面图片的统计信息。
from scipy import misc
f = misc.face()
misc.imsave('face.png', f) # uses the Image module (PIL)

face = misc.face(gray = False)
print (face.mean(), face.max(), face.min())
执行上面示例代码,得到以下结果 -
110.162743886 255 0
现在,我们已经知道图像是由数字组成的,所以数字值的任何变化都会改变原始图像。接下来对图像执行一些几何变换。基本的几何操作是裁剪 -
from scipy import misc
f = misc.face()
misc.imsave('face.png', f) # uses the Image module (PIL)
face = misc.face(gray = True)
lx, ly = face.shape

crop_face = face[int(lx/4): -int(lx/4), int(ly/4): -int(ly/4)]

import matplotlib.pyplot as plt
plt.imshow(crop_face)
plt.show()
执行上面示例代码,得到以下结果 -
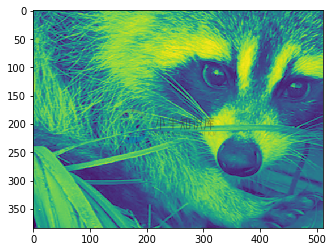
也可以执行一些基本的操作,例如像下面描述的那样倒置图像。参考以下代码 -
from scipy import misc

face = misc.face()
flip_ud_face = np.flipud(face)

import matplotlib.pyplot as plt
plt.imshow(flip_ud_face)
plt.show()
执行上面示例代码,得到以下结果 -
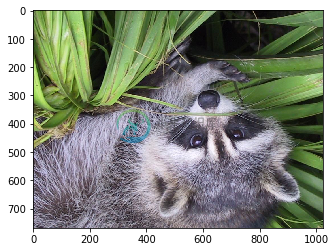
除此之外,还有rotate()函数,它以指定的角度旋转图像。
# rotation
from scipy import misc,ndimage
face = misc.face()
rotate_face = ndimage.rotate(face, 45)

import matplotlib.pyplot as plt
plt.imshow(rotate_face)
plt.show()
执行上面示例代码,得到以下结果 -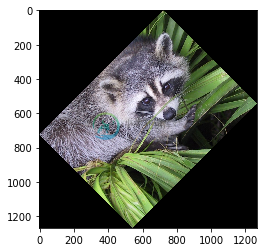
滤镜
下面来看看滤镜如何应用在图像处理中。
图像处理中的滤镜是什么?
滤镜是一种修改或增强图像的技术。例如,可以过滤图像以强调某些功能或删除其他功能。通过滤镜实现的图像处理操作包括平滑,锐化和边缘增强。
滤镜是一种邻域操作,其中输出图像中任何给定像素的值是通过对相应输入像素的邻域中的像素的值应用某种算法来确定的。现在使用SciPy ndimage执行一些操作。
模糊
模糊广泛用于减少图像中的噪声。可以执行过滤操作并查看图像中的更改。看看下面的例子。
from scipy import misc
face = misc.face()
blurred_face = ndimage.gaussian_filter(face, sigma=3)
import matplotlib.pyplot as plt
plt.imshow(blurred_face)
plt.show()
执行上面示例代码,得到以下结果 -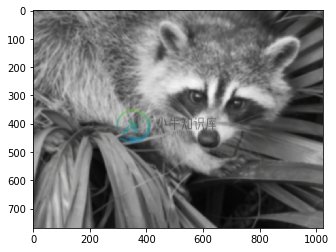
sigma值表示5级模糊程度。通过调整sigma值,可以看到图像质量的变化。
边缘检测
讨论边缘检测如何帮助图像处理。
什么是边缘检测?
边缘检测是一种用于查找图像内物体边界的图像处理技术。它通过检测亮度不连续性来工作。边缘检测用于诸如图像处理,计算机视觉和机器视觉等领域的图像分割和数据提取。
最常用的边缘检测算法包括 -
- 索贝尔(Sobel)
- 坎尼(Canny)
- 普鲁伊特(Prewitt)
- 罗伯茨Roberts
- 模糊逻辑方法
看看下面的一个例子。
import scipy.ndimage as nd
import numpy as np

im = np.zeros((256, 256))
im[64:-64, 64:-64] = 1
im[90:-90,90:-90] = 2
im = ndimage.gaussian_filter(im, 8)

import matplotlib.pyplot as plt
plt.imshow(im)
plt.show()
执行上面示例代码,得到以下结果 -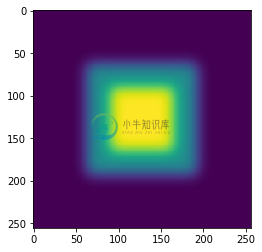
图像看起来像一个方块的颜色。现在,检测这些彩色块的边缘。这里,ndimage提供了一个叫Sobel函数来执行这个操作。而NumPy提供了Hypot函数来将两个合成矩阵合并为一个。
看看下面的一个例子。参考以下实现代码 -
import scipy.ndimage as nd
import matplotlib.pyplot as plt

im = np.zeros((256, 256))
im[64:-64, 64:-64] = 1
im[90:-90,90:-90] = 2
im = ndimage.gaussian_filter(im, 8)

sx = ndimage.sobel(im, axis = 0, mode = 'constant')
sy = ndimage.sobel(im, axis = 1, mode = 'constant')
sob = np.hypot(sx, sy)

plt.imshow(sob)
plt.show()
执行上面示例代码,得到以下结果 -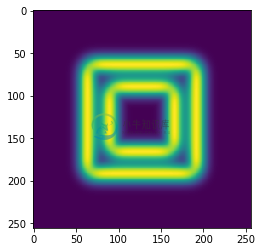
以下是纠正/补充内容:
个人觉得注册应该改为配准更合适一点 提交时间:2019-08-10
