
Android Studio项目适配AndroidX(Android 9.0)的方法步骤

说在前面:
老项目、大项目适配Android X 注意了,一定要谨慎、谨慎、再谨慎。项目中用到的第三方库多的话会很麻烦,有些第三方库还没有适配Android X。
适配Android X的两种情况:一种是老项目适配Android X ,另外一种是新项目要求适配Android 9.0
硬核要求
Android studio 版本升级到3.2.0 以上的版本,
distributionUrl的版本升级为 4.10.1以上
targetSdkVersion 28
gradle 插件的版本升级为 3.2.0以上
classpath 'com.android.tools.build:gradle:3.2.0'
这里以AS 3.4为例
第一步:
新项目,这步可以跳过。
compileSdkVersion 28
  defaultConfig {
    applicationId "gangqing.pu.xmxidaq"
    minSdkVersion 19
    targetSdkVersion 28
    versionCode 1
    versionName "1.0"
    testInstrumentationRunner "androidx.test.runner.AndroidJUnitRunner"
  }
第二步:
// Top-level build file where you can add configuration options common to all sub-projects/modules.

buildscript {
  repositories {
    google()
    jcenter()

  }
  dependencies {
    classpath 'com.android.tools.build:gradle:3.4.0'
    classpath 'com.jakewharton:butterknife-gradle-plugin:10.1.0'
    // NOTE: Do not place your application dependencies here; they belong
    // in the individual module build.gradle files
  }
}

allprojects {
  repositories {
    google()
    jcenter()
    maven { url "https://jitpack.io" }
  }
}

task clean(type: Delete) {
  delete rootProject.buildDir
}
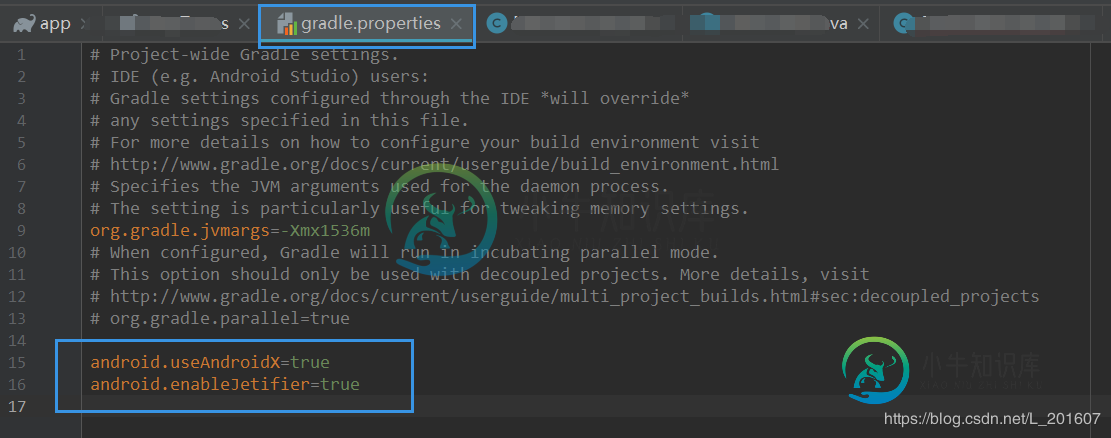
第三步:
在gradle.properties 中加入如下代码,表示支持Android X
android.useAndroidX=true
android.enableJetifier=true
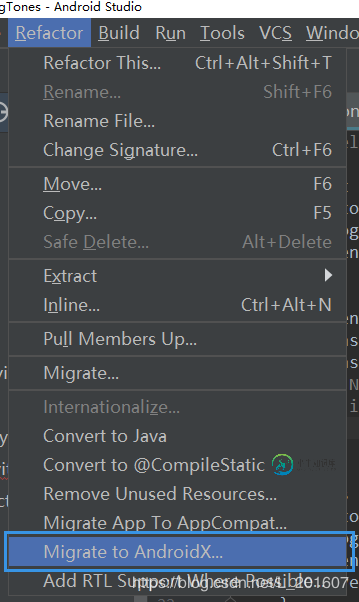
第四步:
Android Studio ----> Refactor----> Migrate to androidx,,一键转为 androidX
第五步:
支持Java 1.8
compileOptions {
    sourceCompatibility JavaVersion.VERSION_1_8
    targetCompatibility JavaVersion.VERSION_1_8
  }
第六步:
修改布局,比如:ConstraintLayout
| 变化之前 | AndroidX |
|---|---|
| <android.support.constraint.ConstraintLayout | <androidx.constraintlayout.widget.ConstraintLayout |
注意:如果是老项目适配AndroidX,没有找到ConstraintLayout 的话,那么还需要在 中添加如下代码
dependencies {
   implementation 'androidx.constraintlayout:constraintlayout:1.1.3'
}
第四步之后,
<android.support.constraint.ConstraintLayout
变为<androidx.constraintlayout.ConstraintLayout 这时你需要修改为
<androidx.constraintlayout.widget.ConstraintLayout |
以上就是本文的全部内容,希望对大家的学习有所帮助,也希望大家多多支持小牛知识库。
-
本文向大家介绍Android项目迁移到AndroidX的方法步骤,包括了Android项目迁移到AndroidX的方法步骤的使用技巧和注意事项,需要的朋友参考一下 1. 写在前面 迁移前请确认所有代码都已提交至代码托管平台或已手动备份! 迁移前请确认所有代码都已提交至代码托管平台或已手动备份! 迁移前请确认所有代码都已提交至代码托管平台或已手动备份! 重要的事情说三遍! 2. 前提条件 将AS更新
-
本文向大家介绍AndroidStudio项目制作倒计时模块的方法,包括了AndroidStudio项目制作倒计时模块的方法的使用技巧和注意事项,需要的朋友参考一下 前言 大家好,我是 Vic,今天给大家带来AndroidStudio项目制作倒计时模块的概述,希望你们喜欢 项目难度 AndroidStudio项目制作倒计时模块的难度,不是很大,就是主要用了Timer和TimerTask这两个,接着就
-
本文向大家介绍Maven搭建springboot项目的方法步骤,包括了Maven搭建springboot项目的方法步骤的使用技巧和注意事项,需要的朋友参考一下 Maven搭建springboot项目 本文是基于Windows 10系统环境,使用Maven搭建springboot项目 Windows 10 apache-maven-3.6.0 IntelliJ IDEA 2018.3.4 x64 一
-
我运行的是Mac OSX,我安装了android Studio-它启动正常。 问题1 我用一个空活动开始一个新项目。在最上面的窗户上我收到一条信息 问题2 我在底部窗口中看到以下错误: 错误:CompilesDKVersion android-L需要使用JDK 7 Open SDK Settings进行编译 打开文件 当我尝试在设备上运行项目时,我得到以下错误: 失败[INSTALL_FAILED
-
本文向大家介绍Eclipse+Maven构建Hadoop项目的方法步骤,包括了Eclipse+Maven构建Hadoop项目的方法步骤的使用技巧和注意事项,需要的朋友参考一下 Maven 翻译为”专家”、”内行”,是 Apache 下的一个纯 Java 开发的开源项目。基于项目对象模型(Project Object Model 缩写:POM)概念,Maven利用一个中央信息片断能管理一个项目的构建
-
本文向大家介绍使用koa2创建web项目的方法步骤,包括了使用koa2创建web项目的方法步骤的使用技巧和注意事项,需要的朋友参考一下 Github上有一个express风格的koa脚手架,用着挺方便,一直以来使用koa开发web项目用的也都是那个脚手架,今天想自己从头搭一个web项目,就折腾了一下 脚手架地址: https://github.com/17koa/koa-generator 初始化