
.Net Core读取Json配置文件的实现示例

前言:在与传统的asp.net MVC项目相比,.net core项目在项目目录的文件结构上和功能上与前者都有很大的区别。例如:在.net core中使用Startup.cs取代Global.asax文件用于加载应用程序的配置和各种启动项。appsettings.json取代web.config文件用于存储应用程序所需的配置参数等等。。。
OK!步入正题,下面来说一下如何读取Json配置文件中的参数。
第一种:使用IConfiguration接口
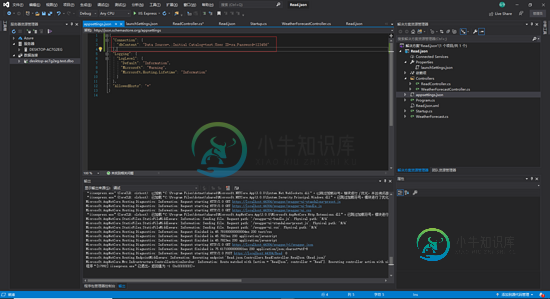
我们先在appsettings.json中配置好数据库连接字符串,然后读取它
{
 "Connection": {
 "dbContent": "Data Source=.;Initial Catalog=test;User ID=sa;Password=123456"
 },
 "Logging": {
 "LogLevel": {
  "Default": "Information",
  "Microsoft": "Warning",
  "Microsoft.Hosting.Lifetime": "Information"
 }
 },
 "AllowedHosts": "*"
}
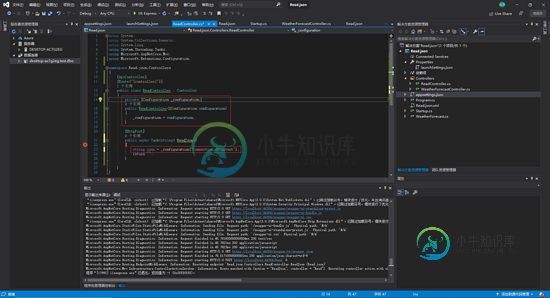
在控制器中注入IConfiguration接口
using System;
using System.Collections.Generic;
using System.Linq;
using System.Threading.Tasks;
using Microsoft.AspNetCore.Mvc;
using Microsoft.Extensions.Configuration;

namespace Read.json.Controllers
{
 [ApiController]
 [Route("[controller]")]
 public class ReadController : Controller
 {
  private IConfiguration _configuration;
  public ReadController(IConfiguration configuration)
  {
   _configuration = configuration;
  }

  [HttpPost]
  public async Task<string> ReadJson()
  {
   //读参
   string conn = _configuration["Connection:dbContent"];
   return "";
  }

 }
}
当然也可以读取数组形式的json,一样的先在appsettings.json中写好配置参数,如下:
{
 "Connection": {
 "dbContent": "Data Source=.;Initial Catalog=test;User ID=sa;Password=123456"
 },

 //------------------------
 "Content": [
 {
  "Trade_name": {
  "test1": "小熊饼干",
  "test2": "旺仔QQ糖",
  "test3": "娃哈哈牛奶"
  }
 }
 ],
 //------------------------

 "Logging": {
 "LogLevel": {
  "Default": "Information",
  "Microsoft": "Warning",
  "Microsoft.Hosting.Lifetime": "Information"
 }
 },
 "AllowedHosts": "*"
}
比如我们想读取test1
string commodity_test1 = _configuration["Content:0:Trade_name:test1"];
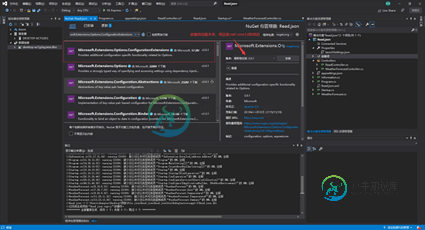
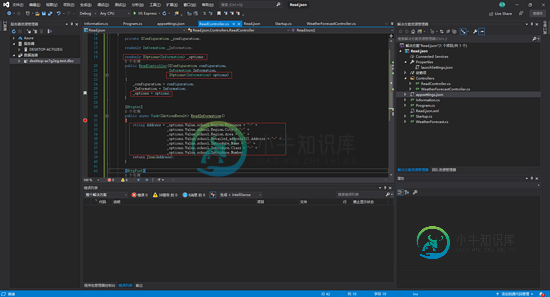
第二种:使用IOptions<T>来读取json配置文件
先把NuGet包导进项目:Microsoft.Extensions.Options.ConfigurationExtensions
首先在appsettings.json中添加节点如下
{
 "Connection": {
 "dbContent": "Data Source=.;Initial Catalog=test;User ID=sa;Password=123456"
 },

 //------------------------
 "Content": [
 {
  "Trade_name": {
  "test1": "小熊饼干",
  "test2": "旺仔QQ糖",
  "test3": "娃哈哈牛奶"
  }
 }
 ],
 //------------------------

 "Logging": {
 "LogLevel": {
  "Default": "Information",
  "Microsoft": "Warning",
  "Microsoft.Hosting.Lifetime": "Information"
 }
 },
 "AllowedHosts": "*",

 //==============================
 "Information": {
 "school": {
  "Introduce": {
  "Name": "实验小学",
  "Class": "中班",
  "Number": "15人"
  },
  "Region": {
  "Province": "湖北",
  "City": "武汉",
  "Area": "洪山区"
  },
  "Detailed_address": [
  {
   "Address": "佳园路207号"
  }
  ]
 }
 }
 //==============================
}
然和再建立一个与这个节点"相同"的类
using System;
using System.Collections.Generic;
using System.Linq;
using System.Threading.Tasks;

namespace Read.json
{
 public class Information
 {
  public School school { get; set; }
 }
 public class School
 {
  public Introduce Introduce { get; set; }

  public Region Region { get; set; }

  public List<Detailed_address> data { get; set; }

 }
 public class Introduce
 {
  public string Name { get; set; }
  public string Class { get; set; }
  public string Number { get; set; }
 }

 public class Region
 {
  public string Province { get; set; }
  public string City { get; set; }
  public string Area { get; set; }
 }
 public class Detailed_address
 {
  public string Address { get; set; }
 }
}
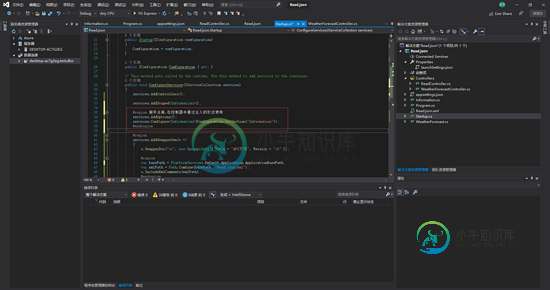
在Startup中添加如下代码
 #region 服务注册,在控制器中通过注入的形式使用
   services.AddOptions();
   services.Configure<Information>(Configuration.GetSection("Information"));
   #endregion
控制器中使用:
using System;
using System.Collections.Generic;
using System.Linq;
using System.Threading.Tasks;
using Microsoft.AspNetCore.Mvc;
using Microsoft.Extensions.Configuration;
using Microsoft.Extensions.Options;
namespace Read.json.Controllers
{
[Route("api/[controller]/[action]")]
[ApiController]
public class ReadController : Controller
{
private IConfiguration _configuration;
readonly Information _Information;
readonly IOptions<Information> _options;
public ReadController(IConfiguration configuration,
Information Information,
IOptions<Information> options)
{
_configuration = configuration;
_Information = Information;
_options = options;
}
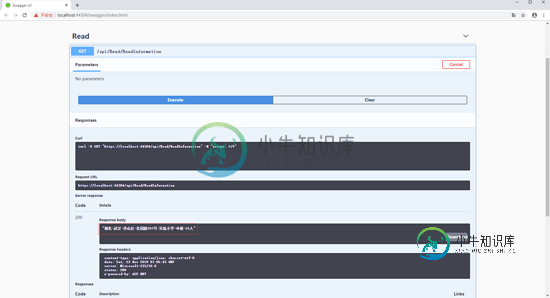
[HttpGet]
public async Task<IActionResult> ReadInformation()
{
string Address = _options.Value.school.Region.Province + "-" +
_options.Value.school.Region.City + "-" +
_options.Value.school.Region.Area + "-" +
_options.Value.school.Detailed_address[0].Address + "-" +
_options.Value.school.Introduce.Name + "-" +
_options.Value.school.Introduce.Class + "-" +
_options.Value.school.Introduce.Number;
return Json(Address);
}
[HttpPost]
public async Task<string> ReadJson()
{
string conn = _configuration["Connection:dbContent"];
string commodity = _configuration["Content:0:Trade_name:test1"];
return "";
}
}
}
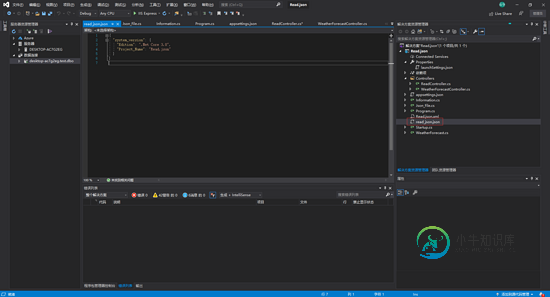
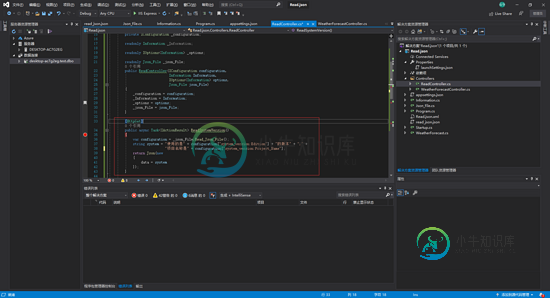
第三种:这种应该比较常见,任意读取自定义的json文件
首先建立一个json文件
{
 "system_version": {
 "Edition": ".Net Core 3.0",
 "Project_Name": "Read.json"
 }
}
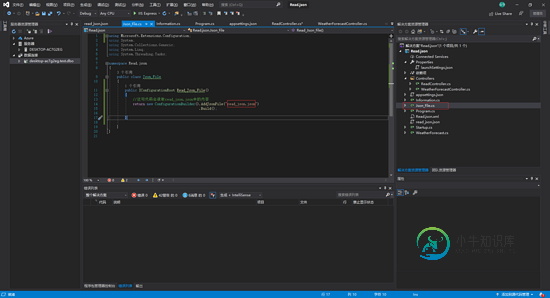
再建一个类,封装一个方法
using Microsoft.Extensions.Configuration;
using System;
using System.Collections.Generic;
using System.Linq;
using System.Threading.Tasks;

namespace Read.json
{
 public class Json_File
 {
  public IConfigurationRoot Read_Json_File()
  {
   //这句代码会读取read_json.json中的内容
   return new ConfigurationBuilder().AddJsonFile("read_json.json")
            .Build();

  }

 }
}
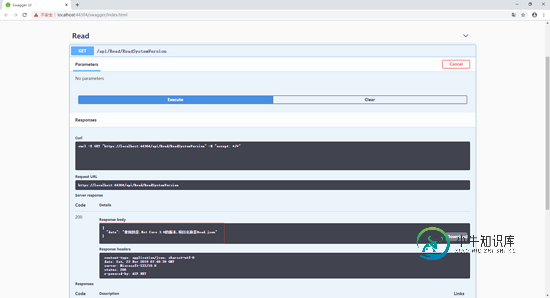
在控制器中调用:
[HttpGet]
  public async Task<IActionResult> ReadSystemVersion()
  {
   var configuration = _json_File.Read_Json_File();
   string system = "使用的是" + configuration["system_version:Edition"] + "的版本" + "," +
       "项目名称是" + configuration["system_version:Project_Name"];
   return Json(new
   {
    data = system
   });
  }
Demo地址:https://github.com/Davenever/Read_Json.git
以上就是本文的全部内容,希望对大家的学习有所帮助,也希望大家多多支持小牛知识库。
-
本文向大家介绍Python实现读写INI配置文件的方法示例,包括了Python实现读写INI配置文件的方法示例的使用技巧和注意事项,需要的朋友参考一下 本文实例讲述了Python实现读写INI配置文件的方法。分享给大家供大家参考,具体如下: 更多关于Python相关内容感兴趣的读者可查看本站专题:《Python函数使用技巧总结》、《Python面向对象程序设计入门与进阶教程》、《Python数据结
-
本文向大家介绍C++读取配置文件的示例代码,包括了C++读取配置文件的示例代码的使用技巧和注意事项,需要的朋友参考一下 代码地址 https://github.com/gongluck/Code-snippet/tree/master/cpp/config 需求 开发中,读取配置文件信息必不可少。Windows平台有现成的API可用,也很方便。但是一旦项目迁移到Linux平台下,原先在Window
-
本文向大家介绍Python实现的读写json文件功能示例,包括了Python实现的读写json文件功能示例的使用技巧和注意事项,需要的朋友参考一下 本文实例讲述了Python实现的读写json文件功能。分享给大家供大家参考,具体如下: 相比java,python对json文件的处理就简单很多。java操作json文件的话需要引用jar包及相关依赖包,想用java操作json的同学可以去百度,这里就
-
问题 怎样读取普通.ini格式的配置文件? 解决方案 configparser 模块能被用来读取配置文件。例如,假设你有如下的配置文件: ; config.ini ; Sample configuration file [installation] library=%(prefix)s/lib include=%(prefix)s/include bin=%(prefix)s/bin prefi
-
您可以以如下各种方式加载或保存配置文件: 在 Burp 菜单中,您可以加载或保存所有用户级选项或项目级选项的配置文件。 在 Burp 的各个子工具的配置面板,您可以使用”选项(Options)”按钮来加载或保存该面板的配置。 在启动向导创建或打开项目时,您可以指定要需要载入的项目级的配置文件。 当您从命令行来启动 Burp 时,您可以使用命令行参数来指定要加载的项目级选项中的一个或多个配置文件。
-
你还有更多的办法吗?我们可以使用vert.x配置模块吗? 除了json之外,有些类型文件需要用conf编写。例如YAML。 请告诉我如何使用Vert.x配置模块来获取信息,以及如何作为JSONObject使用。 谢了!