使用tensorflow框架在Colab上跑通猫狗识别代码
一、 前提:
有Google账号(具体怎么注册账号这里不详述,大家都懂的,自行百度)在你的Google邮箱中关联好colab(怎样在Google邮箱中使用colab在此不详述,自行百度)
二、 现在开始:
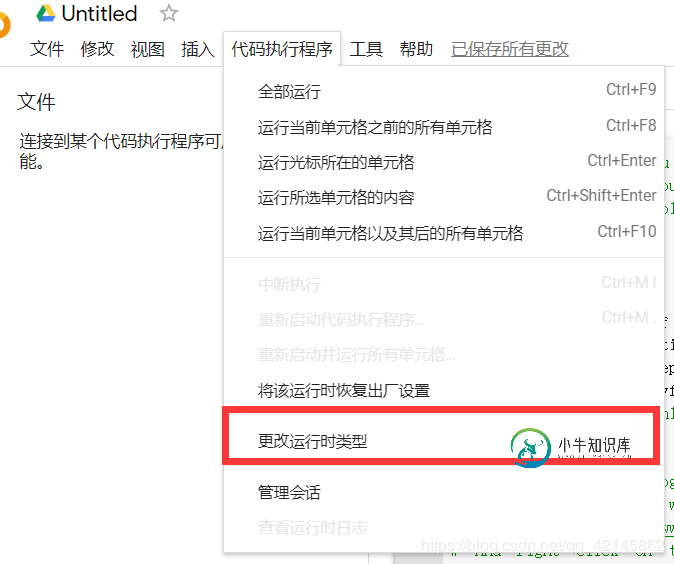
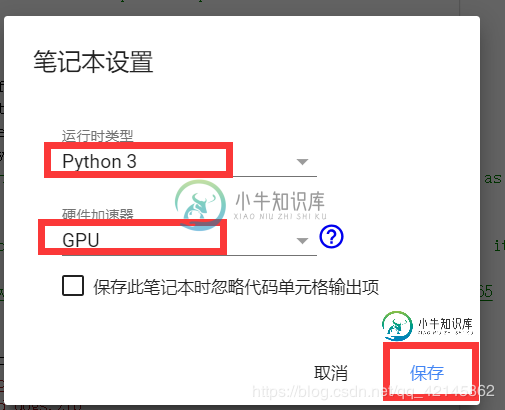
因为我们使用的是colab,所以就不必为安装版本对应的anaconda、python以及tensorflow尔苦恼了,经过以下配置就可以直接开始使用了。


在colab中新建代码块,运行以下代码来下载需要的数据集
# In this exercise you will train a CNN on the FULL Cats-v-dogs dataset
# This will require you doing a lot of data preprocessing because
# the dataset isn't split into training and validation for you
# This code block has all the required inputs
import os
import zipfile
import random
import tensorflow as tf
from tensorflow.keras.optimizers import RMSprop
from tensorflow.keras.preprocessing.image import ImageDataGenerator
from shutil import copyfile
# This code block downloads the full Cats-v-Dogs dataset and stores it as
# cats-and-dogs.zip. It then unzips it to /tmp
# which will create a tmp/PetImages directory containing subdirectories
# called 'Cat' and 'Dog' (that's how the original researchers structured it)
# If the URL doesn't work,
# .  visit https://www.microsoft.com/en-us/download/confirmation.aspx?id=54765
# And right click on the 'Download Manually' link to get a new URL

!wget --no-check-certificate \
  "https://github.com/ADlead/Dogs-Cats/archive/master.zip" \
  -O "/tmp/cats-and-dogs.zip"

local_zip = '/tmp/cats-and-dogs.zip'
zip_ref = zipfile.ZipFile(local_zip, 'r')
zip_ref.extractall('/tmp')
zip_ref.close()
运行结果:
在colab中默认安装TensorFlow1.14,所以会提示让升级tensorflow,可以不用理会,需要升级为2.0的也可以自行百度去升级。
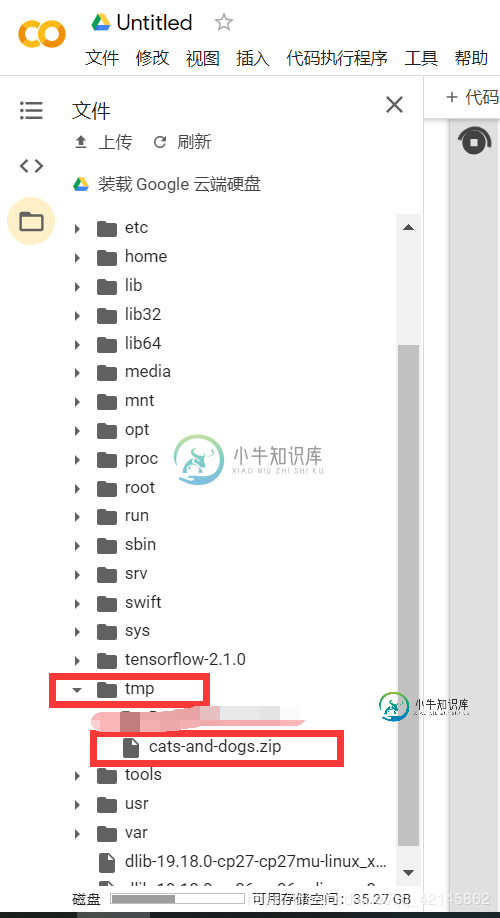
接下来会提示我们需要的数据集以压缩包的形式已经下载好了


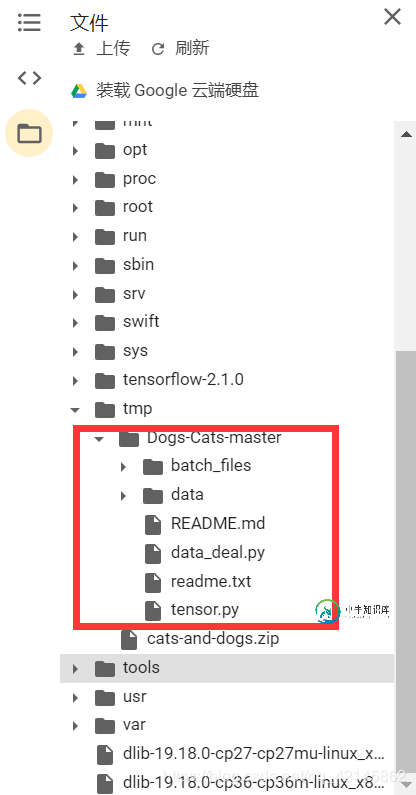
运行以下代码来解压下载好的数据集并把训练图像集划分成训练图像集和测试图像集,分别用于训练模型和测试模型。把25000张图像划分成20000张训练图像和5000张测试图像。深度学习的框架使用的是tensorflow,为了能让tensorflow分批输入数据进行训练,把所有的图像像素信息存储成batch文件。训练集100个batch文件,每个文件有200张图像。测试集1个batch文件,共5000张图像。
import cv2 as cv
import os
import numpy as np

import random
import pickle

import time

start_time = time.time()

data_dir = '/tmp/Dogs-Cats-master/data'
batch_save_path = '/tmp/Dogs-Cats-master/batch_files'

# 创建batch文件存储的文件夹
os.makedirs(batch_save_path, exist_ok=True)

# 图片统一大小:100 * 100
# 训练集 20000:100个batch文件,每个文件200张图片
# 验证集 5000: 一个测试文件,测试时 50张 x 100 批次

# 进入图片数据的目录,读取图片信息
all_data_files = os.listdir(os.path.join(data_dir, 'train/'))

# print(all_data_files)

# 打算数据的顺序
random.shuffle(all_data_files)

all_train_files = all_data_files[:20000]
all_test_files = all_data_files[20000:]

train_data = []
train_label = []
train_filenames = []

test_data = []
test_label = []
test_filenames = []

# 训练集
for each in all_train_files:
  img = cv.imread(os.path.join(data_dir,'train/',each),1)
  resized_img = cv.resize(img, (100,100))

  img_data = np.array(resized_img)
  train_data.append(img_data)
  if 'cat' in each:
    train_label.append(0)
  elif 'dog' in each:
    train_label.append(1)
  else:
    raise Exception('%s is wrong train file'%(each))
  train_filenames.append(each)

# 测试集
for each in all_test_files:
  img = cv.imread(os.path.join(data_dir,'train/',each), 1)
  resized_img = cv.resize(img, (100,100))

  img_data = np.array(resized_img)
  test_data.append(img_data)
  if 'cat' in each:
    test_label.append(0)
  elif 'dog' in each:
    test_label.append(1)
  else:
    raise Exception('%s is wrong test file'%(each))
  test_filenames.append(each)

print(len(train_data), len(test_data))

# 制作100个batch文件
start = 0
end = 200
for num in range(1, 101):
  batch_data = train_data[start: end]
  batch_label = train_label[start: end]
  batch_filenames = train_filenames[start: end]
  batch_name = 'training batch {} of 15'.format(num)

  all_data = {
    'data':batch_data,
    'label':batch_label,
    'filenames':batch_filenames,
    'name':batch_name
  }

  with open(os.path.join(batch_save_path, 'train_batch_{}'.format(num)), 'wb') as f:
    pickle.dump(all_data, f)

  start += 200
  end += 200

# 制作测试文件
all_test_data = {
  'data':test_data,
  'label':test_label,
  'filenames':test_filenames,
  'name':'test batch 1 of 1'
}

with open(os.path.join(batch_save_path, 'test_batch'), 'wb') as f:
  pickle.dump(all_test_data, f)


end_time = time.time()
print('制作结束, 用时{}秒'.format(end_time - start_time))
运行结果:


运行以下编写卷积层、池化层、全连接层、搭建tensorflow的计算图、定义占位符、计算损失函数、预测值、准确率以及训练部分的代码
import tensorflow as tf
import numpy as np
import cv2 as cv
import os
import pickle


''' 全局参数 '''
IMAGE_SIZE = 100
LEARNING_RATE = 1e-4
TRAIN_STEP = 10000
TRAIN_SIZE = 100
TEST_STEP = 100
TEST_SIZE = 50

IS_TRAIN = True

SAVE_PATH = '/tmp/Dogs-Cats-master/model/'

data_dir = '/tmp/Dogs-Cats-master/batch_files'
pic_path = '/tmp/Dogs-Cats-master/data/test1'

''''''


def load_data(filename):
  '''从batch文件中读取图片信息'''
  with open(filename, 'rb') as f:
    data = pickle.load(f, encoding='iso-8859-1')
    return data['data'],data['label'],data['filenames']

# 读取数据的类
class InputData:
  def __init__(self, filenames, need_shuffle):
    all_data = []
    all_labels = []
    all_names = []
    for file in filenames:
      data, labels, filename = load_data(file)

      all_data.append(data)
      all_labels.append(labels)
      all_names += filename

    self._data = np.vstack(all_data)
    self._labels = np.hstack(all_labels)
    print(self._data.shape)
    print(self._labels.shape)

    self._filenames = all_names

    self._num_examples = self._data.shape[0]
    self._need_shuffle = need_shuffle
    self._indicator = 0
    if self._indicator:
      self._shuffle_data()

  def _shuffle_data(self):
    # 把数据再混排
    p = np.random.permutation(self._num_examples)
    self._data = self._data[p]
    self._labels = self._labels[p]

  def next_batch(self, batch_size):
    '''返回每一批次的数据'''
    end_indicator = self._indicator + batch_size
    if end_indicator > self._num_examples:
      if self._need_shuffle:
        self._shuffle_data()
        self._indicator = 0
        end_indicator = batch_size
      else:
        raise Exception('have no more examples')
    if end_indicator > self._num_examples:
      raise Exception('batch size is larger than all examples')
    batch_data = self._data[self._indicator : end_indicator]
    batch_labels = self._labels[self._indicator : end_indicator]
    batch_filenames = self._filenames[self._indicator : end_indicator]
    self._indicator = end_indicator
    return batch_data, batch_labels, batch_filenames

# 定义一个类
class MyTensor:
  def __init__(self):


    # 载入训练集和测试集
    train_filenames = [os.path.join(data_dir, 'train_batch_%d'%i) for i in range(1, 101)]
    test_filenames = [os.path.join(data_dir, 'test_batch')]
    self.batch_train_data = InputData(train_filenames, True)
    self.batch_test_data = InputData(test_filenames, True)

    pass

  def flow(self):
    self.x = tf.placeholder(tf.float32, [None, IMAGE_SIZE, IMAGE_SIZE, 3], 'input_data')
    self.y = tf.placeholder(tf.int64, [None], 'output_data')
    self.keep_prob = tf.placeholder(tf.float32)

    # self.x = self.x / 255.0 需不需要这一步?

    # 图片输入网络中
    fc = self.conv_net(self.x, self.keep_prob)

    self.loss = tf.losses.sparse_softmax_cross_entropy(labels=self.y, logits=fc)
    self.y_ = tf.nn.softmax(fc) # 计算每一类的概率
    self.predict = tf.argmax(fc, 1)
    self.acc = tf.reduce_mean(tf.cast(tf.equal(self.predict, self.y), tf.float32))

    self.train_op = tf.train.AdamOptimizer(LEARNING_RATE).minimize(self.loss)
    self.saver = tf.train.Saver(max_to_keep=1)

    print('计算流图已经搭建.')

  # 训练
  def myTrain(self):
    acc_list = []
    with tf.Session() as sess:
      sess.run(tf.global_variables_initializer())

      for i in range(TRAIN_STEP):
        train_data, train_label, _ = self.batch_train_data.next_batch(TRAIN_SIZE)

        eval_ops = [self.loss, self.acc, self.train_op]
        eval_ops_results = sess.run(eval_ops, feed_dict={
          self.x:train_data,
          self.y:train_label,
          self.keep_prob:0.7
        })
        loss_val, train_acc = eval_ops_results[0:2]

        acc_list.append(train_acc)
        if (i+1) % 100 == 0:
          acc_mean = np.mean(acc_list)
          print('step:{0},loss:{1:.5},acc:{2:.5},acc_mean:{3:.5}'.format(
            i+1,loss_val,train_acc,acc_mean
          ))
        if (i+1) % 1000 == 0:
          test_acc_list = []
          for j in range(TEST_STEP):
            test_data, test_label, _ = self.batch_test_data.next_batch(TRAIN_SIZE)
            acc_val = sess.run([self.acc],feed_dict={
              self.x:test_data,
              self.y:test_label,
              self.keep_prob:1.0
            })
            test_acc_list.append(acc_val)
          print('[Test ] step:{0}, mean_acc:{1:.5}'.format(
            i+1, np.mean(test_acc_list)
          ))
      # 保存训练后的模型
      os.makedirs(SAVE_PATH, exist_ok=True)
      self.saver.save(sess, SAVE_PATH + 'my_model.ckpt')

  def myTest(self):
    with tf.Session() as sess:
      model_file = tf.train.latest_checkpoint(SAVE_PATH)
      model = self.saver.restore(sess, save_path=model_file)
      test_acc_list = []
      predict_list = []
      for j in range(TEST_STEP):
        test_data, test_label, test_name = self.batch_test_data.next_batch(TEST_SIZE)
        for each_data, each_label, each_name in zip(test_data, test_label, test_name):
          acc_val, y__, pre, test_img_data = sess.run(
            [self.acc, self.y_, self.predict, self.x],
            feed_dict={
              self.x:each_data.reshape(1, IMAGE_SIZE, IMAGE_SIZE, 3),
              self.y:each_label.reshape(1),
              self.keep_prob:1.0
            }
          )
          predict_list.append(pre[0])
          test_acc_list.append(acc_val)

          # 把测试结果显示出来
          self.compare_test(test_img_data, each_label, pre[0], y__[0], each_name)
      print('[Test ] mean_acc:{0:.5}'.format(np.mean(test_acc_list)))

  def compare_test(self, input_image_arr, input_label, output, probability, img_name):
    classes = ['cat', 'dog']
    if input_label == output:
      result = '正确'
    else:
      result = '错误'
    print('测试【{0}】,输入的label:{1}, 预测得是{2}:{3}的概率:{4:.5}, 输入的图片名称:{5}'.format(
      result,input_label, output,classes[output], probability[output], img_name
    ))

  def conv_net(self, x, keep_prob):
    conv1_1 = tf.layers.conv2d(x, 16, (3, 3), padding='same', activation=tf.nn.relu, name='conv1_1')
    conv1_2 = tf.layers.conv2d(conv1_1, 16, (3, 3), padding='same', activation=tf.nn.relu, name='conv1_2')
    pool1 = tf.layers.max_pooling2d(conv1_2, (2, 2), (2, 2), name='pool1')

    conv2_1 = tf.layers.conv2d(pool1, 32, (3, 3), padding='same', activation=tf.nn.relu, name='conv2_1')
    conv2_2 = tf.layers.conv2d(conv2_1, 32, (3, 3), padding='same', activation=tf.nn.relu, name='conv2_2')
    pool2 = tf.layers.max_pooling2d(conv2_2, (2, 2), (2, 2), name='pool2')

    conv3_1 = tf.layers.conv2d(pool2, 64, (3, 3), padding='same', activation=tf.nn.relu, name='conv3_1')
    conv3_2 = tf.layers.conv2d(conv3_1, 64, (3, 3), padding='same', activation=tf.nn.relu, name='conv3_2')
    pool3 = tf.layers.max_pooling2d(conv3_2, (2, 2), (2, 2), name='pool3')

    conv4_1 = tf.layers.conv2d(pool3, 128, (3, 3), padding='same', activation=tf.nn.relu, name='conv4_1')
    conv4_2 = tf.layers.conv2d(conv4_1, 128, (3, 3), padding='same', activation=tf.nn.relu, name='conv4_2')
    pool4 = tf.layers.max_pooling2d(conv4_2, (2, 2), (2, 2), name='pool4')

    flatten = tf.layers.flatten(pool4) # 把网络展平,以输入到后面的全连接层

    fc1 = tf.layers.dense(flatten, 512, tf.nn.relu)
    fc1_dropout = tf.nn.dropout(fc1, keep_prob=keep_prob)
    fc2 = tf.layers.dense(fc1, 256, tf.nn.relu)
    fc2_dropout = tf.nn.dropout(fc2, keep_prob=keep_prob)
    fc3 = tf.layers.dense(fc2, 2, None) # 得到输出fc3

    return fc3

  def main(self):
    self.flow()
    if IS_TRAIN is True:
      self.myTrain()
    else:
      self.myTest()

  def final_classify(self):
    all_test_files_dir = './data/test1'
    all_test_filenames = os.listdir(all_test_files_dir)
    if IS_TRAIN is False:
      self.flow()
      # self.classify()
      with tf.Session() as sess:
        model_file = tf.train.latest_checkpoint(SAVE_PATH)
        mpdel = self.saver.restore(sess,save_path=model_file)

        predict_list = []
        for each_filename in all_test_filenames:
          each_data = self.get_img_data(os.path.join(all_test_files_dir,each_filename))
          y__, pre, test_img_data = sess.run(
            [self.y_, self.predict, self.x],
            feed_dict={
              self.x:each_data.reshape(1, IMAGE_SIZE, IMAGE_SIZE, 3),
              self.keep_prob: 1.0
            }
          )
          predict_list.append(pre[0])
          self.classify(test_img_data, pre[0], y__[0], each_filename)

    else:
      print('now is training model...')

  def classify(self, input_image_arr, output, probability, img_name):
    classes = ['cat','dog']
    single_image = input_image_arr[0] #* 255
    if output == 0:
      output_dir = 'cat/'
    else:
      output_dir = 'dog/'
    os.makedirs(os.path.join('./classiedResult', output_dir), exist_ok=True)
    cv.imwrite(os.path.join('./classiedResult',output_dir, img_name),single_image)
    print('输入的图片名称:{0},预测得有{1:5}的概率是{2}:{3}'.format(
      img_name,
      probability[output],
      output,
      classes[output]
    ))

  # 根据名称获取图片像素
  def get_img_data(self,img_name):
    img = cv.imread(img_name)
    resized_img = cv.resize(img, (100, 100))
    img_data = np.array(resized_img)

    return img_data


if __name__ == '__main__':

  mytensor = MyTensor()
  mytensor.main() # 用于训练或测试

  # mytensor.final_classify() # 用于最后的分类

  print('hello world')
运行结果:
参考:https://www.jianshu.com/p/9ee2533c8adb
代码出处:https://github.com/ADlead/Dogs-Cats.git
到此这篇关于使用tensorflow框架在Colab上跑通猫狗识别代码的文章就介绍到这了,更多相关tensorflow框架在Colab上跑通猫狗识别内容请搜索小牛知识库以前的文章或继续浏览下面的相关文章希望大家以后多多支持小牛知识库!
-
本文向大家介绍Python通过TensorFlow卷积神经网络实现猫狗识别,包括了Python通过TensorFlow卷积神经网络实现猫狗识别的使用技巧和注意事项,需要的朋友参考一下 这份数据集来源于Kaggle,数据集有12500只猫和12500只狗。在这里简单介绍下整体思路 处理数据 设计神经网络 进行训练测试 1. 数据处理 将图片数据处理为 tf 能够识别的数据格式,并将数据设计批次。 第
-
本文向大家介绍使用pytorch完成kaggle猫狗图像识别方式,包括了使用pytorch完成kaggle猫狗图像识别方式的使用技巧和注意事项,需要的朋友参考一下 kaggle是一个为开发商和数据科学家提供举办机器学习竞赛、托管数据库、编写和分享代码的平台,在这上面有非常多的好项目、好资源可供机器学习、深度学习爱好者学习之用。 碰巧最近入门了一门非常的深度学习框架:pytorch,所以今天我和大家
-
这篇文章中我放弃了以往的model.fit()训练方法,改用model.train_on_batch方法。两种方法的比较: model.fit():用起来十分简单,对新手非常友好 model.train_on_batch():封装程度更低,可以玩更多花样。 此外我也引入了进度条的显示方式,更加方便我们及时查看模型训练过程中的情况,可以及时打印各项指标。
-
本文向大家介绍TensorFlow卷积神经网络之使用训练好的模型识别猫狗图片,包括了TensorFlow卷积神经网络之使用训练好的模型识别猫狗图片的使用技巧和注意事项,需要的朋友参考一下 本文是Python通过TensorFlow卷积神经网络实现猫狗识别的姊妹篇,是加载上一篇训练好的模型,进行猫狗识别 本文逻辑: 我从网上下载了十几张猫和狗的图片,用于检验我们训练好的模型。 处理我们下载的图片 加
-
我想在我的教程django项目中使用rest_framework。 我按照指示步骤添加了rest_frameworksettings.py如下所示。 但是,pycharm无法识别“rest_框架”,并且在我尝试运行服务器时出现错误: 未能在模块“DjangoProject”上获取实际命令:python进程在django中的代码1:Traceback(最近一次调用):文件“E:\PyCharm 20
-
综述 Web框架[*]识别是信息收集过程简单重要的子任务。知道一个已知类型的框架而且被渗透测试过,这自然而然是一个巨大的优势。除了发现在未打补丁版本中的已知漏洞,还有了解在框架中特定的错误配置和已知文件目录框架使这一识别过程变得非常重要。 一些不同开发商不同版本的web框架被广泛使用。了解框架的信息对测试过程有极大帮助,也能帮助改进测试方案。这些信息可以从一些常见的地方仔细分析推断出来。大多数的w

