
Android仿微信雷达扫描效果的实现方法

本文主要给大家介绍的是关于Android实现微信雷达扫描效果的相关内容,分享出来供大家参考学习,下面来看看详细的介绍:
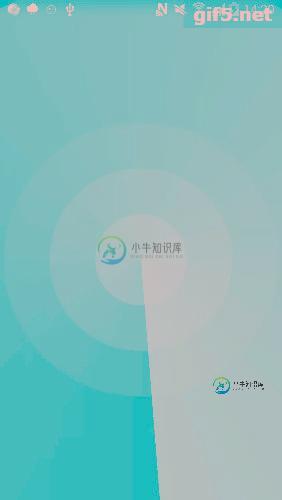
废话不多说 先上图(用AS录制的 转换工具不是很好 所以看得效果不是很好)
效果图
示例代码
Activity 代码
public class ShapeDrawableActivity extends AppCompatActivity {
 private ImageView ivLightbeam;

 private ObjectAnimator radarScanAnim; // 扫描动画

 private int width;
 private int height;

 @Override
 protected void onCreate(Bundle savedInstanceState) {
  super.onCreate(savedInstanceState);

  setContentView(R.layout.activity_shape_drawable);
  ivLightbeam = (ImageView) findViewById(R.id.ivLightbeam);
 }


 @Override
 protected void onResume() {
  super.onResume();
  startScan();
 }

 @Override
 public void onWindowFocusChanged(boolean hasFocus) {
  super.onWindowFocusChanged(hasFocus);
  if (height == 0 || width == 0) {   //获取屏幕长、宽
   width = ScreenUtils.getScreenWidth(this);
   height = ScreenUtils.getScreenHeight(this);   //根据屏幕长、宽计算扫描圆的直径
   int diameter = (int) Math.sqrt(Math.pow(height, 2) + Math.pow(width, 2));   //修改光束的大小,使光束可以扫描到整个屏幕
   FrameLayout.LayoutParams layoutParams = new FrameLayout.LayoutParams(diameter, diameter);
   ivLightbeam.setLayoutParams(layoutParams);   //将扫描光束的中心移至屏幕内容中心
   int offsetX = (width - diameter) / 2;
   int offsetY = (height - diameter) / 2 + ScreenUtils.getStatusHeight(this) / 2;
   ivLightbeam.setX(offsetX);
   ivLightbeam.setY(offsetY);
  }
 }

 @Override
 protected void onPause() {
  super.onPause();
  stopScan();
 } // 开始扫描

 private void startScan() {
  radarScanAnim = ObjectAnimator.ofFloat(ivLightbeam, "rotation", 0f, 360f);
  radarScanAnim.setDuration(2000); //2秒扫描一圈
  radarScanAnim.setInterpolator(new LinearInterpolator());
  radarScanAnim.setRepeatCount(ObjectAnimator.INFINITE);//循环扫描

  ivLightbeam.setVisibility(View.VISIBLE);
  radarScanAnim.start();
 } // 停止扫描

 private void stopScan() {
  ivLightbeam.setVisibility(View.GONE);
  radarScanAnim.end();
 }
}
Activity 布局文件
<FrameLayout xmlns:android="http://schemas.android.com/apk/res/android"
 xmlns:tools="http://schemas.android.com/tools"
 android:layout_width="match_parent"
 android:layout_height="match_parent"
 android:background="#FA000000"
 android:clipToPadding="false"
 android:fitsSystemWindows="true">

 <ImageView
  android:id="@+id/ivWave"
  android:layout_width="match_parent"
  android:layout_height="match_parent"
  android:layout_margin="5dp"
  android:src="@drawable/wave" />

 <ImageView
  android:id="@+id/ivLightbeam"
  android:layout_width="match_parent"
  android:layout_height="match_parent"
  android:src="@drawable/light_beam" />

</FrameLayout>
绘制扫描光束
<shape
 xmlns:android="http://schemas.android.com/apk/res/android"
 android:shape="oval">

 <size
  android:width="500dp"
  android:height="500dp" />

 <gradient
  android:endColor="#AAAAAAAA"
  android:startColor="#00000000"
  android:type="sweep"
  />
</shape>
绘制雷达波纹
<layer-list xmlns:android="http://schemas.android.com/apk/res/android">
 <item>
  <!--最外层圆圈-->
  <shape android:shape="oval">
   <solid android:color="#10FFFFFF" />
   <size
    android:width="600dp"
    android:height="600dp" />
   <stroke
    android:color="#10B8B8B8"
    android:dashWidth="1dp" />
  </shape>
 </item>

 <item
  android:bottom="100dp"
  android:left="100dp"
  android:right="100dp"
  android:top="100dp">
  <!--最中间层圆圈-->
  <shape android:shape="oval">
   <solid android:color="#1CFFFFFF" />
   <stroke
    android:color="#1CB8B8B8"
    android:dashWidth="1dp" />
  </shape>
 </item>

 <item
  android:bottom="200dp"
  android:left="200dp"
  android:right="200dp"
  android:top="200dp">

  <!--最中心圆圈-->
  <shape android:shape="oval">
   <solid android:color="#2CFFFFFF" />
   <stroke
    android:color="#2CB8B8B8"
    android:dashWidth="1dp" />
  </shape>
 </item>
</layer-list>
总结
以上就是这篇文章的全部内容了,希望本文的内容对大家的学习或者工作能带来一定的帮助,如果有疑问大家可以留言交流,谢谢大家对小牛知识库的支持。
-
本文向大家介绍Android仿微信、QQ附近好友雷达扫描效果,包括了Android仿微信、QQ附近好友雷达扫描效果的使用技巧和注意事项,需要的朋友参考一下 1.概述 最近一直到在带实习生,因为人比较多,所以很长一段时间没有更新博客了,今天更新一篇雷达扫描附近好友效果,以后尽量每周更新一篇,先看一下效果: 2.实现 1、效果分析 效果分为两个部分,一个是上半部分的自定义RadarView,还有
-
本文向大家介绍Android动画之雷达扫描效果,包括了Android动画之雷达扫描效果的使用技巧和注意事项,需要的朋友参考一下 我们首先看一下效果图,有个整体的印象 好了,为了便于理解,这里就按照动画所见内容依次展开来说 准备 这里决定采用canvas(画布)和paint(画笔)实现了这个简单动画控件。 由图片可以看到有两条交叉的十字线、几个圆圈和一些白点,那么首先定义一下所需的画笔,画布及一些数
-
本文向大家介绍Android Shader应用开发之雷达扫描效果,包括了Android Shader应用开发之雷达扫描效果的使用技巧和注意事项,需要的朋友参考一下 本文实例为大家分享了Android雷达扫描效果的具体代码,供大家参考,具体内容如下 效果图 知识点提要 Shader 矩阵matrix 属性动画 ShaderView3 外部调用 XML布局 以上就是本文的全部内容,希望对大家的学习有所
-
本文向大家介绍Android仿微信文章悬浮窗效果的实现代码,包括了Android仿微信文章悬浮窗效果的实现代码的使用技巧和注意事项,需要的朋友参考一下 序言 前些日子跟朋友聊天,朋友Z果粉,前些天更新了微信,说微信出了个好方便的功能啊,我问是啥功能啊,看看我大Android有没有,他说现在阅读公众号文章如果有人给你发微信你可以把这篇文章当作悬浮窗悬浮起来,方便你聊完天不用找继续阅读,听完是不是觉得
-
本文向大家介绍Android仿微信主界面的实现方法,包括了Android仿微信主界面的实现方法的使用技巧和注意事项,需要的朋友参考一下 本文实例为大家分享了Android模仿微信主界面展示的具体代码,供大家参考,具体内容如下 先看一下效果图 实现的原理: ViewPager+FragmentPagerAdapter 主界面可分为三部分: top标题栏就是一个TextView 中间的ViewPage
-
本文向大家介绍Android仿微信微博多图展示效果,包括了Android仿微信微博多图展示效果的使用技巧和注意事项,需要的朋友参考一下 1.简介 这是一个用于实现像微信朋友圈和微博的类似的九宫格图片展示控件,通过自定义viewgroup实现,使用方便。 多图根据屏幕适配,单张图片时需要自己指定图片的宽高; 2.使用方法 引用: compile 'com.w4lle.library:NineLayo