Android Notification通知解析
Notification是显示在手机状态栏的通知,Notification通知是具有全局性的通知,一般通过NotificationManager来进行管理.
一般运用Notification的步骤如下:
- 1.调用getSysytemService(NOTIFICATION_SERVICE)来获取系统的NotificationManager,进行Notification的发送和回收
- 2.通过构造器建立一个Notification
- 3.为Notification set各种属性,然后builder()建立
- 4.通过NotificationManager发送通知
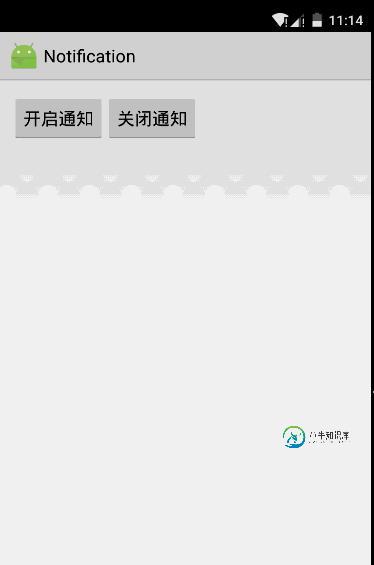
下面通过一个实例来演示上面的用法,先看一张效果图

一.获取系统的NotificationManager
private NotificationManager nm;

  @Override
  protected void onCreate(Bundle savedInstanceState) {
    super.onCreate(savedInstanceState);
    setContentView(R.layout.activity_main);
    //获取系统的通知管理
    nm = (NotificationManager) getSystemService(NOTIFICATION_SERVICE);
  }
二.为主布局的两个按钮添加监听事件,然后分别设置启动通知,并设置各种属性和取消通知
各种属性代码中介绍的很详细,具体可以参考API
启动通知
public void send(View view){
    //用于打开通知启动另一个Activity
    Intent intent = new Intent(MainActivity.this,OtherActivity.class);
    //用于延迟启动
    PendingIntent pi = PendingIntent.getActivity(MainActivity.this, 0, intent, 0);
    //设置通知
    Notification notify = new Notification.Builder(this)
        //设置打开该通知,通知自动消失
        .setAutoCancel(true)
        //设置显示在状态栏的通知提示消息
        .setTicker("新消息")
        //设置通知栏图标
        .setSmallIcon(R.mipmap.ic_launcher)
        //设置通知内容的标题
        .setContentTitle("一条新通知")
        //设置通知内容
        .setContentText("恭喜你通知栏测试成功")
        //设置使用系统默认的声音,默认的led灯
        .setDefaults(Notification.DEFAULT_SOUND | Notification.DEFAULT_LIGHTS)
        //ALL的话则是全部使用默认,声音,震动,闪光灯,需要添加相应权限
//        .setDefaults(ALL)
        //或者自定义声音
        //setSound(Uri.parse())
        //设置要启动的程序
        .setContentIntent(pi)
        //最后用build来建立通知
        .build();
    //发送当前通知,通过NotificationManager来管理
    nm.notify(1,notify);
  }
这里用的OtherActivity是通过通知启动的另一个Activity,为了启动需要在清单文件中加入此Activity,并且因为用到了闪光灯和振动器,所以也需要添加相应的权限
<activity android:name=".OtherActivity"> </activity>
  <uses-permission android:name="android.permission.FLASHLIGHT"/>
  <uses-permission android:name="android.permission.VIBRATE"/>
取消通知
//取消通知
  public void closed(View view){
    nm.cancel(1);
  }
用起来相当很方便.最后附上主界面布局
<LinearLayout xmlns:android="http://schemas.android.com/apk/res/android"
  xmlns:tools="http://schemas.android.com/tools" android:layout_width="match_parent"
  android:layout_height="match_parent" android:paddingLeft="@dimen/activity_horizontal_margin"
  android:orientation="horizontal"
  android:paddingRight="@dimen/activity_horizontal_margin"
  android:paddingTop="@dimen/activity_vertical_margin"
  android:paddingBottom="@dimen/activity_vertical_margin" tools:context=".MainActivity">


  <Button
    android:layout_width="wrap_content"
    android:layout_height="wrap_content"
    android:text="开启通知"
    android:onClick="send"
    android:id="@+id/btnstartnotification"
     />

  <Button
    android:layout_width="wrap_content"
    android:layout_height="wrap_content"
    android:text="关闭通知"
    android:onClick="closed"
    android:id="@+id/btnstopnotification"
     />
</LinearLayout>
以上就是关于Android Notification通知的详细内容,希望对大家的学习有所帮助。
-
本文将主要介绍 service worker 的功能之一:通知 (notification),它允许服务器向用户提示一些信息,并根据用户不同的行为进行一些简单的处理。 通知比较常见的使用情景包括电商网站提醒用户一些关注商品的价格变化,或是在线聊天网站提醒用户收到了新消息等等。 如何使用? 使用 notification 本身非常简单,只需要一行代码,但在此之前需要一些准备工作。 检测浏览器兼容性,
-
使用通知组件,你可以让消息看起来像iOS的推送通知一样。 通知组件JavaScript API 要想创建/关闭通知,我们需要调用相关的App方法 myApp.addNotification(parameters) - 通过指定的参数来创建/显示通知 parameters - 包含通知相关的参数的对象。必选。 方法返回一个动态创建的通知体的HTML元素 myApp.closeNotification
-
<section class="ui-notice"> <i></i> <p>请检查网络</p> <div class="ui-notice-btn"> <button class="ui-btn-primary ui-btn-lg">按钮</button> </div> </section>
-
通知类型: 类型 描述 at At 我的 comment 评论我的 like 喜欢我的 system 系统通知 follow 用户粉丝 获取通知统计 GET /api/v2/user/notification-statistics 1 响应: Status: 200 OK { "at": { "badge": 4, "last_created_at": "2019-02-2
-
您可以在智能手表和手机上接收应用程式发给 M600 的通知。如果您已经允许 M600 显示通知,则通知会出现在主屏幕上。查看Notification settings (通知设定)获取更多信息。 如果您已经在智能手表上将通知标记为未读,就可以在 M600 的主屏幕上看到这一状态图标。 图标上的数字显示新通知的数量。 如需查看通知 从屏幕底部向上滑动或将手腕往外摆动。 轻触通知查看其包含的所有信息。
-
支付结果通知 在用户成功支付后,微信服务器会向该 订单中设置的回调URL 发起一个 POST 请求,请求的内容为一个 XML。里面包含了所有的详细信息,具体请参考:支付结果通知 而对于用户的退款操作,在退款成功之后也会有一个异步回调通知。 本 SDK 内预置了相关方法,以方便开发者处理这些通知,具体用法如下: 只需要在控制器中使用 handlePaidNotify() 方法,在其中对自己的业务进行

