
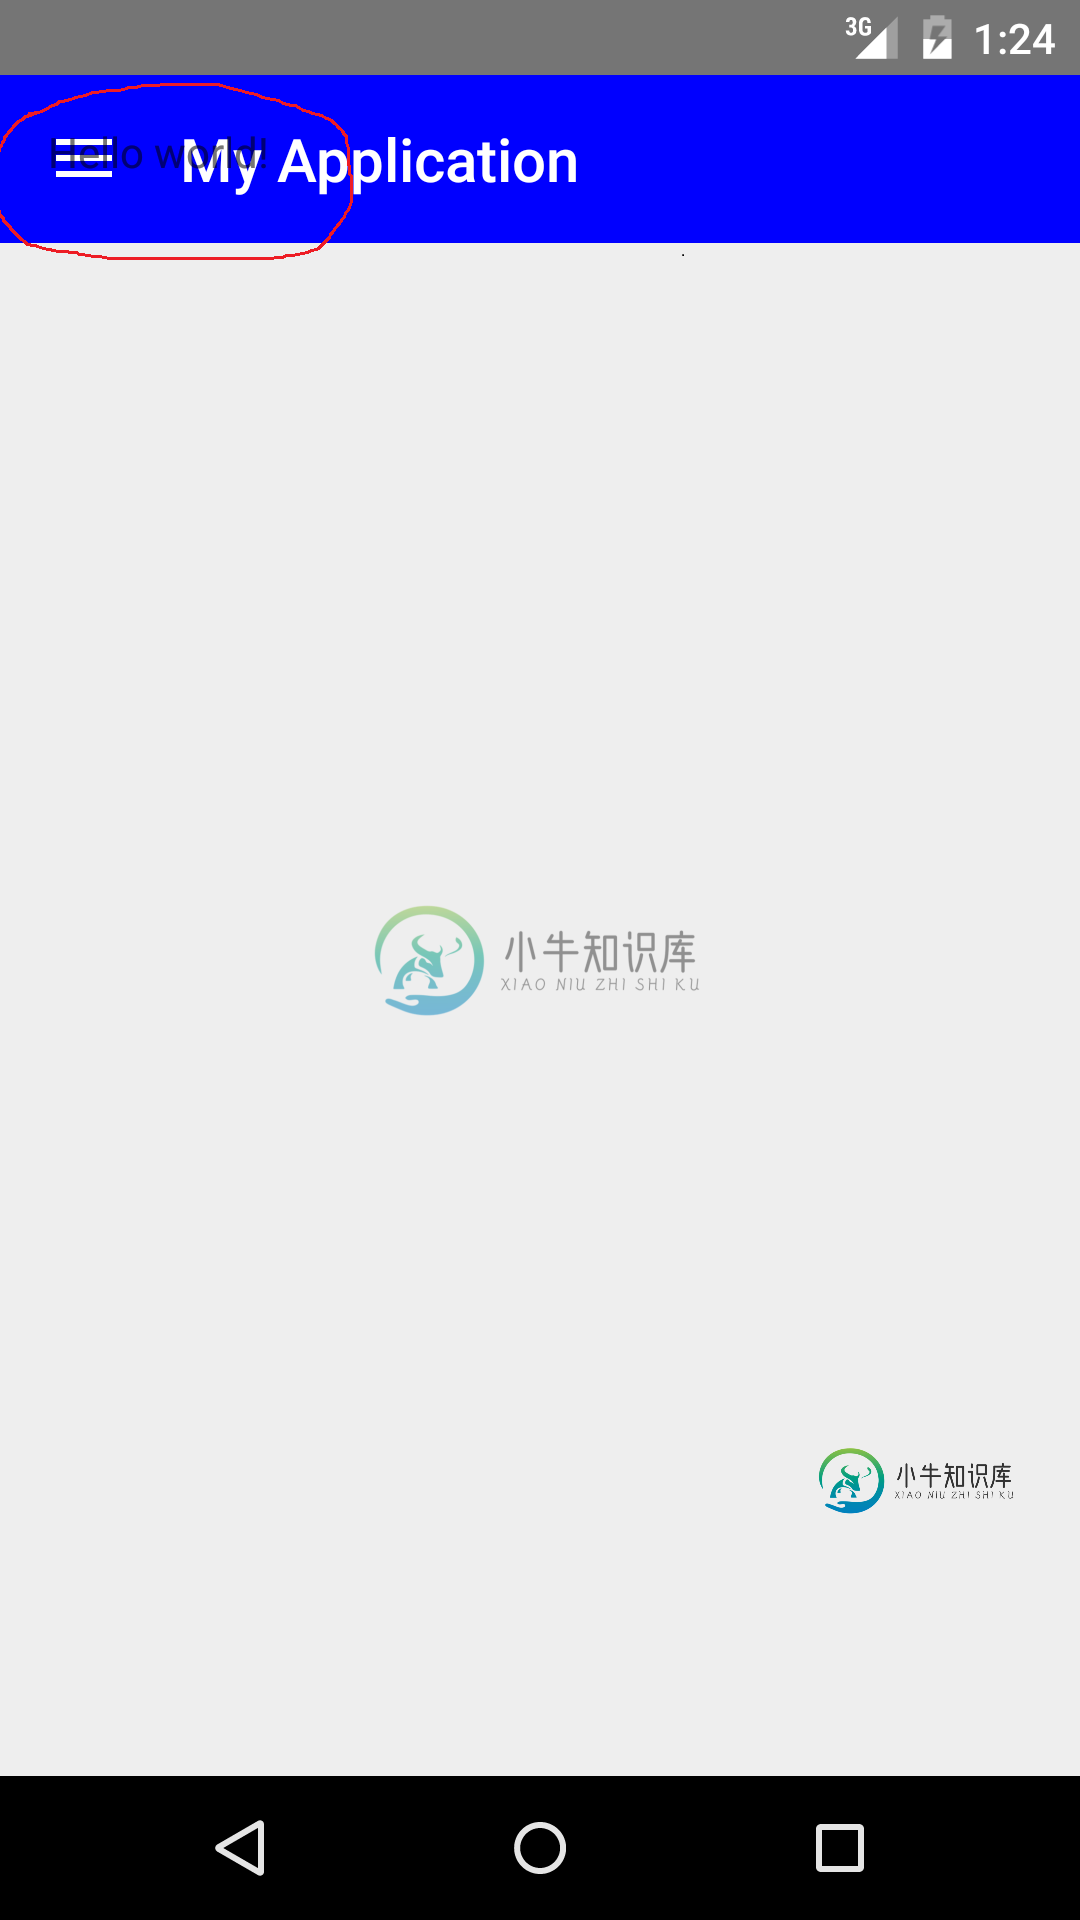
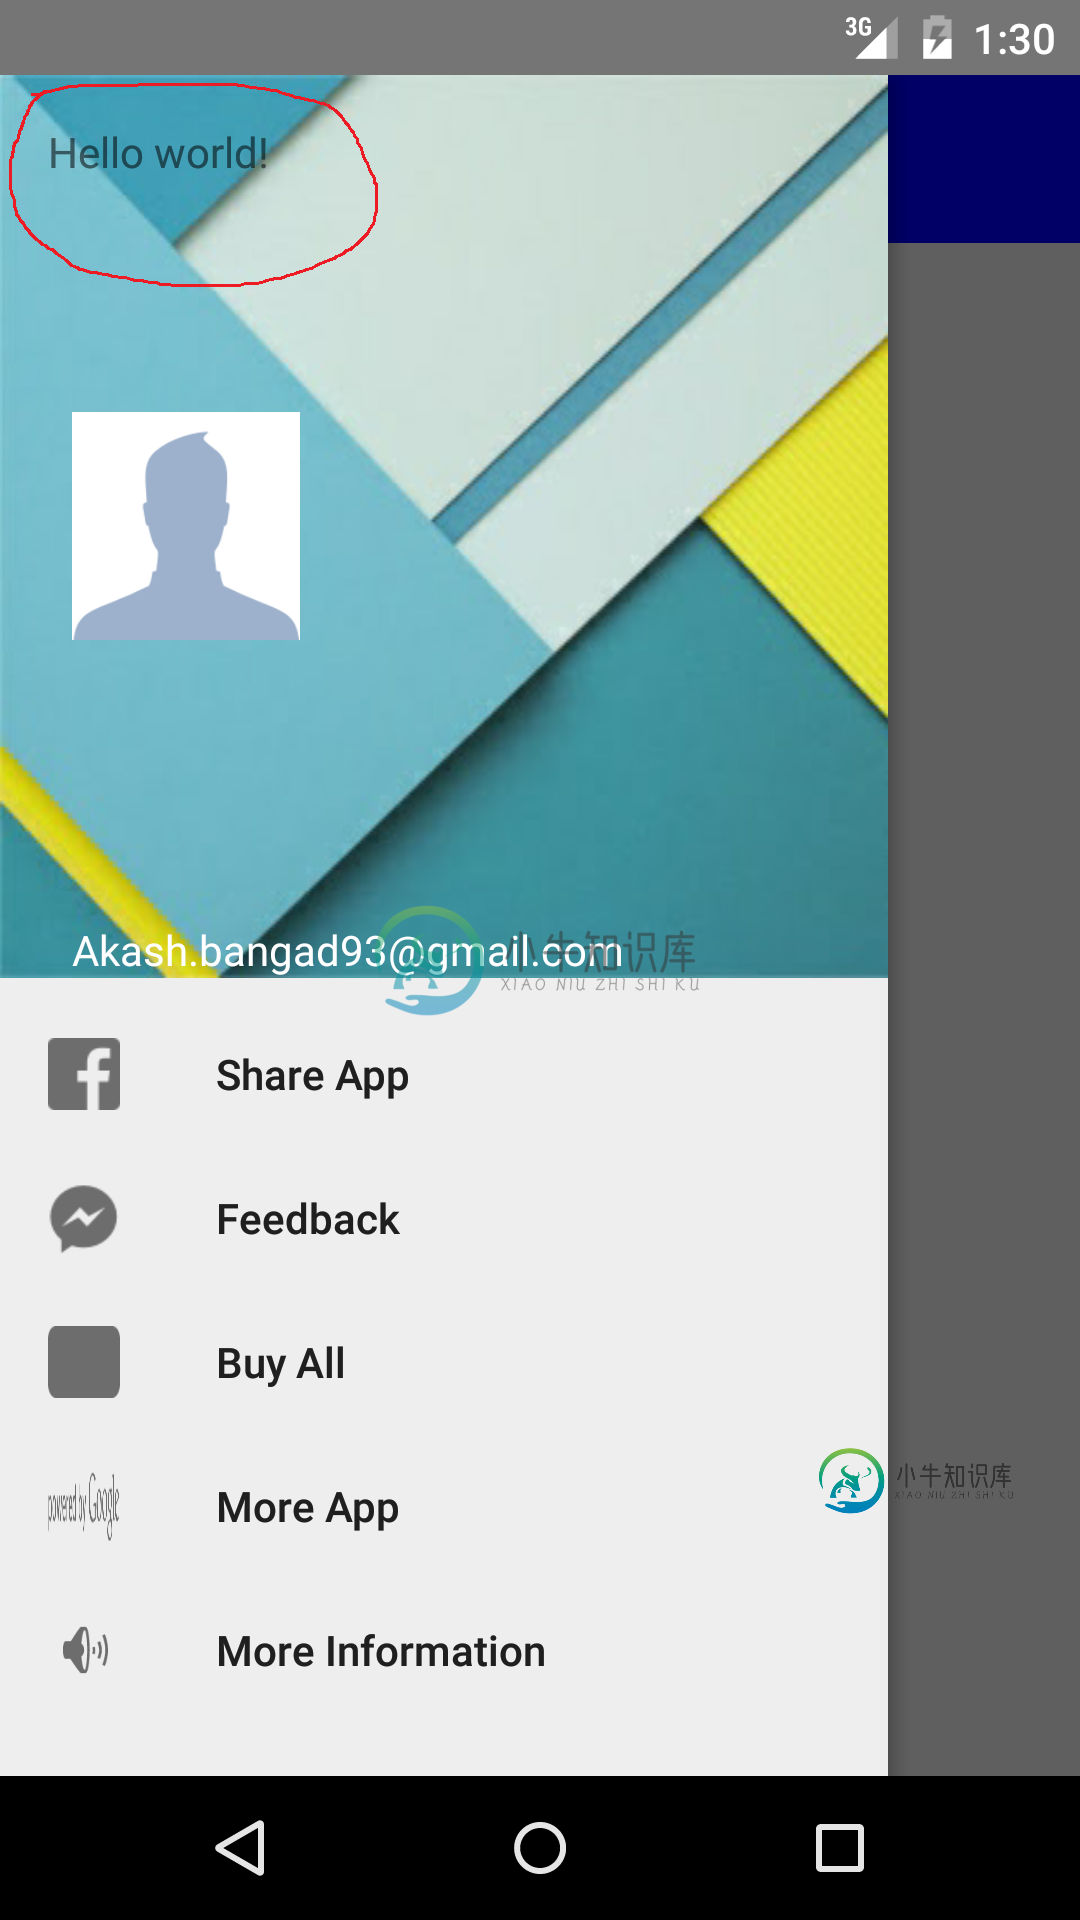
NavigationView和工具栏被内容覆盖

我试图实现材料抽屉菜单使用
>
Android支持v7.widget。工具栏
android.support.design.widget.NavigationView
问题既是NavigationView
*注意:我曾尝试用LinearLayout替换RelativeLayout作为容器,但不起作用。
activity_布局。xml
<android.support.v4.widget.DrawerLayout xmlns:android="http://schemas.android.com/apk/res/android"
android:id="@+id/drawer"
android:layout_width="match_parent"
android:layout_height="match_parent">

<RelativeLayout
    android:layout_width="match_parent"
    android:layout_height="match_parent">
    <FrameLayout
        android:id="@android:id/content"
        android:layout_width="match_parent"
        android:layout_height="match_parent"
        android:layout_below="@id/toolbar"/>
    <android.support.v7.widget.Toolbar
        android:id="@+id/toolbar"
        android:layout_width="match_parent"
        android:layout_height="?attr/actionBarSize"
        android:theme="@style/ThemeOverlay.AppCompat.Dark.ActionBar"
        android:layout_alignParentTop="true"/>
</RelativeLayout>

<android.support.design.widget.NavigationView
    android:id="@+id/navigation_view"
    android:layout_width="wrap_content"
    android:layout_height="match_parent"
    android:layout_gravity="start"/></android.support.v4.widget.DrawerLayout>
碎片xml
<FrameLayout xmlns:android="http://schemas.android.com/apk/res/android"
xmlns:tools="http://schemas.android.com/tools" android:layout_width="match_parent"
android:layout_height="match_parent" android:paddingLeft="@dimen/activity_horizontal_margin"
android:paddingRight="@dimen/activity_horizontal_margin"
android:paddingTop="@dimen/activity_vertical_margin"
android:paddingBottom="@dimen/activity_vertical_margin" tools:context=".MainActivity">

<TextView android:text="@string/hello_world" android:layout_width="wrap_content"
    android:layout_height="wrap_content"/></FrameLayout>
ActivityMain。Java语言
public class MainActivity extends AppCompatActivity{

protected Toolbar mToolbar;
protected NavigationView mNavigationView;
protected DrawerLayout mDrawerLayout;
protected FrameLayout container;

@Override
protected void onCreate(Bundle savedInstanceState) {
    super.onCreate(savedInstanceState);
    setContentView(R.layout.material_activity_layout);

    this.mToolbar = (Toolbar) findViewById(R.id.toolbar);
    setSupportActionBar(this.mToolbar);

    this.mNavigationView = (NavigationView) findViewById(R.id.navigation_view);

    this.mNavigationView.inflateHeaderView(R.layout.nav_header);
    this.mNavigationView.inflateMenu(R.menu.drawer);

    this.mDrawerLayout = (DrawerLayout) findViewById(R.id.drawer);
    ActionBarDrawerToggle defaultActionBarDrawerToggle = new ActionBarDrawerToggle(
            this,
            this.mDrawerLayout,
            this.mToolbar,
            R.string.app_name,
            R.string.app_name) {
        @Override
        public void onDrawerOpened(View drawerView) {
            super.onDrawerOpened(drawerView);
        }

        @Override
        public void onDrawerClosed(View drawerView) {
            super.onDrawerClosed(drawerView);
        }
    };

    this.mDrawerLayout.setDrawerListener(defaultActionBarDrawerToggle);

    defaultActionBarDrawerToggle.syncState();

    this.mToolbar.setTitle("Test Toolbar");
    this.mToolbar.setBackgroundColor(Color.BLUE);

    getFragmentManager().beginTransaction().add(android.R.id.content, new InFragment(), "fragment").commit();
}

@Override
public boolean onCreateOptionsMenu(Menu menu) {
    return true;
}

public static class InFragment extends Fragment {
    @Nullable
    @Override
    public View onCreateView(LayoutInflater inflater, ViewGroup container, Bundle savedInstanceState) {

        return inflater.inflate(R.layout.fragment, container, false);
    }
}
}
这里是结果
共有2个答案

您可以将LinearLayout与android:定向="垂直"一起使用,而不是RelativeLayout
 <LinearLayout
    android:layout_width="match_parent"
    android:layout_height="match_parent"
    android:orientation="vertical" >
<android.support.v7.widget.Toolbar
    android:id="@+id/toolbar"
    android:layout_width="match_parent"
    android:layout_height="?attr/actionBarSize"
    android:theme="@style/ThemeOverlay.AppCompat.Dark.ActionBar"
    android:layout_alignParentTop="true"/>
     <FrameLayout
        android:id="@+id/container"
        android:layout_width="match_parent"
        android:layout_height="match_parent" >
    </FrameLayout>
</LinearLayout>

您不应该覆盖@android: id/content,因为它会导致一些奇怪的行为,因此只需引入一个新的id,例如@id/片段容器并使用它。
当你用android添加一个片段时。R、 id.content并且已经有一些内容将被放置在其他内容之上。
还要更改工具栏在框架布局等其他内容之前的顺序。
希望有帮助
编辑:我确实修改了我的旧答案,因为它不是百分之百正确的。
-
我在Google IO repo中使用了以下代码:https://github.com/google/iosched/blob/master/android/src/main/java/com/google/samples/apps/iosched/ui/BaseActivity.java 我试图在向上滚动时隐藏工具栏,它工作得很好,但我的问题是,当工具栏在屏幕外动画时,我的主要内容保持不变。 在
-
在我的应用程序中,我将工具栏和状态栏设置为共享对象,如本文选项2所示 工具栏和选项卡的一般行为和轮廓非常好——唯一的问题是,当我移动到活动B时,工具栏的一些用户界面元素没有参与内容转换,特别是工具栏标题和菜单图标。 我尝试添加一个SharedElementCallback,并在其中循环工具栏和选项卡的子级,并将它们全部添加到渐变转换中——但这并不影响工具栏和选项卡内容的行为。 你知道怎么从这里开始
-
这个章节,我们会创建状态栏、菜单和工具栏。菜单是一组位于菜单栏的命令。工具栏是应用的一些常用工具按钮。状态栏显示一些状态信息,通常在应用的底部。 主窗口 QMainWindow提供了主窗口的功能,使用它能创建一些简单的状态栏、工具栏和菜单栏。 主窗口是下面这些窗口的合称,所以教程在最下方。 状态栏 状态栏是用来显示应用的状态信息的组件。 #!/usr/bin/python3 # -*- codin
-
这个章节,我们会创建状态栏、菜单和工具栏。菜单是一组位于菜单栏的命令。工具栏是应用的一些常用工具按钮。状态栏显示一些状态信息,通常在应用的底部。 主窗口 QMainWindow 提供了主窗口的功能,使用它能创建一些简单的状态栏、工具栏和菜单栏。 主窗口是下面这些窗口的合称,所以教程在最下方。 状态栏 状态栏是用来显示应用的状态信息的组件。 #!/usr/bin/python3 # -*- codi
-
在向应用添加导航栏和工具栏之前,我们需要决定使用哪种布局。 Framework7在这方面很自由,有3种不同类型的导航栏/工具栏布局,它们对应着在页面/视图中的不同位置。 静态布局 静态布局可能是最少使用的布局。在这种情况下,导航栏和工具栏只是可以滚动的页面内容的一部分,每个页面都有它自己的导航栏和工具栏: <body> ... <div class="views"> <div cl
-
底部导航,有图标和文字,响应鼠标事件和当前页面导航 <nav class="bar bar-tab"> <a class="tab-item external active" href="#"> <span class="icon icon-home"></span> <span class="tab-label">文案</span> </a> <a clas