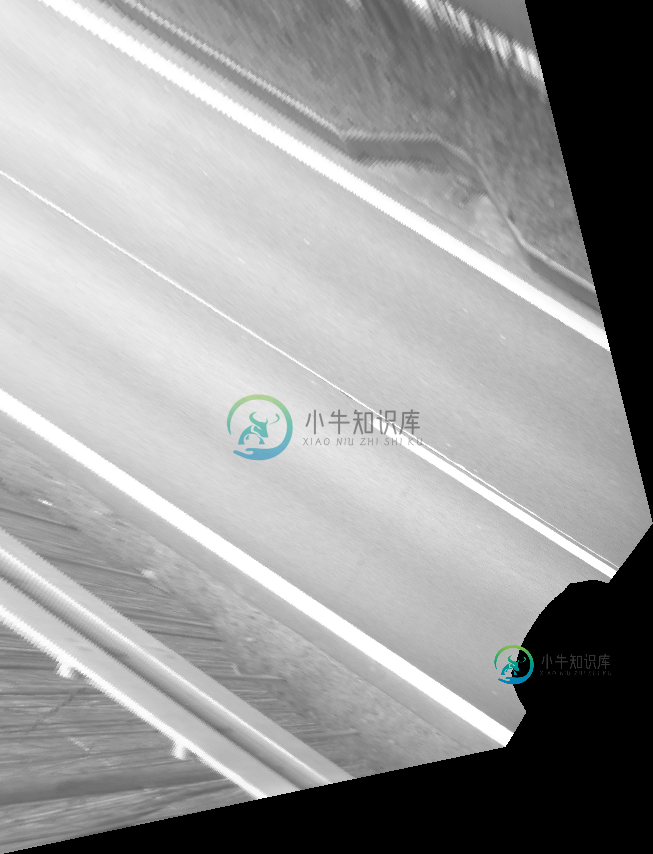
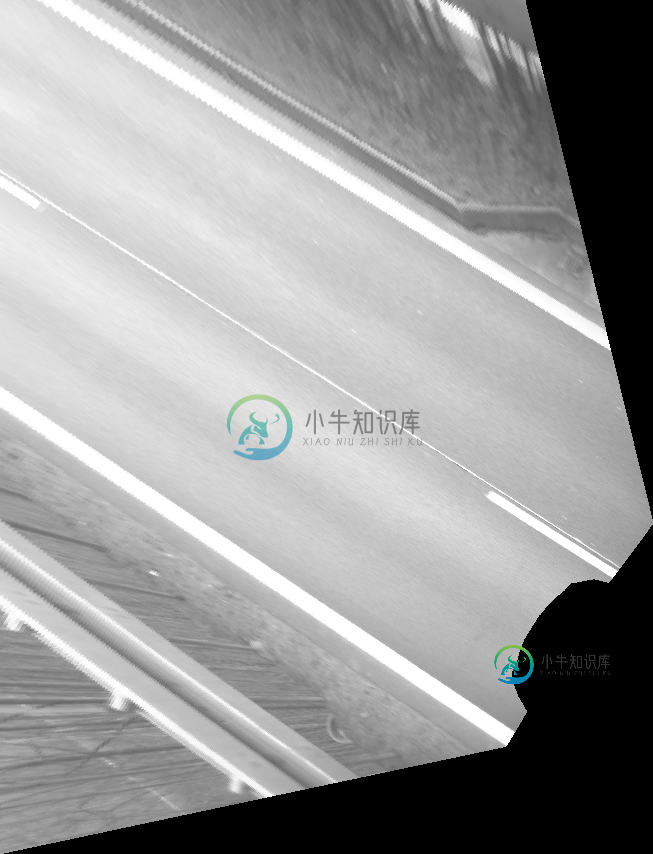
透视图像拼接


这是代码
#include <opencv2/core/core.hpp>
#include <opencv2/highgui/highgui.hpp>
#include<opencv2/opencv.hpp>
#include <opencv2/features2d/features2d.hpp>
#include <opencv2/nonfree/nonfree.hpp>
#include <opencv2/stitching/stitcher.hpp>
#include<vector>
using namespace cv;
using namespace std;
cv::vector<cv::Mat> ImagesList;
string result_name ="/TopViewsHorizantale/1.bmp";
int main()
{
      // Load the images

 Mat image1= imread("current_00000.bmp" );
 Mat image2= imread("current_00001.bmp" );
 cv::resize(image1, image1, image2.size());
 Mat gray_image1;
 Mat gray_image2;
 Mat Matrix = Mat(3,3,CV_32FC1);

 // Convert to Grayscale
 cvtColor( image1, gray_image1, CV_RGB2GRAY );
 cvtColor( image2, gray_image2, CV_RGB2GRAY );
 namedWindow("first image",WINDOW_AUTOSIZE);
 namedWindow("second image",WINDOW_AUTOSIZE);
 imshow("first image",image2);
 imshow("second image",image1);

if( !gray_image1.data || !gray_image2.data )
 { std::cout<< " --(!) Error reading images " << std::endl; return -1; }

//-- Step 1: Detect the keypoints using SURF Detector
 int minHessian = 400;

SurfFeatureDetector detector( minHessian );

std::vector< KeyPoint > keypoints_object, keypoints_scene;

detector.detect( gray_image1, keypoints_object );
detector.detect( gray_image2, keypoints_scene );

//-- Step 2: Calculate descriptors (feature vectors)
 SurfDescriptorExtractor extractor;

Mat descriptors_object, descriptors_scene;

extractor.compute( gray_image1, keypoints_object, descriptors_object );
extractor.compute( gray_image2, keypoints_scene, descriptors_scene );

//-- Step 3: Matching descriptor vectors using FLANN matcher
 FlannBasedMatcher matcher;
 std::vector< DMatch > matches;
 matcher.match( descriptors_object, descriptors_scene, matches );

double max_dist = 0; double min_dist = 100;

//-- Quick calculation of max and min distances between keypoints
 for( int i = 0; i < descriptors_object.rows; i++ )
 { double dist = matches[i].distance;
 if( dist < min_dist ) min_dist = dist;
 if( dist > max_dist ) max_dist = dist;
 }

printf("-- Max dist : %f \n", max_dist );
printf("-- Min dist : %f \n", min_dist );

//-- Use only "good" matches (i.e. whose distance is less than 3*min_dist )
 std::vector< DMatch > good_matches;

for( int i = 0; i < descriptors_object.rows; i++ )
 { if( matches[i].distance < 3*min_dist )
 { good_matches.push_back( matches[i]); }
 }
 std::vector< Point2f > obj;
 std::vector< Point2f > scene;

for( int i = 0; i < good_matches.size(); i++ )
 {
 //-- Get the keypoints from the good matches
 obj.push_back( keypoints_object[ good_matches[i].queryIdx ].pt );
 scene.push_back( keypoints_scene[ good_matches[i].trainIdx ].pt );
 }

// Find the Homography Matrix
 Mat H = findHomography( obj, scene, CV_RANSAC );
 // Use the Homography Matrix to warp the images
 cv::Mat result;
      int N = image1.rows + image2.rows;
 int M = image1.cols+image2.cols;
 warpPerspective(image1,result,H,cv::Size(N,M));
 cv::Mat half(result,cv::Rect(0,0,image2.rows,image2.cols));
 result.copyTo(half);
 namedWindow("Result",WINDOW_AUTOSIZE);
 imshow( "Result", result);

 imwrite(result_name, result);

 waitKey(0);
 return 0;
}
这里还有一些图片的链接:https://www.dropbox.com/sh/ovzkqomxvzw8rww/AAB2DDCrCF6NlCFre7V1Gb6La?dl=0非常感谢你,拉菲
共有1个答案
问题:输出图像太大。
原文:-
int N = image1.rows + image2.rows;
int M = image1.cols+image2.cols;
warpPerspective(image1,result,H,cv::Size(N,M)); // Too big size.
cv::Mat half(result,cv::Rect(0,0,image2.rows,image2.cols));
result.copyTo(half);
namedWindow("Result",WINDOW_AUTOSIZE);
imshow( "Result", result);
生成的结果图像存储了与图像1和图像2中一样多的行。但是,输出图像应该等于图像1和图像2的尺寸-重叠区域的尺寸。
另一个问题 你为什么要扭曲图像1。使用 H' 计算 H'(H 的反矩阵)和变形图像 2。您应该将 image2 注册到 image1 上。
此外,研究warpPerect是如何工作的。它会找到Image2将被扭曲到的区域ROI。接下来,对于该ROI结果区域中的每个像素(例如x, y),它会在Image2中找到相应的位置(例如x', y')。注意:(x', y')可以是实值,例如(4.5,5.4)。
使用某种形式的插值(可能是线性插值)来寻找图像结果中(x,y)的像素值。
接下来,如何找到结果矩阵的大小。不要使用 N,M.使用矩阵 H' 和变形图像角来查找它们将结束的位置
有关转换矩阵,请参阅此wiki和http://planning.cs.uiuc.edu/node99.html.了解旋转、平移、仿射和透视转换矩阵之间的区别。然后在此处阅读opencv文档。
你也可以看看我之前的回答。这个答案显示了简单的代数来寻找一个作物面积。您需要调整两幅图像的四个角的代码。注意,新图像的图像像素也可以到达负像素位置。
示例代码(java语言):-
import java.util.Iterator;
import java.util.LinkedList;
import java.util.List;

import org.opencv.calib3d.Calib3d;
import org.opencv.core.Core;
import org.opencv.core.CvType;
import org.opencv.core.DMatch;
import org.opencv.core.KeyPoint;
import org.opencv.core.Mat;
import org.opencv.core.MatOfDMatch;
import org.opencv.core.MatOfKeyPoint;
import org.opencv.core.MatOfPoint2f;
import org.opencv.core.Point;
import org.opencv.core.Scalar;
import org.opencv.core.Size;
import org.opencv.features2d.DescriptorExtractor;
import org.opencv.features2d.DescriptorMatcher;
import org.opencv.features2d.FeatureDetector;
import org.opencv.features2d.Features2d;
import org.opencv.imgcodecs.Imgcodecs;
import org.opencv.imgproc.Imgproc;

public class Driver {

    public static void stitchImages() {
        // Read as grayscale
        Mat grayImage1 = Imgcodecs.imread("current_00000.bmp", 0);
        Mat grayImage2 = Imgcodecs.imread("current_00001.bmp", 0);

        if (grayImage1.dataAddr() == 0 || grayImage2.dataAddr() == 0) {
            System.out.println("Images read unsuccessful.");
            return;
        }

        // Create transformation matrix
        Mat transformMatrix = new Mat(3, 3, CvType.CV_32FC1);

        // -- Step 1: Detect the keypoints using AKAZE Detector
        int minHessian = 400;
        MatOfKeyPoint keypoints1 = new MatOfKeyPoint();
        MatOfKeyPoint keypoints2 = new MatOfKeyPoint();
        FeatureDetector surf = FeatureDetector.create(FeatureDetector.AKAZE);
        surf.detect(grayImage1, keypoints1);
        surf.detect(grayImage2, keypoints2);

        // -- Step 2: Calculate descriptors (feature vectors)
        DescriptorExtractor extractor = DescriptorExtractor.create(DescriptorExtractor.AKAZE);
        Mat descriptors1 = new Mat();
        Mat descriptors2 = new Mat();
        extractor.compute(grayImage1, keypoints1, descriptors1);
        extractor.compute(grayImage2, keypoints2, descriptors2);

        // -- Step 3: Match the keypoints
        DescriptorMatcher matcher = DescriptorMatcher.create(DescriptorMatcher.BRUTEFORCE);
        MatOfDMatch matches = new MatOfDMatch();
        matcher.match(descriptors1, descriptors2, matches);
        List<DMatch> myList = new LinkedList<>(matches.toList());

        // Filter good matches
        double min_dist = Double.MAX_VALUE;
        Iterator<DMatch> itr = myList.iterator();
        while (itr.hasNext()) {
            DMatch element = itr.next();
            min_dist = Math.min(element.distance, min_dist);
        }

        LinkedList<Point> img1GoodPointsList = new LinkedList<Point>();
        LinkedList<Point> img2GoodPointsList = new LinkedList<Point>();

        List<KeyPoint> keypoints1List = keypoints1.toList();
        List<KeyPoint> keypoints2List = keypoints2.toList();

        itr = myList.iterator();
        while (itr.hasNext()) {
            DMatch dMatch = itr.next();
            if (dMatch.distance >= 5 * min_dist) {
                img1GoodPointsList.addLast(keypoints1List.get(dMatch.queryIdx).pt);
                img2GoodPointsList.addLast(keypoints2List.get(dMatch.trainIdx).pt);
            } else {
                itr.remove();
            }
        }

        matches.fromList(myList);
        Mat outputMid = new Mat();
        System.out.println("best matches size: " + matches.size());
        Features2d.drawMatches(grayImage1, keypoints1, grayImage2, keypoints2, matches, outputMid);
        Imgcodecs.imwrite("outputMid - A - A.jpg", outputMid);

        MatOfPoint2f img1Locations = new MatOfPoint2f();
        img1Locations.fromList(img1GoodPointsList);

        MatOfPoint2f img2Locations = new MatOfPoint2f();
        img2Locations.fromList(img2GoodPointsList);

        // Find the Homography Matrix - Note img2Locations is give first to get
        // inverse directly.
        Mat hg = Calib3d.findHomography(img2Locations, img1Locations, Calib3d.RANSAC, 3);
        System.out.println("hg is: " + hg.dump());

        // Find the location of two corners to which Image2 will warp.
        Size img1Size = grayImage1.size();
        Size img2Size = grayImage2.size();
        System.out.println("Sizes are: " + img1Size + ", " + img2Size);

        // Store location x,y,z for 4 corners
        Mat img2Corners = new Mat(3, 4, CvType.CV_64FC1, new Scalar(0));
        Mat img2CornersWarped = new Mat(3, 4, CvType.CV_64FC1);

        img2Corners.put(0, 0, 0, img2Size.width, 0, img2Size.width);   // x
        img2Corners.put(1, 0, 0, 0, img2Size.height, img2Size.height); // y
        img2Corners.put(2, 0, 1, 1, 1, 1); // z - all 1

        System.out.println("Homography is \n" + hg.dump());
        System.out.println("Corners matrix is \n" + img2Corners.dump());
        Core.gemm(hg, img2Corners, 1, new Mat(), 0, img2CornersWarped);
        System.out.println("img2CornersWarped: " + img2CornersWarped.dump());

        // Find the new size to use
        int minX = 0, minY = 0; // The grayscale1 already has minimum location at 0
        int maxX = 1500, maxY = 1500; // The grayscale1 already has maximum location at 1500(possible 1499, but 1 pixel wont effect)
        double[] xCoordinates = new double[4];
        img2CornersWarped.get(0, 0, xCoordinates);
        double[] yCoordinates = new double[4];
        img2CornersWarped.get(1, 0, yCoordinates);
        for (int c = 0; c < 4; c++) {
            minX = Math.min((int)xCoordinates[c], minX);
            maxX = Math.max((int)xCoordinates[c], maxX);
            minY = Math.min((int)xCoordinates[c], minY);
            maxY = Math.max((int)xCoordinates[c], maxY);
        }
        int rows = (maxX - minX + 1);
        int cols = (maxY - minY + 1);

        // Warp to product final output
        Mat output1 = new Mat(new Size(cols, rows), CvType.CV_8U, new Scalar(0));
        Mat output2 = new Mat(new Size(cols, rows), CvType.CV_8U, new Scalar(0));
        Imgproc.warpPerspective(grayImage1, output1, Mat.eye(new Size(3, 3), CvType.CV_32F), new Size(cols, rows));
        Imgproc.warpPerspective(grayImage2, output2, hg, new Size(cols, rows));
        Mat output = new Mat(new Size(cols, rows), CvType.CV_8U);
        Core.addWeighted(output1, 0.5, output2, 0.5, 0, output);
        Imgcodecs.imwrite("output.jpg", output);
    }

    public static void main(String[] args) {
        System.loadLibrary(Core.NATIVE_LIBRARY_NAME);
        stitchImages();
    }
}
更改描述符
从冲浪搬到阿卡泽。我从这里看到了完美的图像配准。
输出图像
这个输出使用更少的空间,描述符的变化显示完美的注册。
P.S.:恕我直言,编码很棒,但真正的宝藏是基础知识/概念。
-
我试图拖动对象表示为PNG图像透明背景从AnchorPane到HBox。 我使用以下线条将图像设置为拖动视图: 对于不透明的背景图像,这一切都很好,但对于透明的图像,图像的背景是白色的,不透明度为“0.8”。 我尝试为节点拍摄快照: 但它不起作用,白色背景仍然存在。有没有其他方法可以让它像原始图像一样透明?
-
我运行了这段代码。结果似乎没有生成result.png: 并且误差为
-
使用简单的代码,实现了汽车的透视效果。可以延伸到人体骨骼扫描等应用。 [Code4App.com]
-
我一直在运行一个从多个相机拼接图像的项目,但我认为我遇到了瓶颈......我对这个问题有一些问题。 我想尝试在未来将它们安装在车辆上,这意味着相机的相对位置和方向是固定的。 此外,由于我使用多个摄像机,并尝试使用单应性从中缝合图像,我将尽可能靠近摄像机,以减少误差(由于摄像机的焦点不在同一位置,并且摄像机占据一定空间是不可能的)。 这是我的实验短片http://www.youtube.com/wa
-
主要内容:Eclipse 透视图,Eclipse 打开一个透视图,Eclipse 切换透视图,Eclipse 结束透视图,Eclipse 自定义透视图Eclipse 透视图 Eclipse 透视图是初始视图集合和排列以及编辑器区域的名称。默认透视图称为 java。Eclipse 窗口可以打开多个透视图,但在任何时候都只有一个透视图处于活动状态。用户可以在打开的透视图之间切换或打开一个新的透视图。活动透视控制某些菜单和工具栏中显示的内容。 Eclipse 打开一个透视图 要打开一个新的透视图,请单
-
什么是透视图? 透视图是一个包含一系列视图和内容编辑器的可视容器。默认的透视图叫 java。 Eclipse 窗口可以打开多个透视图,但在同一时间只能有一个透视图处于激活状态。 用户可以在两个透视图之间切换。 操作透视图 通过"Window"菜单并选择"Open Perspective > Other"来打开透视图对话框。 透视图对话框中显示了可用的透视图列表。 该透视图列表也可以通过工具栏上的透

