PlotNeuralNet
Latex code for drawing neural networks for reports and presentation. Have a look into examples to see how they are made. Additionally, lets consolidate any improvements that you make and fix any bugs to help more people with this code.
Examples
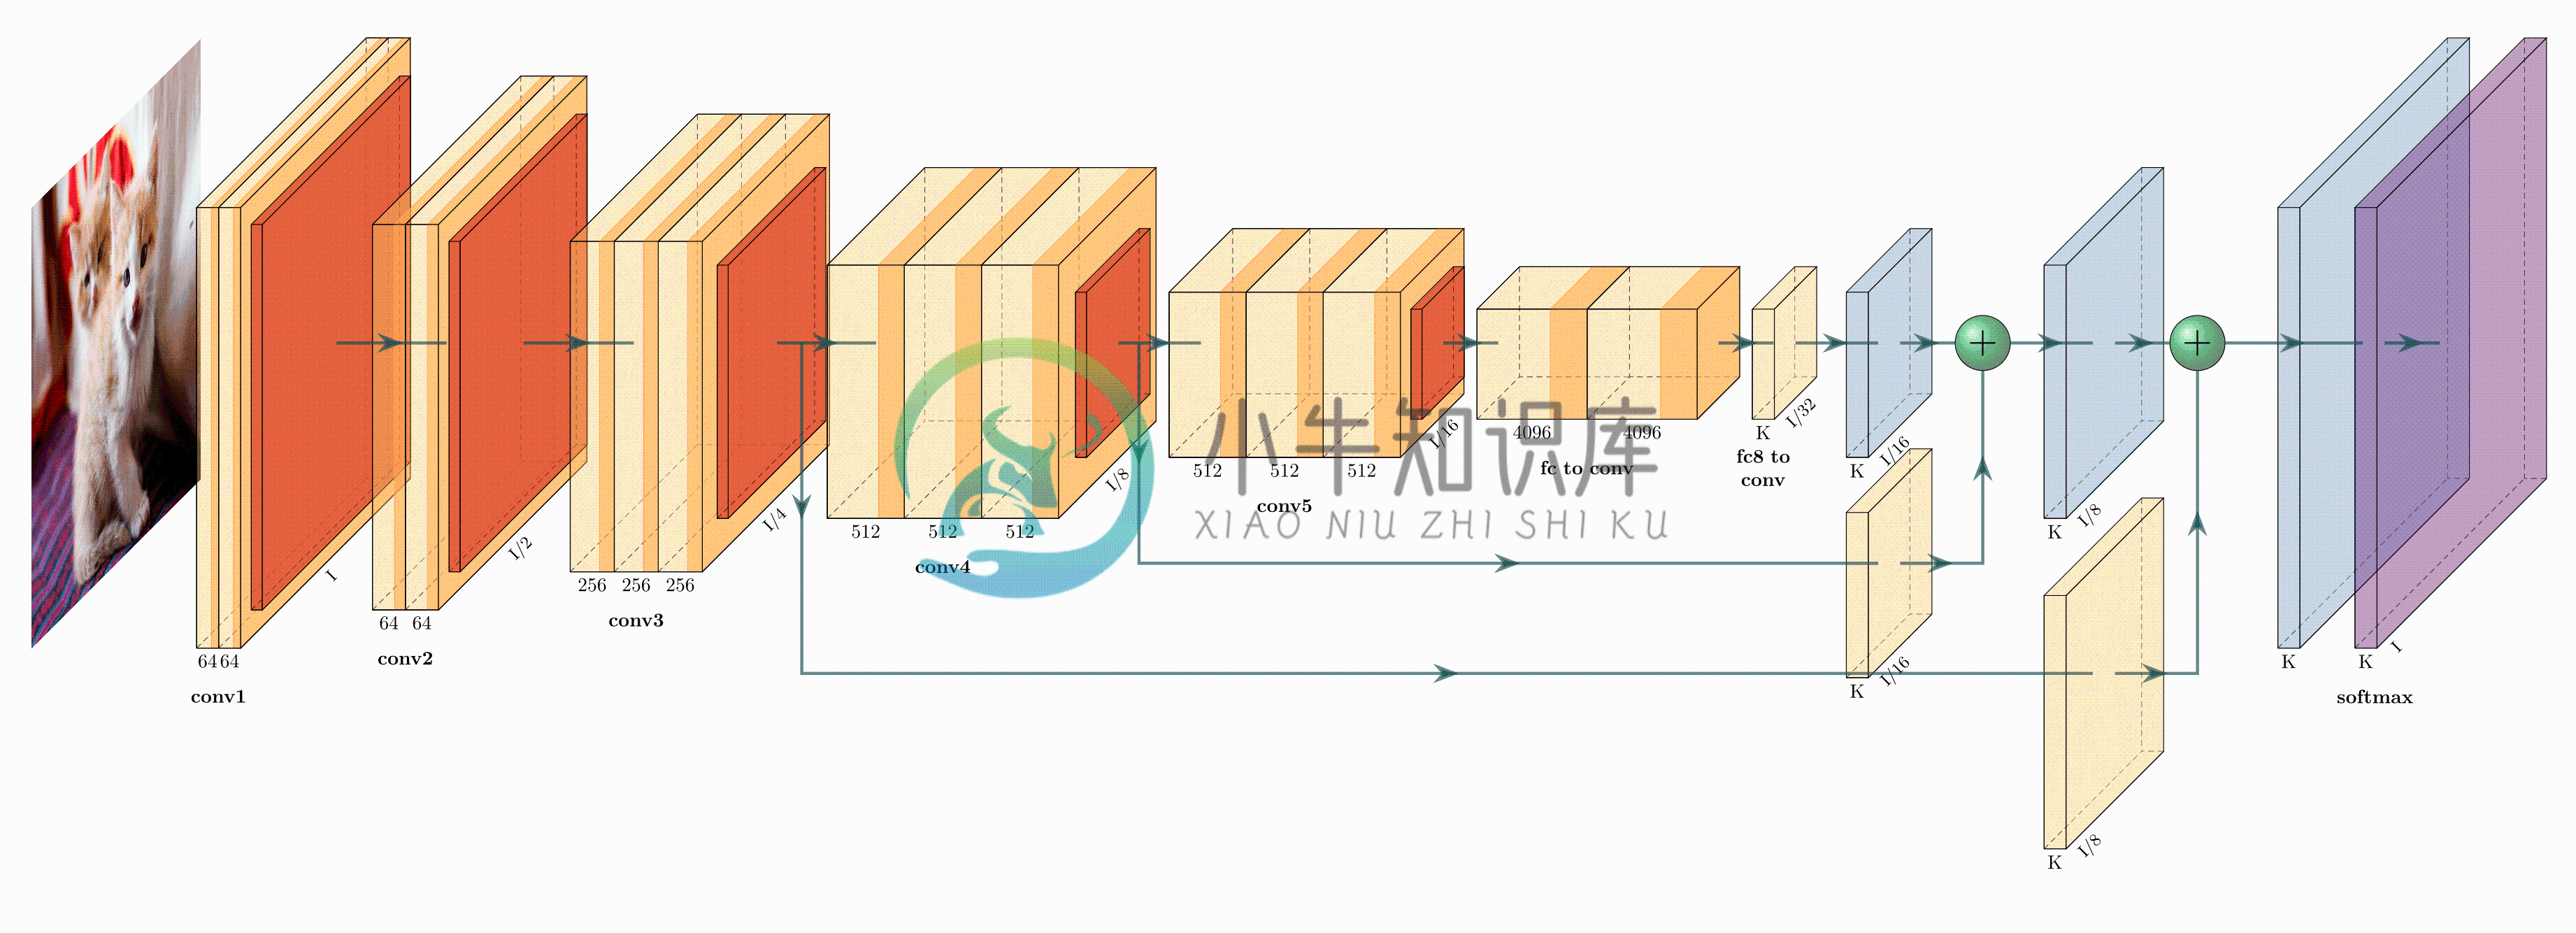
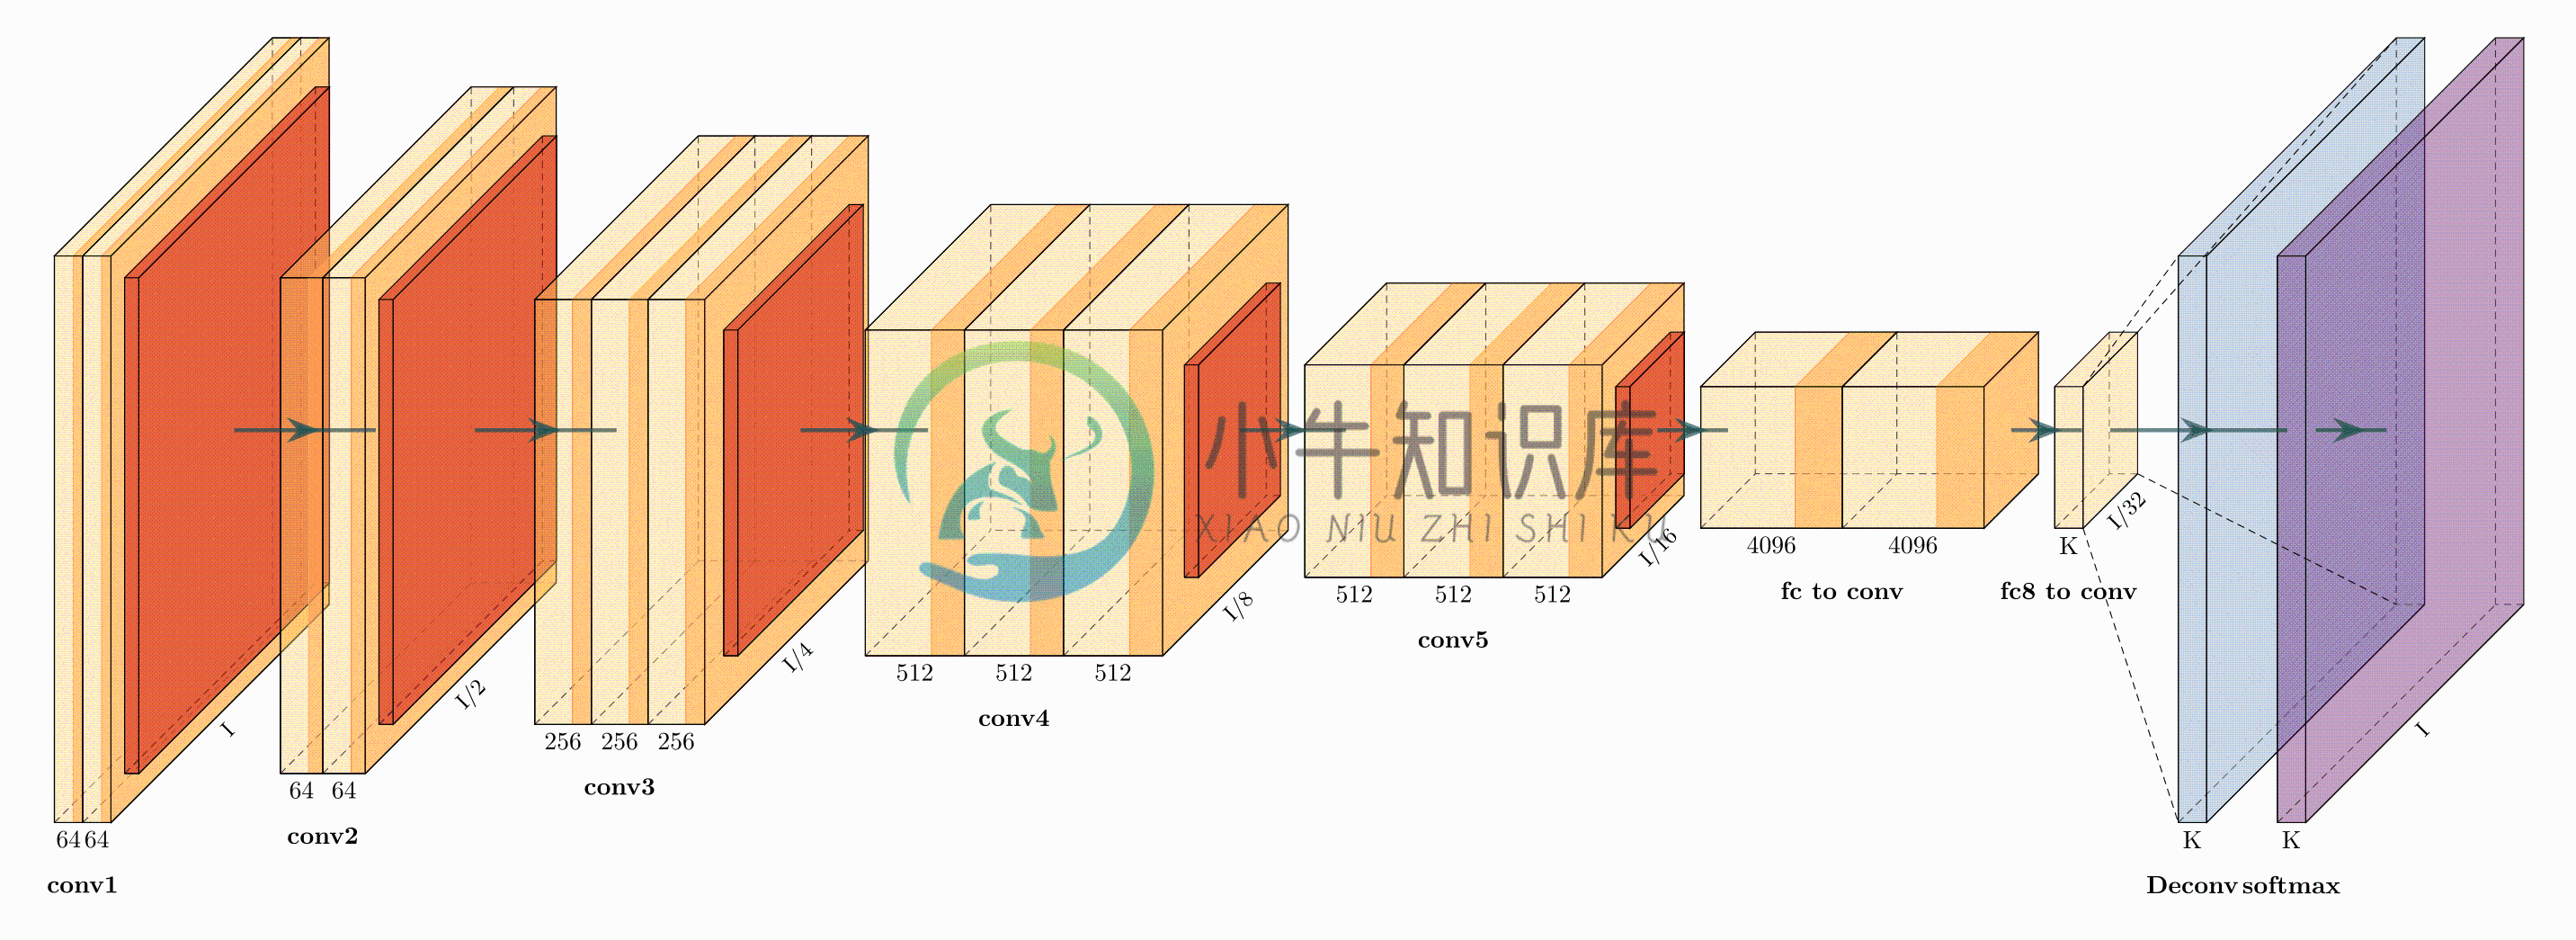
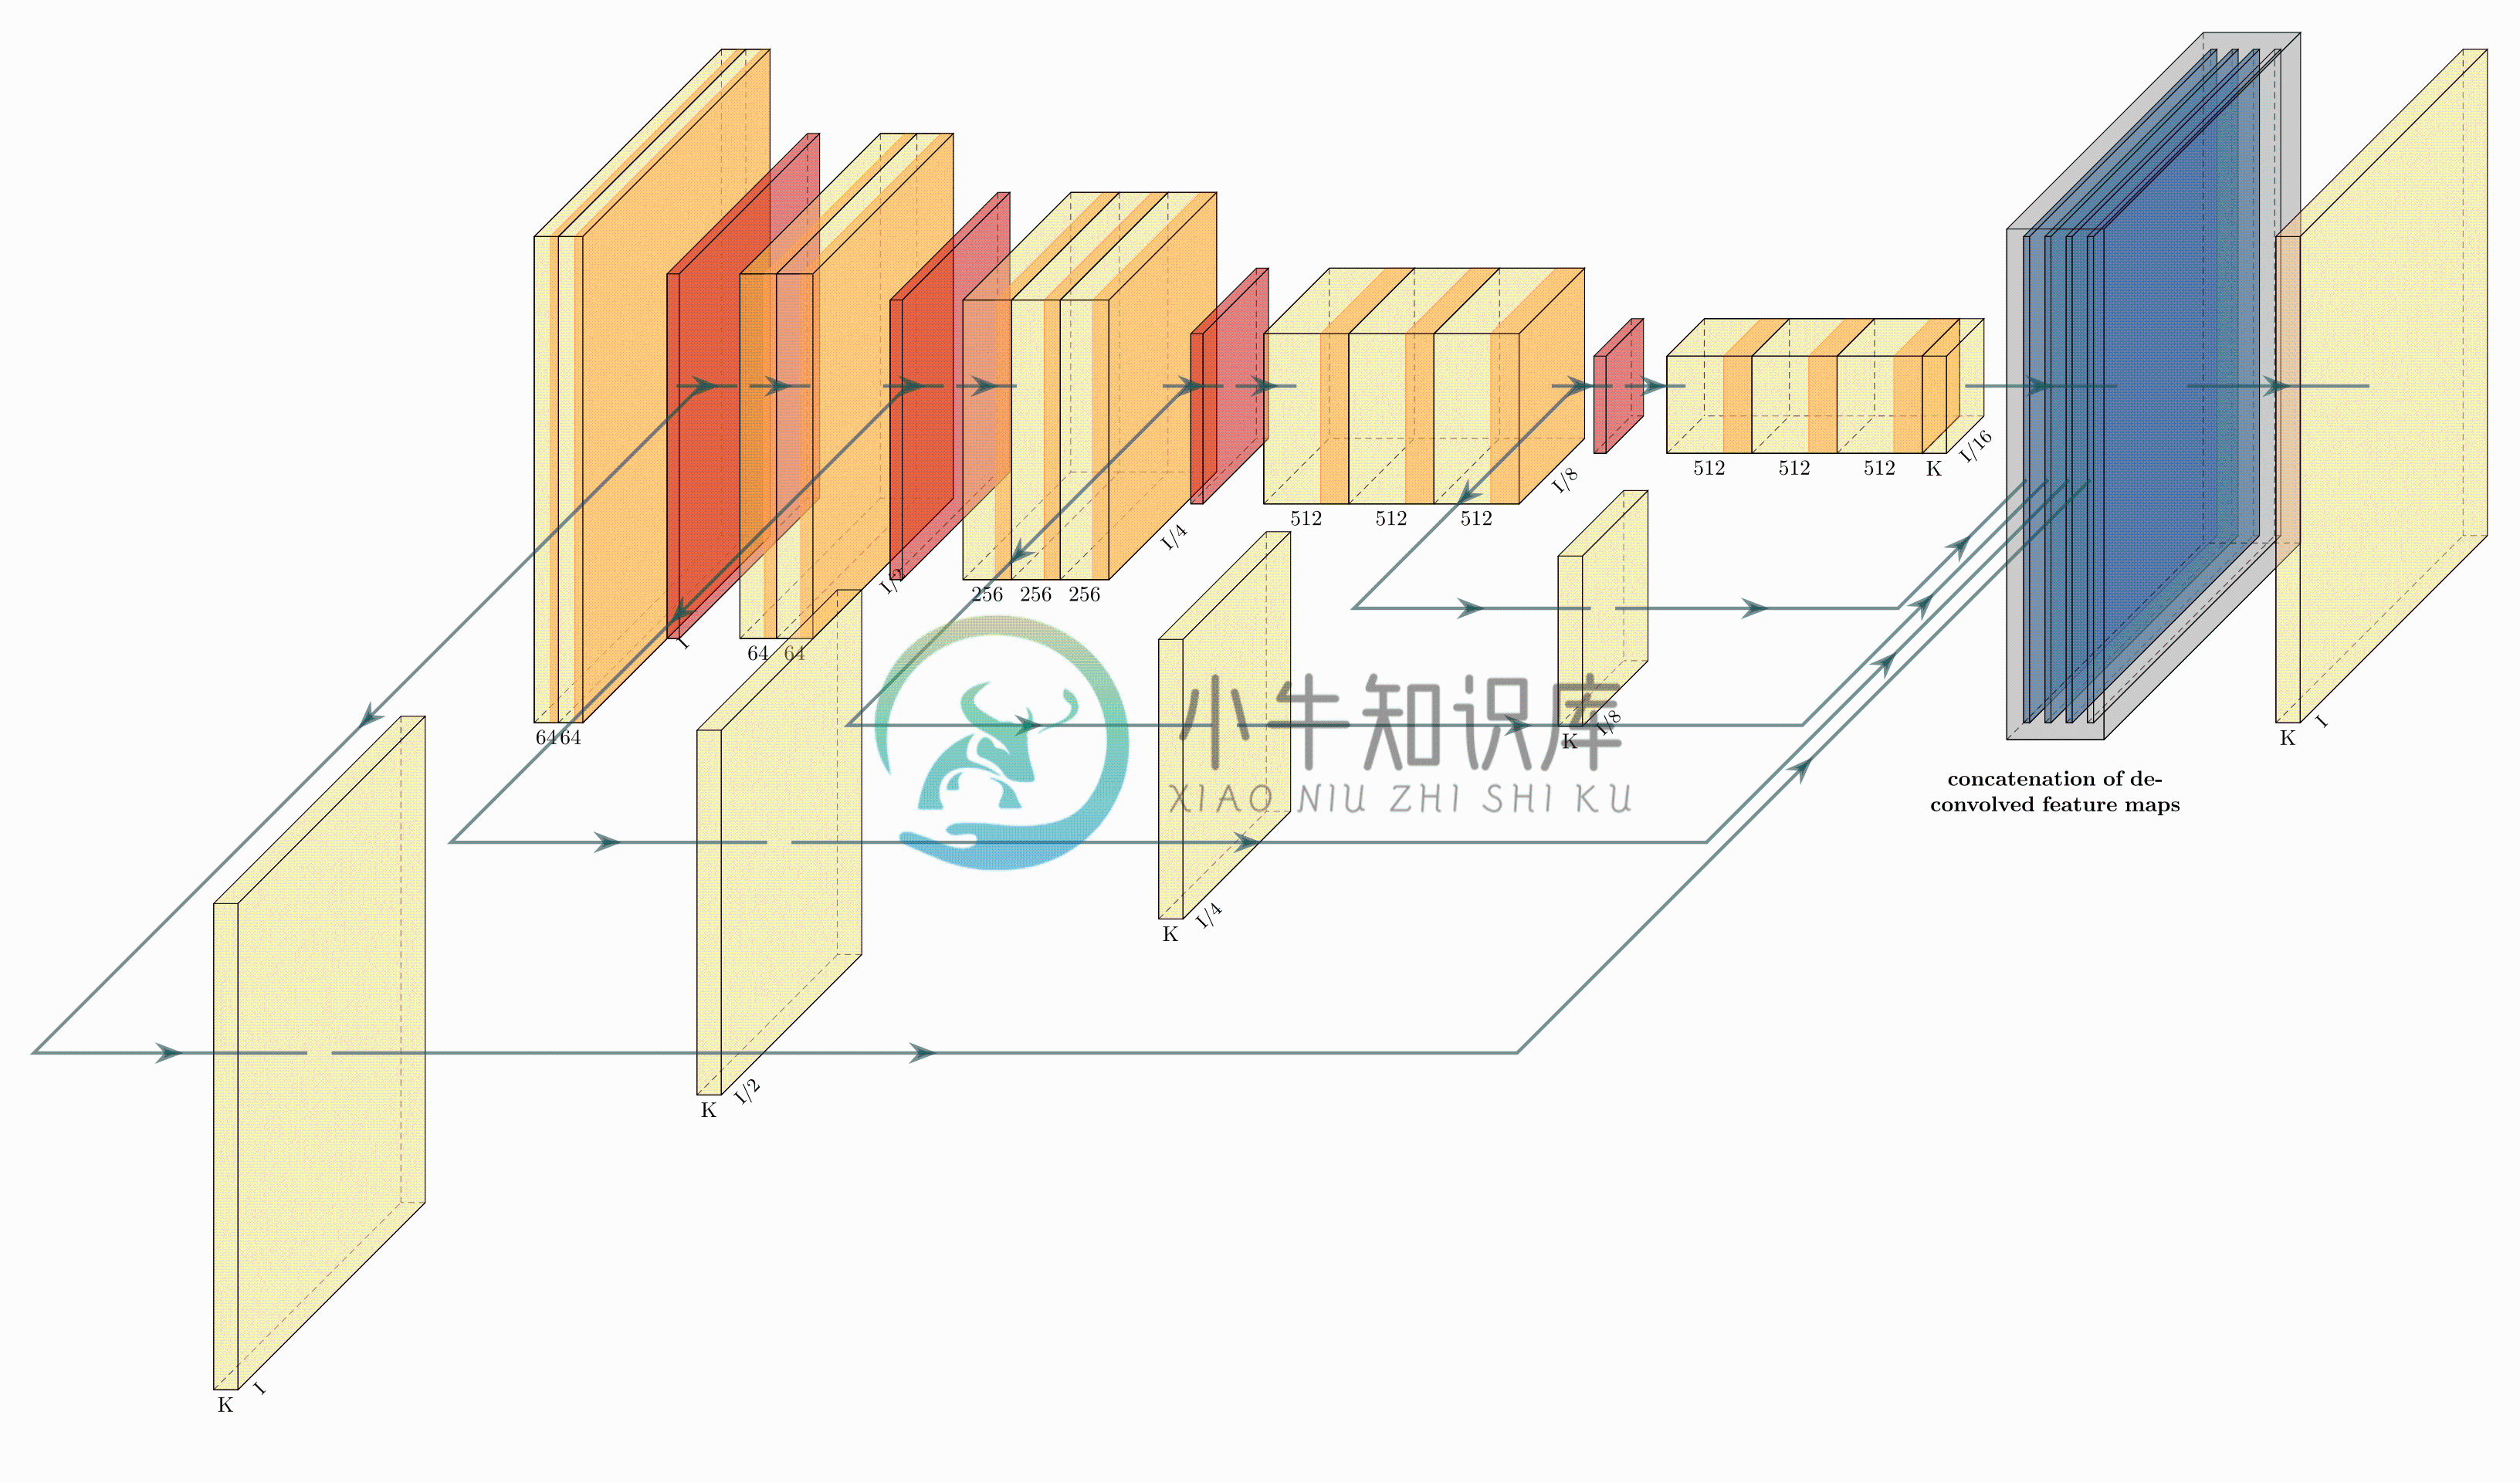
Following are some network representations:
FCN-8 (view on Overleaf)
FCN-32 (view on Overleaf)
Holistically-Nested Edge Detection (view on Overleaf)
Getting Started
Install the following packages on Ubuntu.
Ubuntu 16.04
sudo apt-get install texlive-latex-extraUbuntu 18.04.2Base on this website, please install the following packages.
sudo apt-get install texlive-latex-base
sudo apt-get install texlive-fonts-recommended
sudo apt-get install texlive-fonts-extra
sudo apt-get install texlive-latex-extra
Windows
- Download and install MikTeX.
- Download and install bash runner on Windows, recommends Git bash or Cygwin(https://www.cygwin.com/)
Execute the example as followed.
cd pyexamples/
bash ../tikzmake.sh test_simple
TODO
- Python interface
- Add easy legend functionality
- Add more layer shapes like TruncatedPyramid, 2DSheet etc
- Add examples for RNN and likes.
Latex usage
See examples directory for usage.
Python usage
First, create a new directory and a new Python file:
$ mkdir my_project
$ cd my_project
vim my_arch.py
Add the following code to your new file:
import sys
sys.path.append('../')
from pycore.tikzeng import *

# defined your arch
arch = [
    to_head( '..' ),
    to_cor(),
    to_begin(),
    to_Conv("conv1", 512, 64, offset="(0,0,0)", to="(0,0,0)", height=64, depth=64, width=2 ),
    to_Pool("pool1", offset="(0,0,0)", to="(conv1-east)"),
    to_Conv("conv2", 128, 64, offset="(1,0,0)", to="(pool1-east)", height=32, depth=32, width=2 ),
    to_connection( "pool1", "conv2"),
    to_Pool("pool2", offset="(0,0,0)", to="(conv2-east)", height=28, depth=28, width=1),
    to_SoftMax("soft1", 10 ,"(3,0,0)", "(pool1-east)", caption="SOFT"  ),
    to_connection("pool2", "soft1"),
    to_end()
    ]

def main():
    namefile = str(sys.argv[0]).split('.')[0]
    to_generate(arch, namefile + '.tex' )

if __name__ == '__main__':
    main()
Now, run the program as follows:
bash ../tikzmake.sh my_arch
-
一、安装WinEdt WinEdt 10.3下载 ,按教程安装就好。 二、安装MikTex MiKTeX 官网下载, 安装后,WinEdt会自动加载MikTex的宏包。 三、PlotNeuralNet 下载配置 PlotNeuralNet github 地址,下载到本地,解压。 使用步骤 在PlotNeuralNet当前目录下新建pnntest.py文件,在pnntest.py文件中加入以下代码把
-
\documentclass[border=15pt, multi, tikz]{standalone} %\usepackage{blocks} \usepackage{import} \subimport{../../layers/}{init} \usetikzlibrary{positioning} \def\ConvColor{rgb:yellow,5;red,2.5;white,5}
-
PlotNeuralNet工具经验 内置的layer可以根据自己的需要进行定制,例如skip,conv等模型 这里面的位置信息是非常的操蛋,我大概概括一下,可以分为两种位置信息。第一种,某一个模块的方位(a.north,anchor,west,south,east等),这是针对于这个模块的方位。比如说卷积层的右边(conv.east)。第二种,平面上的坐标,这个可以直接按照数组的方式,例如(3,3


