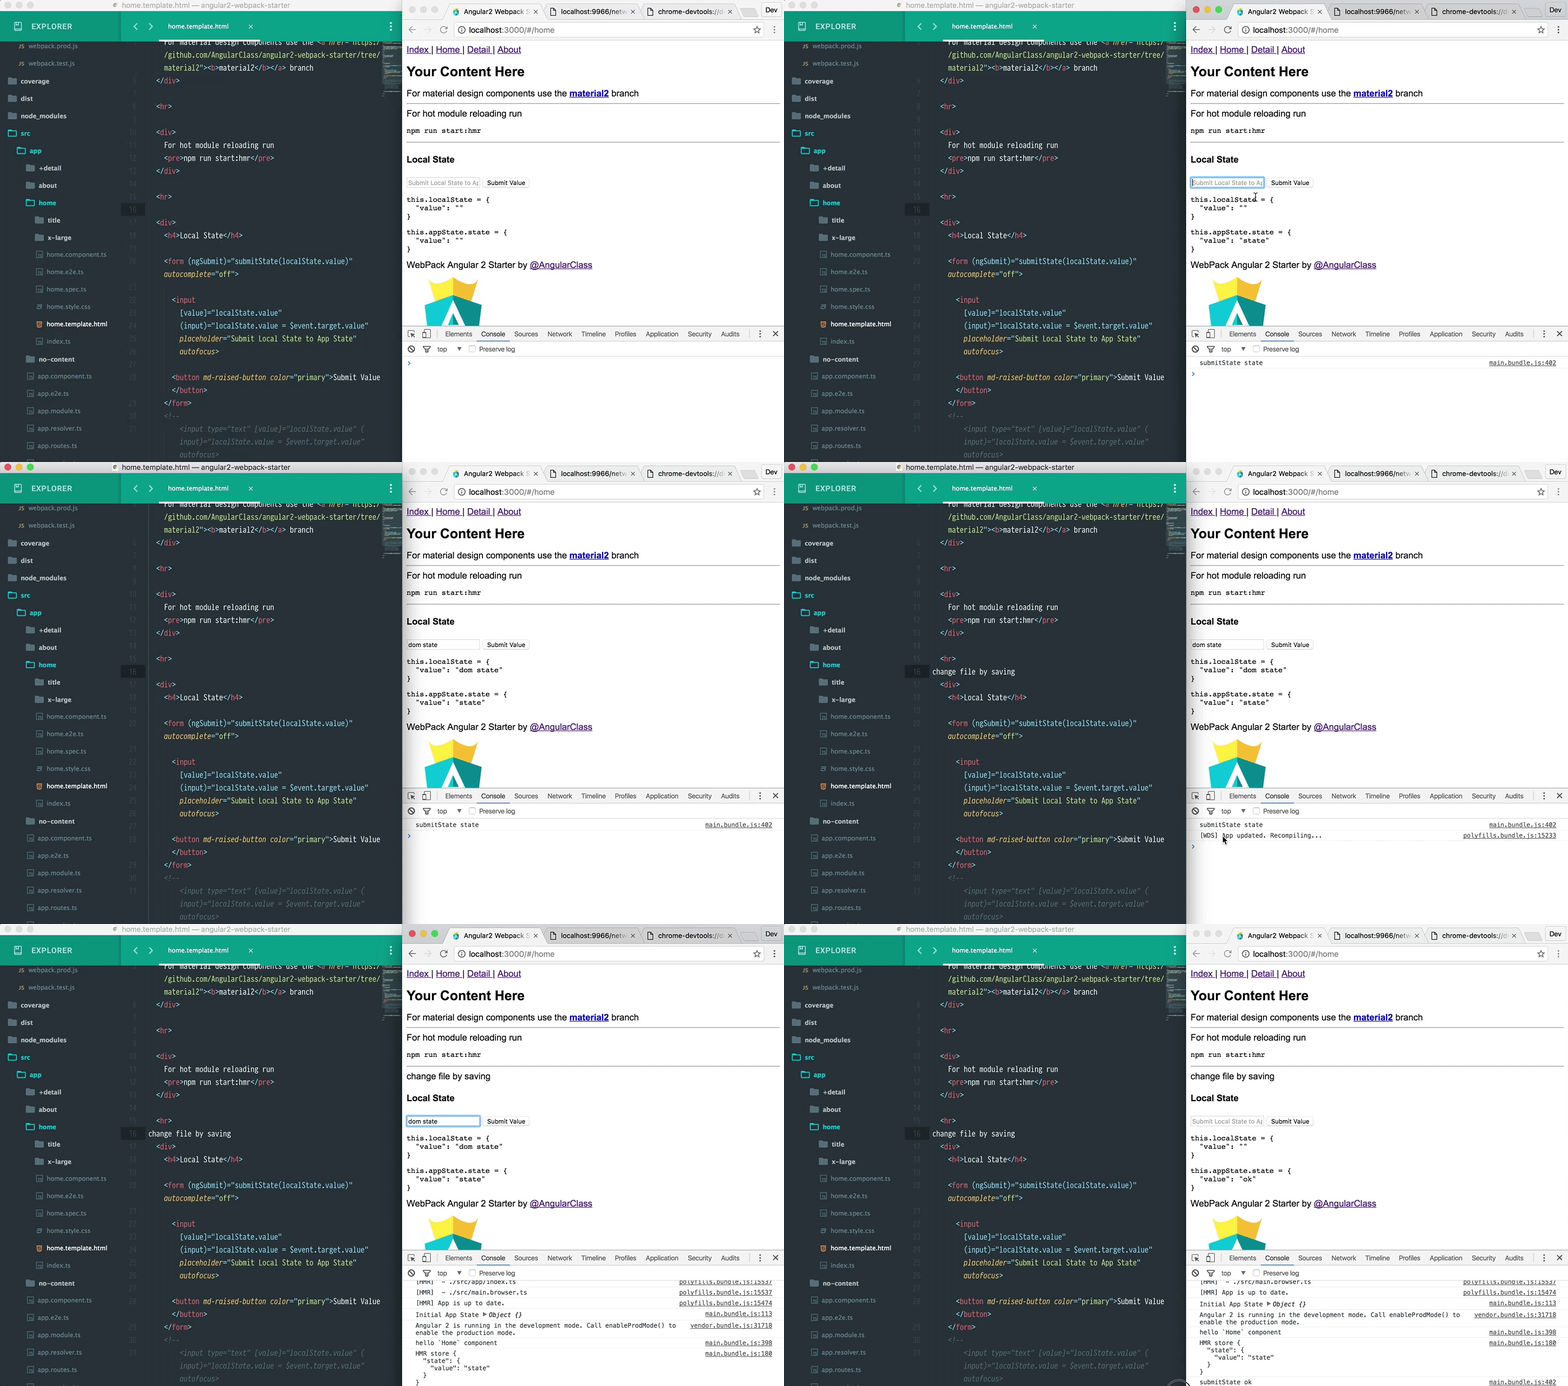
Angular Hot Module Replacement
Angular-HMRHot Module Reloading for Webpack and Angular. All versions of Angular and Webpack will work with this module
npm install @angularclass/hmr
main.browser.ts
import { removeNgStyles, createNewHosts, bootloader } from '@angularclass/hmr';

@NgModule({
  bootstrap: [ App ],
  declarations: [ App ],
  imports: [
    // Angular 2
    BrowserModule,
    FormsModule,
    HttpModule,
    RouterModule.forRoot([], {
      useHash: true
    }),
    // app
    appModule
    // vendors
  ],
  providers: []
})
class MainModule {
  constructor(public appRef: ApplicationRef) {}
  hmrOnInit(store) {
    if (!store || !store.state) return;
    console.log('HMR store', store);
    console.log('store.state.data:', store.state.data)
    // inject AppStore here and update it
    // this.AppStore.update(store.state)
    if ('restoreInputValues' in store) {
      store.restoreInputValues();
    }
    // change detection
    this.appRef.tick();
    delete store.state;
    delete store.restoreInputValues;
  }
  hmrOnDestroy(store) {
    var cmpLocation = this.appRef.components.map(cmp => cmp.location.nativeElement);
    // recreate elements
    store.disposeOldHosts = createNewHosts(cmpLocation)
    // inject your AppStore and grab state then set it on store
    // var appState = this.AppStore.get()
    store.state = {data: 'yolo'};
    // store.state = Object.assign({}, appState)
    // save input values
    store.restoreInputValues  = createInputTransfer();
    // remove styles
    removeNgStyles();
  }
  hmrAfterDestroy(store) {
    // display new elements
    store.disposeOldHosts()
    delete store.disposeOldHosts;
    // anything you need done the component is removed
  }
}

export function main() {
  return platformBrowserDynamic().bootstrapModule(MainModule)
    // use `hmrModule` or the "@angularclass/hmr-loader"
    .then((ngModuleRef: any) => {
      // `module` global ref for webpackhmr
      // Don't run this in Prod
      return hmrModule(ngModuleRef, module);
    });
}

// boot on document ready
bootloader(main);
bootloader is only needed to detect that the dom is ready before bootstraping otherwise bootstrap. This is needed because that dom is already ready during reloading.
Important Helpers
- removeNgStyles: remove angular styles
- createNewHosts and disposeOldHosts: recreate root elements for bootstrapping
- bootloader: boot on document ready or boot if it's already ready
- createInputTransfer and restoreInputValues: transfer input DOM state during replacement
Production
In production you only need bootloader which just does this:
export function bootloader(main) {
  if (document.readyState === 'complete') {
    main()
  } else {
    document.addEventListener('DOMContentLoaded', main);
  }
}
You would bootstrap your app the normal way, in production, after dom is ready. Also, in production, you should remove the loader:
@NGRX/platform (NGRX 4.x.x)
To hook into NGRX 4 you simply need to supply a reducer to set the state, and include it in your development metaReducers.
// make sure you export for AoT
export function stateSetter(reducer: ActionReducer<any>): ActionReducer<any> {
  return function(state: any, action: any) {
    if (action.type === 'SET_ROOT_STATE') {
      return action.payload;
    }
    return reducer(state, action);
  };
}
In your root reducer you can do something like this to include it in your metaReducers.You should access your environment here and only include this in development.
/**
 * By default, @ngrx/store uses combineReducers with the reducer map to compose
 * the root meta-reducer. To add more meta-reducers, provide an array of meta-reducers
 * that will be composed to form the root meta-reducer.
 */
export const metaReducers: ActionReducer<any, any>[] = [stateSetter]
Simply supply the metaReducer to the StoreModule and your hmr is hooked in.
StoreModule.forRoot(reducers, { metaReducers }),
enjoy — PatrickJS
-
A:什么是HMR? Q:HMR(热替换)用于在运行的应用程序中更新代码而不需要重建它。这将导致更快的更新和更少的全页重新加载。 创建HMR的环境 在environments文件夹中新建 src/environments/environment.hmr.ts,内容分别配置为: export const environment = { production: false, hmr: true };
-
NPM 版本要求 $ node -v $ npm -v 其中 Node 版本需要 6.9.0+,NPM 需要 3.0.0+。 #安装安装 如果之前安装了,升级到最新版本: $ npm uninstall -g @angular/cli $ npm cache clean $ npm install -g @angular/cli@latest #创建应用创建应用
-
1.angular-cli.json配置参数解析 { "project": { "name": "ng-admin", //项目名称 "ejected": false // 标记该应用是否已经执行过eject命令把webpack配置释放出来 }, "apps": [ { "root": "src", // 源码根目录 "outDir":
-
一. angular-cli.json常见配置 { "project": { "name": "ng-admin", //项目名称 "ejected": false // 标记该应用是否已经执行过eject命令把webpack配置释放出来 }, "apps": [ { "root": "src", // 源码根目录 "outDir": "
-
angular-ui-router使用 github源码地址:https://github.com/angular-ui/ui-router api地址 http://angular-ui.github.io/ui-router/site 安装 npm install --save angular-ui-router 使用angular-ui-router 备注: 以下所有示例代码来源于个人所写的
-
Angular 是一款十分流行且好用的 Web 前端框架,目前由 Google 维护。这个条目收录的是 Angular 2 及其后面的版本。由于官方已将 Angular 2 和之前的版本 Angular.js 分开维护(两者的 GitHub 地址和项目主页皆不相同),所以就有了这个页面。传送门:Angular.js 特性 跨平台 渐进式 Web 应用 借助现代化 Web 平台的力量,交付 app
-
即将到来的Angular 2框架是使用TypeScript开发的。 因此Angular和TypeScript一起使用非常简单方便。 Angular团队也在其文档里把TypeScript视为一等公民。 正因为这样,你总是可以在Angular 2官网(或Angular 2官网中文版)里查看到最新的结合使用Angular和TypeScript的参考文档。 在这里查看快速上手指南,现在就开始学习吧!
-
从头开始创建项目 lint你的代码 运行您的单元测试和端到端测试。 Angular 2 CLI目前只在TypeScript中生成框架,稍后还会有其他版本。
-
这小节内容是译者加的,因为我认为对于新手而言,学习一个框架是有成本的,特别是对于一个不算简单的技术来说,我希望这篇教程是对新手友好的,所以我首先要让你放心的将时间和精力投入到Angular2 中。那我们先不谈技术细节,先用数据说话。 这里我多说一句,最近看一些文章中谷歌趋势截图,大都没有把范围限定在“编程”上。图中可以看出Vue2非常少,所以在下面比较中不再单独统计。 教程数量 这里我选取的主要是
-
我们已经在Highcharts Configuration Syntax一章中看到了用于绘制图表的配置 。 下面给出角度计图表的示例。 配置 (Configurations) 现在让我们看一下所采取的其他配置/步骤。 chart.type 将图表类型配置为基于计量。 将类型设置为“规格”。 var chart = { type: 'guage' }; pane 此类型仅适用于极坐标图和角度
-
角度计图表用于绘制仪表/仪表类型图表。 在本节中,我们将讨论不同类型的角度计图表。 Sr.No. 图表类型和描述 1 角度计 角度表。 2 实心仪表 实心图表。 3 Clock 时钟。 4 带双轴的仪表 带双轴的仪表图。 5 VU表 VU表图表。


