NativeScript Speech Recognition
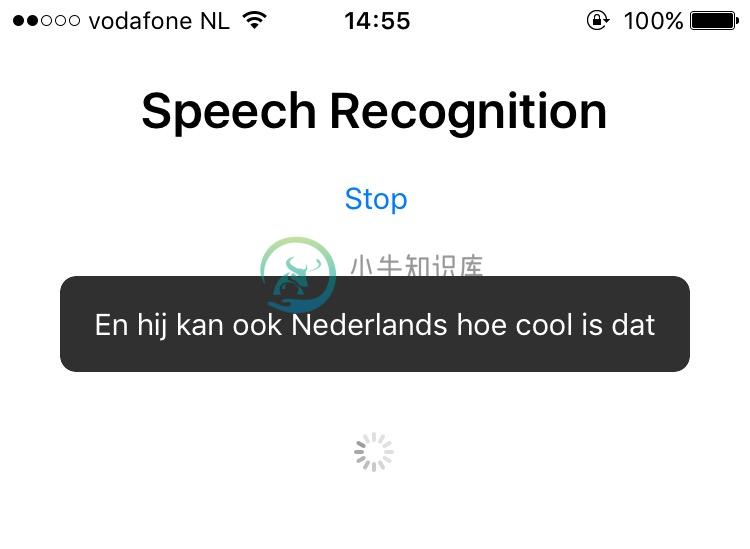
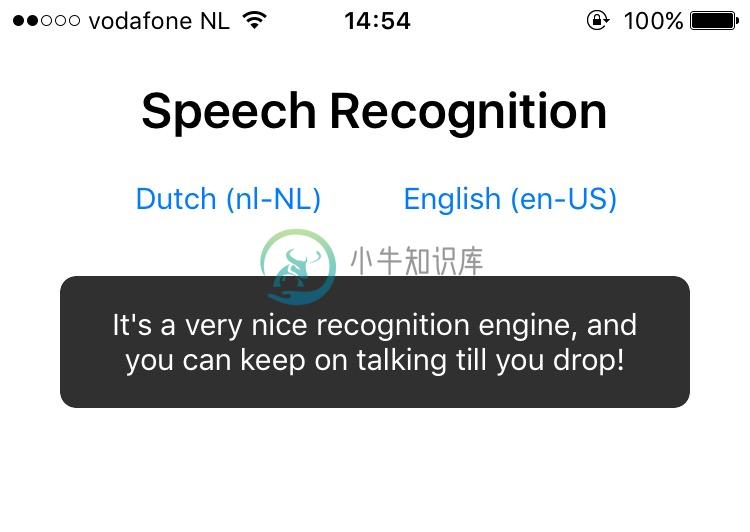
This is the plugin demo in action..
| ..while recognizing Dutch
|
.. after recognizing American-English
|
|---|---|
 |
 |
Installation
From the command prompt go to your app's root folder and execute:
NativeScript 7+:
ns plugin add nativescript-speech-recognition
NativeScript < 7:
tns plugin add nativescript-speech-recognition@1.5.0
Testing
You'll need to test this on a real device as a Simulator/Emulator doesn't have speech recognition capabilities.
API
available
Depending on the OS version a speech engine may not be available.
JavaScript
// require the plugin
var SpeechRecognition = require("nativescript-speech-recognition").SpeechRecognition;

// instantiate the plugin
var speechRecognition = new SpeechRecognition();

speechRecognition.available().then(
  function(available) {
    console.log(available ? "YES!" : "NO");
  }
);
TypeScript
// import the plugin
import { SpeechRecognition } from "nativescript-speech-recognition";

class SomeClass {
  private speechRecognition = new SpeechRecognition();

  public checkAvailability(): void {
    this.speechRecognition.available().then(
      (available: boolean) => console.log(available ? "YES!" : "NO"),
      (err: string) => console.log(err)
    );
  }
}
requestPermission
You can either let startListening handle permissions when needed, but if you want to have more controlover when the permission popups are shown, you can use this function:
this.speechRecognition.requestPermission().then((granted: boolean) => {
  console.log("Granted? " + granted);
});
startListening
On iOS this will trigger two prompts:
The first prompt requests to allow Apple to analyze the voice input. The user will see a consent screen which you can extend with your own message by adding a fragment like this to app/App_Resources/iOS/Info.plist:
<key>NSSpeechRecognitionUsageDescription</key>
<string>My custom recognition usage description. Overriding the default empty one in the plugin.</string>
The second prompt requests access to the microphone:
<key>NSMicrophoneUsageDescription</key>
<string>My custom microphone usage description. Overriding the default empty one in the plugin.</string>
TypeScript
// import the options
import { SpeechRecognitionTranscription } from "nativescript-speech-recognition";

this.speechRecognition.startListening(
  {
    // optional, uses the device locale by default
    locale: "en-US",
    // set to true to get results back continuously
    returnPartialResults: true,
    // this callback will be invoked repeatedly during recognition
    onResult: (transcription: SpeechRecognitionTranscription) => {
      console.log(`User said: ${transcription.text}`);
      console.log(`User finished?: ${transcription.finished}`);
    },
    onError: (error: string | number) => {
      // because of the way iOS and Android differ, this is either:
      // - iOS: A 'string', describing the issue.
      // - Android: A 'number', referencing an 'ERROR_*' constant from https://developer.android.com/reference/android/speech/SpeechRecognizer.
      //            If that code is either 6 or 7 you may want to restart listening.
    }
  }
).then(
  (started: boolean) => { console.log(`started listening`) },
  (errorMessage: string) => { console.log(`Error: ${errorMessage}`); }
).catch((error: string | number) => {
  // same as the 'onError' handler, but this may not return if the error occurs after listening has successfully started (because that resolves the promise,
  // hence the' onError' handler was created.
});
Angular tip
If you're using this plugin in Angular, then note that the onResult callback is not part of Angular's lifecycle.So either update the UI in an ngZone as shown here,or use ChangeDetectorRef as shown here.
stopListening
TypeScript
this.speechRecognition.stopListening().then(
  () => { console.log(`stopped listening`) },
  (errorMessage: string) => { console.log(`Stop error: ${errorMessage}`); }
);
Demo app (Angular)
This plugin is part of the plugin showcase app I built using Angular.
Angular video tutorial
Rather watch a video? Check out this tutorial on YouTube.
-
Reduce cost and horizontally scale deepspeech.pytorch using TorchElastic with Kubernetes. 使用TorchElastic和Kubernetes降低成本并水平扩展deepspeech.pytorch。 使用Deepspeech.pytorch的端到端语音到文本模型 (End-to-End Speech T
-
在本章中,我们将学习使用Python和Python进行语音识别。 言语是成人人际交往的最基本手段。 语音处理的基本目标是提供人与机器之间的交互。 语音处理系统主要有三个任务 - First ,语音识别允许机器捕捉我们说的单词,短语和句子 Second ,自然语言处理,让机器了解我们所说的话,和 Third ,语音合成让机器说话。 本章重点介绍speech recognition ,即理解人类所说话
-
Speech模块管理语音输入功能,提供语音识别功能,可支持用户通过麦克风设备进行语音输入内容。通过plus.speech可获取语音输入管理对象。 语音输入接口可使得网页开发人员能快速调用设备的麦克风进行语音输入,而不需要安装额外的浏览器插件。规范不定义底层语音识别引擎的技术架构,浏览器实现可基于语音识别服务器或本地内置语音识别模块。 方法: startRecognize: 启动语音识别 stopR
-
FPGA Speech Recognition Simple Speech Recognition System using MATLAB and VHDL on Altera DE0. Demo Video here Introduction This project is a trial to develop a simple speech recognition engine on low-
-
Asterisk speech recognition 是一个 AGI 脚本语言使得 Asterisk 可以使用 Google 的语音识别引擎。
-
概述 SpeechRecognition对象 事件 参考链接 概述 这个API用于浏览器接收语音输入。 它最早是由Google提出的,目的是让用户直接进行语音搜索,即对着麦克风说出你所要搜索的词,搜索结果就自动出现。Google首先部署的是input元素的speech属性(加上浏览器前缀x-webkit)。 <input id="query" type="search" class="k-inpu
-
概述 SpeechRecognition对象 事件 参考链接 概述 这个API用于浏览器接收语音输入。 它最早是由Google提出的,目的是让用户直接进行语音搜索,即对着麦克风说出你所要搜索的词,搜索结果就自动出现。Google首先部署的是input元素的speech属性(加上浏览器前缀x-webkit)。 <input id="query" type="search" class="k-inpu

