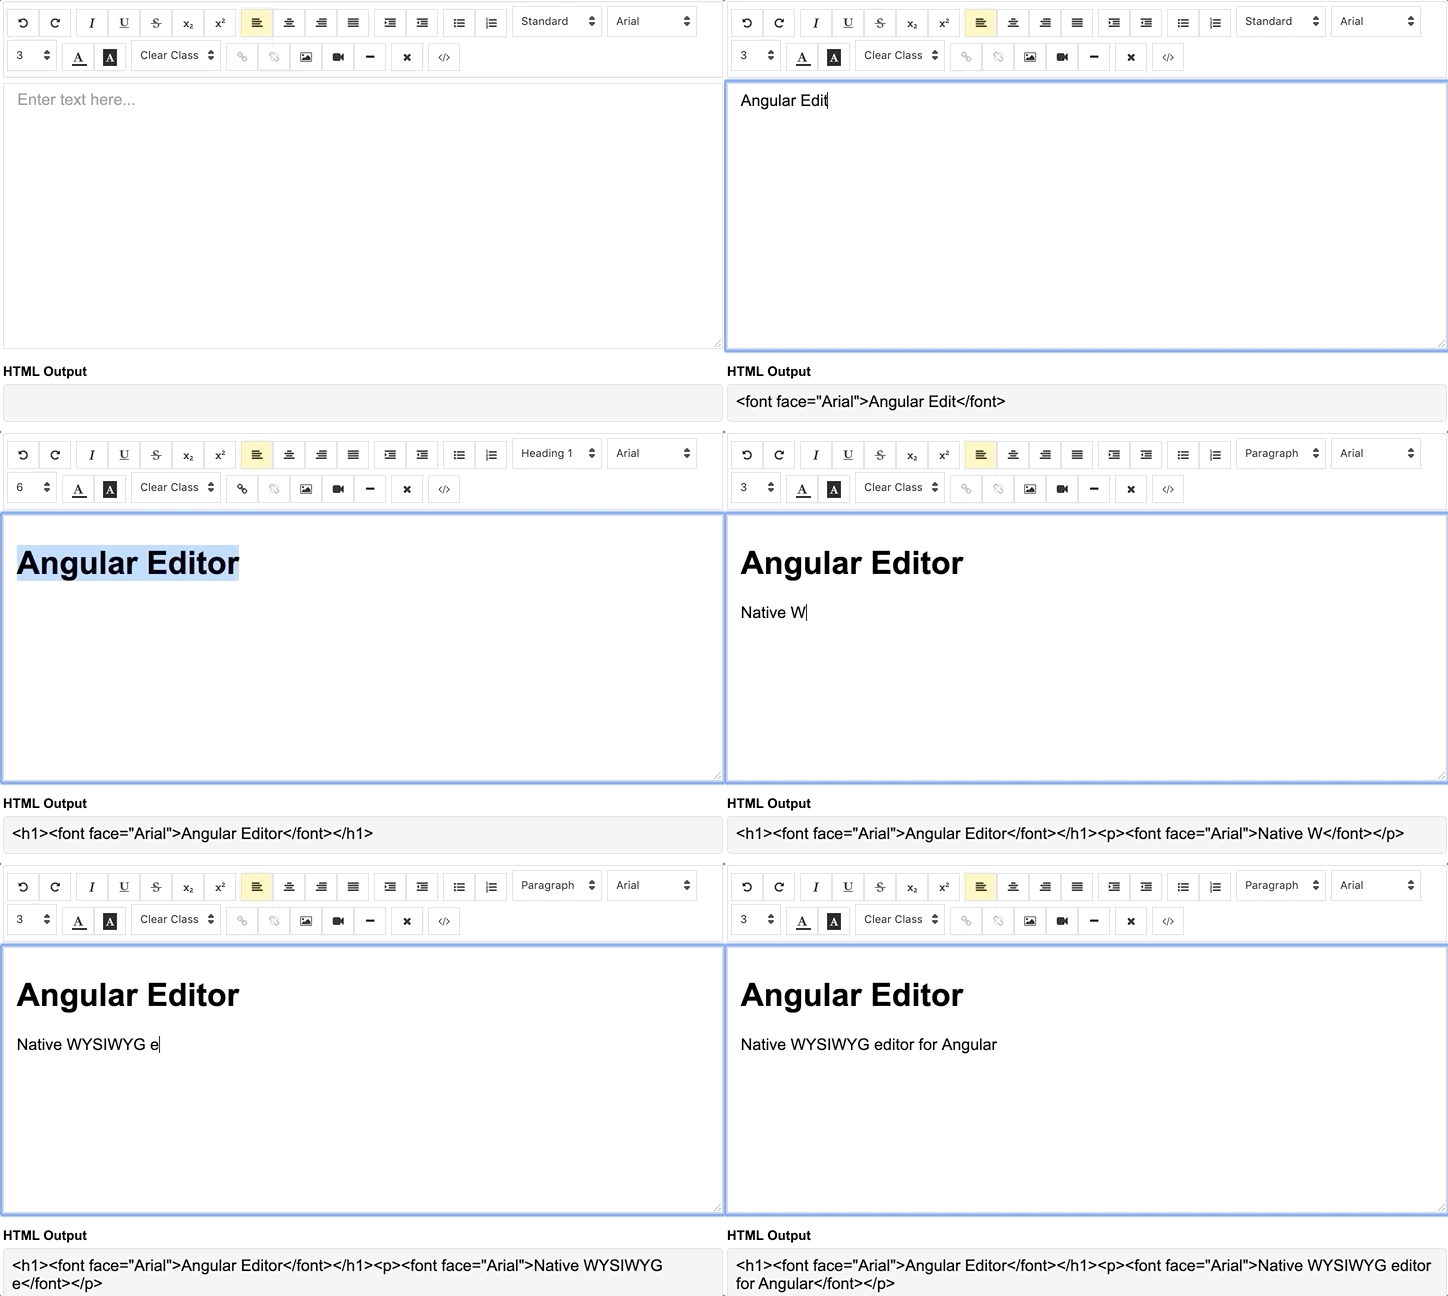
AngularEditor
A simple native WYSIWYG/Rich Text editor for Angular 6-12+
Demo
demo | See the code in StackBlitz.
Getting Started
Installation
Install via npm package manager
npm install @kolkov/angular-editor --save
Versions
1.0.0 and above - for Angular v8.x.x and above
0.18.4 and above - for Angular v7.x.x
0.15.x - for Angular v6.x.x
Usage
Import angular-editor module
import { HttpClientModule} from '@angular/common/http';
import { AngularEditorModule } from '@kolkov/angular-editor';

@NgModule({
  imports: [ HttpClientModule, AngularEditorModule ]
})
Then in HTML
<angular-editor [placeholder]="'Enter text here...'" [(ngModel)]="htmlContent"></angular-editor>
or for usage with reactive forms
<angular-editor formControlName="htmlContent" [config]="editorConfig"></angular-editor>
if you using more than one editor on same page set id property
<angular-editor id="editor1" formControlName="htmlContent1" [config]="editorConfig"></angular-editor>
<angular-editor id="editor2" formControlName="htmlContent2" [config]="editorConfig"></angular-editor>
where
import { AngularEditorConfig } from '@kolkov/angular-editor';


editorConfig: AngularEditorConfig = {
    editable: true,
      spellcheck: true,
      height: 'auto',
      minHeight: '0',
      maxHeight: 'auto',
      width: 'auto',
      minWidth: '0',
      translate: 'yes',
      enableToolbar: true,
      showToolbar: true,
      placeholder: 'Enter text here...',
      defaultParagraphSeparator: '',
      defaultFontName: '',
      defaultFontSize: '',
      fonts: [
        {class: 'arial', name: 'Arial'},
        {class: 'times-new-roman', name: 'Times New Roman'},
        {class: 'calibri', name: 'Calibri'},
        {class: 'comic-sans-ms', name: 'Comic Sans MS'}
      ],
      customClasses: [
      {
        name: 'quote',
        class: 'quote',
      },
      {
        name: 'redText',
        class: 'redText'
      },
      {
        name: 'titleText',
        class: 'titleText',
        tag: 'h1',
      },
    ],
    uploadUrl: 'v1/image',
    upload: (file: File) => { ... }
    uploadWithCredentials: false,
    sanitize: true,
    toolbarPosition: 'top',
    toolbarHiddenButtons: [
      ['bold', 'italic'],
      ['fontSize']
    ]
};
For ngModel to work, you must import FormsModule from @angular/forms, or for formControlName, you must import ReactiveFormsModule from @angular/forms
API
Inputs
| Input | Type | Default | Required | Description |
|---|---|---|---|---|
| id | string |
- |
no | Id property when multiple editor used on same page |
| [config] | AngularEditorConfig |
default config |
no | config for the editor |
| placeholder | string |
- |
no | Set custom placeholder for input area |
| tabIndex | number |
- |
no | Set Set tabindex on angular-editor |
Outputs
| Output | Description |
|---|---|
| (html) | Output html |
| (viewMode) | Fired when switched visual and html source mode |
| (blur) | Fired when editor blur |
| (focus) | Fired when editor focus |
Methods
| Name | Description |
|---|---|
| focus | Focuses the editor element |
Other
| Name | Type | Description |
|---|---|---|
| AngularEditorConfig | configuration | Configuration for the AngularEditor component. |
Configuration
| Input | Type | Default | Required | Description |
|---|---|---|---|---|
| editable | bolean |
true |
no | Set editing enabled or not |
| spellcheck | bolean |
true |
no | Set spellchecking enabled or not |
| translate | sting |
yes |
no | Set translating enabled or not |
| sanitize | bolean |
true |
no | Set DOM sanitizing enabled or not |
| height | string |
auto |
no | Set height of the editor |
| minHeight | string |
0 |
no | Set minimum height of the editor |
| maxHeight | string |
auto |
no | Set maximum height of the editor |
| width | string |
auto |
no | Set width of the editor |
| minWidth | string |
0 |
no | Set minimum width of the editor |
| enableToolbar | bolean |
true |
no | Set toolbar enabled or not |
| showToolbar | bolean |
true |
no | Set toolbar visible or not |
| toolbarPosition | string |
top |
no | Set toolbar position top or bottom |
| placeholder | string |
- |
no | Set placeholder text |
| defaultParagraphSeparator | string |
- |
no | Set default paragraph separator such as p |
| defaultFontName | string |
- |
no | Set default font such as Comic Sans MS |
| defaultFontSize | string |
- |
no | Set default font size such as 1 - 7 |
| uploadUrl | string |
- |
no | Set image upload endpoint https://api.exapple.com/v1/image/upload and return response with imageUrl key. {"imageUrl" : } |
| upload | function |
- |
no | Set image upload function |
| uploadWithCredentials | bolean |
false |
no | Set passing or not credentials in the image upload call |
| fonts | Font[] |
- |
no | Set array of available fonts [{name, class},...] |
| customClasses | CustomClass[] |
- |
no | Set array of available fonts [{name, class, tag},...] |
| outline | bolean |
true |
no | Set outline of the editor if in focus |
| toolbarHiddenButtons | string[][] |
- |
no | Set of the array of button names or elements to hide |
toolbarHiddenButtons: [
  [
    'undo',
    'redo',
    'bold',
    'italic',
    'underline',
    'strikeThrough',
    'subscript',
    'superscript',
    'justifyLeft',
    'justifyCenter',
    'justifyRight',
    'justifyFull',
    'indent',
    'outdent',
    'insertUnorderedList',
    'insertOrderedList',
    'heading',
    'fontName'
  ],
  [
    'fontSize',
    'textColor',
    'backgroundColor',
    'customClasses',
    'link',
    'unlink',
    'insertImage',
    'insertVideo',
    'insertHorizontalRule',
    'removeFormat',
    'toggleEditorMode'
  ]
]
What's included
Within the download you'll find the following directories and files. You'll see something like this:
angular-editor/
└── projects/
    ├── angular-editor/
    └── angular-editor-app/
angular-editor/ - library
angular-editor-app/ - demo application
Documentation
The documentation for the AngularEditor is hosted at our website AngularEditor
Contributing
Please read through our contributing guidelines. Included are directions for opening issues, coding standards, and notes on development.
Editor preferences are available in the editor config for easy use in common text editors. Read more and download plugins at http://editorconfig.org.
Versioning
For a transparency into our release cycle and in striving to maintain backward compatibility, AngularEditor is maintained under the Semantic Versioning guidelines.
See the Releases section of our project for changelogs for each release version.
Creators
Andrey Kolkov
Donate
If you like my work and I save your time you can buy me a
-
下载editor的文件 进入官网进行下载https://pandao.github.io/editor.md/,解压后放入assets目录下 全局加载editormd资源文件 全局加载js文件 在angular.json中引入editormd.min.js,在引入editormd.min.js文件前需要先引入jQuery 安装jQuery npm install jquery --save 在s
-
应用程序现在有了基本的标题。 接下来你要创建一个新的组件来显示英雄信息并且把这个组件放到应用程序的外壳里去。 创建英雄组件 使用 Angular CLI 创建一个名为 heroes 的新组件。 ng generate component heroes CLI 创建了一个新的文件夹, src/app/heroes/,并生成了 HeroesComponent 的 4 个文件。 HeroesCompon
-
1.下载editor.md源文件 https://pandao.github.io/editor.md/#download 2.将下载的源文件放在项目某目录下: 例如:src/assets/editor.md/ 3.在angular.json文件中,将所需要引入的css、js文件添加进来 "styles": [ "src/assets/editor.md/css/ed
-
Angular6 + Editor.md angular markdown directive指令方法 想要在angular中使用Markdown编辑器,怪我太笨,搞了三天才算有了自己想要的结果,主要是使用了Editor.md,其中碰到了一些坑,觉得有必要记录一下.有两种方法,一种是editor.md作为指令Directive进行构建,还有一种是使用自定义表单集成Editor.md.(方法)…比较
-
monaco-editor是一款优秀的在线编辑器,能够智能提示多种开发语言、脚本语言,还能做文本比较... 项目GitHub:https://github.com/atularen/ngx-monaco-editor 本人node等版本: Angular CLI: 6.2.9 Node: 8.12.0 OS: win32 x64 Angular: 6.1.10 一、安装: npm instal
-
在低版本的 angular 例如 angular7 中使用 ng2-ace-editor 包,当项目的 angular 升级到高版本例如 angular 12 版本,由于 ng2-ace-editor 不兼容 angular 12,经过 lvy 编译时就会报错,可以将 ng2-ace-editor 包替换成 ng12-ace-editor 包即可,npm 地址:ng12-ace-editor -
-
Angular Email Editor The excellent drag-n-drop email editor by Unlayer as a Angular wrapper component. This is the most powerful and developer friendly visual email builder for your app. Video Overvie
-
Angular 是一款十分流行且好用的 Web 前端框架,目前由 Google 维护。这个条目收录的是 Angular 2 及其后面的版本。由于官方已将 Angular 2 和之前的版本 Angular.js 分开维护(两者的 GitHub 地址和项目主页皆不相同),所以就有了这个页面。传送门:Angular.js 特性 跨平台 渐进式 Web 应用 借助现代化 Web 平台的力量,交付 app
-
即将到来的Angular 2框架是使用TypeScript开发的。 因此Angular和TypeScript一起使用非常简单方便。 Angular团队也在其文档里把TypeScript视为一等公民。 正因为这样,你总是可以在Angular 2官网(或Angular 2官网中文版)里查看到最新的结合使用Angular和TypeScript的参考文档。 在这里查看快速上手指南,现在就开始学习吧!
-
从头开始创建项目 lint你的代码 运行您的单元测试和端到端测试。 Angular 2 CLI目前只在TypeScript中生成框架,稍后还会有其他版本。
-
这小节内容是译者加的,因为我认为对于新手而言,学习一个框架是有成本的,特别是对于一个不算简单的技术来说,我希望这篇教程是对新手友好的,所以我首先要让你放心的将时间和精力投入到Angular2 中。那我们先不谈技术细节,先用数据说话。 这里我多说一句,最近看一些文章中谷歌趋势截图,大都没有把范围限定在“编程”上。图中可以看出Vue2非常少,所以在下面比较中不再单独统计。 教程数量 这里我选取的主要是
-
我们已经在Highcharts Configuration Syntax一章中看到了用于绘制图表的配置 。 下面给出角度计图表的示例。 配置 (Configurations) 现在让我们看一下所采取的其他配置/步骤。 chart.type 将图表类型配置为基于计量。 将类型设置为“规格”。 var chart = { type: 'guage' }; pane 此类型仅适用于极坐标图和角度


