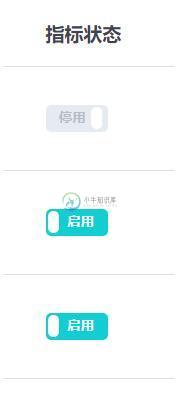
vue.js封装switch开关组件的操作
我的项目本来用的element,但是switch开关不符合设计要求,于是自己封装了一个switch组件,并且实现了switch开关的双向数据绑定

<template>
<label role="checkbox" :class="['switch', { toggled }]">
<input type="checkbox" class="switch-input" @change="toggle" />
<div
class="switch-core"
:style="{ backgroundColor: toggled ? colorChecked : colorUnchecked }"
>
<div
class="switch-button"
:style="{
transition: `transform ${speed}ms`,
transform: toggled ? null : `translate3d(32px, 0px, 0px)`
}"
></div>
</div>
<span class="switch-label label-right" v-if="toggled" v-html="labelChecked">
</span>
<span class="switch-label label-left" v-html="labelUnchecked" v-else>
</span>
</label>
</template>
<script>
export default {
 name: "ToggleSwitch",
 data() {
  return {
   toggled: this.value
  };
 },
 props: {
  value: {
   type: Boolean,
   default: true
  },
  speed: {
   type: Number,
   default: 100
  },
  labelChecked: {
   type: String,
   default: "启用"
  },
  labelUnchecked: {
   type: String,
   default: "停用"
  },
  colorChecked: {
   type: String,
   default: "#11CED2"
  },
  colorUnchecked: {
   type: String,
   default: "#E6EAF1"
  }
 },
 watch: {
  value: function(val) {
   this.value = val;
  }
 },
 methods: {
  toggle(event) {
   this.toggled = !this.toggled;
   this.$emit("update:value", this.toggled);
   this.$emit("change", event);
  }
 }
};
</script>
<style lang="scss" scoped>
.switch {
 display: inline-block;
 position: relative;
 overflow: hidden;
 vertical-align: middle;
 user-select: none;
 font-size: 10px;
 cursor: pointer;

 .switch-input {
  display: none;
 }

 .switch-label {
  position: absolute;
  top: 0;
  font-weight: 600;
  color: white;

  z-index: 2;

  &.label-left {
   left: 10px;
   line-height: 20px;
   border-top-left-radius: 2px;
   border-bottom-left-radius: 2px;
   color: #b5bdc8;
  }

  &.label-right {
   right: 10px;
   line-height: 20px;
   border-top-right-radius: 2px;
   border-bottom-right-radius: 2px;
  }
 }

 .switch-core {
  display: block;
  position: relative;
  box-sizing: border-box;
  outline: 0;
  margin: 0;
  transition: border-color 0.3s, background-color 0.3s;
  user-select: none;
  width: 46px;
  height: 20px;
  border-radius: 4px;
  line-height: 20px;

  .switch-button {
   width: 8px;
   height: 16px;
   display: block;
   position: absolute;
   overflow: hidden;
   top: 2;
   left: 2;
   z-index: 3;
   transform: translate3d(0, 0, 0);
   background-color: rgba(255, 255, 255, 1);
   border-radius: 4px;
   margin-top: 2px;
   margin-left: 2px;
  }
 }
}
</style>
调用开关组件
<toggle-switch
       v-model="value"
       :value.sync="value"
       @change="switchChange"
      >
      </toggle-switch>
组件实现了switch开关的双向数据绑定,在父组件的methods中写一个@change事件
switchChange() {
   console.log("switch值改变");
  },
补充知识:vue 监控el-switch控件值的变化
我要的效果是根据系统消息的推送范围决定推送人标签的显示,如下图两种情况:
——选择全站推送

——选择个人推送

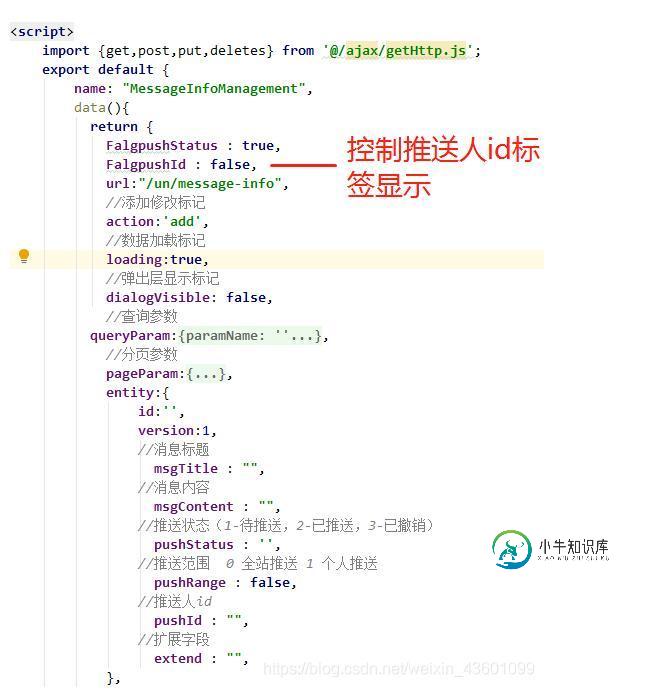
——页面定义的data对象

el-switch标签控件的代码, v-model="entity.pushRange"绑定的是推送范围字段
 <el-form-item label="推送范围:" :label-width="formLabelWidth" prop="pushRange">
    <el-switch
     v-model="entity.pushRange"
     active-color="#13ce66"
     inactive-color="#ff4949"
     active-text="全站"
     inactive-text="个人"
     @change="parens2($event)">
    </el-switch>
 </el-form-item>
下面的推送人id文本框,v-if=“FalgpushId”用来控制该文本框的显示,等于false时隐藏,true时显示(默认值为初始化时定义的FalgpushId = false,所以隐藏掉了)
 <!-- 推送人id -->
 <el-form-item label="推送人ID:" :label-width="formLabelWidth" prop="pushId" v-if="FalgpushId">
   <el-input v-model="entity.pushId" :disabled="disabled" clearable></el-input>
 </el-form-item>
methods中的方法,通过$event写法来监控该控件值的变化
 methods:{

  //该方法传入推送范围值,根据判断,决定是否展示其下面的推送人ID文本框
     parens2(value){
      let self = this ;
      if(value == false){
       //el-switch控件为 个人推送时,value为false
       self.FalgpushId = true;   //推送人id文本框显示
       self.entity.pushRange = false;
      }else if(value == true){
       //el-switch控件为 true 全站推送,value为true
       self.FalgpushId = false;   //推送人id文本框隐藏
       self.entity.pushRange = true;
      }
     },
 }
以上这篇vue.js封装switch开关组件的操作就是小编分享给大家的全部内容了,希望能给大家一个参考,也希望大家多多支持小牛知识库。
-
本节要学的两个控件是我们在使用 Android 手机时经常会用到的,相信大家对它并不陌生,甚至是非常熟悉,但是现实是很多开发者并不了解开关控件,所以会花不少功夫通过 TextView 或 Button 来实现开关功能,殊不知 Android 系统已经为我们提供了非常友好的控件—— ToggleButton 和 Switch。 1. 开关控件的功能 首先我们来看一张图感受一下开关控件是啥: 没错,A
-
介绍 用于在打开和关闭状态之间进行切换。 引入 import { createApp } from 'vue'; import { Switch } from 'vant'; const app = createApp(); app.use(Switch); 代码演示 基础用法 通过 v-model 绑定开关的选中状态,true 表示开,false 表示关。 <van-switch v-mod
-
mui提供了开关控件,点击滑动两种手势都可以对开关控件进行操作,UI如下:.demo .mui-switch{ float: left; margin: 15px; } 默认开关控件,带on/off文字提示,打开时为绿色背景,基本class类为.mui-switch、.mui-switch-handle,DOM结构如下: <div class="mui-switch"> <div class
-
import { Switch } from 'feui'; components: { [Switch.name]: Switch }, data() { return { defaultT: true, defaultF: false, stringValue: '0' }; }, methods: { onClick (newV
-
使用指南 组件介绍 开关选择器。使用场景:需要表示开关状态/两种状态之间的切换时;和 checkbox 的区别是,切换 switch 会直接触发状态改变,而 checkbox 一般用于状态标记,需要和提交操作配合。 引入方式 import { Switch } from "feart"; components:{ 'fe-switch':Switch } data() {
-
开关组件。 Usage 全部引入 import { Switch } from 'beeshell'; 按需引入 import { Switch } from 'beeshell/dist/components/Switch'; Examples Code 详细 Code import { Switch } from 'beeshell'; <Switch value={this.state

