
Android实现简洁的APP登录界面

今天需求要做一个所有app都有的登录界面,正好巩固一下我们之前学的基础布局知识。
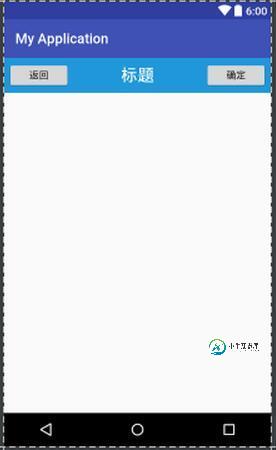
先来看下效果图
1.布局的xml文件
<?xml version="1.0" encoding="utf-8"?>
<RelativeLayout     xmlns:android="http://schemas.android.com/apk/res/android"
 android:layout_width="match_parent"
 android:layout_height="match_parent"
 android:background="#2197db"
 >
 <ImageView
  android:id="@+id/loginbutton"
  android:layout_width="wrap_content"
  android:layout_height="wrap_content"
  android:layout_centerHorizontal="true"
  android:layout_marginTop="40dp"
  android:src="@drawable/login_pic"/>

<LinearLayout
  android:id="@+id/input"
  android:layout_width="match_parent"
  android:layout_height="wrap_content"
  android:layout_below="@+id/loginbutton"
  android:layout_marginLeft="28dp"
  android:layout_marginRight="28dp"
  android:background="#fff"
  android:orientation="vertical">
<LinearLayout
  android:layout_width="fill_parent"
  android:layout_height="44dp"
  android:background="#fff"
  android:gravity="center_vertical"
  android:orientation="horizontal" >

 <EditText
   android:id="@+id/userId"
   android:layout_width="wrap_content"
   android:layout_height="fill_parent"
   android:layout_weight="1"
   android:background="@null"
   android:imeOptions="actionDone"
   android:textSize="16sp"
   android:ems="10"
   android:hint="请输入用户名"
   >
 </EditText>
<Button
   android:id="@+id/button_bar"
   android:layout_width="20dp"
   android:layout_height="20dp"
   android:layout_marginRight="8dp"
   android:layout_marginLeft="1dp"
   android:background="@drawable/login_input_arrow"
   />

 </LinearLayout>
 <View
   android:layout_width="fill_parent"
   android:layout_height="1.0px"
   android:layout_marginLeft="1.0px"
   android:layout_marginRight="1.0px"
   android:background="#ffc0c3c4" />
<EditText
   android:id="@+id/pass"
   android:layout_width="fill_parent"
   android:layout_height="44.0dip"
   android:background="#00ffffff"
   android:gravity="center_vertical"
   android:inputType="textPassword"
   android:maxLength="16"
   android:maxLines="1"
   android:textColor="#ff1d1d1d"
   android:textColorHint="#ff666666"
   android:textSize="16.0sp"
   android:hint="请输入密码"
   />
 </LinearLayout>
 <Button
  android:id="@+id/loginBtn"
  android:layout_width="fill_parent"
  android:layout_height="wrap_content"
  android:layout_below="@+id/input"
  android:layout_marginTop="10dp"
  android:background="#3aadfd"
  android:text="登 录"
  android:textColor="#ffffff"
  android:textSize="18dp"
  android:layout_centerHorizontal="true"
  android:layout_marginLeft="28dp"
  android:layout_marginRight="28dp"/>
 <TextView
  android:text=""
  android:layout_width="wrap_content"
  android:layout_below="@+id/loginBtn"
  android:layout_height="wrap_content"
  android:layout_centerHorizontal="true"
  android:id="@+id/promptText"
  android:textColor="#ff0000"
  android:layout_marginTop="10dp"
  android:textSize="18sp"/>

</RelativeLayout>
2.java部分代码
public class LoginActivity extends Activity implements View.OnClickListener{
  private static final String TAG = "login";
   Button loginBtn = null;
   EditText useridEt = null;
   EditText passEt = null;
   TextView promptText = null;
   @Override
  super.onCreate(savedInstanceState);
  setContentView(R.layout.activity_login);
  loginBtn = (Button) findViewById(R.id.loginBtn);
  loginBtn.setOnClickListener(this);
  useridEt = (EditText) findViewById(R.id.userId);
  passEt = (EditText) findViewById(R.id.pass);
  promptText = (TextView) findViewById(R.id.promptText);
  OkHttpClient okHttpClient = new OkHttpClient.Builder()
    .connectTimeout(10000L, TimeUnit.MILLISECONDS)
    .readTimeout(10000L, TimeUnit.MILLISECONDS)
    .build();
  OkHttpUtils.initClient(okHttpClient);

 @Override
 public void onClick(View v) {
  String userid = useridEt.getText().toString().trim();
  String pass = passEt.getText().toString().trim();
  if(userid.equals("")){
   promptText.setText(R.string.userIdError);
   return ;
  }
  if(pass.equals("")){
   promptText.setText(R.string.passError);
   return ;
  }
 WebConstant.digest = ("Basic " + new String(Base64.encode((userid + ':' + pass).getBytes(), Base64.DEFAULT))).replace("\n", "");

   String url = WebConstant.REQUESTPATH+"/users/" + userid+"?getAll=true";
   OkHttpUtils.get()
     .url(url).addHeader("Authorization", WebConstant.digest).addHeader("Accept-Language","zh-CN")
     .build().execute(new Callback()
     {
      @Override
      public String parseNetworkResponse(Response response, int id) throws Exception {
       String string = response.body().string();
       JSONObject jsonObj = new JSONObject(string);
       if(jsonObj.get("userName")!=null){
        WebConstant.userId = (String)jsonObj.get("userId");
        WebConstant.userName = (String)jsonObj.get("userName");
        return (String) jsonObj.get("userName");
       }
       return null;
      }

      @Override
      public void onError(Call call, Exception e, int id) {
       WebConstant.digest = null;
       promptText.setText(R.string.loginError);
       Log.i(TAG,e.getMessage());
       e.printStackTrace();
      }

      @Override
      public void onResponse(Object response, int id) {
       promptText.setText(R.string.loginSuccess+" "+response);
       Intent intent = new Intent();
       LoginActivity.this.setResult(WebConstant.RESULT_OK, intent);
       LoginActivity.this.finish();
      }
     });

 }
}
简单的登录,用户名密码验证。
以上就是本文的全部内容,希望对大家的学习有所帮助,也希望大家多多支持小牛知识库。
-
本文向大家介绍C#实现简单的登录界面,包括了C#实现简单的登录界面的使用技巧和注意事项,需要的朋友参考一下 首先我们来看一个简单的制作过程 打开visual 2010,新建窗体,既然是登录窗口,那么就不让它出现最大化、最小化以及拖拉大小功能(上一节已经提到过怎么设置大小),如图所示,甚至窗体的Text属性值为“登录窗口”,大小随意。 创建窗体之后就开始界面详细的组件布局了,主要是在左边拖拉控件,然
-
本文向大家介绍VS2012实现简单登录界面,包括了VS2012实现简单登录界面的使用技巧和注意事项,需要的朋友参考一下 本文实例为大家分享了VS2012实现登录界面的具体代码,供大家参考,具体内容如下 这个是第一个界面的代码: 这个是第二个界面的代码: 运行结果如图: 以上就是本文的全部内容,希望对大家的学习有所帮助,也希望大家多多支持呐喊教程。
-
本文向大家介绍Android中使用Kotlin实现一个简单的登录界面,包括了Android中使用Kotlin实现一个简单的登录界面的使用技巧和注意事项,需要的朋友参考一下 Kotlin 是一种在 Java 虚拟机上运行的静态类型编程语言,被称之为 Android 世界的Swift,由 JetBrains 设计开发并开源。 Kotlin 可以编译成Java字节码,也可以编译成 JavaScript,
-
本文向大家介绍Android Studio实现简单的QQ登录界面的示例代码,包括了Android Studio实现简单的QQ登录界面的示例代码的使用技巧和注意事项,需要的朋友参考一下 一、项目概述 QQ是我们日常生活使用最多的软件之一,包含登录界面和进入后的聊天界面、好友列表界面和空间动态界面等。登录界面的制作比较简单,主要考验布局的使用,是实现QQ项目的第一步。现在APP开发的首要工作都是实现登
-
本文向大家介绍Android开发实例之登录界面的实现,包括了Android开发实例之登录界面的实现的使用技巧和注意事项,需要的朋友参考一下 本文要演示的Android开发实例是如何完成一个Android中的miniTwitter登录界面,下面将分步骤讲解怎样实现图中的界面效果,让大家都能轻松的做出美观的登录界面。 miniTwitter登录界面效果图 先贴上最终要完成的
-
本文向大家介绍Android自定义EditText实现登录界面,包括了Android自定义EditText实现登录界面的使用技巧和注意事项,需要的朋友参考一下 本文实例为大家分享了Android自定义EditText实现登录界面的具体代码,供大家参考,具体内容如下 先看效果图: 自定义edittext 控件,监听focus和textchange 状态 实现是否显示删除图片。 自定义TextView