
详解Xamarin.Android 利用Fragment实现底部菜单

本篇文章主要介绍了详解Xamarin.Android 利用Fragment实现底部菜单,分享给大家,具体如下:
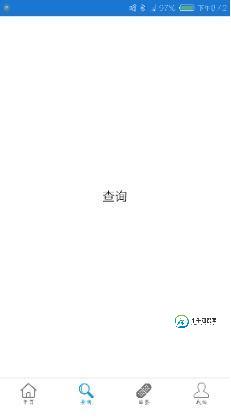
效果图:
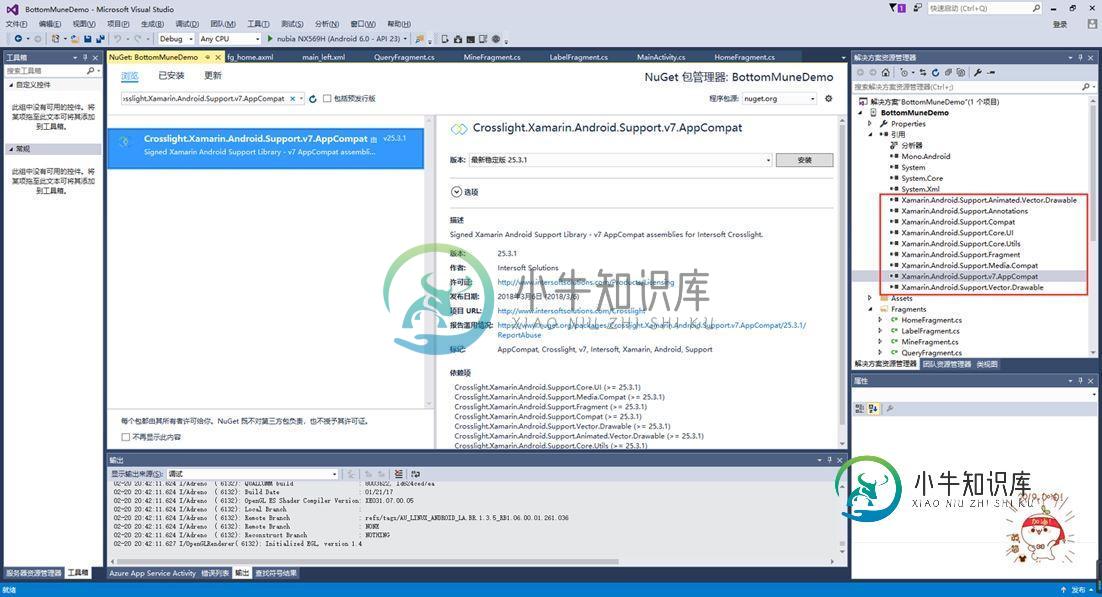
第一步:添加引用
引用 Crosslight.Xamarin.Android.Support.v7.AppCompat 这个包。
第二步:绘制Main和Fragment界面
fg_home.axml
<?xml version="1.0" encoding="utf-8"?>
<LinearLayout xmlns:android="http://schemas.android.com/apk/res/android"
  android:orientation="vertical"
  android:layout_width="match_parent"
  android:layout_height="match_parent"
  android:background="#FFFFFF">
  <TextView
    android:id="@+id/txt_content"
    android:layout_width="match_parent"
    android:layout_height="match_parent"
    android:gravity="center"
    android:text="首页"
    android:textColor="#000000"
    android:textSize="20sp" />
</LinearLayout>
fg_label.axml
<?xml version="1.0" encoding="utf-8"?>
<LinearLayout xmlns:android="http://schemas.android.com/apk/res/android"
  android:orientation="vertical"
  android:layout_width="match_parent"
  android:layout_height="match_parent"
  android:background="#FFFFFF">
  <TextView
    android:id="@+id/txt_content"
    android:layout_width="match_parent"
    android:layout_height="match_parent"
    android:gravity="center"
    android:text="贴签"
    android:textColor="#000000"
    android:textSize="20sp" />
</LinearLayout>
fg_mine.axml
<?xml version="1.0" encoding="utf-8"?>
<LinearLayout xmlns:android="http://schemas.android.com/apk/res/android"
  android:orientation="vertical"
  android:layout_width="match_parent"
  android:layout_height="match_parent"
  android:background="#FFFFFF">
  <TextView
    android:id="@+id/txt_content"
    android:layout_width="match_parent"
    android:layout_height="match_parent"
    android:gravity="center"
    android:text="我的"
    android:textColor="#000000"
    android:textSize="20sp" />
</LinearLayout>
fg_query.axml
<?xml version="1.0" encoding="utf-8"?>
<LinearLayout xmlns:android="http://schemas.android.com/apk/res/android"
  android:orientation="vertical"
  android:layout_width="match_parent"
  android:layout_height="match_parent"
  android:background="#FFFFFF">
  <TextView
    android:id="@+id/txt_content"
    android:layout_width="match_parent"
    android:layout_height="match_parent"
    android:gravity="center"
    android:text="查询"
    android:textColor="#000000"
    android:textSize="20sp" />
</LinearLayout>
Main.axml
<?xml version="1.0" encoding="utf-8"?>
<LinearLayout xmlns:android="http://schemas.android.com/apk/res/android"
  xmlns:tools="http://schemas.android.com/tools"
  android:layout_width="match_parent"
  android:layout_height="match_parent"
  android:orientation="vertical">
  <include
    layout="@layout/main_left" />
</LinearLayout>
main_left.xml
<?xml version="1.0" encoding="utf-8"?>
<android.support.v4.widget.DrawerLayout xmlns:android="http://schemas.android.com/apk/res/android"
  android:id="@+id/dl_left"
  android:layout_width="match_parent"
  android:layout_height="match_parent"
  android:background="#f0f0f0">
 <!--主布局-->
 <LinearLayout
   android:layout_width="match_parent"
   android:layout_height="match_parent"
   android:orientation="horizontal">
  <RelativeLayout
  android:layout_width="match_parent"
  android:layout_height="match_parent"
  android:id="@+id/relativelayout1"
   android:fitsSystemWindows="true">
   <RelativeLayout
     android:id="@+id/ly_top_bar"
     android:layout_width="match_parent"
     android:layout_height="48dp"
     android:visibility="gone">
   </RelativeLayout>
   <LinearLayout
      android:id="@+id/ly_tab_bar"
      android:layout_width="match_parent"
      android:layout_height="50dp"
      android:layout_alignParentBottom="true"
      android:background="#FFFFFF"
       android:orientation="vertical">

    <View
      android:layout_width="match_parent"
      android:layout_height="2px"
      android:background="#cccccc" />
    <LinearLayout
      android:layout_width="match_parent"
      android:layout_height="40dp"
      android:orientation="horizontal"
      android:layout_marginTop="5dp">
     <ImageView
      android:id="@+id/iv_home"
      android:layout_width="25.6dp"
      android:layout_height="37.6dp"
      android:src="@drawable/icon_home1"
      android:layout_weight="1"/>
     <ImageView
      android:id="@+id/iv_query"
      android:layout_width="25.6dp"
      android:layout_height="37.6dp"
      android:src="@drawable/icon_query1"
      android:layout_weight="1"/>
     <ImageView
      android:id="@+id/iv_label"
     android:layout_width="25.6dp"
      android:layout_height="37.6dp"
      android:src="@drawable/icon_label1"
      android:layout_weight="1"/>
     <ImageView
      android:id="@+id/iv_mine"
      android:layout_width="25.6dp"
      android:layout_height="37.6dp"
      android:src="@drawable/icon_mine1"
      android:layout_weight="1"/>
    </LinearLayout>
   </LinearLayout>
   <View
     android:id="@+id/div_tab_bar"
     android:layout_width="match_parent"
     android:layout_height="2px"
     android:background="#FFFFFF"
     android:layout_above="@id/ly_tab_bar" />
   <FrameLayout
     android:layout_width="match_parent"
     android:layout_height="match_parent"
      android:id="@+id/fy_home"
     android:layout_below="@id/ly_top_bar"
     android:layout_above="@id/div_tab_bar" />
   <FrameLayout
     android:layout_width="match_parent"
     android:layout_height="match_parent"
     android:id="@+id/fy_query"
      android:layout_below="@id/ly_top_bar"
     android:layout_above="@id/div_tab_bar"/>
   <FrameLayout
     android:layout_width="match_parent"
     android:layout_height="match_parent"
     android:id="@+id/fy_label"
      android:layout_below="@id/ly_top_bar"
     android:layout_above="@id/div_tab_bar"/>
   <FrameLayout
     android:layout_width="match_parent"
     android:layout_height="match_parent"
     android:id="@+id/fy_mine"
      android:layout_below="@id/ly_top_bar"
     android:layout_above="@id/div_tab_bar"/>
  </RelativeLayout>
 </LinearLayout>
</android.support.v4.widget.DrawerLayout>
第三步:在value文件下创建Style,并且自定义 BaseAppTheme 样式
<?xml version="1.0" encoding="utf-8" ?>
<resources>

 <color name="primary">#1e89e7</color>
 <color name="primaryDark">#1976d2</color>
 <color name="red">#ff0000</color>
 <color name="white">#ffffff</color>

 <style name="BaseAppTheme" parent="Theme.AppCompat.Light.DarkActionBar">
  <item name="windowActionBar">false</item>
  <item name="windowNoTitle">true</item>
  <item name="colorPrimary">@color/primary</item>
  <item name="colorPrimaryDark">@color/primaryDark</item>
  <item name="drawerArrowStyle">@style/AppTheme.DrawerArrowToggle</item>
 </style>

 <style name="AppTheme.DrawerArrowToggle" parent="Base.Widget.AppCompat.DrawerArrowToggle">
  <item name="color">@android:color/white</item>
 </style>
</resources>
第四步:编写每个Fragment的后台,这里只写一个。
using System;
using System.Collections.Generic;
using System.Linq;
using System.Text;

using Android.App;
using Android.Content;
using Android.OS;
using Android.Runtime;
using Android.Util;
using Android.Views;
using Android.Widget;

namespace BottomMuneDemo.Fragments
{
  public class HomeFragment : Fragment
  {
    private string content { get; set; }
    public HomeFragment(string content)
    {
      this.content = content;
    }

    public override void OnCreate(Bundle savedInstanceState)
    {
      base.OnCreate(savedInstanceState);

      // Create your fragment here
    }

    public override View OnCreateView(LayoutInflater inflater, ViewGroup container, Bundle savedInstanceState)
    {
      View view = inflater.Inflate(Resource.Layout.fg_home, container, false);
      TextView txt_content = (TextView)view.FindViewById(Resource.Id.txt_content);
      txt_content.Text = "首页";

      return view;
    }
  }
}
第五步:在Main活动中进行设置。
using Android.App;
using Android.Widget;
using Android.OS;
using Android.Support.V7.App;
using BottomMuneDemo.Fragments;
using Android.Views;

namespace BottomMuneDemo
{
  [Activity(Label = "BottomMuneDemo", MainLauncher = true, Theme = "@style/BaseAppTheme")]
  public class MainActivity : AppCompatActivity
  {
    private ImageView iv_home;
    private ImageView iv_query;
    private ImageView iv_label;
    private ImageView iv_mine;

    private FrameLayout fy_home;
    private FrameLayout fy_query;
    private FrameLayout fy_label;
    private FrameLayout fy_mine;

    HomeFragment fg1;
    QueryFragment fg2;
    LabelFragment fg3;
    MineFragment fg4;

    protected override void OnCreate(Bundle savedInstanceState)
    {
      base.OnCreate(savedInstanceState);
      SetContentView(Resource.Layout.Main);

      fy_home = (FrameLayout)FindViewById(Resource.Id.fy_home);
      fy_query = (FrameLayout)FindViewById(Resource.Id.fy_query);
      fy_label = (FrameLayout)FindViewById(Resource.Id.fy_label);
      fy_mine = (FrameLayout)FindViewById(Resource.Id.fy_mine);

      iv_home = (ImageView)FindViewById(Resource.Id.iv_home);
      iv_query = (ImageView)FindViewById(Resource.Id.iv_query);
      iv_label = (ImageView)FindViewById(Resource.Id.iv_label);
      iv_mine = (ImageView)FindViewById(Resource.Id.iv_mine);

      bindViews();
      iv_home.PerformClick();

    }


    #region 底部菜单选项卡

    //ui组件初始化与事件绑定
    private void bindViews()
    {

      iv_home.Click += (s, e) => { onClick(iv_home); };
      iv_query.Click += delegate { onClick(iv_query); };
      iv_label.Click += delegate { onClick(iv_label); };
      iv_mine.Click += delegate { onClick(iv_mine); };
    }
    //隐藏所有Fragment
    private void hideAllFragment(FragmentTransaction fragmentTransaction)
    {
      if (fg1 != null) fragmentTransaction.Hide(fg1);
      if (fg2 != null) fragmentTransaction.Hide(fg2);
      if (fg3 != null) fragmentTransaction.Hide(fg3);
      if (fg4 != null) fragmentTransaction.Hide(fg4);

      iv_home.SetImageResource(Resource.Drawable.icon_home1);
      iv_query.SetImageResource(Resource.Drawable.icon_query1);
      iv_label.SetImageResource(Resource.Drawable.icon_label1);
      iv_mine.SetImageResource(Resource.Drawable.icon_mine1);
    }
    //重置所有文本的选中状态
    private void setSelected()
    {
      iv_home.Selected = false;
      iv_query.Selected = false;
      iv_label.Selected = false;
      iv_mine.Selected = false;
    }
    //单击事件
    public void onClick(View v)
    {
      FragmentTransaction fTransaction = FragmentManager.BeginTransaction();
      hideAllFragment(fTransaction);
      switch (v.Id)
      {
        case Resource.Id.iv_home:
          setSelected();
          iv_home.Selected = true;
          iv_home.SetImageResource(Resource.Drawable.icon_home2);
          if (fg1 == null)
          {
            fg1 = new HomeFragment("首页");
            fTransaction.Add(Resource.Id.fy_home, fg1);
          }
          else { fTransaction.Show(fg1); }
          break;

        case Resource.Id.iv_query:
          setSelected();
          iv_query.Selected = true;
          iv_query.SetImageResource(Resource.Drawable.icon_query2);
          if (fg2 == null)
          {
            fg2 = new QueryFragment("查询");
            fTransaction.Add(Resource.Id.fy_query, fg2);
          }
          else { fTransaction.Show(fg2); }
          break;

        case Resource.Id.iv_label:
          setSelected();
          iv_label.Selected = true;
          iv_label.SetImageResource(Resource.Drawable.icon_label2);
          if (fg3 == null)
          {
            fg3 = new LabelFragment("贴签");
            fTransaction.Add(Resource.Id.fy_label, fg3);
          }
          else { fTransaction.Show(fg3); }
          break;

        case Resource.Id.iv_mine:
          setSelected();
          iv_mine.Selected = true;
          iv_mine.SetImageResource(Resource.Drawable.icon_mine2);
          if (fg4 == null)
          {
            fg4 = new MineFragment("我的");
            fTransaction.Add(Resource.Id.fy_mine, fg4);
          }
          else { fTransaction.Show(fg4); }
          break;
      }
      fTransaction.Commit();
    }
    #endregion
  }
}
到这里就结束了,亲测代码有效,如有问题请留言。
以上就是本文的全部内容,希望对大家的学习有所帮助,也希望大家多多支持小牛知识库。
-
本文向大家介绍使用Fragment+ViewPager实现底部导航栏,包括了使用Fragment+ViewPager实现底部导航栏的使用技巧和注意事项,需要的朋友参考一下 前几天准备写一个小程序,一直认为fragment实现底部导航栏,是很容易的事情,可是却遇到了前所未有的问题,先给大家贴出来我出错的界面布局代码: 这个布局实现的效果如下: 只看效果,大家觉得挺好的,但是重要的问题来了。 下面的r
-
本文向大家介绍Android底部菜单栏(RadioGroup+Fragment)美化,包括了Android底部菜单栏(RadioGroup+Fragment)美化的使用技巧和注意事项,需要的朋友参考一下 众所周知,android的底部菜单栏太重要,平时项目一般都是需要用到的,但是网上关于这方面的demo做得太丑了,实在惨不忍睹,所以这里便用RadioGroup+Fragment的方式写了一个,顺便
-
本文向大家介绍详解基于javascript实现的苹果系统底部菜单,包括了详解基于javascript实现的苹果系统底部菜单的使用技巧和注意事项,需要的朋友参考一下 (不好意,先前发布的是有误的分析。现在的这个没问提了!!!) 昨天看到了“妙味课堂”的一个苹果菜单的DEMO。根据里面提到的“勾股定理”。我自己分析了一下代码。如下: 先来一效果图吧! 静止时: 鼠标滑动时: 一、要实现在的功能或效果:
-
本文向大家介绍Android利用碎片fragment实现底部标题栏(Github模板开源),包括了Android利用碎片fragment实现底部标题栏(Github模板开源)的使用技巧和注意事项,需要的朋友参考一下 fragment特点 Fragment与Activity相似,有自己的生命周期,布局。相当于一个迷你的Activity Fragment可以作为Activity的组成部分,一个Act
-
本文向大家介绍Flutter实现底部菜单导航,包括了Flutter实现底部菜单导航的使用技巧和注意事项,需要的朋友参考一下 简介 现在我们的 APP 上面都会在屏幕下方有一排的按钮,点击不同的按钮可以进入不同的界面。就是说在界面的底部会有一排的按钮导航。可看下面的图示。 完成图示 程序工程目录 梳理下实现步骤 我们需要实现这个底部菜单导航,就需要有底部菜单的那一排图标按钮。图标按钮是固定在一个工具
-
本文向大家介绍Android如何实现底部菜单固定到底部,包括了Android如何实现底部菜单固定到底部的使用技巧和注意事项,需要的朋友参考一下 今天搞了很久的一个问题,导航菜单没有固定到底部,因为上面是ListView,可是没内容,于是就浮动上去了。 效果如下: 这里采用的是一个碎片,代码是: 出问题了,百度了很多,试了很多的办法,没用。 主页面代码: 最后发现是这段代码惹的麻烦:android: