Vue $mount实战之实现消息弹窗组件
之前的项目一直在使用Element-UI框架,element中的Notification、Message组件使用时不需要在html写标签,而是使用js调用。那时就很疑惑,为什么element ui使用this.$notify、this.$message就可以实现这样的功能?
1、实现消息弹窗组件的几个问题
- 如何在任何组件中使用this.$message就可以显示消息?
- 如何将消息的dom节点插入到body中?
- 同时出现多个消息弹窗时,消息弹窗的z-index如何控制?
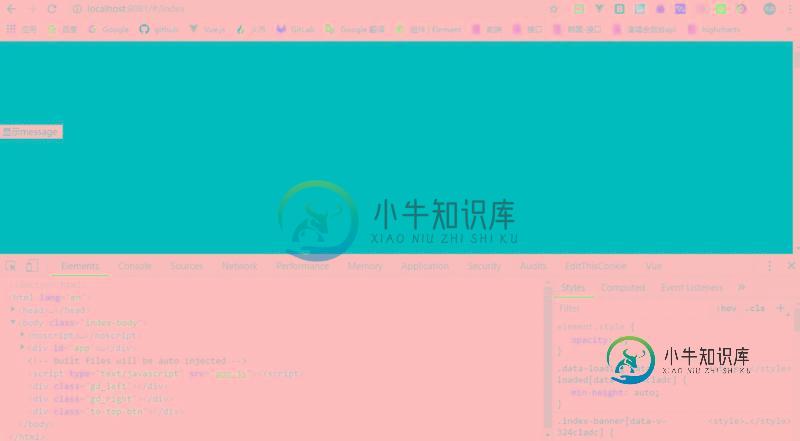
2、效果预览

3、代码实现
PMessage.vue
<template>
 <transition name="message-fade">
 <div class="p-message"
   :class="[type, extraClass]"
   v-show="show"
   @mouseenter="clearTimer"
   @mouseleave="startTimer">
  <div class="p-message-container">
  <i class="p-message-icon" :class="`p-message-icon-${type}`"></i>
  <div class="p-message-content">
   <slot class="p-message-content">
   <div v-html="message"></div>
   </slot>
  </div>
  </div>
 </div>
 </transition>
</template>
<script>
 // 绑定事件
 function _addEvent(el, eventName, fn){
 if(document.addEventListener){
  el.addEventListener(eventName, fn, false);
 }else if(window.attachEvent){
  el.attactEvent('on' + eventName, fn);
 }
 };
 // 解绑事件
 function _offEvent(el, eventName, fn){
 if(document.removeEventListener){
  el.removeEventListener(eventName, fn, false);
 }else if(window.detachEvent){
  el.detachEvent('on' + eventName, fn);
 }
 };
 export default {
 name: "PMessage",
 data(){
  return {
  type: 'success',
  duration: 3000,
  extraClass: '',
  message: '',
  timer: null,
  closed: false,
  show: false
  }
 },
 methods: {
  startTimer(){
  if(this.duration > 0){
   this.timer = setTimeout(() => {
   if(!this.closed){
    this.close();
   }
   }, this.duration);
  }
  },
  clearTimer(){
  clearTimeout(this.timer);
  },
  close(){
  this.closed = true;
  if(typeof this.onClose === 'function'){
   // 调用onClose方法,以从p-message.js中的instances数组中移除当前组件,不移除的话就占空间了
   this.onClose();
  }
  },
  // 销毁组件
  destroyElement(){
  _offEvent(this.$el, 'transitionend', this.destroyElement);
  // 手动销毁组件
  this.$destroy(true);
  this.$el.parentNode.removeChild(this.$el);
  },
 },
 watch: {
  // 监听closed,如果它为true,则销毁message组件
  closed(newVal){
  if(newVal){
   this.show = false;
   // message过渡完成后再去销毁message组件及移除元素
   _addEvent(this.$el, 'transitionend', this.destroyElement);
  }
  }
 },
 mounted() {
  this.startTimer();
 }
 }
</script>
<style lang="stylus">
@import "p-message.styl"
</style>
p-message.js
import Vue from 'vue';
import PMessage from './PMessage.vue';
import {popupManager} from "../../common/js/popup-manager";
let PMessageControl = Vue.extend(PMessage);
let count = 0;
// 存储message组件实例,如需有关闭所有message的功能就需要将每个message组件都存储起来
let instances = [];
const isVNode = function (node) {
 return node !== null && typeof node === 'object' && Object.prototype.hasOwnProperty.call(node, 'componentOptions');
};
const Message = function (options) {
 options = options || {};
 if(typeof options === 'string'){
 options = {
  message: options
 };
 }
 let id = 'message_' + ++count;
 let userOnClose = options.onClose;
 // PMsesage.vue销毁时会调用传递进去的onClose,而onClose的处理就是将指定id的message组件从instances中移除
 options.onClose = function (){
 Message._close(id, userOnClose);
 };
 /* 这里传递给PMessageControl的data不会覆盖PMessage.vue中原有的data,而是与PMessage.vue中原有的data进行合并,类似
 * 与mixin,包括传递methods、生命周期函数也是一样 */
 let instance = new PMessageControl({
 data: options
 });
 // 传递vNode
 if(isVNode(instance.message)){
 instance.$slots.default = [instance.message];
 instance.message = null;
 }
 instance.id = id;
 // 渲染元素,随后使用原生appendChild将dom插入到页面中
 instance.$mount();
 let $el = instance.$el;
 // message弹窗的z-index由popupManager来提供
 $el.style.zIndex = popupManager.getNextZIndex();
 document.body.appendChild($el);
 // 将message显示出来
 instance.show = true;
 console.log(instance)
 instances.push(instance);
 return instance;
};
// message简化操作
['success','error'].forEach(function (item) {
 Message[item] = options => {
 if(typeof options === 'string'){
  options = {
  message: options
  }
 }
 options.type = item;
 return Message(options);
 }
});
/**
 * 从instances删除指定message,内部使用
 * @param id
 * @param userOnClose
 * @private
 */
Message._close = function (id, userOnClose) {
 for(var i = 0, len = instances.length; i < len; i++){
 if(instances[i].id === id){
  if(typeof userOnClose === 'function'){
  userOnClose(instances[i]);
  }
  instances.splice(i, 1);
  break;
 }
 }
};
// 关闭所有message
Message.closeAll = function () {
 for(var i = instances.length - 1; i >= 0; i--){
 instances.close();
 }
};
export default Message;
popup-manager.js
let zIndex = 1000;
let hasZIndexInited = false;
const popupManager = {
 // 获取索引
 getNextZIndex(){
 if(!hasZIndexInited){
  hasZIndexInited = true;
  return zIndex;
 }
 return zIndex++;
 }
};
export {popupManager};
p-index.js
import pMessage from './p-message.js';
export default pMessage;
p-message.styl
.p-message{
 position: fixed;
 top: 20px;
 left: 50%;
 padding: 8px 15px;
 border-radius: 4px;
 background-color: #fff;
 color: #000;
 transform: translateX(-50%);
 transition: opacity .3s, transform .4s;
 &.message-fade-enter,
 &.message-fade-leave-to{
 opacity: 0;
 transform: translateX(-50%) translateY(-30px);
 }
 &.message-fade-enter-to,
 &.message-fade-leave{
 opacity: 1;
 transform: translateX(-50%) translateY(0);
 }
 &.error{
 color: #ff3737;
 }
 .p-message-icon{ /* 使图标与内容能够垂直居中 */
 display: table-cell;
 vertical-align: middle;
 width: 64px;
 height: 45px;
 &.p-message-icon-success{
  background: url("../../assets/images/icons/message-icon/icon_success.png") no-repeat 0 0;
 }
 &.p-message-icon-error{
  background: url("../../assets/images/icons/message-icon/icon_error.png") no-repeat 0 0;
 }
 }
 .p-message-content{ /* 使图标与内容能够垂直居中 */
 display: table-cell;
 vertical-align: middle;
 padding-left: 15px;
 }
}
main.js
// 引入pMessage组件
import pMessage from './components/p-message/p-index.js';
// 将pMessage绑定到Vue.prototype中。这样在组件中就可以通过this.$pMessage()的形式来使用了
Vue.prototype.$pMessage = pMessage;
-
本文向大家介绍Vue render函数实战之实现tabs选项卡组件,包括了Vue render函数实战之实现tabs选项卡组件的使用技巧和注意事项,需要的朋友参考一下 用过Element ui库的童鞋肯定知道<el-tabs>组件,简单、好用、可以自定义标签页,不知道广大童鞋们在刚开始使用<el-tabs>组件的时候有没有想过它是如何实现的?我咋刚开始使用<el-tabs>组件的时候就有去想过,也
-
本文向大家介绍Vue 实现一个命令式弹窗组件功能,包括了Vue 实现一个命令式弹窗组件功能的使用技巧和注意事项,需要的朋友参考一下 前言 在日常工作中弹窗组件是很常用的组件,但用得多还是别人的,空闲时间就自己来简单实现一个弹窗组件 涉及知识点:extend、$mount、$el 使用方式: 目录结构 index.vue:组件布局、样式、交互逻辑 index.js:挂载组件、暴露方法 知识点 在此之
-
本文向大家介绍Vue实战之vue登录验证的实现代码,包括了Vue实战之vue登录验证的实现代码的使用技巧和注意事项,需要的朋友参考一下 最近一直在撸一个给大学生新生用的产品,在撸的时候有时候会发现自己力不从心,是不是我的能力下降,是不是我该放弃我的最热爱的事业了?这对我的心灵造成了巨大的伤害,所以我决定向苍老师起誓一定练好我这双手——好好写代码(想多的同学赶紧去面壁5秒钟再过来往下看)~~~ 我做
-
本文向大家介绍以v-model与promise两种方式实现vue弹窗组件,包括了以v-model与promise两种方式实现vue弹窗组件的使用技巧和注意事项,需要的朋友参考一下 最近公司有一个后台业务虽然也是写在了现有的后台系统中,但是之后要为这个业务单独拉出来新建一个后台系统,所以现有的后台系统中的vue组件库,就不能用了(因为不知道将来的系统要基于什么组件库,以防给未来移植项目带来麻烦),这
-
本文向大家介绍Vue组件化开发之通用型弹出框的实现,包括了Vue组件化开发之通用型弹出框的实现的使用技巧和注意事项,需要的朋友参考一下 本文主要分享关于组件化开发的理解,让刚入门的小伙伴少走一些弯路,提高开发效率,作者本人也是新手,如有不当之处,请大佬指出,感谢。 相信很多刚入门的小伙伴,经常会写很多重复的代码,而这些代码一般情况下也都是大同小异,在这种情况下,如何让开发和学习变得更加高效,组件化
-
本文向大家介绍使用vue实现各类弹出框组件,包括了使用vue实现各类弹出框组件的使用技巧和注意事项,需要的朋友参考一下 简单介绍一下vue中常用dialog组件的封装: 实现动态传入内容,实现取消,确认等回调函数。 首先写一个基本的弹窗样式,如上图所示。 在需要用到弹窗的地方中引入组件: 点击一个按钮显示弹窗,并保证关闭弹窗后再次点击依旧显示 在弹窗组件中定义一个value值:v-model="s

