Android 实现夜间模式的快速简单方法实例详解
ChangeMode
项目地址:ChangeMode
Implementation of night mode for Android.
用最简单的方式实现夜间模式,支持ListView、RecyclerView。
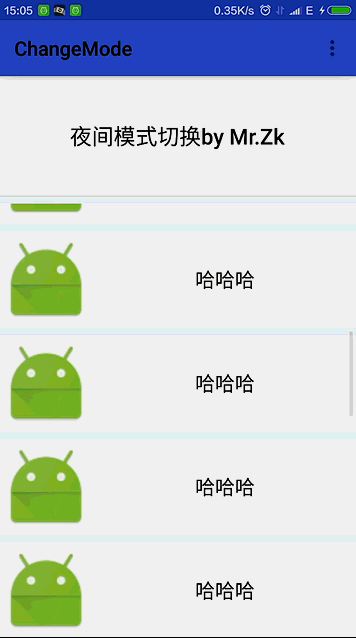
Preview

Usage xml
android:background="?attr/zzbackground"
app:backgroundAttr="zzbackground"//如果当前页面要立即刷新,这里传入属性名称 比如 R.attr.zzbackground 传 zzbackground 即可
android:textColor="?attr/zztextColor"
app:textColorAttr="zztextColor"//如需立即刷新页面效果 同上
java
@Override
protected void onCreate(Bundle savedInstanceState) {
//1. 在要立即切换效果的页面调用此方法
ChangeModeController.getInstance().init(this,R.attr.class).setTheme(this, R.style.DayTheme, R.style.NightTheme);
//在其他页面调用此方法
//ChangeModeController.setTheme(this, R.style.DayTheme, R.style.NightTheme);
super.onCreate(savedInstanceState);
setContentView(R.layout.activity_main);
//添加额外 view 至夜间管理
// ChangeModeController.getInstance().addBackgroundColor(toolbar, R.attr.colorPrimary);
//ChangeModeController.getInstance().addBackgroundDrawable(view,R.attr.colorAccent);
// ChangeModeController.getInstance().addTextColor(view,R.attr.colorAccent);
//2. 设置切换
//ChangeModeController.changeDay(this, R.style.DayTheme);
//ChangeModeController.changeNight(this, R.style.NightTheme);
}
@Override
protected void onDestroy() {
super.onDestroy();
//3. 在 onDestroy 调用
ChangeModeController.onDestory();
}
详细操作描述
第一步:自定义属性
<?xml version="1.0" encoding="utf-8"?>
<resources>
<attr name="zzbackground" format="color|reference"/>
<attr name="zzbackgroundDrawable" format="reference"/>
<attr name="zztextColor" format="color"/>
<attr name="zzItemBackground" format="color"/>
</resources>
第二步:配置夜间 style 文件
<resources>
<!-- Base application theme. -->
<style name="AppTheme" parent="Theme.AppCompat.Light.DarkActionBar">
<!-- Customize your theme here. -->
<item name="colorPrimary">@color/colorPrimary</item>
<item name="colorPrimaryDark">@color/colorPrimaryDark</item>
<item name="colorAccent">@color/colorAccent</item>
<item name="windowActionBar">false</item>
<item name="android:windowNoTitle">true</item>
<item name="windowNoTitle">true</item>
</style>
<!--日间模式 -->
<style name="DayTheme" parent="AppTheme">
<item name="zzbackground">@color/dayBackground</item>
<item name="zzbackgroundDrawable">@drawable/ic_launcher</item>
<item name="zztextColor">@color/dayTextColor</item>
<item name="zzItemBackground">@color/dayItemBackground</item>
</style>
<!--夜间模式 -->
<style name="NightTheme" parent="AppTheme">
<item name="zzbackground">@color/nightBackground</item>
<item name="zzbackgroundDrawable">@color/nightBackground</item>
<item name="zztextColor">@color/nightTextColor</item>
<item name="zzItemBackground">@color/nightItemBackground</item>

<item name="colorPrimary">@color/colorPrimaryNight</item>
<item name="colorPrimaryDark">@color/colorPrimaryDarkNight</item>
<item name="colorAccent">@color/colorAccentNight</item>
</style>
<style name="AppTheme.AppBarOverlay" parent="ThemeOverlay.AppCompat.Dark.ActionBar" />
<style name="AppTheme.PopupOverlay" parent="ThemeOverlay.AppCompat.Light" />
</resources>
为相关属性设置对应模式的属性值:
<?xml version="1.0" encoding="utf-8"?>
<resources>
<color name="dayBackground">#F2F4F7</color>
<color name="dayTextColor">#000</color>
<color name="dayItemBackground">#fff</color>
<color name="nightItemBackground">#37474F</color>
<color name="nightBackground">#263238</color>
<color name="nightTextColor">#fff</color>
</resources>
第三步:在布局文件中配置使用对应属性
<?xml version="1.0" encoding="utf-8"?>
<LinearLayout xmlns:android="http://schemas.android.com/apk/res/android"
xmlns:tools="http://schemas.android.com/tools"
android:layout_width="match_parent"
android:layout_height="match_parent"
xmlns:app="http://schemas.android.com/apk/res-auto"
android:orientation="vertical"
android:background="?attr/zzbackground"
app:backgroundAttr="zzbackground"
tools:context="com.thinkfreely.changemode.MainActivity">
<android.support.design.widget.AppBarLayout
android:layout_width="match_parent"
android:layout_height="wrap_content"
app:theme="@style/AppTheme.AppBarOverlay">
<android.support.v7.widget.Toolbar
android:id="@+id/toolbar"
android:layout_width="match_parent"
android:layout_height="?attr/actionBarSize"
android:background="?attr/colorPrimary"
app:backgroundAttr="colorPrimary"
app:titleTextColor="?attr/zztextColor"
app:popupTheme="@style/AppTheme.PopupOverlay"
/>
</android.support.design.widget.AppBarLayout>
<Button
android:layout_width="match_parent"
android:layout_height="120dp"
android:gravity="center"
android:textColor="?attr/zztextColor"
app:textColorAttr="zztextColor"
android:background="?attr/zzItemBackground"
app:backgroundAttr="zzItemBackground"
android:padding="10dp"
android:layout_marginBottom="8dp"
android:textSize="22sp"
android:textAllCaps="false"
android:text="夜间模式切换 by Mr.Zk" />
<android.support.v7.widget.RecyclerView
android:id="@+id/recyclerView"
android:layout_width="match_parent"
android:layout_height="match_parent"
android:scrollbars="vertical"/>
</LinearLayout>
注意textColorAttr、backgroundAttr、backgroundDrawableAttr三个属性。如需当前页面立即刷新,需填加相应属性。
属性 描述
textColorAttr 修改字体颜色时设置。如 R.attr.zztextColor 传 zztextColor 即可。例:app:textColorAttr="zztextColor"
backgroundAttr 修改背景颜色/背景图片时设置。同上。例: app:backgroundAttr="zzbackground"
backgroundDrawableAttr 修改背景颜色/背景图片时设置。同上。例: app:backgroundDrawableAttr="zzbackground"
第四步:页面调用 java 代码
@Override
protected void onCreate(Bundle savedInstanceState) {
//1. 在要立即切换效果的页面调用此方法
ChangeModeController.getInstance().init(this,R.attr.class).setTheme(this, R.style.DayTheme, R.style.NightTheme);
//在其他页面调用此方法
//ChangeModeController.setTheme(this, R.style.DayTheme, R.style.NightTheme);
super.onCreate(savedInstanceState);
setContentView(R.layout.activity_main);
//2.设置切换夜间活日间模式
//ChangeModeController.changeDay(this, R.style.DayTheme);//切换日间模式
//ChangeModeController.changeNight(this, R.style.NightTheme);//切换夜间模式
}
@Override
protected void onDestroy() {
super.onDestroy();
//3. 在 onDestroy 调用
ChangeModeController.onDestory();
}
代码调用三步,即可开始夜间之旅。 如果页面有新创建的视图要加入夜间模式控制,代码调用:
//添加额外 view 至夜间管理
// ChangeModeController.getInstance().addBackgroundColor(toolbar, R.attr.colorPrimary);
//ChangeModeController.getInstance().addBackgroundDrawable(view,R.attr.colorAccent);
// ChangeModeController.getInstance().addTextColor(view,R.attr.colorAccent);
如果在改变夜间模式时有其他非标准定义的属性时,可在ChangeModeController.changeDay或ChangeModeController.changeNight之后调用如下代码给相关属性赋值:
TypedValue attrTypedValue = ChangeModeController.getAttrTypedValue(this, R.attr.zztextColor);
toolbar.setTitleTextColor(getResources().getColor(attrTypedValue.resourceId));
About me
An Android Developer in ZhengZhou.
License
======= Copyright 2016 zhangke
Licensed under the Apache License, Version 2.0 (the "License"); you may not use this file except in compliance with the License. You may obtain a copy of the License at http://www.apache.org/licenses/LICENSE-2.0 Unless required by applicable law or agreed to in writing, software distributed under the License is distributed on an "AS IS" BASIS, WITHOUT WARRANTIES OR CONDITIONS OF ANY KIND, either express or implied. See the License for the specific language governing permissions and limitations under the License.
以上所述是小编给大家介绍的Android 实现夜间模式的快速简单方法实例详解,希望对大家有所帮助,如果大家有任何疑问欢迎给我留言,小编会及时回复大家的,在此也非常感谢大家对小牛知识库网站的支持!
-
本文向大家介绍php单例模式的简单实现方法,包括了php单例模式的简单实现方法的使用技巧和注意事项,需要的朋友参考一下 php单例模式的简单实现方法 首先我们要知道明确单例模式这个概念,那么什么是单例模式呢? 单例模式顾名思义,就是只有一个实例。 作为对象的创建模式, 单例模式确保某一个类只有一个实例,而且自行实例化并向整个系统提供这个实例, 这个类我们称之为单例类。 单例模式的要点有三个: 一是
-
本文向大家介绍php简单实现快速排序的方法,包括了php简单实现快速排序的方法的使用技巧和注意事项,需要的朋友参考一下 本文实例讲述了php简单实现快速排序的方法。分享给大家供大家参考。具体实现方法如下: 希望本文所述对大家的php程序设计有所帮助。
-
本文向大家介绍Android实现夜间模式切换功能实现代码,包括了Android实现夜间模式切换功能实现代码的使用技巧和注意事项,需要的朋友参考一下 现在很多App都有夜间模式,特别是阅读类的App,夜间模式现在已经是阅读类App的标配了,事实上,日间模式与夜间模式就是给App定义并应用两套不同颜色的主题,用户可以自动或者手动的开启,今天用Android自带的support包来实现夜间模式。由于Su
-
本文向大家介绍Android夜间模式最佳实践,包括了Android夜间模式最佳实践的使用技巧和注意事项,需要的朋友参考一下 由于Android的设置中并没有夜间模式的选项,对于喜欢睡前玩手机的用户,只能简单的调节手机屏幕亮度来改善体验。目前越来越多的应用开始把夜间模式加到自家应用中,没准不久google也会把这项功能添加到Android系统中吧。 业内关于夜间模式的实现,有两种主流方案,各有其利弊
-
本文向大家介绍c# 单例模式的实现方法,包括了c# 单例模式的实现方法的使用技巧和注意事项,需要的朋友参考一下 单例模式大概是所有设计模式中最简单的一种,如果在面试时被问及熟悉哪些设计模式,你可能第一个答的就是单例模式。 单例模式的实现分为两种:饿汉式和懒汉式。前者是在静态构造函数执行时就立即实例化,后者是在程序执行过程中第一次需要时再实例化。两者有各自适用的场景,实现方式也都很简单,唯一在设计时
-
问题内容: 我创建了一个新文件。所谓 然后在那里我做: 我想在另一个class()中使用它, 很好,但是当我深入研究错误时。 问题答案: 您不能只是拥有一个init。该变量必须在类顶层声明。 使用单例的示例: 当需要在另一个类中使用单例时,只需在另一个类中执行此操作: 按照Martin R和Caleb的评论进行更新: 我已将初始化程序设为私有。它在其他Swift文件中阻止的初始化,从而只能通过使用

