WPF实现简单的跑马灯效果
最近项目上要用到跑马灯的效果,和网上不太相同的是,网上大部分都是连续的,而我们要求的是不连续的。
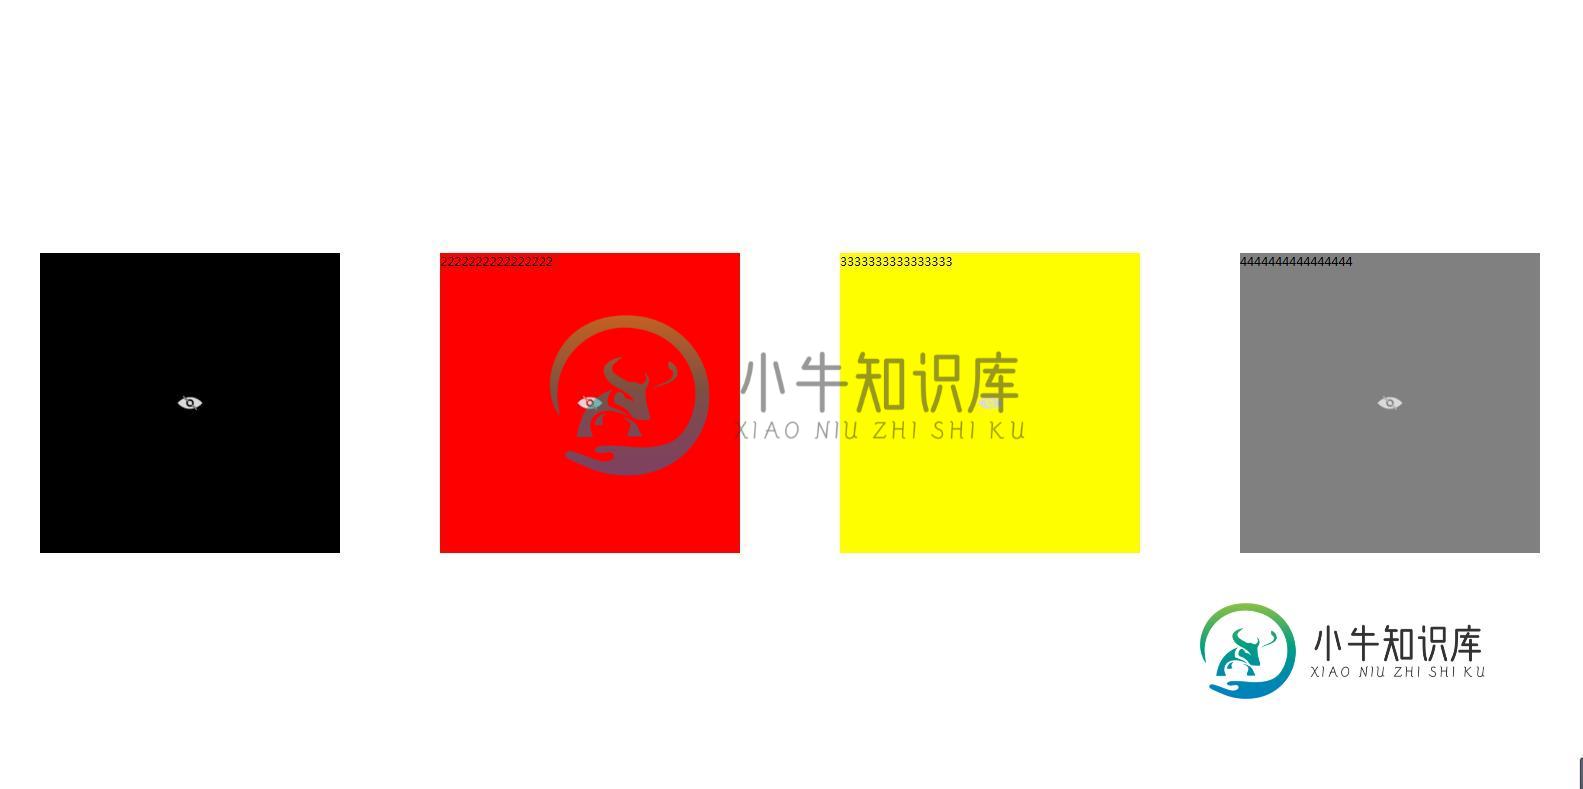
也就是是,界面上就展示4项(展示项数可变),如果有7项要展示的话,则不断的在4个空格里左跳,当然,衔接上效果不是很好看。
然后,需要支持点击以后进行移除掉不再显示的内容。
效果如下:

思路大致如下:
1、最外层用一个ViewBox,为了可以填充调用此控件的地方,这样可以方便自动拉伸
<Viewbox x:Name="viewbox_main" Height="{Binding Path=ActualHeight}" Width="{Binding Path=ActualWidth}" MouseLeave="grid_main_MouseLeave" MouseMove="grid_main_MouseMove" HorizontalAlignment="Stretch" VerticalAlignment="Stretch" Stretch="Fill"/>
2、定义三个变量,一个是Count值,是为了设定要展示的UserControl的个数的,例如默认是4个,如效果图,当然,设置成5的话,就是5个了;一个List<Grid>是为了放入展示控件的列表,一个List<UserControl>是用来放所有要用于跑马灯里的控件的。
3、设置一个Canvas,放入到最外层的Viewbox中,用于跑马灯时候用(这也是常用的跑马灯控件Canvas)
//给Canvas设置一些属性
 canvas_board.VerticalAlignment = VerticalAlignment.Stretch;
 canvas_board.HorizontalAlignment = HorizontalAlignment.Stretch;
canvas_board.Width = this.viewbox_main.ActualWidth;
canvas_board.Height = this.viewbox_main.ActualHeight;
canvas_board.ClipToBounds = true;
//用viewbox可以支持拉伸
this.viewbox_main.Child = canvas_board;
4、将要循环的Grid放入到Canvas里,这里的Grid的个数,要比展示的个数大一个,也就是Count+1个值,因为滚动的时候,其实是在最外面有一个的,这样保证了循环的走动。至于两个控件之间的Margin这个就是要设置Grid的了,到时候控件是直接扔进Grid里的
//循环将Grid加入到要展示的列表里
for (int i = 0; i < Uc_Count + 1; i++)
{
 Grid grid = new Grid();
 grid.Width = canvas_board.Width / Uc_Count - 10;
 grid.Height = canvas_board.Height - 10;
 grid.Margin = new Thickness(5);
 this.canvas_board.Children.Add(grid);
 grid.SetValue(Canvas.TopProperty, 0.0);
 grid.SetValue(Canvas.LeftProperty, i * (grid.Width + 10));

 UcListForShow.Add(grid);
}
5、给每个Grid增加一个动画效果,就是向左移动的效果
for (int i = 0; i < UcListForShow.Count; i++)
{
 //设置滚动时候的效果
 DoubleAnimationUsingKeyFrames daukf_uc = new DoubleAnimationUsingKeyFrames();
 LinearDoubleKeyFrame k1_uc = new LinearDoubleKeyFrame(i * (UcListForShow[i].Width + 10), KeyTime.FromTimeSpan(TimeSpan.FromSeconds(2)));
 LinearDoubleKeyFrame k2_uc = new LinearDoubleKeyFrame((i - 1) * (UcListForShow[i].Width + 10), KeyTime.FromTimeSpan(TimeSpan.FromSeconds(2.5)));
 daukf_uc.KeyFrames.Add(k1_uc);
 daukf_uc.KeyFrames.Add(k2_uc);
 storyboard_imgs.Children.Add(daukf_uc);
 Storyboard.SetTarget(daukf_uc, UcListForShow[i]);
 Storyboard.SetTargetProperty(daukf_uc, new PropertyPath("(Canvas.Left)"));
}
6、滚动的时候,要计算UserControl到底是添加到了哪个Grid里面,也就是哪个控件作为了第一位。
我们设置一个索引值scroll_index,默认的时候,scroll_index=0,这是初始的状态,当滚动起来以后,scroll_index = scroll_index + 1 - Uc_Count;
然后,判断,循环的时候,是否是展示列表的末尾了,如果是的话,则要填充的控件是scroll_index %UcListSum.Count(滚动索引,对总数直接取余数),如果不是的话则是scroll_index++ % UcListSum.Count(滚动索引++,对总数直接取余数)
scroll_index = scroll_index + 1 - Uc_Count;

for (int i = 0; i < UcListForShow.Count; i++)
{
 UcListForShow[i].SetValue(Canvas.LeftProperty, i * (UcListForShow[i].Width + 10));
 UserControl uc;
 if (i == UcListForShow.Count - 1)
 {
  uc = UcListSum[scroll_index % UcListSum.Count];
 }
 else
 {
  uc = UcListSum[scroll_index++ % UcListSum.Count];
 }
 if (uc.Parent != null)
 {
  (uc.Parent as Grid).Children.Clear();//将Usercontrol从原来的里面移除掉,要不然会抛错,Usercontrol已属于另一个控件
 }
 UcListForShow[i].Children.Clear();
 UcListForShow[i].Children.Add(uc);
 //将隐藏按钮加入到Grid里
 Button btn = new Button();
 btn.Style = (dictionary["hidenStyle"] as Style);//从样式文件里读取到Button的样式
 btn.Tag = UcListForShow[i].Children;//给Tag赋值,这样方便查找
 btn.Click += Btn_Click;//注册隐藏事件
 UcListForShow[i].Children.Add(btn);
}
代码中,需要注意的是(uc.Parent as Grid).Children.Clear(),如果不移除的话,则会提示,已经属于另一个,所以,要从parent里面移除掉。
7、Button的隐藏事件,当Button点击以后,则要进行隐藏,其实也就是将总数里面,减除掉不再显示的那一项
private void Btn_Click(object sender, RoutedEventArgs e)
{
 if ((sender as Button).Tag != null)
 {
  UcListSum.Remove((((sender as Button).Tag as UIElementCollection)[0] as UserControl));
 }
 if (UcListSum.Count == Uc_Count)//当列表数和要展示的数目相同的时候,就停止掉动画效果
 {
  storyboard_imgs.Completed -= Storyboard_imgs_Completed;
  storyboard_imgs.Stop();
  for (int i = 0; i < Uc_Count; i++)
  {
   UcListForShow[i].Children.Clear();
   if (UcListSum[i].Parent != null)
   {
    (UcListSum[i].Parent as Grid).Children.Clear();
   }
   UcListForShow[i].Children.Add(UcListSum[i]);
  }
  return;
 }
}
所有代码如下:
using System;
using System.Collections.Generic;
using System.Linq;
using System.Text;
using System.Windows;
using System.Windows.Controls;
using System.Windows.Data;
using System.Windows.Documents;
using System.Windows.Input;
using System.Windows.Media;
using System.Windows.Media.Animation;
using System.Windows.Media.Imaging;
using System.Windows.Navigation;
using System.Windows.Shapes;

namespace MarqueeUserControl
{
 /// <summary>
 /// MarqueeUC.xaml 的交互逻辑
 /// </summary>
 public partial class MarqueeUC : UserControl
 {
  ResourceDictionary dictionary;
  public MarqueeUC()
  {
   InitializeComponent();
   //读取样式文件
   dictionary = new ResourceDictionary { Source = new Uri("/MarqueeUserControl;component/MarqueeUserControlDictionary.xaml", UriKind.Relative) };
  }
  #region 属性
  private int _uc_Count = 0;
  /// <summary>
  /// 用来展示几个
  /// </summary>
  public int Uc_Count
  {
   get
   {
    return _uc_Count;
   }

   set
   {
    _uc_Count = value;
   }
  }

  private List<Grid> _ucListForShow = new List<Grid>();
  /// <summary>
  /// 用来展示的控件列表
  /// </summary>
  private List<Grid> UcListForShow
  {
   get
   {
    return _ucListForShow;
   }

   set
   {
    _ucListForShow = value;
   }
  }

  private List<UserControl> _ucListSum = new List<UserControl>();
  /// <summary>
  /// 要添加的控件的列表
  /// </summary>
  public List<UserControl> UcListSum
  {
   get
   {
    return _ucListSum;
   }

   set
   {
    _ucListSum = value;
   }
  }

  #endregion
  Canvas canvas_board = new Canvas();
  Storyboard storyboard_imgs = new Storyboard();
  int scroll_index = 0;//滚动索引
  double scroll_width;//滚动宽度

  void GridLayout()
  {
   if (Uc_Count == 0)//如果这个值没有赋值的话,则默认显示四个
   {
    Uc_Count = 4;
   }
   //给Canvas设置一些属性
   canvas_board.VerticalAlignment = VerticalAlignment.Stretch;
   canvas_board.HorizontalAlignment = HorizontalAlignment.Stretch;
   canvas_board.Width = this.viewbox_main.ActualWidth;
   canvas_board.Height = this.viewbox_main.ActualHeight;
   canvas_board.ClipToBounds = true;
   //用viewbox可以支持拉伸
   this.viewbox_main.Child = canvas_board;
   //循环将Grid加入到要展示的列表里
   for (int i = 0; i < Uc_Count + 1; i++)
   {
    Grid grid = new Grid();
    grid.Width = canvas_board.Width / Uc_Count - 10;
    grid.Height = canvas_board.Height - 10;
    grid.Margin = new Thickness(5);
    this.canvas_board.Children.Add(grid);
    grid.SetValue(Canvas.TopProperty, 0.0);
    grid.SetValue(Canvas.LeftProperty, i * (grid.Width + 10));

    UcListForShow.Add(grid);
   }
  }

  void StoryLoad()
  {
   for (int i = 0; i < UcListForShow.Count; i++)
   {//设置滚动时候的效果
    DoubleAnimationUsingKeyFrames daukf_uc = new DoubleAnimationUsingKeyFrames();
    LinearDoubleKeyFrame k1_uc = new LinearDoubleKeyFrame(i * (UcListForShow[i].Width + 10), KeyTime.FromTimeSpan(TimeSpan.FromSeconds(2)));
    LinearDoubleKeyFrame k2_uc = new LinearDoubleKeyFrame((i - 1) * (UcListForShow[i].Width + 10), KeyTime.FromTimeSpan(TimeSpan.FromSeconds(2.5)));
    daukf_uc.KeyFrames.Add(k1_uc);
    daukf_uc.KeyFrames.Add(k2_uc);
    storyboard_imgs.Children.Add(daukf_uc);
    Storyboard.SetTarget(daukf_uc, UcListForShow[i]);
    Storyboard.SetTargetProperty(daukf_uc, new PropertyPath("(Canvas.Left)"));
   }

   storyboard_imgs.FillBehavior = FillBehavior.Stop;
   storyboard_imgs.Completed += Storyboard_imgs_Completed;
   storyboard_imgs.Begin();
  }

  private void Storyboard_imgs_Completed(object sender, EventArgs e)
  {

   scroll_index = scroll_index + 1 - Uc_Count;

   for (int i = 0; i < UcListForShow.Count; i++)
   {
    UcListForShow[i].SetValue(Canvas.LeftProperty, i * (UcListForShow[i].Width + 10));
    UserControl uc;
    if (i == UcListForShow.Count - 1)
    {
     uc = UcListSum[scroll_index % UcListSum.Count];
    }
    else
    {
     uc = UcListSum[scroll_index++ % UcListSum.Count];
    }
    if (uc.Parent != null)
    {
     (uc.Parent as Grid).Children.Clear();//将Usercontrol从原来的里面移除掉,要不然会抛错,Usercontrol已属于另一个控件
    }
    UcListForShow[i].Children.Clear();
    UcListForShow[i].Children.Add(uc);
    //将隐藏按钮加入到Grid里
    Button btn = new Button();
    btn.Style = (dictionary["hidenStyle"] as Style);//从样式文件里读取到Button的样式
    btn.Tag = UcListForShow[i].Children;//给Tag赋值,这样方便查找
    btn.Click += Btn_Click;//注册隐藏事件
    UcListForShow[i].Children.Add(btn);
   }

   storyboard_imgs.Begin();
  }

  private void Btn_Click(object sender, RoutedEventArgs e)
  {
   if ((sender as Button).Tag != null)
   {
    UcListSum.Remove((((sender as Button).Tag as UIElementCollection)[0] as UserControl));
   }
   if (UcListSum.Count == Uc_Count)//当列表数和要展示的数目相同的时候,就停止掉动画效果
   {
    storyboard_imgs.Completed -= Storyboard_imgs_Completed;
    storyboard_imgs.Stop();
    for (int i = 0; i < Uc_Count; i++)
    {
     UcListForShow[i].Children.Clear();
     if (UcListSum[i].Parent != null)
     {
      (UcListSum[i].Parent as Grid).Children.Clear();
     }
     UcListForShow[i].Children.Add(UcListSum[i]);
    }
    return;
   }
  }

  public void StartMar()
  {
   GridLayout();

   scroll_width = this.canvas_board.Width;

   for (int i = 0; i < UcListForShow.Count; i++)
   {
    UserControl uc;
    if (i == UcListForShow.Count - 1)
    {
     uc = UcListSum[scroll_index % UcListSum.Count];
    }
    else
    {
     uc = UcListSum[scroll_index++ % UcListSum.Count];
    }
    if (uc.Parent != null)
    {
     (uc.Parent as Grid).Children.Clear();
    }
    UcListForShow[i].Children.Clear();
    UcListForShow[i].Children.Add(uc);
   }
   StoryLoad();
  }

  private void grid_main_MouseLeave(object sender, MouseEventArgs e)
  {
   if (storyboard_imgs.GetCurrentState() == ClockState.Stopped)//如果是停止的状态,则直接返回,不再起作用
   {
    return;
   }
   if (storyboard_imgs.GetIsPaused() == true)//如果是暂停状态的话,则开始
   {
    storyboard_imgs.Begin();
   }
  }

  private void grid_main_MouseMove(object sender, MouseEventArgs e)
  {
   if (storyboard_imgs.GetIsPaused() == false)
   {
    storyboard_imgs.Pause();
   }
  }
 }
}
<ResourceDictionary xmlns="http://schemas.microsoft.com/winfx/2006/xaml/presentation"
     xmlns:x="http://schemas.microsoft.com/winfx/2006/xaml"
     xmlns:local="clr-namespace:MarqueeUserControl">
 <Style TargetType="Button" x:Key="hidenStyle">
  <Setter Property="Background" Value="Transparent"/>
  <Setter Property="HorizontalAlignment" Value="Center"/>
  <Setter Property="VerticalAlignment" Value="Center"/>
  <Setter Property="Width" Value="25"/>
  <Setter Property="Height" Value="25"/>
  <Setter Property="BorderBrush" Value="Transparent"/>
  <Setter Property="BorderThickness" Value="0"/>
  <Setter Property="Template"><!--把Image放到Template里作为Content显示,如果是单独给Content设置图片的话,则只有一个按钮显示图片,其他的不显示-->
   <Setter.Value>
    <ControlTemplate TargetType="{x:Type Button}">
     <Border>
      <Image Source="hiden.png"/>
     </Border>
    </ControlTemplate>
   </Setter.Value>
  </Setter>
 </Style>
</ResourceDictionary>
没有解决的问题
想给Button增加鼠标悬停的时候,显示,移除的时候隐藏,但是发现不好使,原因是当MouseOver上去的时候,虽然Visibility的值变了,但是只有到下一次的时候,Button的值才被附上,而此时,已经MouseLeave了,请哪位大神指导一下,看看这个显示和隐藏怎么做。
以上就是本文的全部内容,希望对大家的学习有所帮助,也希望大家多多支持小牛知识库。
-
本文向大家介绍jQuery+CSS3文字跑马灯特效的简单实现,包括了jQuery+CSS3文字跑马灯特效的简单实现的使用技巧和注意事项,需要的朋友参考一下 jQuery+CSS3文字跑马灯特效是一款将跑马灯背景制作为3D立方体效果,文字在上面移动时,就像是文字投影到墙壁上,在转角出会改变运动方向。 效果图如下: 完整HTML代码如下: 以上就是小编为大家带来的jQuery+CSS3文字跑马灯特效的
-
本文向大家介绍javascript实现文字跑马灯效果,包括了javascript实现文字跑马灯效果的使用技巧和注意事项,需要的朋友参考一下 本文实例为大家分享了js实现文字跑马灯效果的具体代码,供大家参考,具体内容如下 思路: 1.判断文字的长度和容器的长度,如果文字长度大于容器长度,则开始滚动,否则不滚动。 2.获取滚动条到元素左边的距离,递归滚动,直到滚动后的距离等于文字的长度退出递归。 判断
-
本文向大家介绍原生JS实现跑马灯效果,包括了原生JS实现跑马灯效果的使用技巧和注意事项,需要的朋友参考一下 效果如下:(动态效果可复制代码查看,案例中的图片可自行选择添加) 代码如下: 以上就是本文的全部内容,希望本文的内容对大家的学习或者工作能带来一定的帮助,同时也希望多多支持呐喊教程!
-
本文向大家介绍Android实现垂直跑马灯效果,包括了Android实现垂直跑马灯效果的使用技巧和注意事项,需要的朋友参考一下 在我们开发过程中,跑马灯这个功能非常实用的,在实现这个功能的时候,这个时候我们通常需要找demo来实现这个方法,我从github上面找到这个demo感觉很好用,所以就要实现了这个功能喽MarqueeView,看这个工具类,因为我找这个类的时候是没有点击事件的,所以我给它加
-
本文向大家介绍Unity实现跑马灯抽奖效果,包括了Unity实现跑马灯抽奖效果的使用技巧和注意事项,需要的朋友参考一下 Unity 跑马灯抽奖效果实现代码,供大家参考,具体内容如下 这边用到插件是NGUI+Dotween,思路简单说下:先排版,通过移动图片蒙版来实现效果。 下面是排版和文件目录。 代码部分是通过余数去确认停的位置,boxlist通过unity拖拉加入数据,chooseBoxList
-
本文向大家介绍android使用TextView实现跑马灯效果,包括了android使用TextView实现跑马灯效果的使用技巧和注意事项,需要的朋友参考一下 本文实例为大家分享了android使用TextView实现跑马灯效果的具体代码,供大家参考,具体内容如下 先上效果图:此为静态图,实际动态中文字匀速向左滑动。 实现步骤: 第一步:创建好布局页面 第二步:在activity中编写java代

