
将JUnit 5测试结果与Intellij测试报告集成

我的build.gradle是这样配置的:
apply plugin: 'java'

compileTestJava {
    sourceCompatibility = 1.8
    targetCompatibility = 1.8
}

repositories {
    mavenCentral()
}

dependencies {
    testCompile("org.junit.jupiter:junit-jupiter-api:5.0.0-M1")
    testRuntime("org.junit.vintage:junit-vintage-engine:5.0.0-M1")
}
下面是一个简单的测试:
public class JUnit5Test {
    @Test
    void test() {

    }
}
当我执行测试时,我在控制台中看到了这一点:
Test run finished after 76 ms
[         1 tests found     ]
[         0 tests skipped   ]
[         1 tests started   ]
[         0 tests aborted   ]
[         1 tests successful]
[         0 tests failed    ]

BUILD SUCCESSFUL
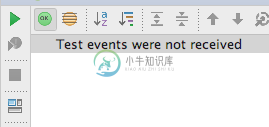
但测试报告中没有任何内容:
我做错了什么?如何将JUnit 5结果集成到测试报告窗口中?
我正在使用Intellij 2016.2
共有3个答案

据我所知(我仍在学习),您需要使用基于JUni4的运行器才能运行
我最终从gradle开始在Intellij上了JUnit5。junit5 gradle消费者示例中显示的构建文件,玩它,敲我的头,等等,直到我让它工作。当我用gradle在控制台中运行测试和用Intellij运行测试时,仍然存在差异。有时Intellij不会将测试类标识为测试,尤其是对于嵌套测试。但是,我可以右键单击各个类并在Intellij中运行它们。
下面是我对gradle的修改。构建在intellij中工作的文件(包括我注释掉的内容
buildscript {
    repositories {
        mavenCentral()
    }
    dependencies {
        classpath 'org.junit.platform:junit-platform-gradle-plugin:1.0.0-M2'
    }
}

repositories {
    mavenCentral()
}

ext.junit4Version        = '4.12'
ext.junitVintageVersion  = '4.12.0-M2'
ext.junitPlatformVersion = '1.0.0-M12'
ext.junitJupiterVersion  = '5.0.0-M2'
ext.junitPlatformConsoleVersion = '1.0.0-M2'
ext.log4JVersion         = '2.5'

apply plugin: 'java'
apply plugin: 'eclipse'
apply plugin: 'idea'
apply plugin: 'org.junit.platform.gradle.plugin'

jar {
    baseName = 'x2'
    version = '1.0.0-SNAPSHOT'
}

compileTestJava {
    sourceCompatibility = 1.8
    targetCompatibility = 1.8
    options.compilerArgs += '-parameters'
}

junitPlatform {
    // platformVersion '1.0.0-SNAPSHOT'
    engines {
         include 'junit-jupiter', 'junit-vintage'
        // exclude 'custom-engine'
    }
    tags {
        // include 'fast'
        // exclude 'slow'
    }
    // includeClassNamePattern '.*Test'
    // enableStandardTestTask true
    // reportsDir "build/test-results/junit-platform" // this is the default
    // logManager 'org.apache.logging.log4j.jul.LogManager'
}

dependencies {

    // JUnit Jupiter API and TestEngine implementation
    testCompile("org.junit.jupiter:junit-jupiter-api:${junitJupiterVersion}")
    testRuntime("org.junit.jupiter:junit-jupiter-engine:${junitJupiterVersion}")

    testCompile("org.junit.platform:junit-platform-console:${junitPlatformConsoleVersion}")
    testRuntime("org.junit.platform:junit-platform-console:${junitPlatformConsoleVersion}")

    // added to run via test suite
    testCompile("org.junit.platform:junit-platform-runner:${junitPlatformConsoleVersion}")
    testRuntime("org.junit.platform:junit-platform-runner:${junitPlatformConsoleVersion}")

    // If you also want to support JUnit 3 and JUnit 4 tests
    //testCompile("junit:junit:${junit4Version}")
    //testRuntime("org.junit.vintage:junit-vintage-engine:${junitVintageVersion}")

   // testRuntime("org.apache.logging.log4j:log4j-core:${log4JVersion}")
   // testRuntime("org.apache.logging.log4j:log4j-jul:${log4JVersion}")
}

task wrapper(type: Wrapper) {
    distributionUrl = 'https://services.gradle.org/distributions/gradle-2.14.1-bin.zip'
}
希望这有帮助。

从2016.2版开始,现在完全支持这一点。它的工作原理就像它对Junit4测试结果所做的那样:您确实需要激活JUnit插件(请参阅文件菜单下的设置...项目,插件部分)。
不要使用Gradle工具窗口来启动测试,直接使用IDE工具。其中包括:
- 单击边距图标(看起来像一个绿色圆圈,上面叠加了一个小的“播放”图标),然后选择“运行”或“调试”
- 右键单击类或方法名称并选择“运行”或“调试”
- 使用“运行”菜单,任何带有“运行”或“调试”的菜单项
- 在运行配置工具栏下拉列表中选择测试类,然后单击绿色的“播放”图标
请注意,目前,TestFactory方法不能以这种方式运行。如果您的类只有TestFactory方法,那么这可能会非常混乱!您可以通过向包含TestFactory方法的类添加一个虚拟的Test方法来解决这个问题,然后按照上面的描述运行该类。运行整个类时,可以正确找到TestFactory方法。

使用gradle执行测试时,会将结果打印到控制台,如上所示。如果您想在Idea的测试报告窗口中查看结果,只需使用全新的内置支持在IDE中执行测试:https://www.jetbrains.com/idea/whatsnew/#v2016-2-java
希望这能帮上忙向马蒂亚斯问好
-
22.13.7.测试报告 测试任务默认生成以下结果. 一份HTML测试报告 一个与Ant的JUnit测试报告任务兼容的XML.这个格式与许多其他服务兼容,如CI serves 结果是有效的二进制,测试任务会从这些二进制结果生成其他结果。 有一个独立的TestReport任务类型会根据一些Test任务实例生成的二进制源码生成一个HTML报告.使用这种测试类型,需要定义一个destinationDir
-
当运行单元测试的时候,Gradle 会输出一份 HTML 格式的报告以方便查看结果。Android plugin 则将所有连接设备的测试报告都合并到一个 HTML 格式的报告文件中。所有测试结果都以 XML 文件形式保存到 build/reports/androidTests/ 中(类似于 JUnit 的运行结果保存在 build/reports/tests 中)。可以自定义路径: android
-
5.4 测试报告 当运行单元测试的时候,Gradle 会生成一份 HTML 报告以便于查看测试结果。 Android plugins 在这个基础上扩展了 HTML 报告,以合并所有已连接设备上的测试结果。 5.4.1 单工程报告 在运行测试的时候工程会自动的生成报告,默认位置是: build/reports/androidTests 这和 jUnit 报告的位置 build/reports/tes
-
在我的gradle构建脚本中,我将doLast方法添加到test task中,以运行ant.junit任务,从而从几个jar文件中执行测试。 如何增强此任务以获得gradle html报表的好处?我看到ant junit测试xml报告是在$builddir/test-results中与其他“分级测试”创建的xml一起正确创建的。但是,$builddir/reports/tests“只包含。我希望g
-
在一个配置了多个应用项目和多个 Library 项目的多项目里,当同时运行所有测试的时候,测试结果整合到一份测试报告中可能是非常有用的。 为了实现这个目的,需要在同一个配置中添加另一个插件。可以通过以下方式添加: buildscript { repositories { jcenter() } dependencies { classpath
-
当运行单元测试的时候,Gradle会输出一份HTML格式的报告以方便查看结果。 Android plugin也是基于此,并且扩展了HTML报告文件,它将所有连接设备的报告都合并到一个文件里面。