
如何在android系统状态栏中显示文本

我正在尝试为Android牛轧糖开发一个应用程序,我想在状态栏中显示一些信息/文本,生成一个Android服务例程。所以我的问题是,我不知道如何显示状态栏中的文本。
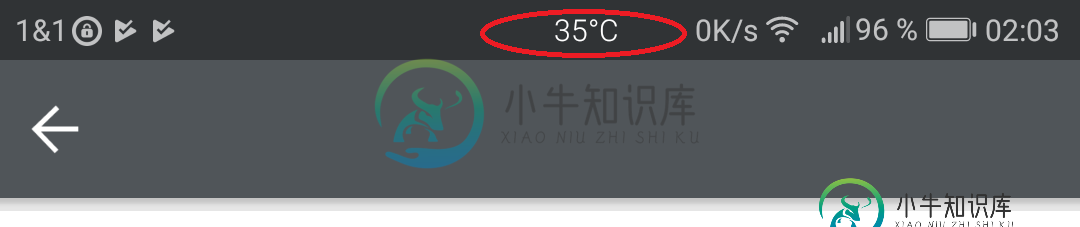
我添加了一个示例图像来显示我的确切意思(红圈)。我知道这是有可能的,因为我在play Store的一款电池监控器应用中看到了它。
我已经尝试了notificationbatch.builder,但我认为这不是正确的方法。也许是一个叠加,但搜索后,我没有找到什么。
import android.app.Notification;
import android.app.NotificationManager;
import android.os.Bundle;
import android.support.v4.app.NotificationCompat;
import android.support.v7.app.AppCompatActivity;
import android.support.v7.widget.Toolbar;

public class MainActivity extends AppCompatActivity
{
    private final int NOTIFICATION_ID = 10;

    @Override
    protected void onCreate (Bundle savedInstanceState)
    {
        super.onCreate(savedInstanceState);
        setContentView(R.layout.activity_main);

        Toolbar toolbar = (Toolbar) findViewById(R.id.toolbar);
        setSupportActionBar(toolbar);

        NotificationCompat.Builder mBuilder = new NotificationCompat.Builder(this);
        mBuilder.setContentTitle("Value");
        mBuilder.setContentText("123");
        mBuilder.setSmallIcon(R.mipmap.ic_launcher);
        mBuilder.setOngoing(true);
        mBuilder.setAutoCancel(false);

        //Intent resultIntent = new Intent(this, MainActivity.class);
        //PendingIntent resultPendingIntent = PendingIntent.getActivity(this, 0, resultIntent, PendingIntent.FLAG_UPDATE_CURRENT);
        //mBuilder.setContentIntent(resultPendingIntent);

        Notification notification = mBuilder.build();
        notification.flags |= Notification.FLAG_NO_CLEAR | Notification.FLAG_ONGOING_EVENT;

        NotificationManager mNotifyMgr = (NotificationManager) getSystemService(NOTIFICATION_SERVICE);
        mNotifyMgr.notify(NOTIFICATION_ID, notification);
    }
}
activity_main.xml
<?xml version="1.0" encoding="utf-8"?>
<RelativeLayout
    xmlns:android="http://schemas.android.com/apk/res/android"
    xmlns:app="http://schemas.android.com/apk/res-auto"
    xmlns:tools="http://schemas.android.com/tools"
    android:layout_width="match_parent"
    android:layout_height="match_parent"
    android:fitsSystemWindows="true"
    tools:context=".MainActivity">

    <android.support.design.widget.CoordinatorLayout
        android:layout_width="match_parent"
        android:layout_height="match_parent">

        <android.support.design.widget.AppBarLayout android:layout_height="wrap_content"
                                                    android:layout_width="match_parent"
                                                    android:theme="@style/AppTheme.AppBarOverlay">

            <android.support.v7.widget.Toolbar android:id="@+id/toolbar"
                                               android:layout_width="match_parent"
                                               android:layout_height="wrap_content"
                                               android:background="#000000"
                                               app:popupTheme="@style/AppTheme.PopupOverlay" />

        </android.support.design.widget.AppBarLayout>

        <LinearLayout
            android:layout_width="match_parent"
            android:layout_height="match_parent"
            android:layout_alignParentLeft="true"
            android:layout_alignParentTop="true"
            android:orientation="vertical"
            app:layout_behavior="@string/appbar_scrolling_view_behavior"
            android:weightSum="100" >

            <TextView
                android:id="@+id/tv_value"
                android:layout_width="wrap_content"
                android:layout_height="wrap_content"
                android:text="Hello World!"
                app:layout_constraintBottom_toBottomOf="parent"
                app:layout_constraintLeft_toLeftOf="parent"
                app:layout_constraintRight_toRightOf="parent"
                app:layout_constraintTop_toTopOf="parent"/>

        </LinearLayout>

    </android.support.design.widget.CoordinatorLayout>

</RelativeLayout>
结果:


共有1个答案

我确实找到了一个解决方案,关键字是用一个浮动窗口叠加的。
int statusBarHeight = 0;
int resourceId = getResources().getIdentifier("status_bar_height", "dimen", "android");
if (resourceId > 0) statusBarHeight = getResources().getDimensionPixelSize(resourceId);

final WindowManager.LayoutParams parameters = new WindowManager.LayoutParams(
        WindowManager.LayoutParams.WRAP_CONTENT,
        statusBarHeight,
        WindowManager.LayoutParams.TYPE_SYSTEM_ERROR,   // Allows the view to be on top of the StatusBar
        WindowManager.LayoutParams.FLAG_NOT_FOCUSABLE | WindowManager.LayoutParams.FLAG_LAYOUT_IN_SCREEN,    // Keeps the button presses from going to the background window and Draws over status bar
        PixelFormat.TRANSLUCENT);
parameters.gravity = Gravity.TOP | Gravity.CENTER;

LinearLayout ll = new LinearLayout(this);
ll.setBackgroundColor(Color.TRANSPARENT);
LinearLayout.LayoutParams layoutParameteres = new LinearLayout.LayoutParams(LinearLayout.LayoutParams.WRAP_CONTENT, LinearLayout.LayoutParams.MATCH_PARENT);
ll.setLayoutParams(layoutParameteres);

TextView tv = new TextView(this);
ViewGroup.LayoutParams tvParameters = new ViewGroup.LayoutParams(ViewGroup.LayoutParams.WRAP_CONTENT, ViewGroup.LayoutParams.MATCH_PARENT);
tv.setLayoutParams(tvParameters);
tv.setTextColor(Color.WHITE);
tv.setGravity(Gravity.CENTER);
tv.setText("123");
ll.addView(tv);

WindowManager windowManager = (WindowManager) getSystemService(WINDOW_SERVICE);
windowManager.addView(ll, parameters);
-
在我的应用程序中,我需要向用户显示通知。下面的代码片段通过在Android设备标题栏中显示图标和内容标题而发挥了很好的作用。 当我试图构建用于部署应用程序的包时,我得到了以下错误: 我需要在新的代码段中设置什么才能在android设备状态栏中显示内容标题?
-
我希望我的应用程序看起来像这样: 如有任何帮助,我们将不胜感激!
-
我试图在Android 4.4透明状态栏我知道如何通过定义自己的风格使其透明: 我在这里发现:https://stackoverflow.com/a/20573595/2633630 所以我发现我可以在我的布局中使用android: fitsSystemWindows="true"和android: clipToPadd="false",我在这里找到了http://mindofaandroidde
-
我有一个iOS的应用程序,通常不显示状态栏通过使用prefersStatusBarHidden返回YES在根视图控制器类。我使用MFMailComposeViewController撰写邮件消息使用PresViewController:动画:完成。我无法使MFMailComposeViewController不显示状态栏。我尝试子类化MFMailComposeViewController并使pre
-
本文向大家介绍Android仿QQ在状态栏显示登录状态效果,包括了Android仿QQ在状态栏显示登录状态效果的使用技巧和注意事项,需要的朋友参考一下 运行本实例,将显示一个用户登录界面,输入用户名(hpuacm)和密码(1111)后,单击"登录"按钮,将弹出如下图所示的选择登录状态的列表对话框, 单击代表登录状态的列表项,该对话框消失,并在屏幕的左上角显示代表登录状态的通知(如图) 过一段时间后