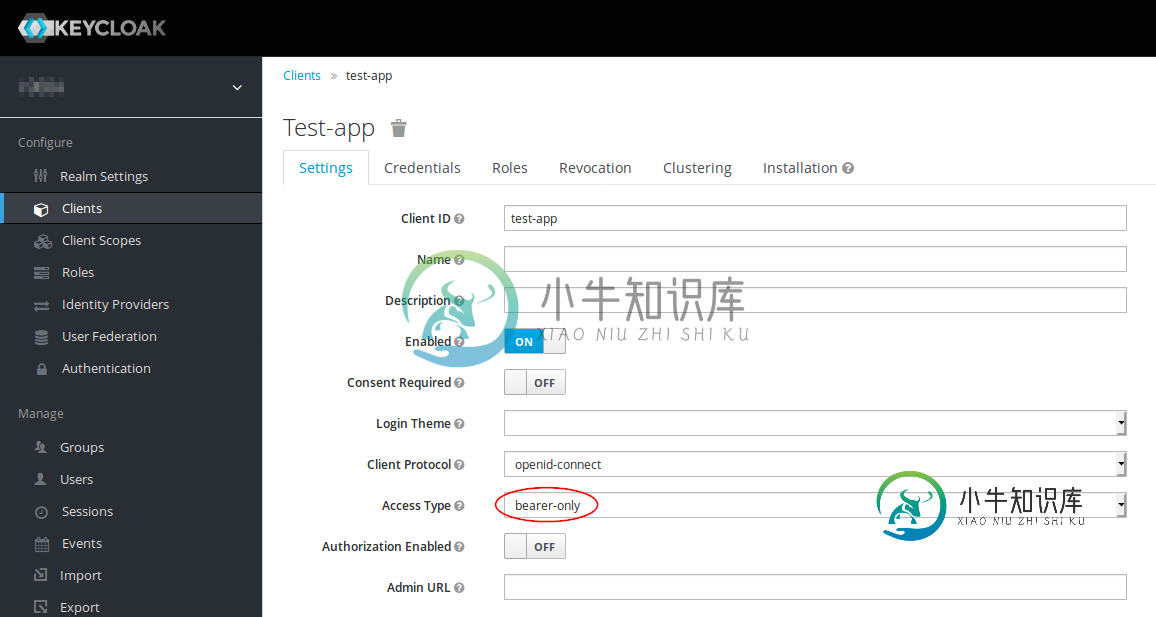
如何使用KeyCloak实现具有基于令牌访问的简单web服务?
我想创建一个以以下方式工作的web服务:
>
客户端控制KeyCloak并提供用户名和密码。
KeyCloak将访问令牌返回给客户端。
private String getAccessToken() throws IOException {
    final CloseableHttpClient client = HttpClients.createDefault();

    final List<NameValuePair> nameValuePairs = new ArrayList<NameValuePair>(4);
    nameValuePairs.add(new BasicNameValuePair("client_id", "test-app"));
    nameValuePairs.add(new BasicNameValuePair("username", "user1"));
    nameValuePairs.add(new BasicNameValuePair("password", "user1"));
    nameValuePairs.add(new BasicNameValuePair("grant_type", "password"));


    try {
        final HttpPost post = new HttpPost("http://localhost:8080/auth/realms/myrealm/protocol/openid-connect/token");
        post.setEntity(new UrlEncodedFormEntity(nameValuePairs));
        post.setHeader("Accept", "application/json");
        post.setHeader("Content-type", "application/x-www-form-urlencoded");

        final CloseableHttpResponse response = client.execute(post);

        final int statusCode = response.getStatusLine().getStatusCode();

        System.out.println(String.format("Result: %d", statusCode));

        if (statusCode != 200) {
            System.out.println("Something went wrong");
            return null;
        }

        final String responseTxt = EntityUtils.toString(response.getEntity());
        final JSONObject json = new JSONObject(responseTxt);

        final String accessToken = json.getString("access_token");
        return accessToken;
    } finally {
        try {
            client.close();
        } catch (final IOException exception) {
            exception.printStackTrace();
        }
    }
}
我使用以下代码来访问它(accesstoken是上一步中的访问令牌):
    final String targetUrl = "http://127.0.0.1/test";
    final CloseableHttpClient client = HttpClients.createDefault();
    final HttpGet get = new HttpGet(targetUrl);
    get.setHeader("Authorization", String.format("Bearer%s", accessToken));
    final CloseableHttpResponse response = client.execute(get);
    final int statusCode = response.getStatusLine().getStatusCode();
    System.out.println(String.format("Result: %d", statusCode));
    client.close();
当我这样做时,我得到KeyCloak的登录页面作为响应,而不是web服务的响应。
如何配置web服务?
@RestController
public class SampleRestController {
    @RequestMapping("/test")
    public String test() {
        return "Hello, world!";
    }
}
@Configuration
@EnableWebSecurity
@ComponentScan(basePackageClasses = KeycloakSecurityComponents.class)
public class SecurityConfig extends KeycloakWebSecurityConfigurerAdapter {
    @Autowired
    public void configureGlobal(final AuthenticationManagerBuilder auth) throws Exception {

        KeycloakAuthenticationProvider keycloakAuthenticationProvider
                = keycloakAuthenticationProvider();
        keycloakAuthenticationProvider.setGrantedAuthoritiesMapper(
                new SimpleAuthorityMapper());
        auth.authenticationProvider(keycloakAuthenticationProvider);
    }
    @Bean
    public KeycloakSpringBootConfigResolver KeycloakConfigResolver() {
        return new KeycloakSpringBootConfigResolver();
    }


    @Bean
    @Override
    protected SessionAuthenticationStrategy sessionAuthenticationStrategy() {
        return new RegisterSessionAuthenticationStrategy(
                new SessionRegistryImpl());
    }

    @Override
    public void configure(HttpSecurity http) throws Exception {
        super.configure(http);
        http.authorizeRequests()
                .antMatchers("/test*")
                .hasRole("user")
                .anyRequest()
                .permitAll();
    }
}
server.port = 8090

spring.main.allow-bean-definition-overriding=true


keycloak.realm = myrealm
keycloak.auth-server-url = http://127.0.0.1:8080/auth
keycloak.ssl-required = external
keycloak.resource = test-app
keycloak.public-client=true
keycloak.security-constraints[0].authRoles[0]=user
keycloak.security-constraints[0].securityCollections[0].patterns[0]=/test/*

server.port = 8090
spring.main.allow-bean-definition-overriding=true
keycloak.realm = myrealm
keycloak.resource = test-app
keycloak.auth-server-url = http://127.0.0.1:8080/auth
keycloak.bearer-only = true
keycloak.ssl-required = external
keycloak.principal-attribute = preferred_username
共有1个答案
您使用了错误的流或目标。如果您想使用登录/密码,您可以选择其中的两个:
>
电流。您尝试访问,您的服务器检查您的登录,如果您没有-重定向到KeyCloak。登录后,keycloak使用access_code(不是token)将您重定向到您的页面(或登录页面--我不记得了)。在此之后,您的服务将此代码发送到keycloak并执行其他操作
将流更改为密码流。在这种情况下,您将向服务发送用户名/密码(而不是Keycloak),服务将此凭据发送到Keycloak,然后执行其他操作
-
本文向大家介绍Python基于twisted实现简单的web服务器,包括了Python基于twisted实现简单的web服务器的使用技巧和注意事项,需要的朋友参考一下 本文实例讲述了Python基于twisted实现简单的web服务器,分享给大家供大家参考。具体方法如下: 1. 新建htm文件夹,在这个文件夹中放入显示的网页文件 2. 在htm文件夹的同级目录下,建立web.py,web.py的内
-
我使用Keycloak来保护我的react前端和Node.js后端。这些客户端使用基于角色的授权进行保护。 我尝试这个endpoint来撤消用户访问令牌。但不起作用/auth/admin/realms//users/ 是否有方法在Keycloak中撤销特定用户的访问令牌?
-
我必须将一个遗留的身份验证系统移到Keycloak,并且我不能更改客户端上的实际工作流。因此,我需要用我的api(在node.js中)提供一个用户创建和登录系统,该系统反过来代表用户从Keycloak创建和获取访问令牌。 我能够创建一个用户,但我无法找到为该用户生成访问令牌的方法。我找到的唯一解决办法是创建一个用户并设置一个随机密码,然后要求授予提供用户名和密码的用户,但这意味着我必须在自己的一侧
-
我正在制作SPA,并决定使用JWT进行身份验证/授权,我读过一些关于令牌与Cookies的博客。我理解cookie授权是如何工作的,也理解基本令牌授权是如何工作的。问题是,我看不出刷新令牌如何适合它,在我看来,它降低了安全性。让我解释一下,就像我看到的那样: 通过用户名验证用户时 > 服务器还需要不断地查找存储,以查看什么用户,cookie点。 通过用户名验证用户时 这很容易受到XSS(跨站点脚本
-
我正在尝试使用邮递员应用程序从keycloak获取访问令牌。我使用的流是身份验证代码流。URI am提供的身份验证是 http://localhost:8080/auth/realms/realm_name/openid-connect/token 即使在keycloak中,我在clients下的Security-admin-console中将有效的重定向URI修改为http://localhos
-
我有一个Keycloak(独立)V1.9.4。最后在AWS实例上使用Wildfly 10安装安装程序,并尝试使用Keycloak(通过Keycloak的登录页面)和Twitter4j来验证Twitter用户,然后明显地让我的应用程序验证并查看用户的时间线等。 我已经配置了身份提供程序(Twitter)、领域和我的客户端应用程序。 我还在apps.Twitter.com上设置了一个Twitter应用

