
PDF阅读器系列之--MuPDF源码分析过程(一)

说在前面
1.最近接到项目是做移动设备的阅读器开发,心想之前我都没接触过相关阅读器的知识,更别说PDF了 -。-!
2.作者我之前的工作是在一家互联网公司做App应用开发的
3.我从来都没想过要写博客,偶然兴起,开通了博客,开始写一些关于自己工作中的,学习中的总结吧
4.我的工作经验虽然有2年,但是安卓开发的经验才1年不到,若有写的有不对的地方请告诉我,共同进步
5.算不上学霸,算不上学渣,赶上了互联网的好时机,你有什么理由不去努力呢
6.最后一句话:The harder, more fortunate.
正题
1.链接
https://github.com/JoanZapata/android-pdfview/
http://www.mupdf.com/docs/how-to-build-mupdf-for-android
https://github.com/muennich/mupdf
https://code.google.com/p/vudroid/
https://code.google.com/archive/p/apdfviewer/
https://code.google.com/archive/p/apdfviewer/
http://my.oschina.net/ernest/blog/16999?fromerr=xJRln0eg
2.PDFVIEWER实现步骤
>功能:
可支持动画,缩放,缓存,滑动
基于Vudroid,不能改变它原有的渲染速度,大小尺寸一致

>步骤:
1.  build.gradle‘s   config
compile 'com.joanzapata.pdfview:android-pdfview:1.0.4@aar'
2. Include PDFView in your layout
you'd best use FrameLayout or RelativeLayout
<com.joanzapata.pdfview.PDFView android:id="@+id/pdfview"android:layout_width="match_parent"android:layout_height="match_parent"/>'''
3.impl
    pdfView.fromAsset(pdfName)
    .pages(0, 2, 1, 3, 3, 3)
    .defaultPage(1)
    .showMinimap(false)
    .enableSwipe(true)
    .onDraw(onDrawListener)
    .onLoad(onLoadCompleteListener)
    .onPageChange(onPageChangeListener)
    .load();
3.tips
1. pdf文件放在资产目录文件夹下,pdfName就是你PDF格式文件的全名
2.pages属性是可选择的,通过它可以按照你想要的规则进行过滤或排序
3.defaultPage是默认显示哪一页
4.showMinimap
5.enableSwipe
6.onDraw应该是跟编辑pdf相关的配置
7.onLoad是当加载完毕时的回调
8.onPageChange是页面发生改变时的回调,需要实现onPageChangeListener接口,并实现中的回调方法onPageChanged,方法参数有当前页和总页数
9.load是初始化加载,配置完成后执行
4.源码分析:
part one : PDFView
1.继承SurfaceView
2.CacheManager,AnimationManager,DragPinchManager
3.(可变数组)
originalUserPages:The pages the user want to display in order
filteredUserPages:The same pages but with a filter to avoid repetition
4.默认支持横向滑动,通过设置swipeVertical=true来设置竖向滑动
5.setWillNotDraw(false):surfaceview默认情况下不会调用onDraw,但我们需要这样设置
6.load两个重载方法,如果不回收(recycled=false)就抛出异常:需要先移除才可以调用load
7.复写onDetachFromWindow方法中调用了recycle(),方法实现是取消任务清除缓存
8.onDraw 之后再看
5.特点
1.使用Builder的构建方式,调用方式很简单,只需要配置一些必需的信息即可
2.枚举列出3种状态 DEFAULT LOADED SHOWN
3.所有实现都在Configurator中
实现效果
一款基于Vudroid的PDF阅读器实现
MuPDF的引入
mupdf的引入
官网:http://www.mupdf.com/
我下载的是最新版
git 地址:
git clone --recursive git://git.ghostscript.com/mupdf.git官方步骤:
To build/debug android build.
1) Download the android sdk, and install it. These instructions have been
written with r14 (the latest version at time of writing) of the SDK in mind;
other versions may give problems. On windows r14 unpacked as:
C:\Program Files (x86)\Android\android-sdk
on Macos an older version installed as:
/Library/android-sdk-mac_x86
on Linux install it as:
mkdir ~/android-sdk
cd ~/android-sdk
tar ~/Downloads/android-sdk_r20.0.3-linux.tgz
Whatever directory it unpacks to, ensure that both the ‘tools’ and
‘platform-tools’ directories inside it have been added to your PATH.
2) Download the android ndk, and unpack it. These instructions were written
with NDK r6b (the latest version at the time of writing) in mind, but the
build has now been tweaked to work with r10b. Other versions may give problems.
It’s important that you use the correct NDK for the target platform. If you’re
targeting a 32-bit platform (such as “ARM EABI v7a” or “Intel x86 Arm”) then
you MUST use the 32-bit target NDK. If you get UnsatisfiedLinkError when
opening a document in MuPDF, then you’ve tried to use the 64-bit target NDK
with a 32-bit target!
On windows I unpacked it as:
C:\android-ndk-r10b
on Macos an older version unpacked as:
/Library/android-ndk-r5
on Linux as:
mkdir ~/android-ndk
cd ~/android-ndk
tar jxvf ~/Downloads/android-ndk32-r10b-linux-x86.tar.bz2
It is very important that you should unpack it to a directory with no
spaces in the name! (Don’t be tempted to put it in C:\Program Files etc)
Ensure that that directory is also added to your PATH.
3) On windows, to use the ndk, you must be running under cygwin. This means
you need to install Cygwin 1.7 or greater now.
[ In version r5 of the ndk, when running under cygwin, there were ]
[ bugs to do with the automatic conversion of dependencies from DOS ]
[ format paths to cygwin format paths. The 2 fixes can be found in: ]
[ ]
[ http://groups.google.com/group/android-ndk/msg/b385e47e1484c2d4 ]
[ ]
[ Use the latest version and there should not be a problem. ]
4) If the SDK has not popped up a window already, bring up a shell, and run
‘android’ (or android.bat on cygwin/windows). You should now have a window
with a graphical gui for the sdk. From here you can install the different SDK
components for the different flavours of android. Download them all -
bandwidth and disk space are cheap, right? Make sure you get at least
the API level 11 as this is the current dependency for mupdf.
5) In new versions of the GUI there is a ‘Tools’ menu from which you can
select ‘Manage AVDs…’. In old versions, go to the Virtual Devices entry
on the right hand side. You need to create yourself an emulator image to
use. Click ‘New…’ on the right hand side and a window will appear. Fill
in the entries as follows:
 Name: FroyoEm
 Target: Android 2.2 - API Level 8
 CPU/ABI: ARM (armeabi)     (If this option exists)
 SD card: Size: 1024MiB
 Skin: Resolution: 480x756  (756 just fits my macbook screen, but 800 may
                             be 'more standard')
Click ‘Create AVD’ (on old versions you may have to wait for a minute or
so while it is prepared. Now you can exit the GUI.
6) You will need a copy of the JDK installed. See
http://www.oracle.com/technetwork/java/javase/downloads/. When this
installs, ensure that JAVA_HOME is set to point to the installation
directory.
7) You will need a copy of Apache ANT installed.
See http://ant.apache.org/. Ensure that ANT_HOME is set to point to
the top level directory, and that ANT_HOME/bin is on the PATH.
8) Now we are ready to build mupdf for Android. Check out a copy of MuPDF
(but you’ve done that already, cos you’re reading this, right?).
9) You will also need a copy of mupdf’s thirdparty libraries. If you are
using git, make sure to do a git submodule update –init from the top of
the build tree. Older versions packaged this source code in a .zip-file
(see the source code link on http://mupdf.com/). Unpack the contents of
this into a ‘thirdparty’ directory created within the mupdf directory
(i.e. at the same level as fitz, pdf, android etc).
10) Finally, you will need a copy of a ‘generated’ directory. This is not
currently available to download.
The normal mupdf build process involves running some code on the host
(the machine on which you are compiling), rather than the target (the
machine/device on which you eventually want to run mupdf). This code
repacks various bits of information (fonts, CMAPs etc) into a more
compact and usable form.
Unfortunately, the android SDK does not provide a compiler for the host
machine, so we cannot run this step automatically as part of the android
build. You will need to generate it by running a different build, such
as the windows or linux native builds.
We do not make a snapshot of the generated directory available to
download as the contents of this directory change frequently, and we’d
have to keep multiple versions on the website. We assume that anyone
capable of building for android is capable of doing a normal hosted
build.
On windows (where you are using cygwin), or on linux/macos, this can be
as simple as running ‘make generate’ in the top level directory.
11) Change into mupdf’s android directory. Copy the
android/local.properties.sample file to be android/local.properties and
change the sdk path there as appropriate. This should be the only bit of
localisation you need to do.
12) Change into the android directory (note, the android directory, NOT
the android/jni directory!), and execute (in a Cygwin window on Windows!):
ndk-build
This should build the native code portion.
If this dies with an error in thirdparty/jbig2/os_types.h load this
file into an editor, and change line 43 from:
#else
to
#elif !defined(HAVE_STDINT_H)
and this should solve the problem.
13) Then execute:
ant debug
or on windows under cygwin:
ant.bat debug
This should build the java wrapper.
14) Now start the emulator by executing:
emulator -avd FroyoEm
This will take a while to full start up (be patient).
15) We now need to give the demo file something to chew on, so let’s copy
a file into the SD card image of the emulator (this should only need to be
done once). With the emulator running type:
adb push ../../MyTests/pdf_reference17.pdf /mnt/sdcard/Download/test.pdf
(where obviously ../../MyTests/pdf_reference17.pdf is altered for your
machine, and under Windows, should start c:/ even if invoked from cygwin)
(adb lives in /platform-tools if it’s not on your path).
16) With the emulator running (see step 14), execute
ant debug install
(‘ant.bat debug install’ on Windows) and that will copy MuPDF into the
emulator where you can run it from the launchpad screen.
17) To see debug messages from the emulator (including stdout/stderr from
our app), execute:
adb logcat
Good luck!
是不是看起来比较费力?不要紧,我来总结一下步骤:
1.
2. mupdf的platform/android是我们编译android所需要操作的目录。里面有一个README,其中一步是生成genarated目录的。这步必须要做。也就是到mupdf根目录,进行make generate,会生成这个目录。然后把这个目录复制到platform/android下面。
3. 修改local.properties 中指定ndk.dir= sdk.dir= ;举个例子:
4.
sdk.dir=C:\\softwares\\eclipseAdt\\sdk\\platforms\\android-19
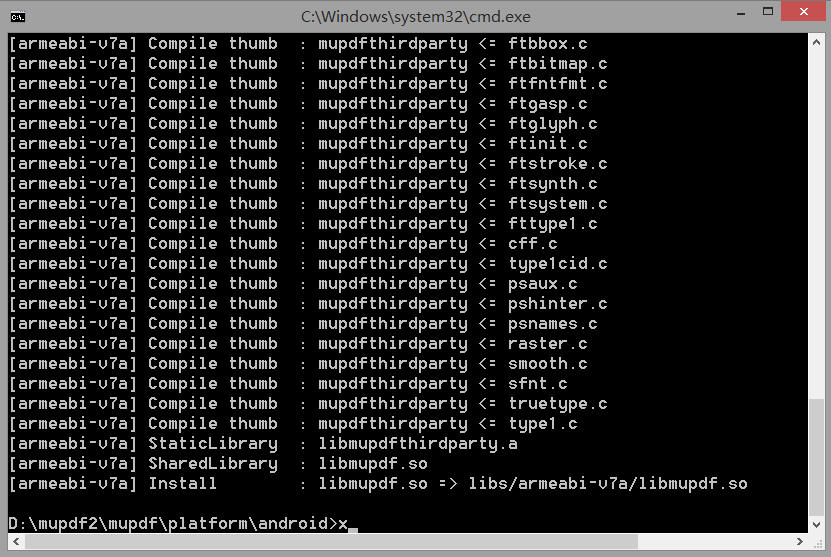
ndk.dir=C:\\oftwares\\android-ndk-r105.在android目录下ndk-build;
6.在android目录下多了obj文件夹,及包含了so库文件
如有遇到ndk问题:请复制错误到stackoverflow中查询