Face Recognition
You can also read a translated version of this file in Chinese 简体中文版 or in Korean 한국어 or in Japanese 日本語.
Recognize and manipulate faces from Python or from the command line withthe world's simplest face recognition library.
Built using dlib's state-of-the-art face recognitionbuilt with deep learning. The model has an accuracy of 99.38% on theLabeled Faces in the Wild benchmark.
This also provides a simple face_recognition command line tool that letsyou do face recognition on a folder of images from the command line!
Features
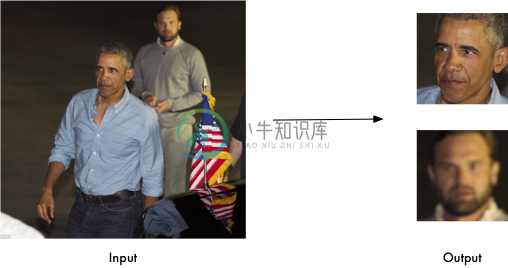
Find faces in pictures
Find all the faces that appear in a picture:
import face_recognition
image = face_recognition.load_image_file("your_file.jpg")
face_locations = face_recognition.face_locations(image)
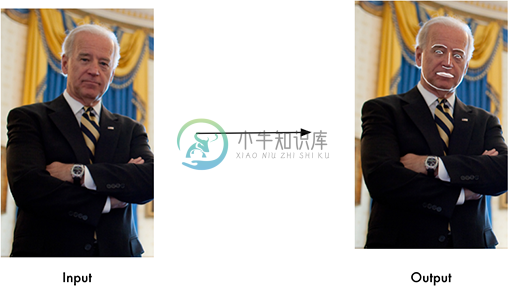
Find and manipulate facial features in pictures
Get the locations and outlines of each person's eyes, nose, mouth and chin.
import face_recognition
image = face_recognition.load_image_file("your_file.jpg")
face_landmarks_list = face_recognition.face_landmarks(image)
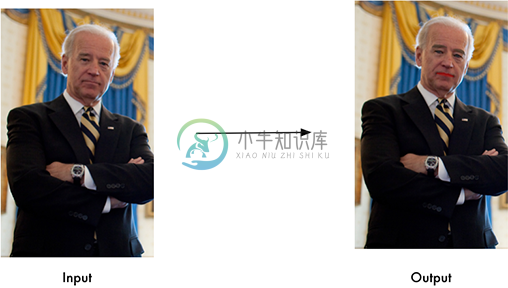
Finding facial features is super useful for lots of important stuff. But you can also use it for really stupid stufflike applying digital make-up (think 'Meitu'):
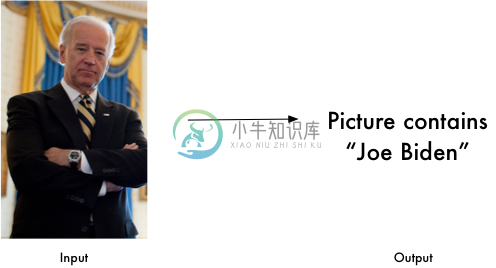
Identify faces in pictures
Recognize who appears in each photo.
import face_recognition
known_image = face_recognition.load_image_file("biden.jpg")
unknown_image = face_recognition.load_image_file("unknown.jpg")

biden_encoding = face_recognition.face_encodings(known_image)[0]
unknown_encoding = face_recognition.face_encodings(unknown_image)[0]

results = face_recognition.compare_faces([biden_encoding], unknown_encoding)
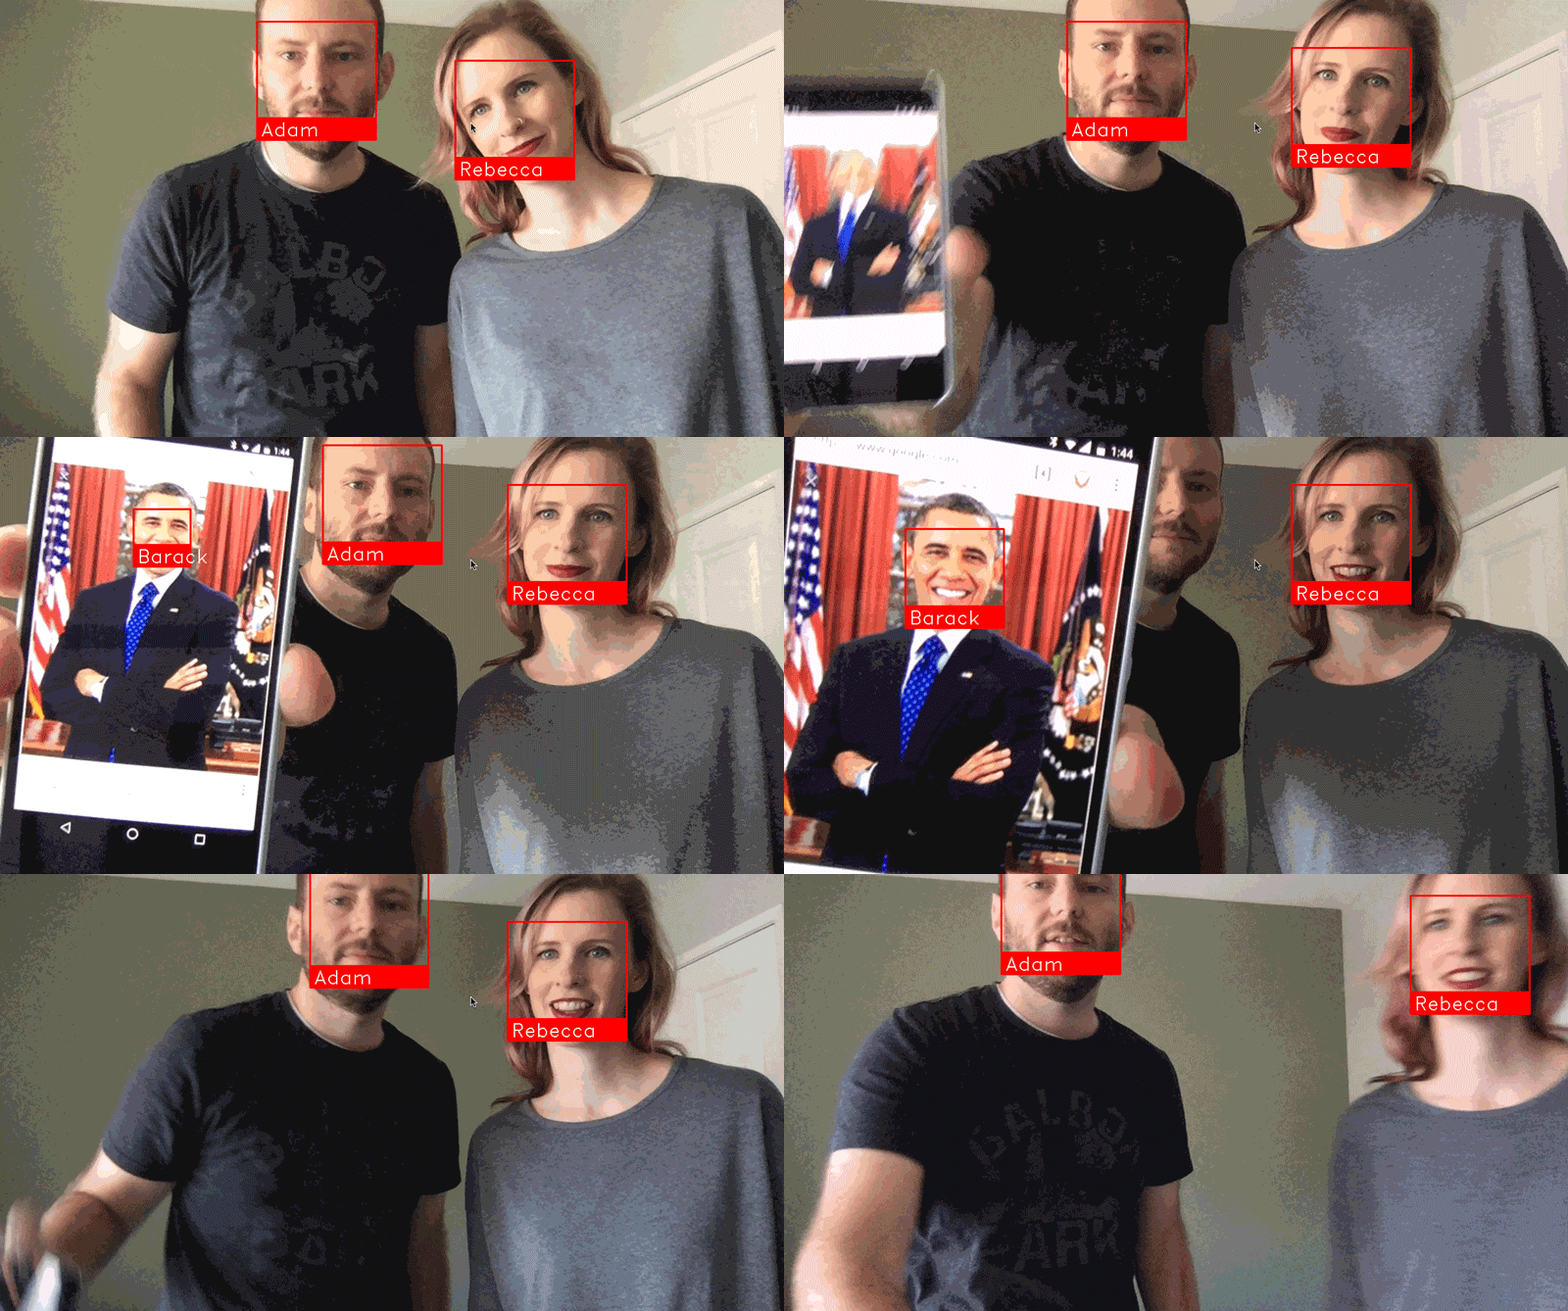
You can even use this library with other Python libraries to do real-time face recognition:
See this example for the code.
Online Demos
User-contributed shared Jupyter notebook demo (not officially supported):
Installation
Requirements
- Python 3.3+ or Python 2.7
- macOS or Linux (Windows not officially supported, but might work)
Installation Options:
Installing on Mac or Linux
First, make sure you have dlib already installed with Python bindings:
Then, make sure you have cmake installed:
brew install cmake
Finally, install this module from pypi using pip3 (or pip2 for Python 2):
pip3 install face_recognition
Alternatively, you can try this library with Docker, see this section.
If you are having trouble with installation, you can also try out apre-configured VM.
Installing on an Nvidia Jetson Nano board
- Jetson Nano installation instructions
- Please follow the instructions in the article carefully. There is current a bug in the CUDA libraries on the Jetson Nano that will cause this library to fail silently if you don't follow the instructions in the article to comment out a line in dlib and recompile it.
Installing on Raspberry Pi 2+
Installing on FreeBSD
pkg install graphics/py-face_recognition
Installing on Windows
While Windows isn't officially supported, helpful users have posted instructions on how to install this library:
Installing a pre-configured Virtual Machine image
- Download the pre-configured VM image (for VMware Player or VirtualBox).
Usage
Command-Line Interface
When you install face_recognition, you get two simple command-lineprograms:
face_recognition- Recognize faces in a photograph or folder full forphotographs.face_detection- Find faces in a photograph or folder full for photographs.
face_recognition command line tool
The face_recognition command lets you recognize faces in a photograph orfolder full for photographs.
First, you need to provide a folder with one picture of each person youalready know. There should be one image file for each person with thefiles named according to who is in the picture:
Next, you need a second folder with the files you want to identify:
Then in you simply run the command face_recognition, passing inthe folder of known people and the folder (or single image) with unknownpeople and it tells you who is in each image:
$ face_recognition ./pictures_of_people_i_know/ ./unknown_pictures/

/unknown_pictures/unknown.jpg,Barack Obama
/face_recognition_test/unknown_pictures/unknown.jpg,unknown_person
There's one line in the output for each face. The data is comma-separatedwith the filename and the name of the person found.
An unknown_person is a face in the image that didn't match anyone inyour folder of known people.
face_detection command line tool
The face_detection command lets you find the location (pixel coordinatates)of any faces in an image.
Just run the command face_detection, passing in a folder of imagesto check (or a single image):
$ face_detection  ./folder_with_pictures/

examples/image1.jpg,65,215,169,112
examples/image2.jpg,62,394,211,244
examples/image2.jpg,95,941,244,792
It prints one line for each face that was detected. The coordinatesreported are the top, right, bottom and left coordinates of the face (in pixels).
Adjusting Tolerance / Sensitivity
If you are getting multiple matches for the same person, it might be thatthe people in your photos look very similar and a lower tolerance valueis needed to make face comparisons more strict.
You can do that with the --tolerance parameter. The default tolerancevalue is 0.6 and lower numbers make face comparisons more strict:
$ face_recognition --tolerance 0.54 ./pictures_of_people_i_know/ ./unknown_pictures/

/unknown_pictures/unknown.jpg,Barack Obama
/face_recognition_test/unknown_pictures/unknown.jpg,unknown_person
If you want to see the face distance calculated for each match in orderto adjust the tolerance setting, you can use --show-distance true:
$ face_recognition --show-distance true ./pictures_of_people_i_know/ ./unknown_pictures/

/unknown_pictures/unknown.jpg,Barack Obama,0.378542298956785
/face_recognition_test/unknown_pictures/unknown.jpg,unknown_person,None
More Examples
If you simply want to know the names of the people in each photograph but don'tcare about file names, you could do this:
$ face_recognition ./pictures_of_people_i_know/ ./unknown_pictures/ | cut -d ',' -f2

Barack Obama
unknown_person
Speeding up Face Recognition
Face recognition can be done in parallel if you have a computer withmultiple CPU cores. For example, if your system has 4 CPU cores, you canprocess about 4 times as many images in the same amount of time by usingall your CPU cores in parallel.
If you are using Python 3.4 or newer, pass in a --cpus <number_of_cpu_cores_to_use> parameter:
$ face_recognition --cpus 4 ./pictures_of_people_i_know/ ./unknown_pictures/
You can also pass in --cpus -1 to use all CPU cores in your system.
Python Module
You can import the face_recognition module and then easily manipulatefaces with just a couple of lines of code. It's super easy!
API Docs: https://face-recognition.readthedocs.io.
Automatically find all the faces in an image
import face_recognition

image = face_recognition.load_image_file("my_picture.jpg")
face_locations = face_recognition.face_locations(image)

# face_locations is now an array listing the co-ordinates of each face!
See this exampleto try it out.
You can also opt-in to a somewhat more accurate deep-learning-based face detection model.
Note: GPU acceleration (via NVidia's CUDA library) is required for goodperformance with this model. You'll also want to enable CUDA supportwhen compliling dlib.
import face_recognition

image = face_recognition.load_image_file("my_picture.jpg")
face_locations = face_recognition.face_locations(image, model="cnn")

# face_locations is now an array listing the co-ordinates of each face!
See this exampleto try it out.
If you have a lot of images and a GPU, you can alsofind faces in batches.
Automatically locate the facial features of a person in an image
import face_recognition

image = face_recognition.load_image_file("my_picture.jpg")
face_landmarks_list = face_recognition.face_landmarks(image)

# face_landmarks_list is now an array with the locations of each facial feature in each face.
# face_landmarks_list[0]['left_eye'] would be the location and outline of the first person's left eye.
See this exampleto try it out.
Recognize faces in images and identify who they are
import face_recognition

picture_of_me = face_recognition.load_image_file("me.jpg")
my_face_encoding = face_recognition.face_encodings(picture_of_me)[0]

# my_face_encoding now contains a universal 'encoding' of my facial features that can be compared to any other picture of a face!

unknown_picture = face_recognition.load_image_file("unknown.jpg")
unknown_face_encoding = face_recognition.face_encodings(unknown_picture)[0]

# Now we can see the two face encodings are of the same person with `compare_faces`!

results = face_recognition.compare_faces([my_face_encoding], unknown_face_encoding)

if results[0] == True:
    print("It's a picture of me!")
else:
    print("It's not a picture of me!")
See this exampleto try it out.
Python Code Examples
All the examples are available here.
Face Detection
- Find faces in a photograph
- Find faces in a photograph (using deep learning)
- Find faces in batches of images w/ GPU (using deep learning)
- Blur all the faces in a live video using your webcam (Requires OpenCV to be installed)
Facial Features
Facial Recognition
- Find and recognize unknown faces in a photograph based on photographs of known people
- Identify and draw boxes around each person in a photo
- Compare faces by numeric face distance instead of only True/False matches
- Recognize faces in live video using your webcam - Simple / Slower Version (Requires OpenCV to be installed)
- Recognize faces in live video using your webcam - Faster Version (Requires OpenCV to be installed)
- Recognize faces in a video file and write out new video file (Requires OpenCV to be installed)
- Recognize faces on a Raspberry Pi w/ camera
- Run a web service to recognize faces via HTTP (Requires Flask to be installed)
- Recognize faces with a K-nearest neighbors classifier
- Train multiple images per person then recognize faces using a SVM
Creating a Standalone Executable
If you want to create a standalone executable that can run without the need to install python or face_recognition, you can use PyInstaller. However, it requires some custom configuration to work with this library. See this issue for how to do it.
Articles and Guides that cover face_recognition
- My article on how Face Recognition works: Modern Face Recognition with Deep Learning
- Covers the algorithms and how they generally work
- Face recognition with OpenCV, Python, and deep learning by Adrian Rosebrock
- Covers how to use face recognition in practice
- Raspberry Pi Face Recognition by Adrian Rosebrock
- Covers how to use this on a Raspberry Pi
- Face clustering with Python by Adrian Rosebrock
- Covers how to automatically cluster photos based on who appears in each photo using unsupervised learning
How Face Recognition Works
If you want to learn how face location and recognition work instead ofdepending on a black box library, read my article.
Caveats
- The face recognition model is trained on adults and does not work very well on children. It tends to mixup children quite easy using the default comparison threshold of 0.6.
- Accuracy may vary between ethnic groups. Please see this wiki page for more details.
Deployment to Cloud Hosts (Heroku, AWS, etc)
Since face_recognition depends on dlib which is written in C++, it can be tricky to deploy an appusing it to a cloud hosting provider like Heroku or AWS.
To make things easier, there's an example Dockerfile in this repo that shows how to run an app built withface_recognition in a Docker container. With that, you should be able to deployto any service that supports Docker images.
You can try the Docker image locally by running: docker-compose up --build
There are also several prebuilt Docker images.
Linux users with a GPU (drivers >= 384.81) and Nvidia-Docker installed can run the example on the GPU: Open the docker-compose.yml file and uncomment the dockerfile: Dockerfile.gpu and runtime: nvidia lines.
Having problems?
If you run into problems, please read the Common Errors section of the wiki before filing a github issue.
Thanks
- Many, many thanks to Davis King (@nulhom)for creating dlib and for providing the trained facial feature detection and face encoding modelsused in this library. For more information on the ResNet that powers the face encodings, check outhis blog post.
- Thanks to everyone who works on all the awesome Python data science libraries like numpy, scipy, scikit-image,pillow, etc, etc that makes this kind of stuff so easy and fun in Python.
- Thanks to Cookiecutter and theaudreyr/cookiecutter-pypackage project templatefor making Python project packaging way more tolerable.
-
1.安装 首先,必须提前安装cmake、numpy、dlib,其中,由于博主所用的python版本是3.6.4(为了防止不兼容,所以用之前的版本),只能安装19.7.0及之前版本的dlib,所以直接pip install dlib会报错,需要pip install dlib==19.7.0 安装完预备库之后就可以直接pip install face_recognition 2.应用 (1)提取人脸
-
Face Recognition using OpenCV
-
1. 安装Anaconda 已有Anaconda请跳过该步骤 1.1 下载Anaconda离线安装包 wget https://repo.continuum.io/archive/Anaconda3-5.3.1-Linux-x86_64.sh 1.2安装Anaconda bash Anaconda3-5.3.1-Linux-x86_64.sh 然后一路回车和yes即可 2. 创建conda环境 c
-
因为工作原因,需要利用openCV实现一些基本的人脸识别处理。为此,需要安装face_recognition这个库。 但是我在安装过程中总是报错,踩了很多坑。 事实证明,ChatGPT虽然很智能,但是当我问他该如何安装并且对提示的问题该如何处理的时候,他的回答还是不可靠的。 首先说怎么安装吧, 第一步:安装opencv,也就是可以导入cv2 pip install opencv-python 第二
-
Face_recognition windows安装 windows下安装需要安装vs2019 c++模块 安装openCV pip install opencv-contrib-python 安装cmake pip install cmake 安装boost pip install boost 安装dlib pip install dlib 安装face_recognition pip inst
-
windows下安装face_recognition 该安装包在linux下安装还是比较简单的,但在window下需要折腾一下,因为安装face_recogniton 之前需要先编译安装dlib。 这里给一个别人编译好的dlib版本,直接pip安装即可。 链接: https://pan.baidu.com/s/1CSOXulyEUOFQf_gfAiQ1RQ 密码: sfti 下载后通过cmd进入到


